Install the system board
Use this information to install the system board.


Before installing the system board, touch the static-protective package that contains the new system board to any unpainted surface on the outside of the server. Then, take the new system board out of the package and place it on a static-protective surface.
To install the system board, complete the following steps:
Watch the procedure
A video of this procedure is available at YouTube.

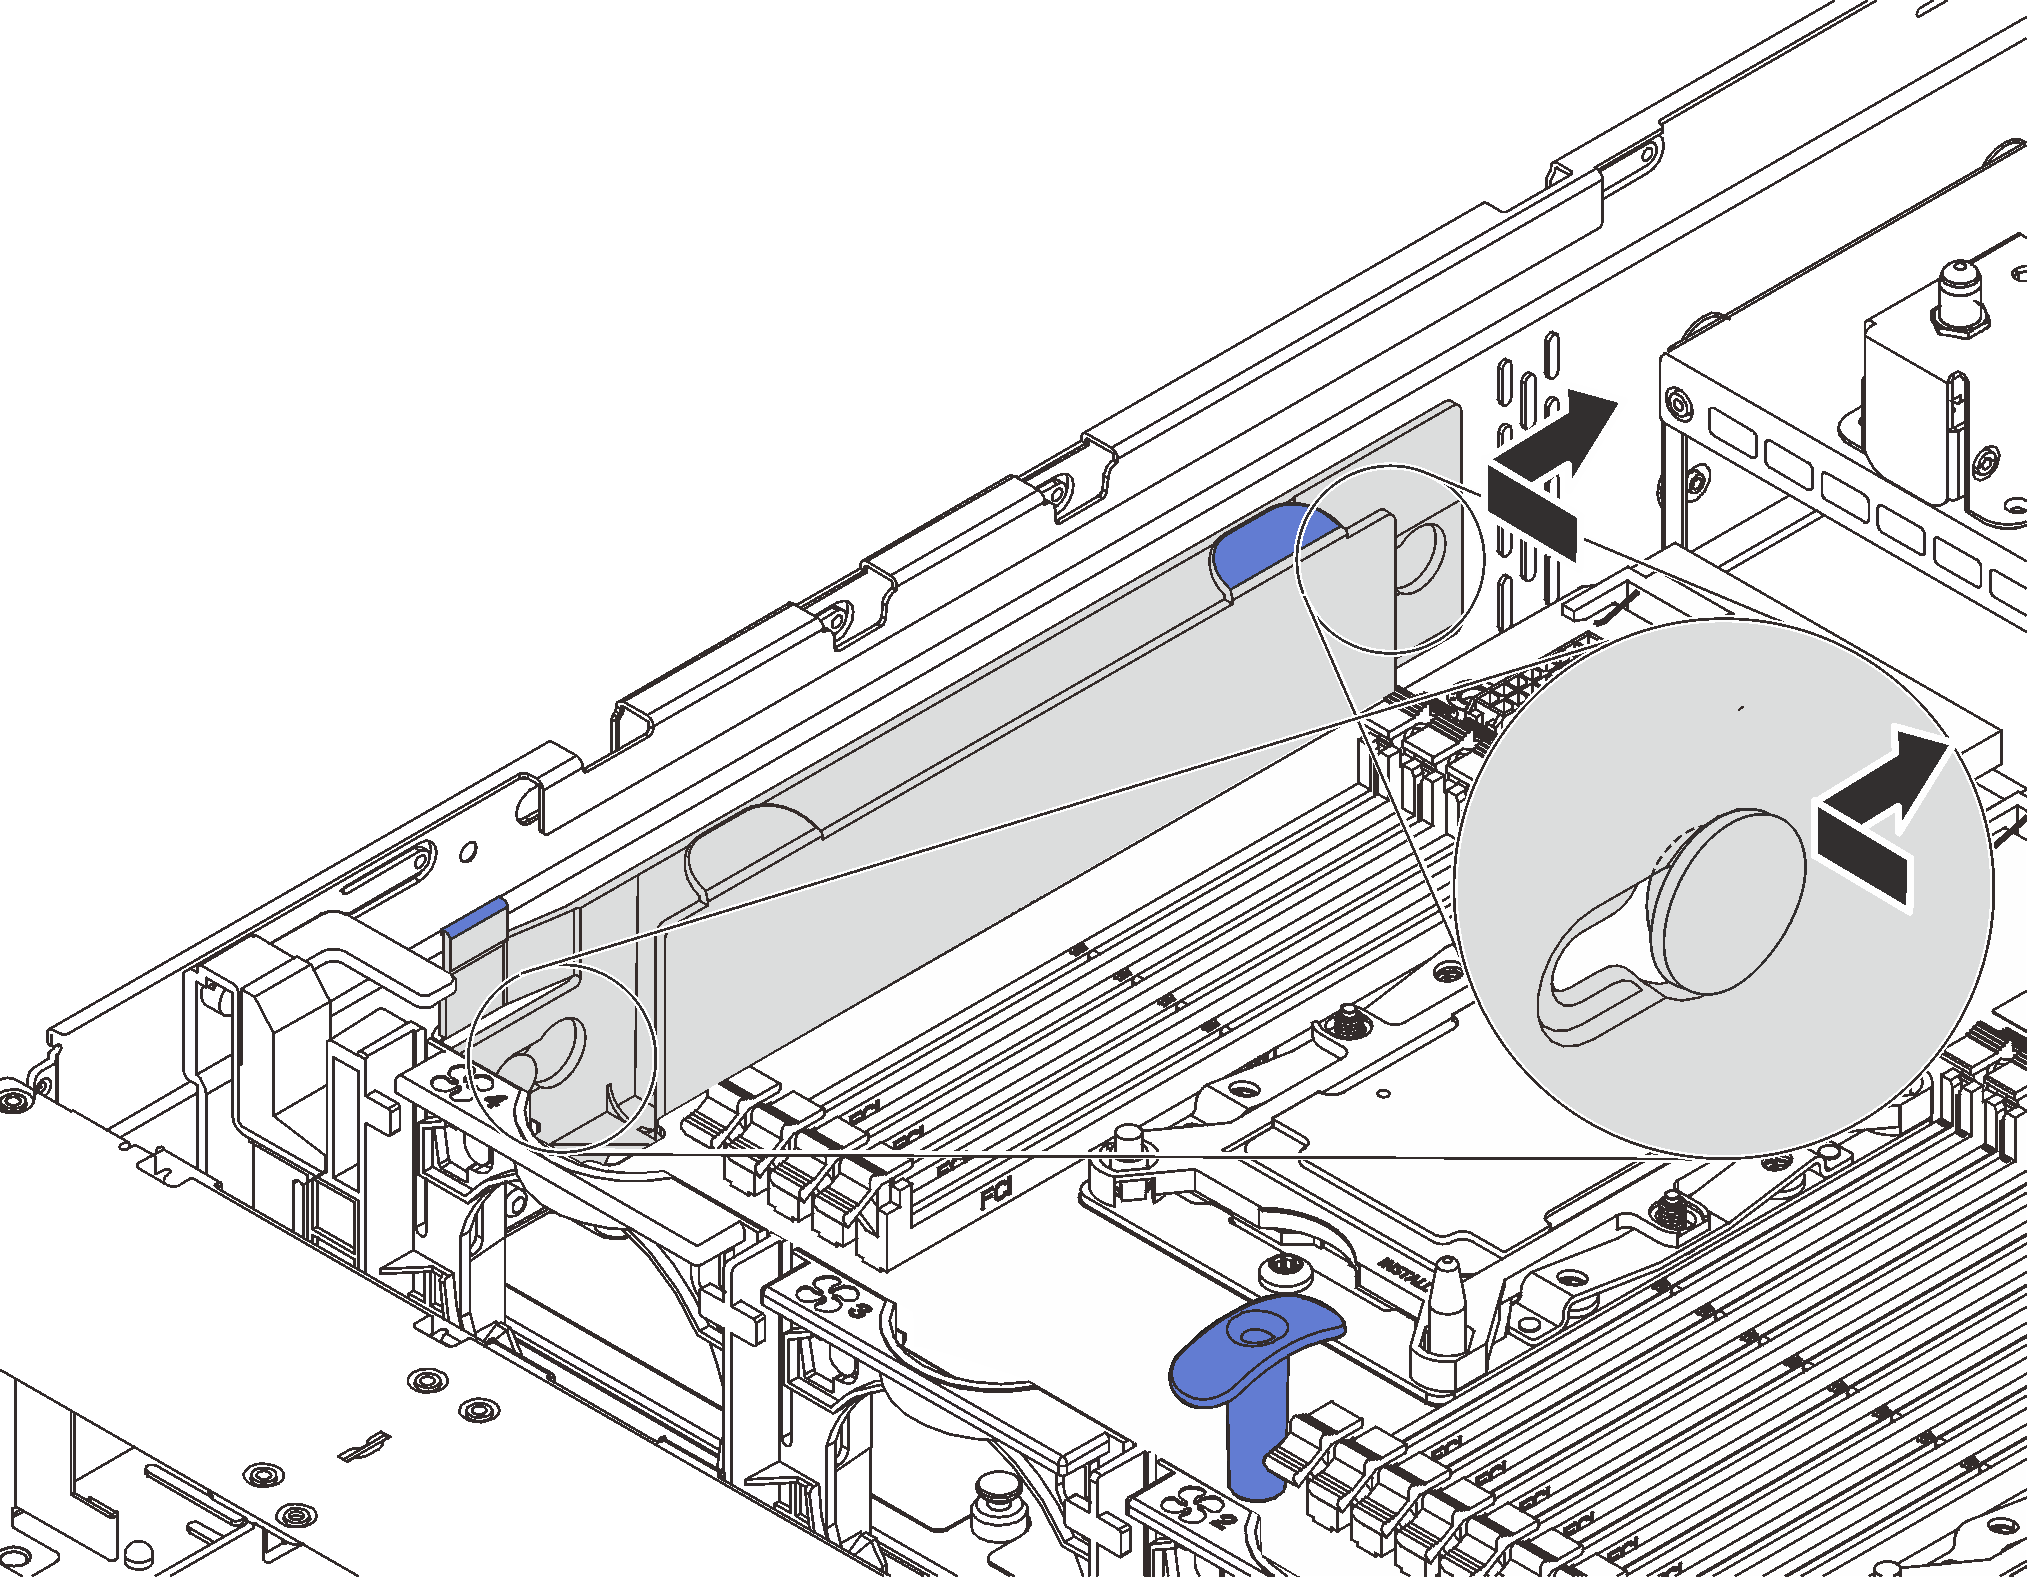
- Hold the blue lift handles on the system board carefully and align the two holes in the system board with the corresponding mounting studs on the chassis as shown. Then, slide the system board to the rear of the server. Ensure that the rear connectors on the new system board are inserted into the corresponding holes in the rear panel.
- Install the eight screws to secure the system board.
- Reinstall the cable holder.Figure 2. Cable holder installation
Push the power supplies into the bays until they click into place.
Install any components that you removed from the failing system board. See the related topics in Hardware replacement procedures.
Update the machine type and serial number with new vital product data (VPD). Use the Lenovo XClarity Provisioning Manager to update the machine type and serial number. See Update the machine type and serial number.
Enable TPM/TCM. See Enable TPM/TCM.
Optionally, enable Secure Boot. See Enable UEFI Secure Boot.