RAID-Flash-Stromversorgungsmodul auf der Adapterhalterung installieren
Mithilfe diesen Informationen können Sie das RAID-Flash-Stromversorgungsmodul auf der Adapterhalterung installieren.
Zu dieser Aufgabe
Lesen Sie Installationsrichtlinien und Sicherheitsprüfungscheckliste, um sicherzustellen, dass Sie sicher arbeiten.
Schalten Sie den Server und die Peripheriegeräte aus und trennen Sie alle Netzkabel und alle externen Kabel. Siehe Server ausschalten.
Bewahren Sie elektrostatisch empfindliche Teile bis zur Installation in ihren antistatischen Schutzhüllen auf, um statische Aufladung zu vermeiden. Berühren Sie die Teile mit einem Antistatikarmband oder einem anderen Erdungssystem. Legen Sie die Teile auf eine antistatische Oberfläche.
Vorgehensweise
- Installieren Sie das RAID-Flash-Stromversorgungsmodul auf der Adapterhalterung.Abbildung 1. Installieren eines RAID-Flash-Stromversorgungsmoduls
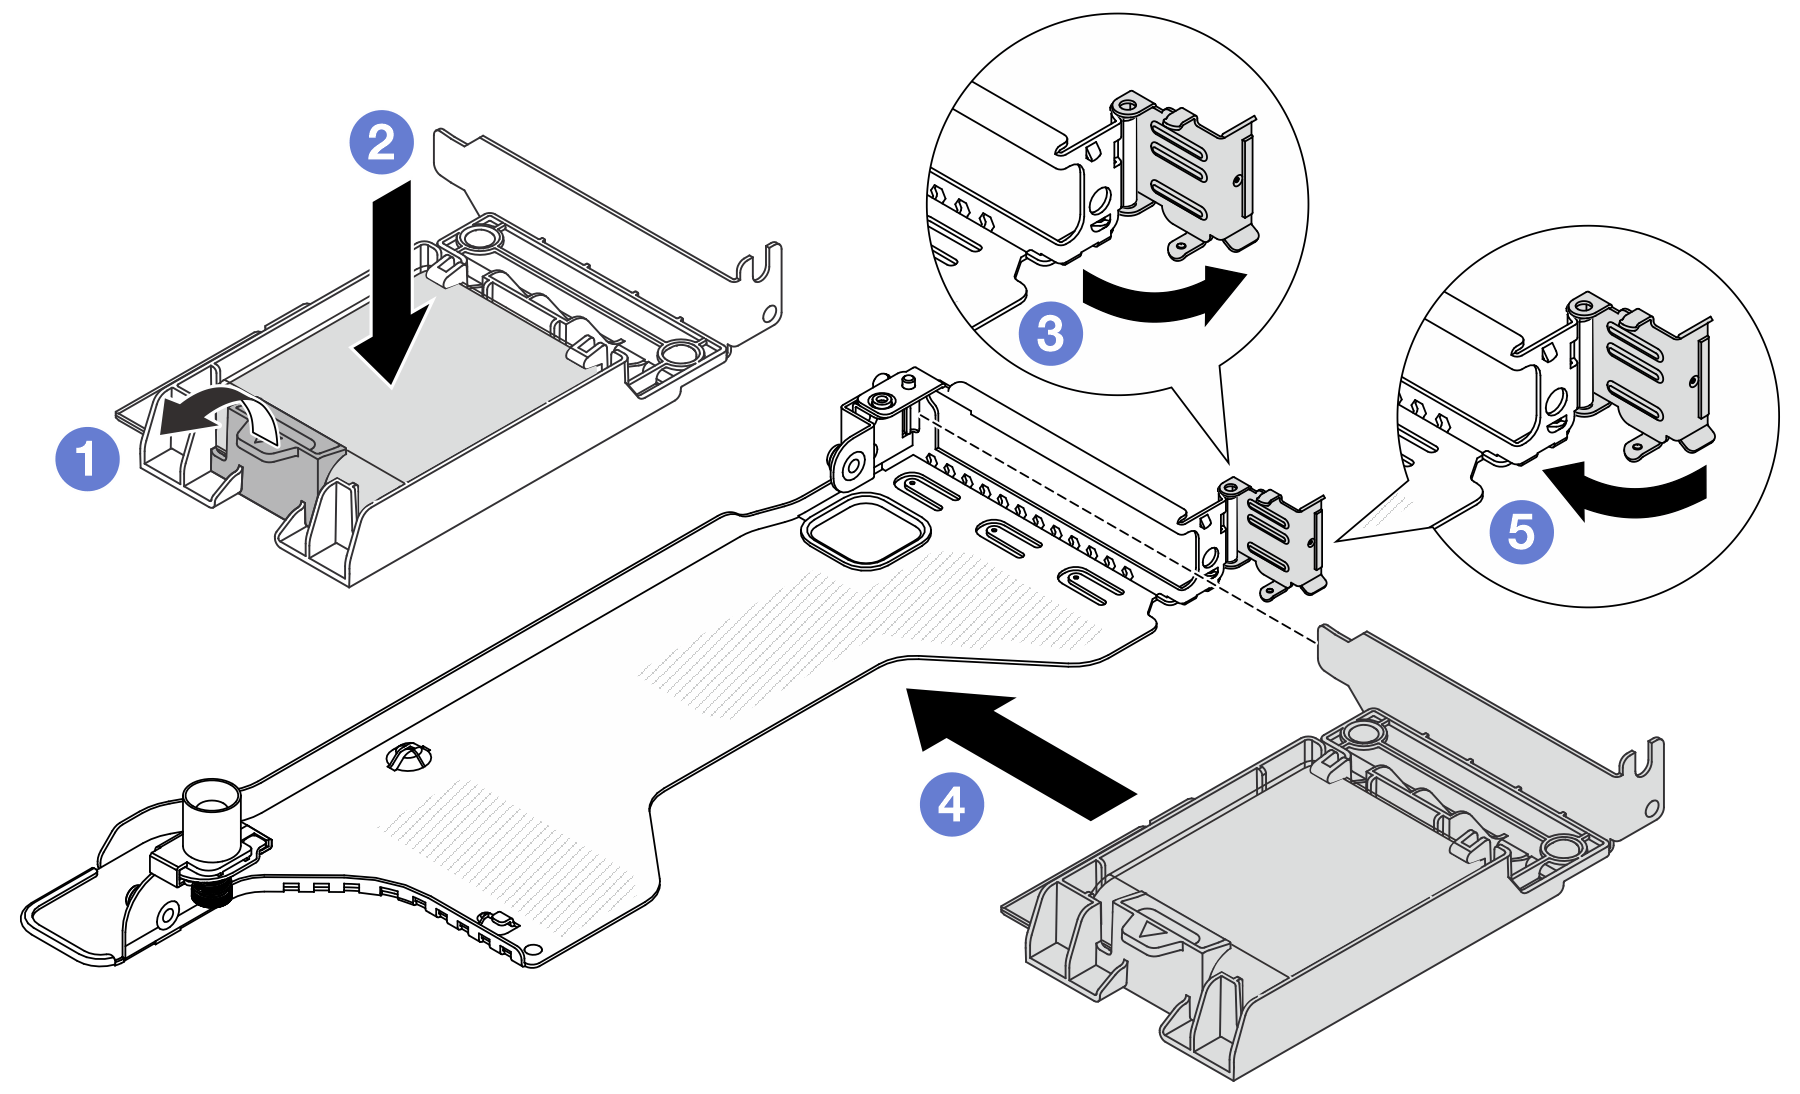
 Öffnen Sie die Halteklammer an der Halterung.
 Setzen Sie das RAID-Flash-Stromversorgungsmodul in die Halterung ein und drücken Sie es herunter, um es in der Halterung zu fixieren.
 Drehen Sie die Verriegelung an der Adapterhalterung in die offene Position.
 Richten Sie die RAID-Flash-Stromversorgungsmodul-Baugruppe am Steckplatz auf der Adapterkarte aus. Schieben Sie dann die RAID-Flash-Stromversorgungsmodul-Baugruppe vorsichtig gerade in den Steckplatz, bis sie fest sitzt und ihre Halterung fixiert ist.
 Schließen Sie die Halteklammer.
Nach dieser Aufgabe
Installieren Sie die Adapterkartenbaugruppe im Gehäuse. Siehe Hintere Adapterkarte installieren.
Schließen Sie das Flash-Stromversorgungsmodul mit dem im Lieferumfang enthaltenen Verlängerungskabel an einen Adapter an.
Schließen Sie den Austausch von Komponenten ab, (siehe Austausch von Komponenten abschließen).
Demo-Video