Retrait du boîtier d’unités de disque dur M.2 avant et des fonds de panier d’unité
Suivez les instructions de cette section pour retirer le boîtier d'unités de disque dur M.2 avant et les fonds de panier d'unité.
À propos de cette tâche
Lisez Conseils d’installation et Liste de contrôle d’inspection de sécurité pour vous assurer que vous travaillez en toute sécurité.
Mettez le serveur et tous les dispositifs périphériques hors tension, puis déconnectez les cordons d’alimentation et tous les câbles externes. Voir Mise hors tension du serveur.
Empêchez l’exposition à l’électricité statique, laquelle peut entraîner l’arrêt du système et la perte de données, en conservant les composants sensibles à l’électricité statique dans des emballages antistatiques jusqu’à leur installation, et en manipulant ces dispositifs en portant une dragonne de décharge électrostatique ou un autre système de mise à la terre.
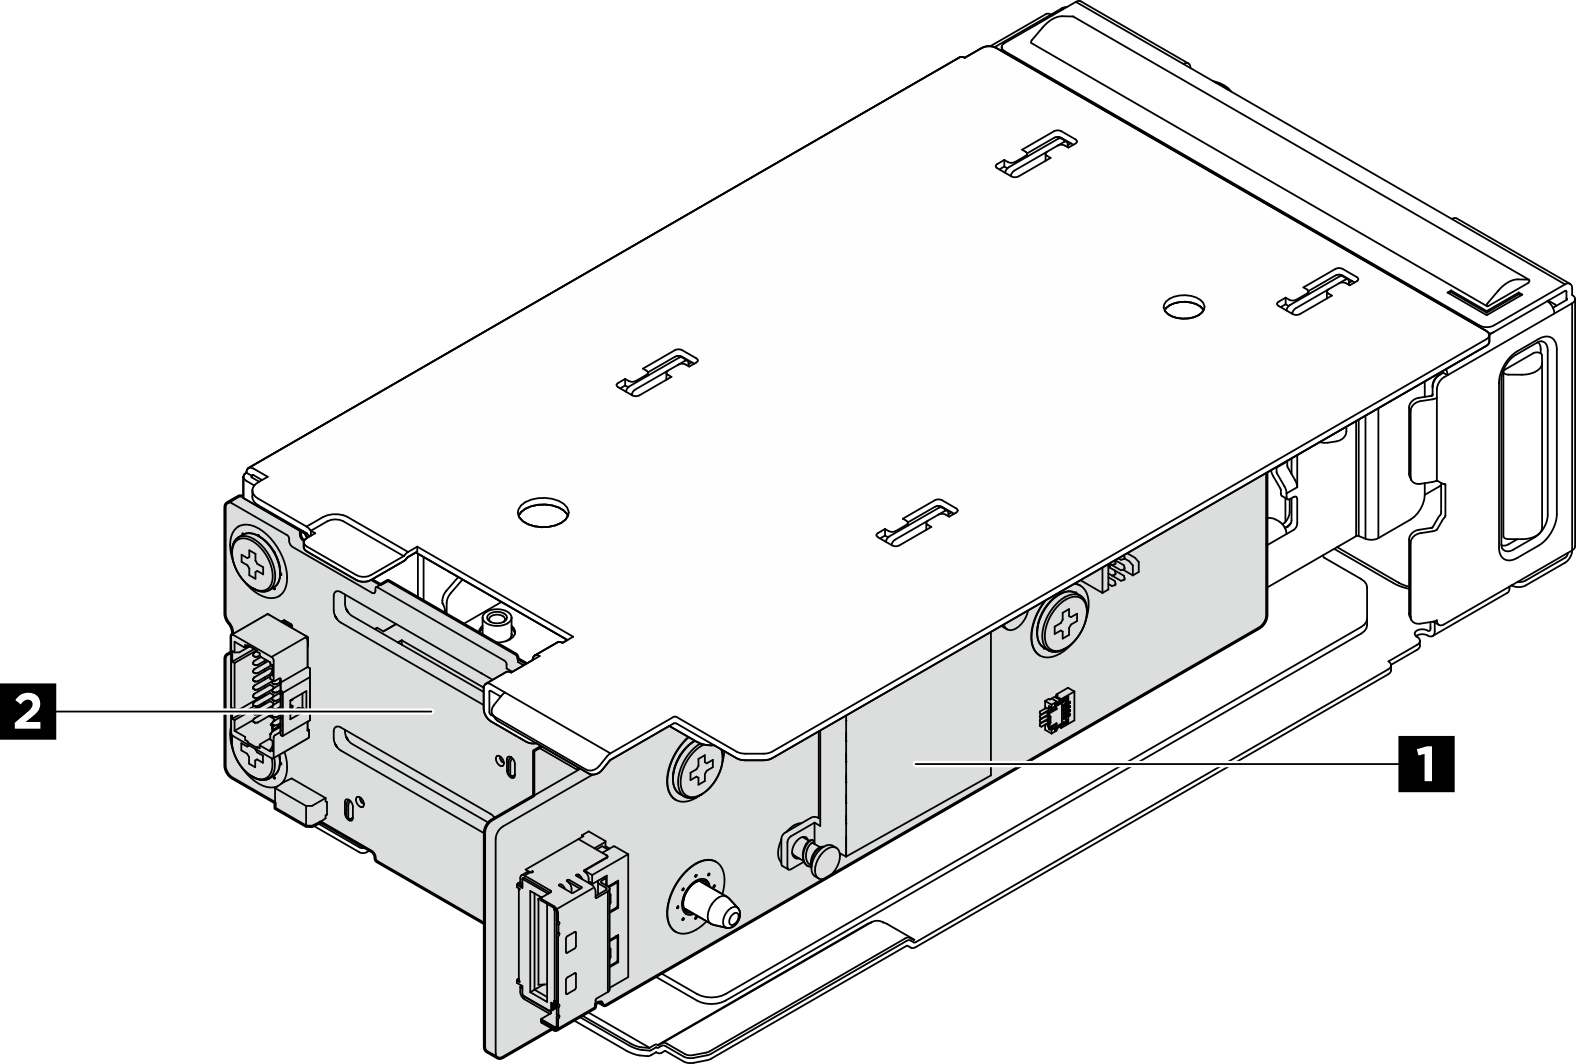
| 1 Carte contrôleur M.2 | 2 Fond de panier de démarrage M.2 |
Procédure
- (En option) Pour les configurations avec unités E3.S ou modules de mémoire CXL (CMM), retirez du châssis le boîtier d'unités de disque dur M.2 avant avec le cadre du boîtier.
 Ouvrez le taquet pour libérer le boîtier d'unités de disque dur avec le cadre.
 Faites glisser le boîtier d'unités de disque dur avec cadre pour l'extraire du châssis.
Figure 2. Retrait du boîtier d'unités de disque dur M.2 avant avec le cadre du boîtier
- Retirez le boîtier d'unités de disque dur M.2 avant.
- Pour les configurations avec des unités 2,5 pouces à l'avant du serveur, retirez le boîtier d'unités de disque dur M.2 avant du châssis.
- Pour les configurations avec des unités de disque dur E3.S ou des CMM, retirez le boîtier d'unités de disque dur M.2 avant du cadre du boîtier.
- Appuyez sur le taquet de déverrouillage à l'aide d'un tournevis plat pour libérer le boîtier d'unités de disque dur.
- Faites glisser le boîtier d'unités de disque dur pour le retirer.
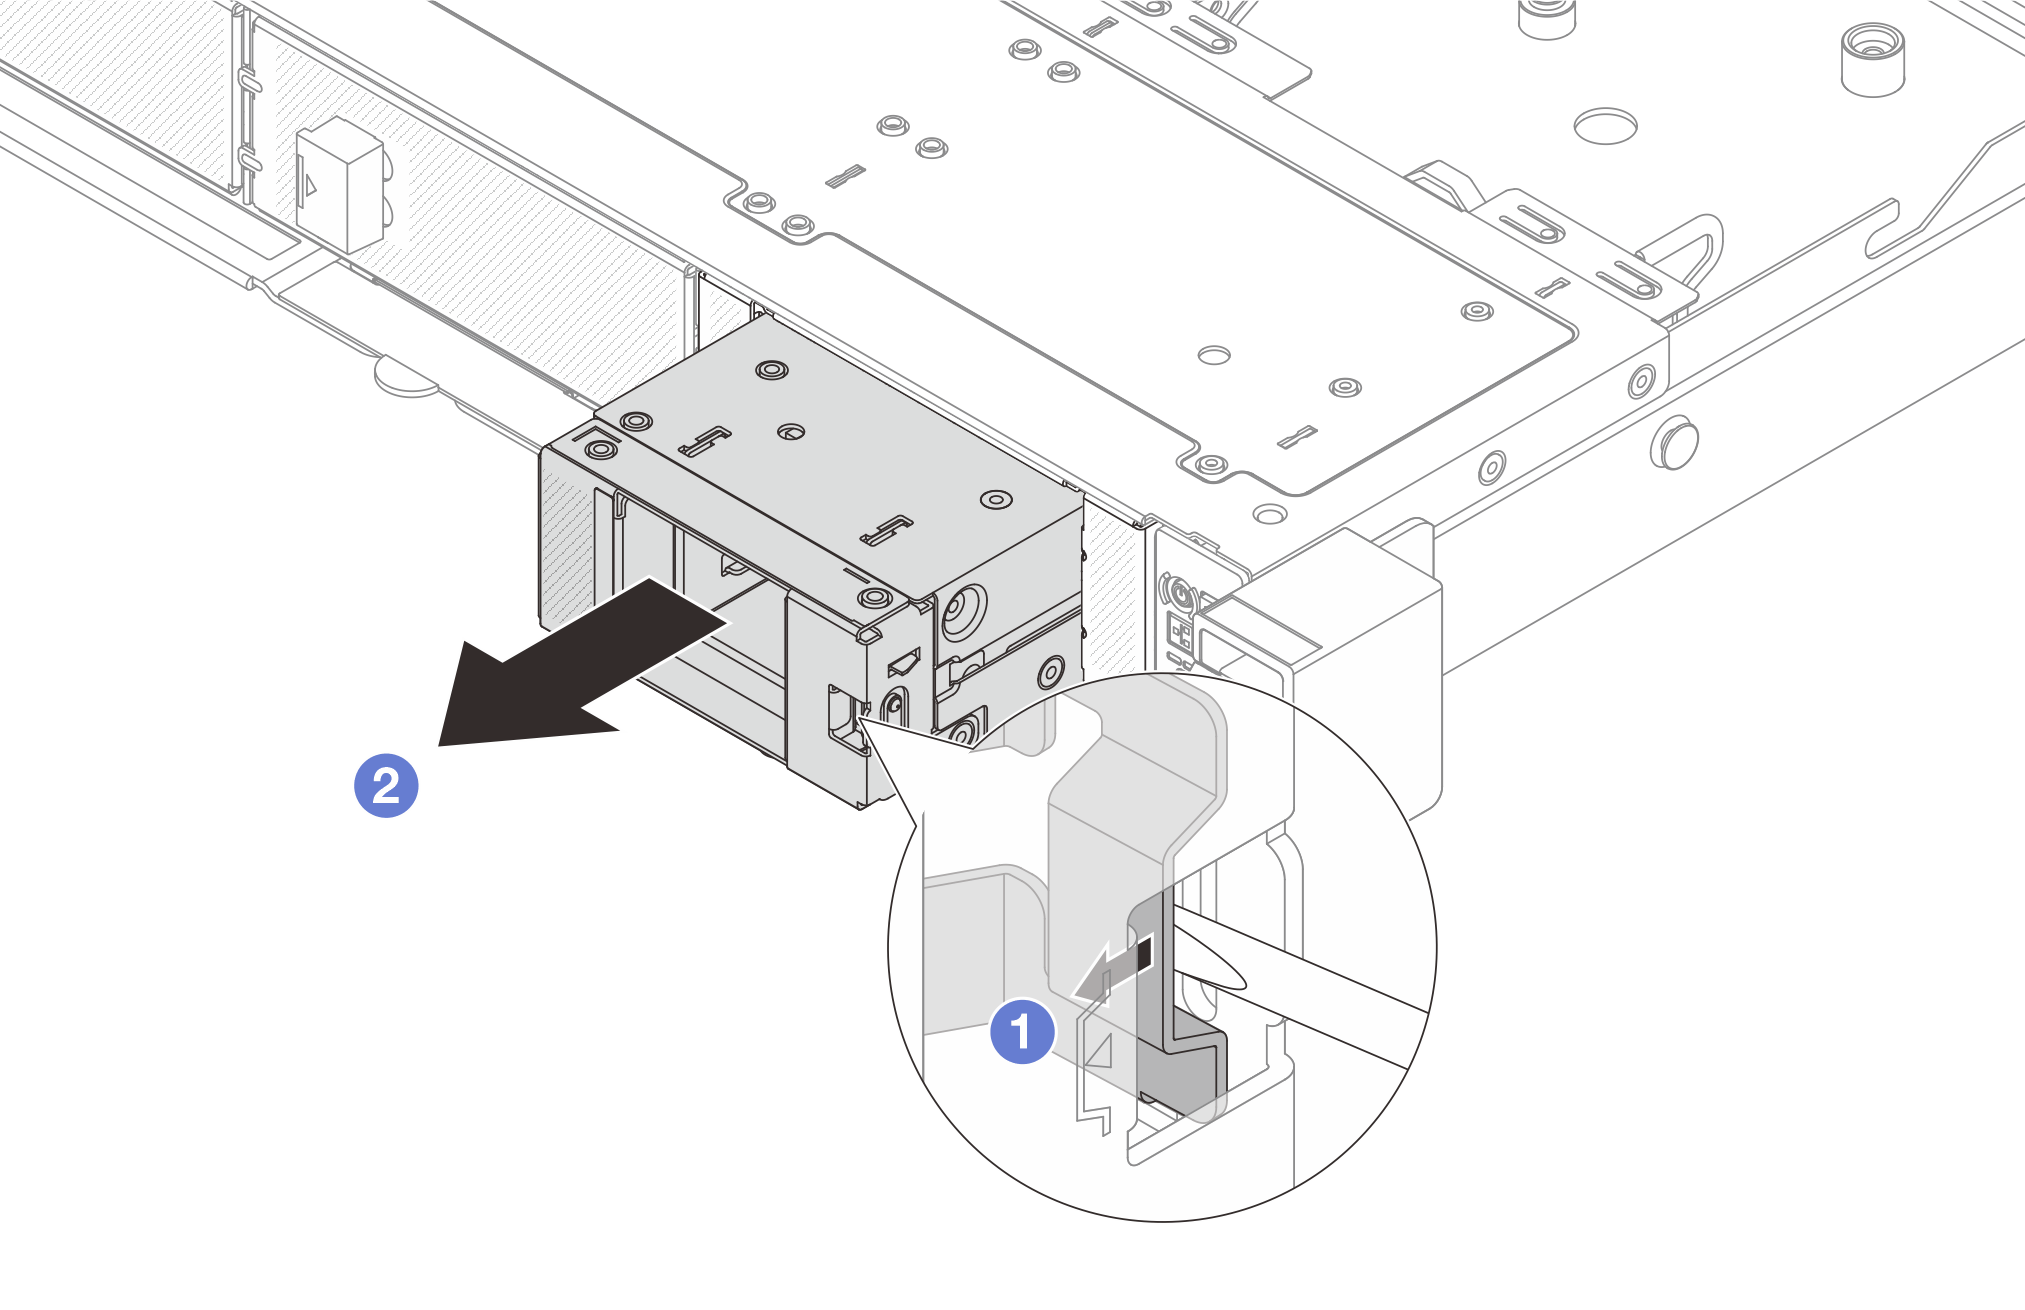 Figure 3. Retrait du boîtier d'unités de disque dur M.2 avant du cadre du boîtier
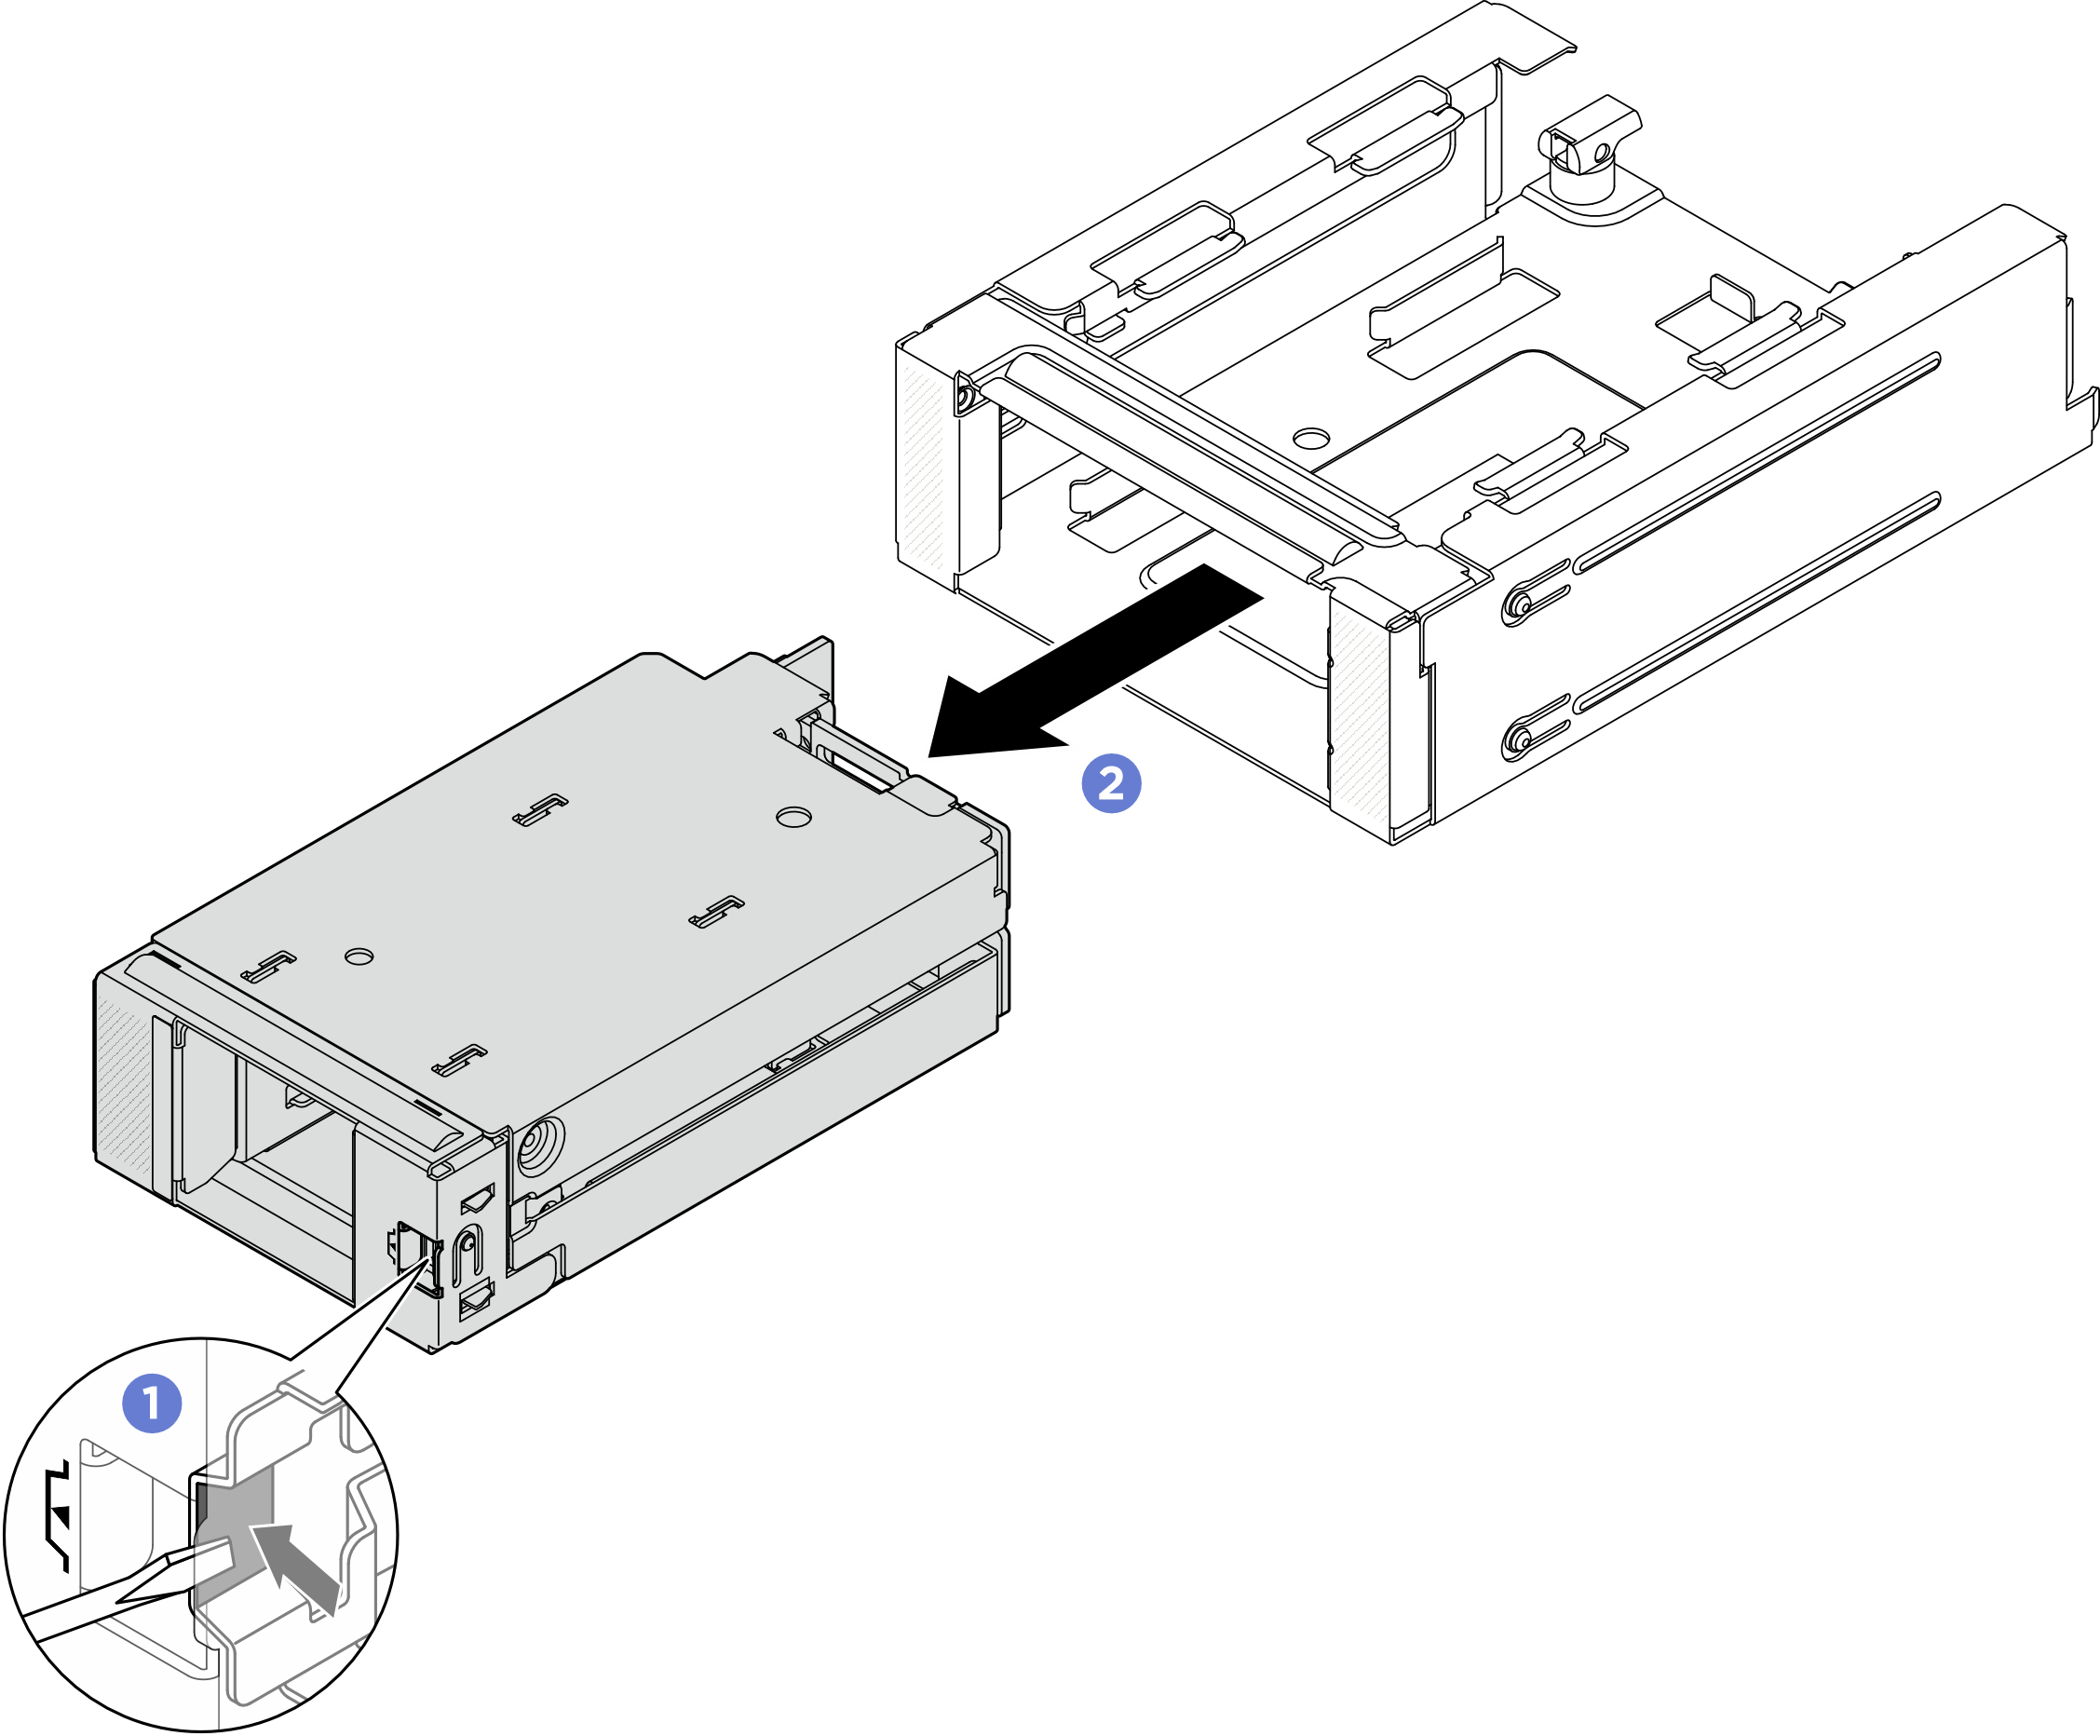
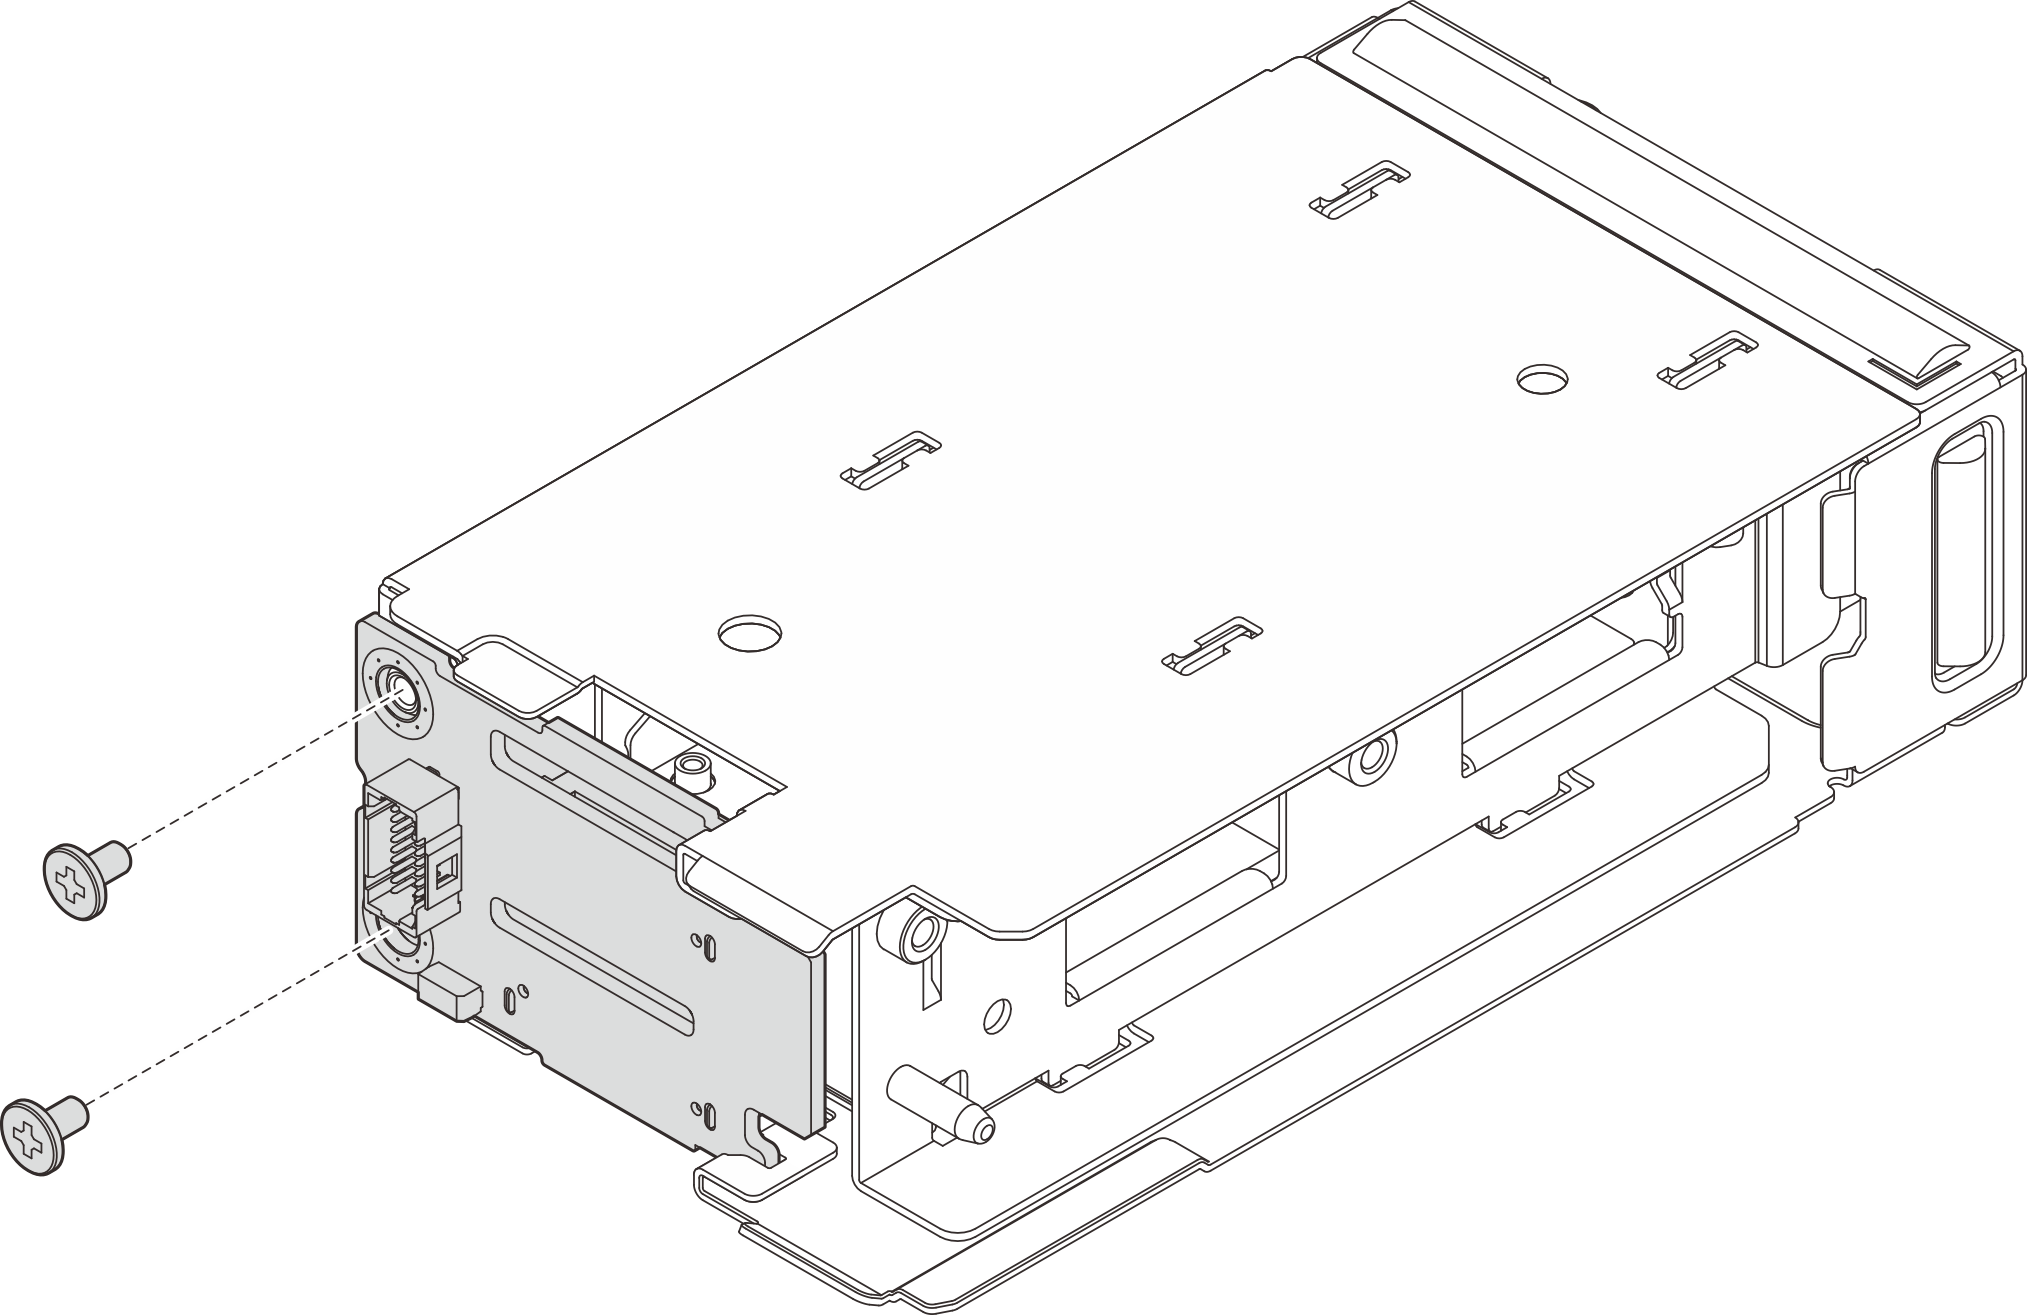
- Retirez la carte contrôleur M.2 avant du boîtier d'unités de disque dur.
- Desserrez les deux vis qui fixent la carte contrôleur.
- Retirez la carte contrôleur du boîtier d'unités de disque dur.
Figure 4. Retrait de la carte contrôleur M.2 avant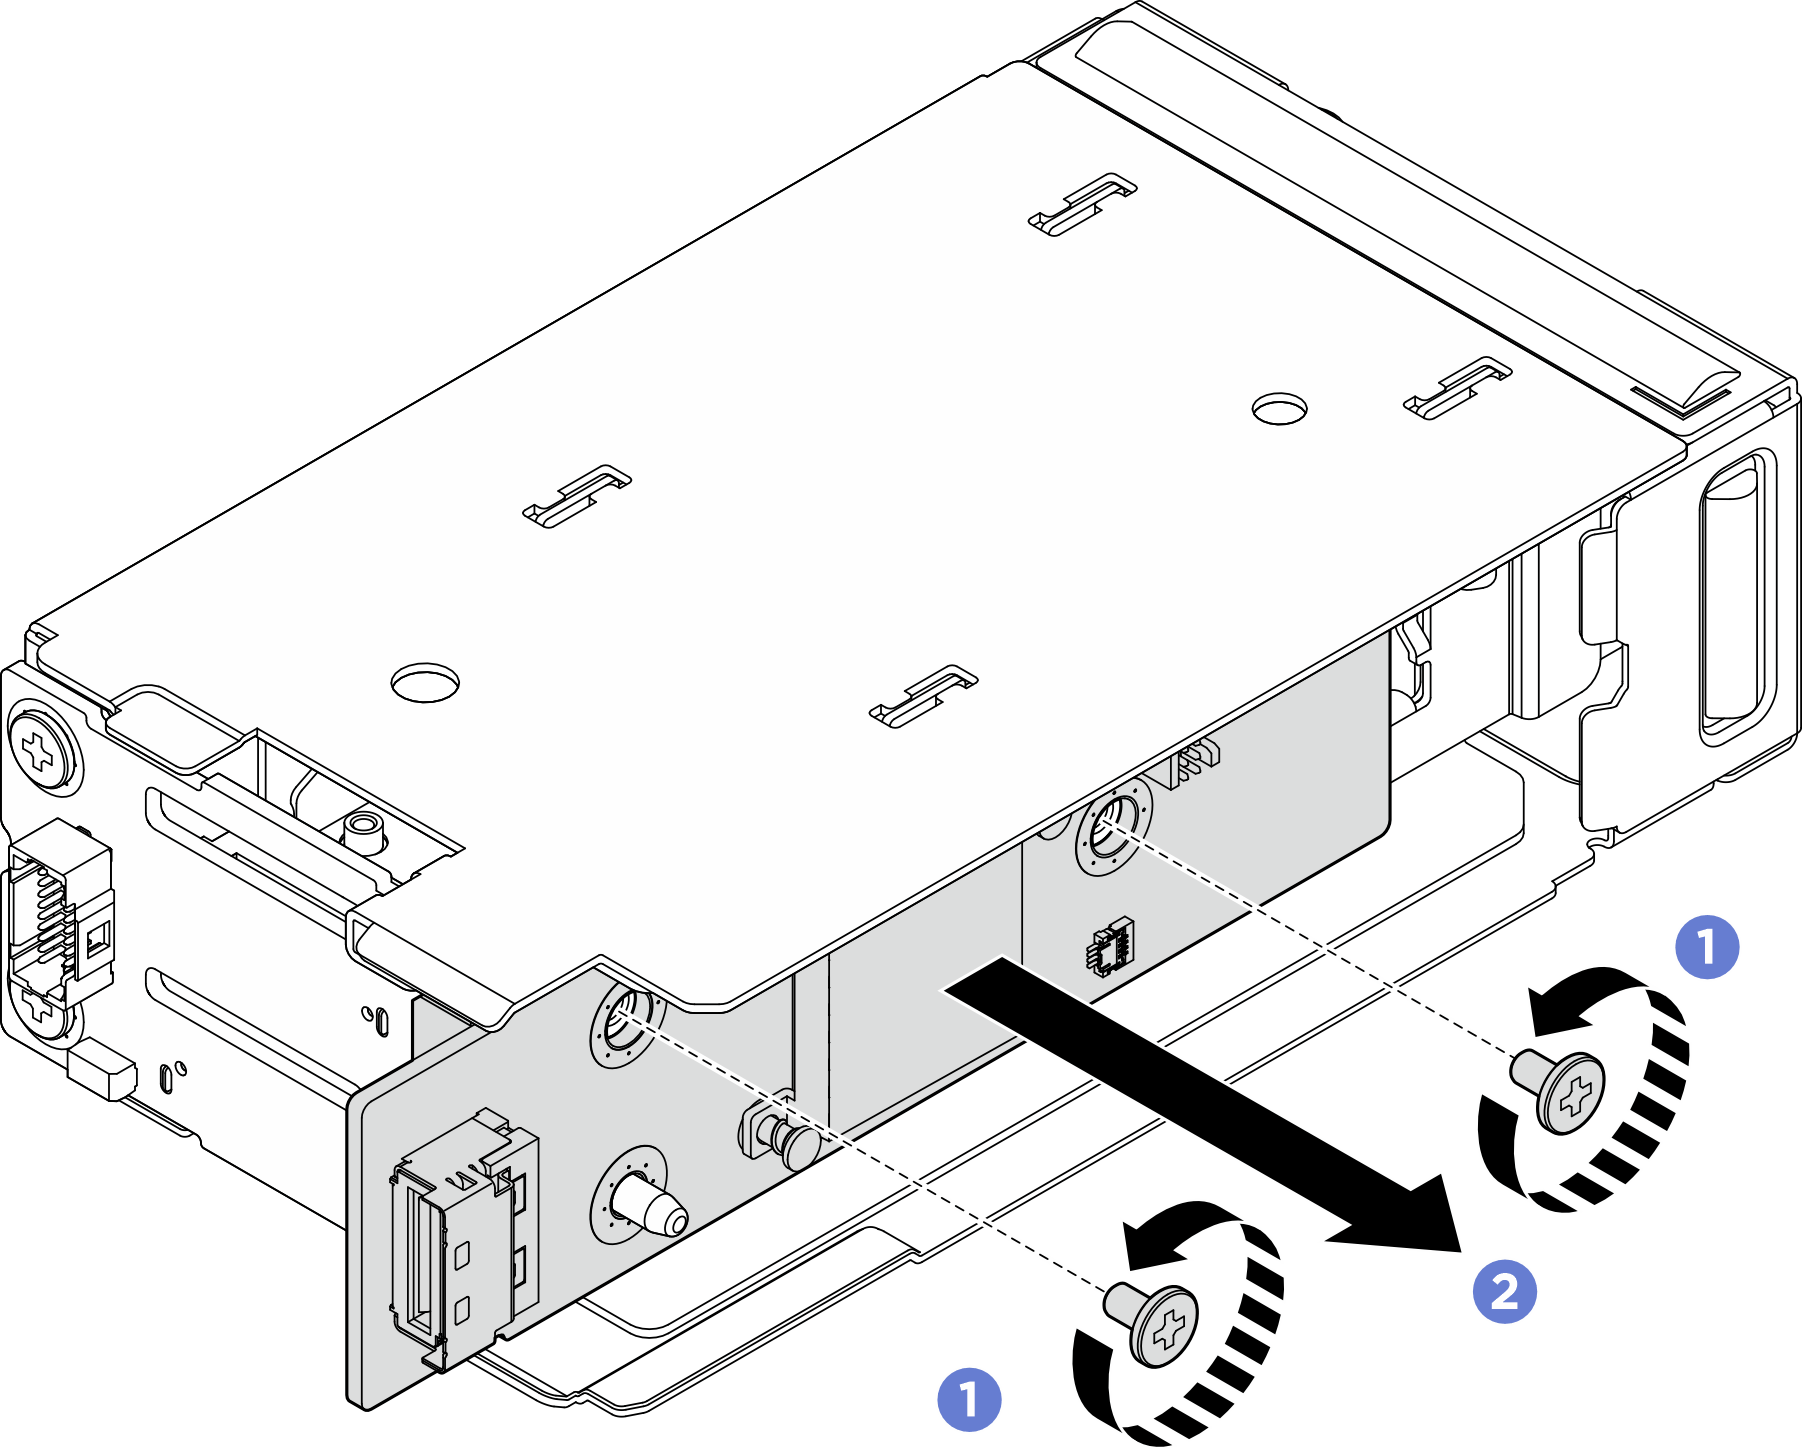
- Retirez le fond de panier de démarrage M.2 avant du boîtier d'unités de disque dur.
- Desserrez les deux vis de fixation du fond de panier.Figure 5. Desserrer les vis
- Retirez le fond de panier. Faites pivoter le côté gauche du fond de panier vers l'extérieur du boîtier d'unités de disque dur. Retirez le fond de panier du boîtier d'unités de disque dur interne.Figure 6. Retrait du fond de panier de démarrage M.2 avant
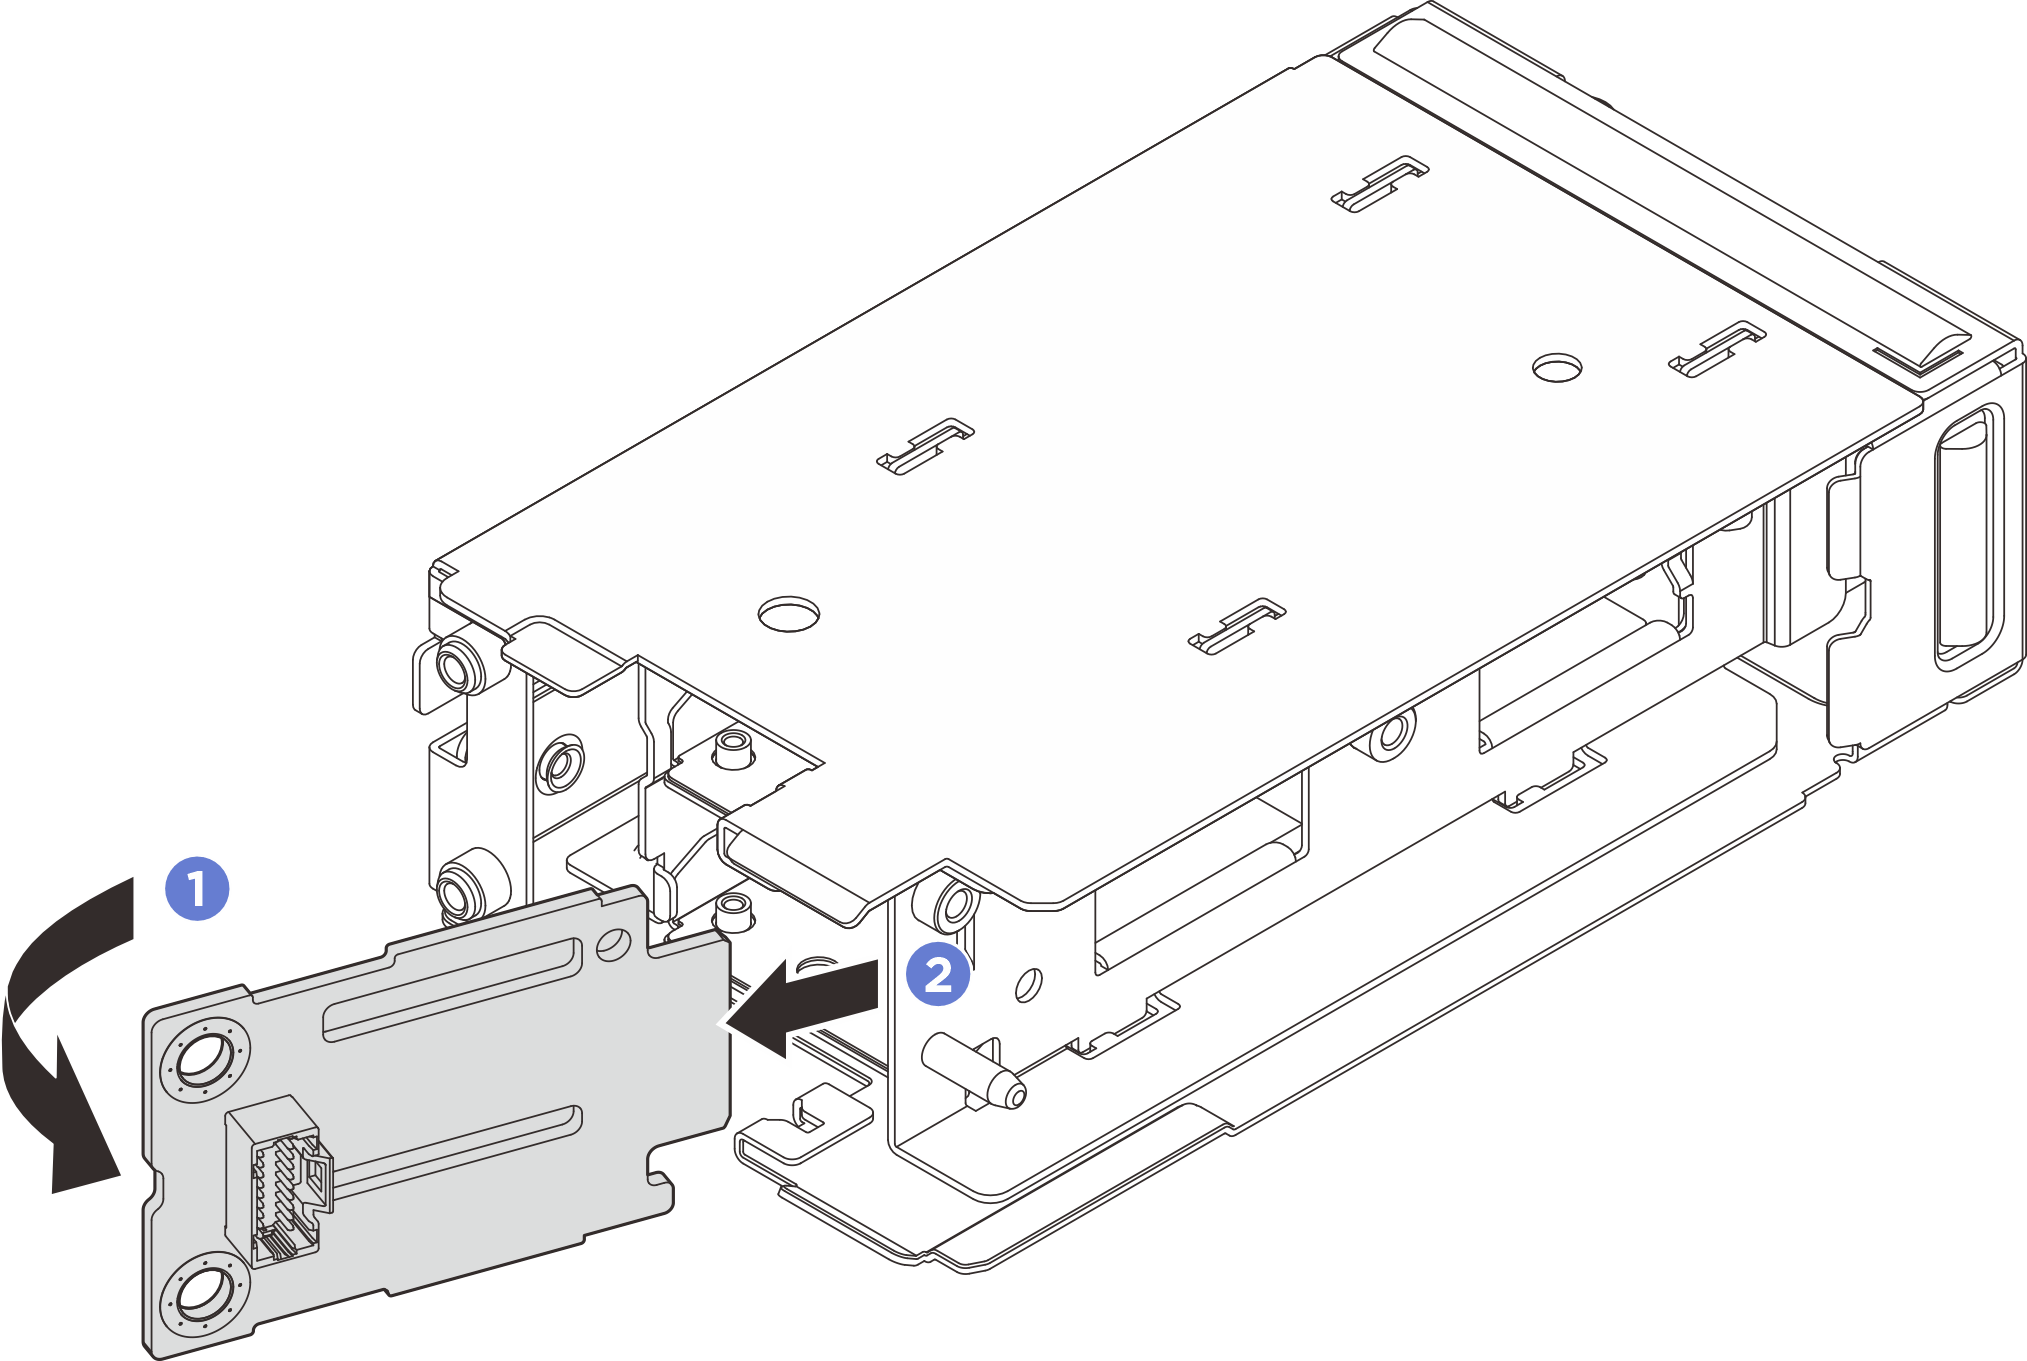
- Desserrez les deux vis de fixation du fond de panier.
Après avoir terminé
Si vous devez renvoyer le composant ou le périphérique en option, suivez les instructions d’emballage et utilisez les matériaux que vous avez reçus pour l’emballer.
Vidéo de démonstration