섀시에 RAID 플래시 전원 모듈 설치
다음 정보를 사용하여 RAID 플래시 전원 모듈을 섀시에 설치하십시오.
이 작업 정보
절차
- 서버가 섀시의 RAID 플래시 전원 모듈 위치를 덮는 트레이와 함께 제공된 경우 먼저 트레이를 제거하십시오.그림 1. 트레이 제거
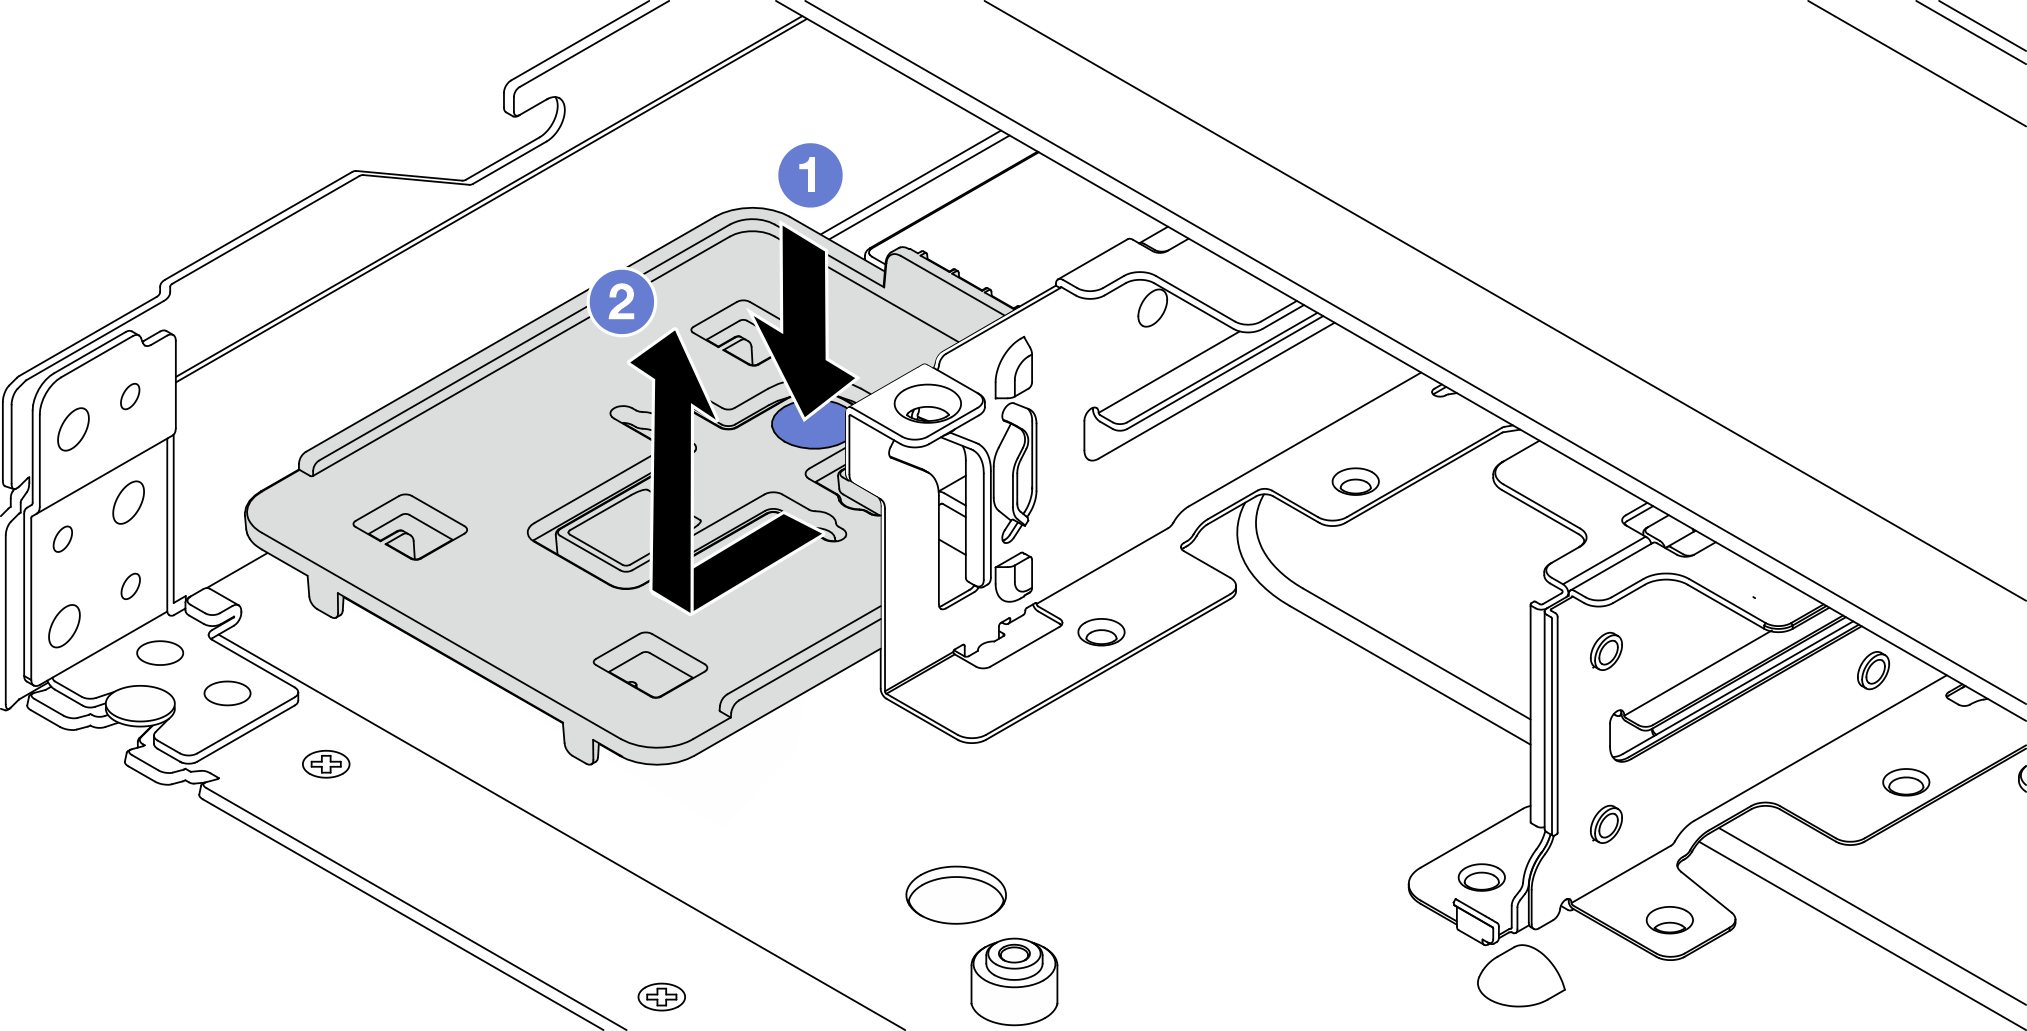
 파란색 터치 지점을 눌러 트레이를 섀시에서 분리합니다.
 트레이를 그림과 같은 방향으로 움직여 섀시에서 들어 올립니다.
- 서버의 섀시에 RAID 플래시 전원 모듈 홀더가 없는 경우 먼저 해당 홀더를 설치하십시오.그림 2. RAID 플래시 전원 모듈 홀더 설치

홀더를 내려 놓고 그림과 같은 방향으로 움직여 홀더를 섀시에 고정합니다.
- 섀시에 RAID 플래시 전원 모듈을 설치하십시오.그림 3. 섀시에 RAID 플래시 전원 모듈 설치
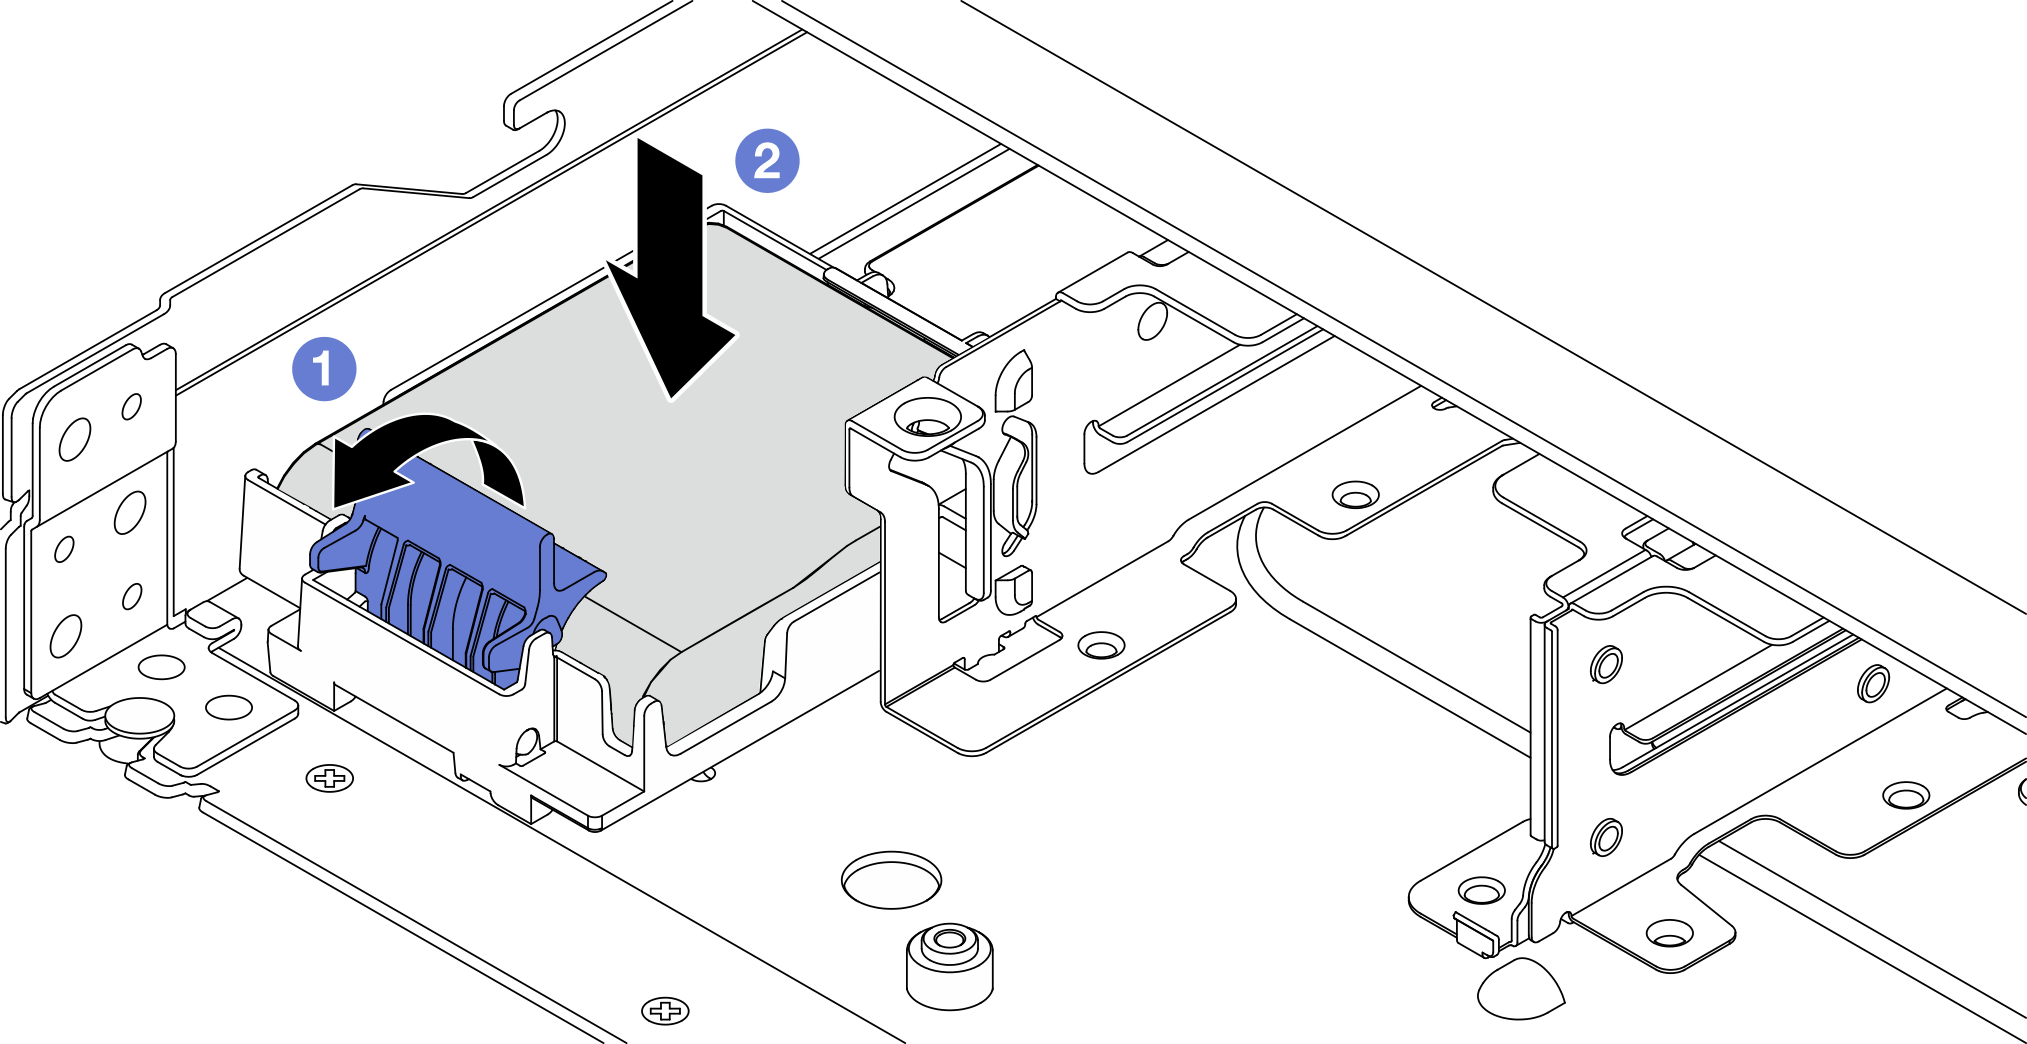
- 홀더에서 고정 클립을 여십시오.
- RAID 플래시 전원 모듈을 홀더에 넣고 눌러 홀더에 고정시키십시오.
완료한 후
플래시 전원 모듈과 함께 제공되는 확장 케이블을 사용하여 슈퍼 커패시터 모듈을 어댑터에 연결하십시오.
부품 교체를 완료하십시오. 부품 교체 완료의 내용을 참조하십시오.
데모 비디오
피드백 보내기