ติดตั้งไดรฟ์ E3.S แบบ Hot-swap
ทำตามคำแนะนำในส่วนนี้เพื่อติดตั้งไดรฟ์ E3.S แบบ Hot-swap
เกี่ยวกับงานนี้
อ่าน คู่มือการติดตั้ง และ รายการตรวจสอบความปลอดภัย เพื่อให้แน่ใจว่าคุณจะทำงานได้อย่างปลอดภัย
นำหีบห่อป้องกันไฟฟ้าสถิตที่มีไดรฟ์ไปแตะที่พื้นผิวโลหะที่ไม่ทาสีบนเครื่อง แล้วจึงนำไดรฟ์ออกจากบรรจุภัณฑ์ และวางลงบนพื้นผิวที่มีการป้องกันไฟฟ้าสถิต
ตรวจสอบให้แน่ใจว่าคุณบันทึกข้อมูลบนไดรฟ์ของคุณแล้ว โดยเฉพาะอย่างยิ่งถ้าข้อมูลนั้นเป็นส่วนหนึ่งของอาร์เรย์ RAID ก่อนคุณถอดไดรฟ์ออกจากเซิร์ฟเวอร์
เพื่อป้องกันไม่ให้ขั้วต่อไดรฟ์เสียหาย ตรวจสอบให้แน่ใจว่าฝาครอบด้านบนเซิร์ฟเวอร์อยู่ในตำแหน่งและปิดสนิททุกครั้งที่คุณติดตั้งและถอดไดรฟ์
เพื่อให้แน่ใจว่ามีการระบายความร้อนของระบบอย่างเพียงพอ อย่าใช้งานเซิร์ฟเวอร์นานกว่าสองนาทีโดยไม่มีไดรฟ์หรือแผงครอบช่องใส่ไดรฟ์ติดตั้งอยู่ในช่องใส่แต่ละช่อง
ก่อนจะเปลี่ยนไดรฟ์ ตัวควบคุมไดรฟ์ (รวมถึงตัวควบคุมที่รวมอยู่บนแผงระบบ), แบ็คเพลนของไดรฟ์ หรือสายไดรฟ์ ให้สำรองข้อมูลที่สำคัญทั้งหมดที่เก็บอยู่บนไดรฟ์ก่อน
ก่อนที่จะถอดส่วนประกอบใดๆ ของอาร์เรย์ RAID (ไดรฟ์ การ์ด RAID ฯลฯ) ให้สำรองข้อมูลการกำหนดค่า RAID ทั้งหมด
- ค้นหาเอกสารที่มากับไดรฟ์ แล้วปฏิบัติตามคำแนะนำเหล่านั้นนอกเหนือจากคำแนะนำในบทนี้
- คุณสามารถรักษาความสมบูรณ์ของการรบกวนทางแม่เหล็กไฟฟ้า (EMI) และการระบายความร้อนของเครื่องได้ด้วยการปิดหรือใช้งานช่องใส่ไดรฟ์และช่องเสียบ PCI และ PCIe ทั้งหมด เมื่อคุณติดตั้งไดรฟ์, PCI หรืออะแดปเตอร์ PCIe ให้เก็บแผงกั้นและแผงครอบ EMC จากฝาครอบช่องใส่ไดรฟ์ หรือช่องเสียบ PCI หรืออะแดปเตอร์ PCIe เอาไว้เผื่อว่าคุณจะต้องถอดอุปกรณ์นั้นออกในภายหลัง
- ดูรายชื่ออุปกรณ์เสริมที่รองรับสำหรับเซิร์ฟเวอร์ทั้งหมดที่ เว็บไซต์ Lenovo ServerProven
- ช่องใส่ไดรฟ์จะมีตัวเลขกำกับไว้เพื่อระบุลำดับการติดตั้ง (เริ่มจากเลข “0”) ดู มุมมองด้านหน้า สำหรับการกำหนดหมายเลขช่องใส่ไดรฟ์
ไปที่ เว็บไซต์ดาวน์โหลดไดรเวอร์และซอฟต์แวร์สำหรับ ThinkSystem SR630 V4 เพื่อดูข้อมูลการอัปเดตเฟิร์มแวร์และไดรเวอร์ล่าสุดของเซิร์ฟเวอร์คุณ
ไปที่ อัปเดตเฟิร์มแวร์ สำหรับข้อมูลเพิ่มเติมเกี่ยวกับเครื่องมืออัปเดตเฟิร์มแวร์
ขั้นตอน
- ถ้าฝา E3.S ติดตั้งไว้แล้ว ให้ถอดฝา E3.S ออก
 กดปุ่มบนฝา E3.S เพื่อปลดฝาครอบ
 ถอดฝา E3.S ออกจากเซิร์ฟเวอร์
รูปที่ 1. การถอดฝา E3.S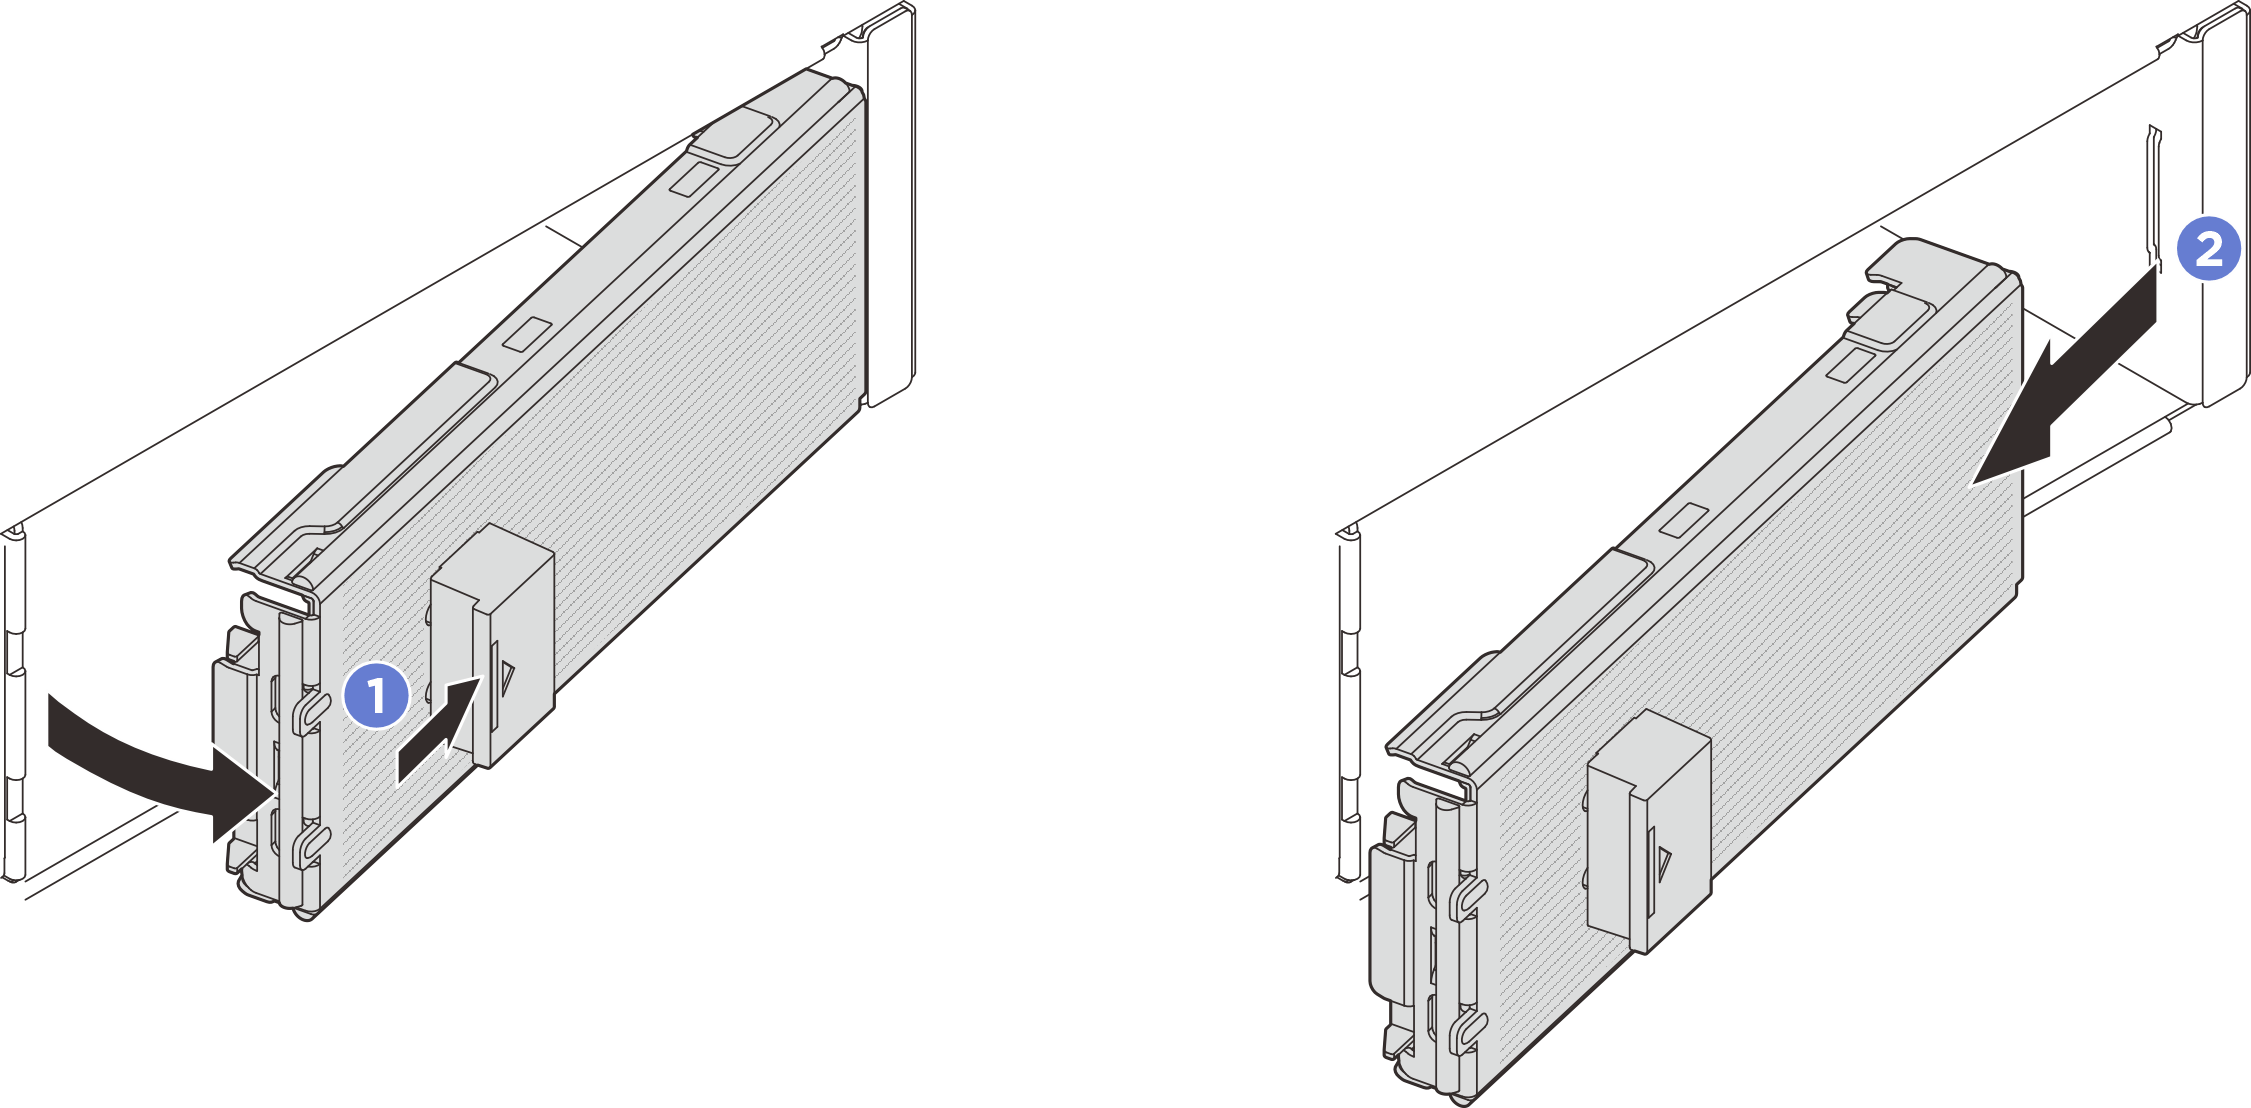
- หากมีการติดตั้งแผงครอบช่องใส่ในช่องใส่ ให้ถอดแผงครอบช่องใส่ออก ดึงคันโยกปลดล็อคบนแผงครอบแล้วเลื่อนออกจากเซิร์ฟเวอร์
- บีบแถบปลดล็อคบนแผงครอบ
- เลื่อนแผงครอบออกจากช่องใส่
รูปที่ 2. การถอดแผงครอบช่องใส่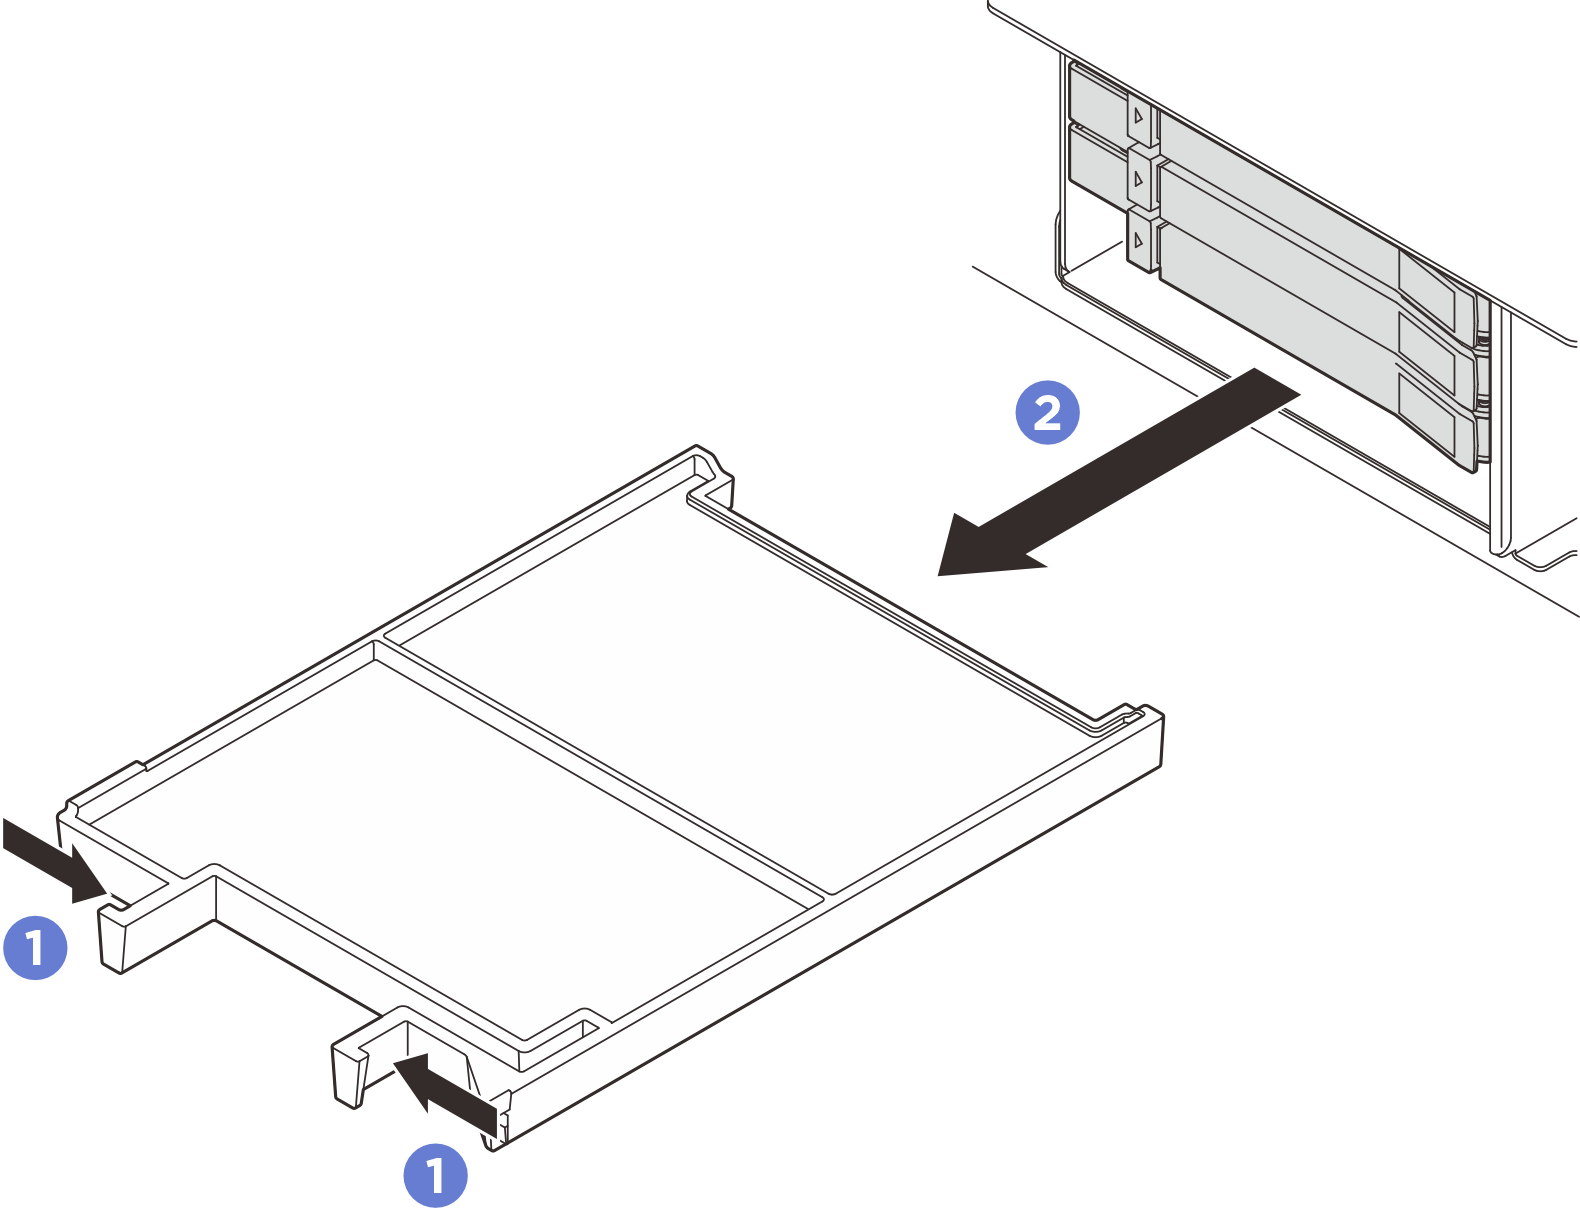
- ติดตั้งไดรฟ์แบบ Hot-swap แบบ E3.S
- ตรวจสอบให้แน่ใจว่าที่จับไดรฟ์อยู่ในตำแหน่งเปิด จากนั้น ให้จัดแนวไดรฟ์ให้ตรงกับรางนำทางในช่องใส่ แล้วค่อยๆ ดันไดรฟ์เข้าไปในช่องใส่จนสุด
- หมุนที่จับไดรฟ์ไปยังตำแหน่งปิดให้สุด จนกว่าสลักที่จับจะคลิกเข้าที่
รูปที่ 3. การติดตั้งไดรฟ์ E3.S แบบ Hot-swap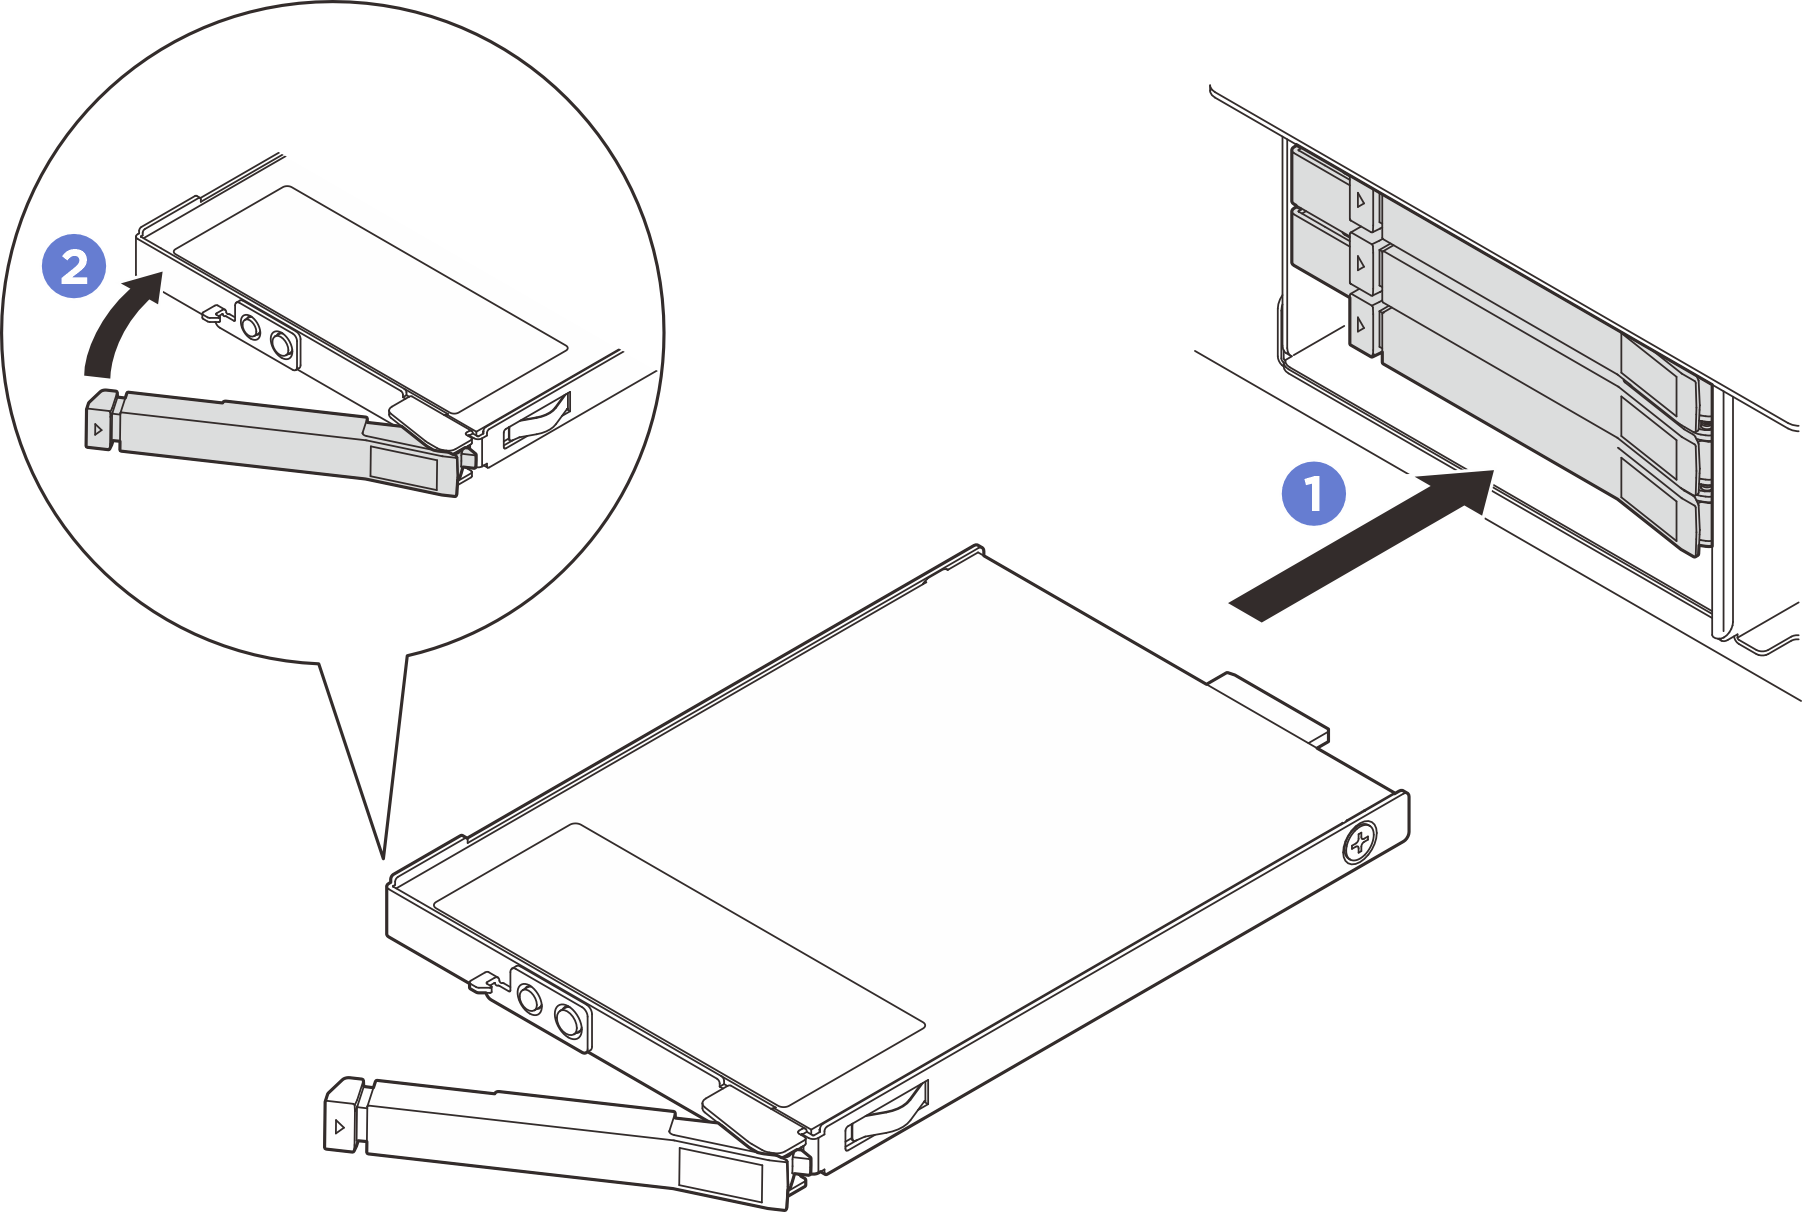
- หากมีไดรฟ์เพิ่มเติมที่จะติดตั้งให้ทำตอนนี้ หากช่องใดว่าง ให้เติมด้วยแผงครอบช่องใส่
ในการติดตั้งแผงครอบช่องใส่ ให้เสียบลงในช่องใส่ว่างจนกว่าจะเข้าที่แน่นดี
รูปที่ 4. การติดตั้งแผงครอบช่องใส่
- ถอดแผ่นด้านในของฝา E3.S หากจำเป็น ทั้งนี้ขึ้นอยู่กับการกำหนดค่าหมายเหตุ
- เมื่อพื้นที่ที่จะครอบคลุมมีการติดตั้งตัวครอบ E3.S 1T ควรถอดแผ่นด้านในของฝา E3.S
- เพื่อการระบายความร้อนและการไหลเวียนของอากาศที่เหมาะสม เมื่อพื้นที่ที่จะครอบคลุมไม่มีการติดตั้งตัวครอบ E3.S 1T ต้องมีแผ่นด้านในของฝา E3.S
- กดแถบเพื่อปลดแผ่นด้านใน
- หมุนแผ่นด้านในออกจากฝา E3.S เพื่อถอดออก
รูปที่ 5. การถอดแผ่นด้านใน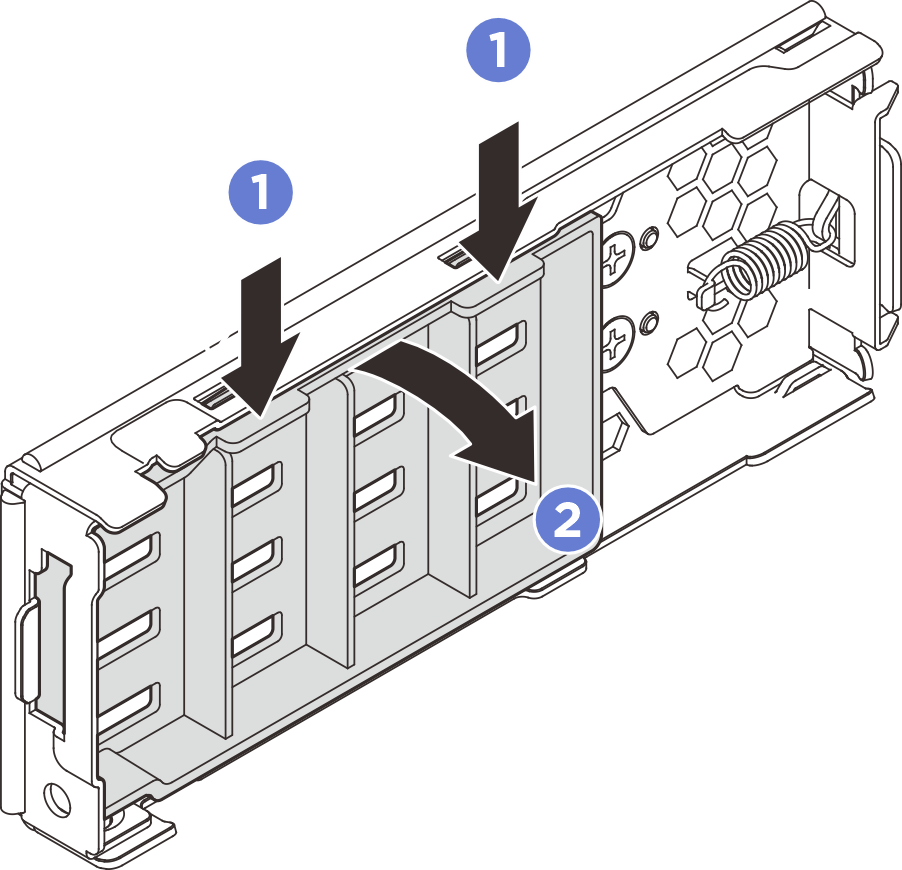
- ติดตั้งฝา E3.S กลับไปที่เซิร์ฟเวอร์อีกครั้ง
- ใส่ฝา E3.S เข้าไปในช่องเสียบ
- หมุนฝา E3.S เข้าหาเซิร์ฟเวอร์จนกว่าจะคลิกเข้าที่
รูปที่ 6. การติดตั้งฝา E3.S สำคัญ
สำคัญฝา E3.S ถูกออกแบบมาเพื่อรักษาความสมบูรณ์ของ EMI ในเซิร์ฟเวอร์ รุ่นเซิร์ฟเวอร์ที่มีไดรฟ์ E3.S ทั้งหมดควรใช้งานโดยมีฝา E3.S ติดตั้งไว้ทั้งหมด
หลังจากดำเนินการเสร็จ
หากมีการกำหนดค่าเซิร์ฟเวอร์สำหรับการทำงานของ RAID ผ่านอะแดปเตอร์ ThinkSystem RAID คุณอาจต้องกำหนดค่าดิสก์อาร์เรย์ของคุณใหม่หลังจากติดตั้งไดรฟ์ โปรดดูเอกสารที่มาพร้อมกับอะแดปเตอร์ ThinkSystem RAID สำหรับข้อมูลเพิ่มเติมเกี่ยวกับการทำงานของ RAID และคำแนะนำฉบับสมบูรณ์สำหรับการใช้งานอะแดปเตอร์ ThinkSystem RAID
วิดีโอสาธิต