安裝前方 M.2 框架和硬碟背板
請依照本節中的指示安裝前方 M.2 框架和硬碟背板。
關於此作業
小心
圖 1. 前方 M.2 硬碟背板
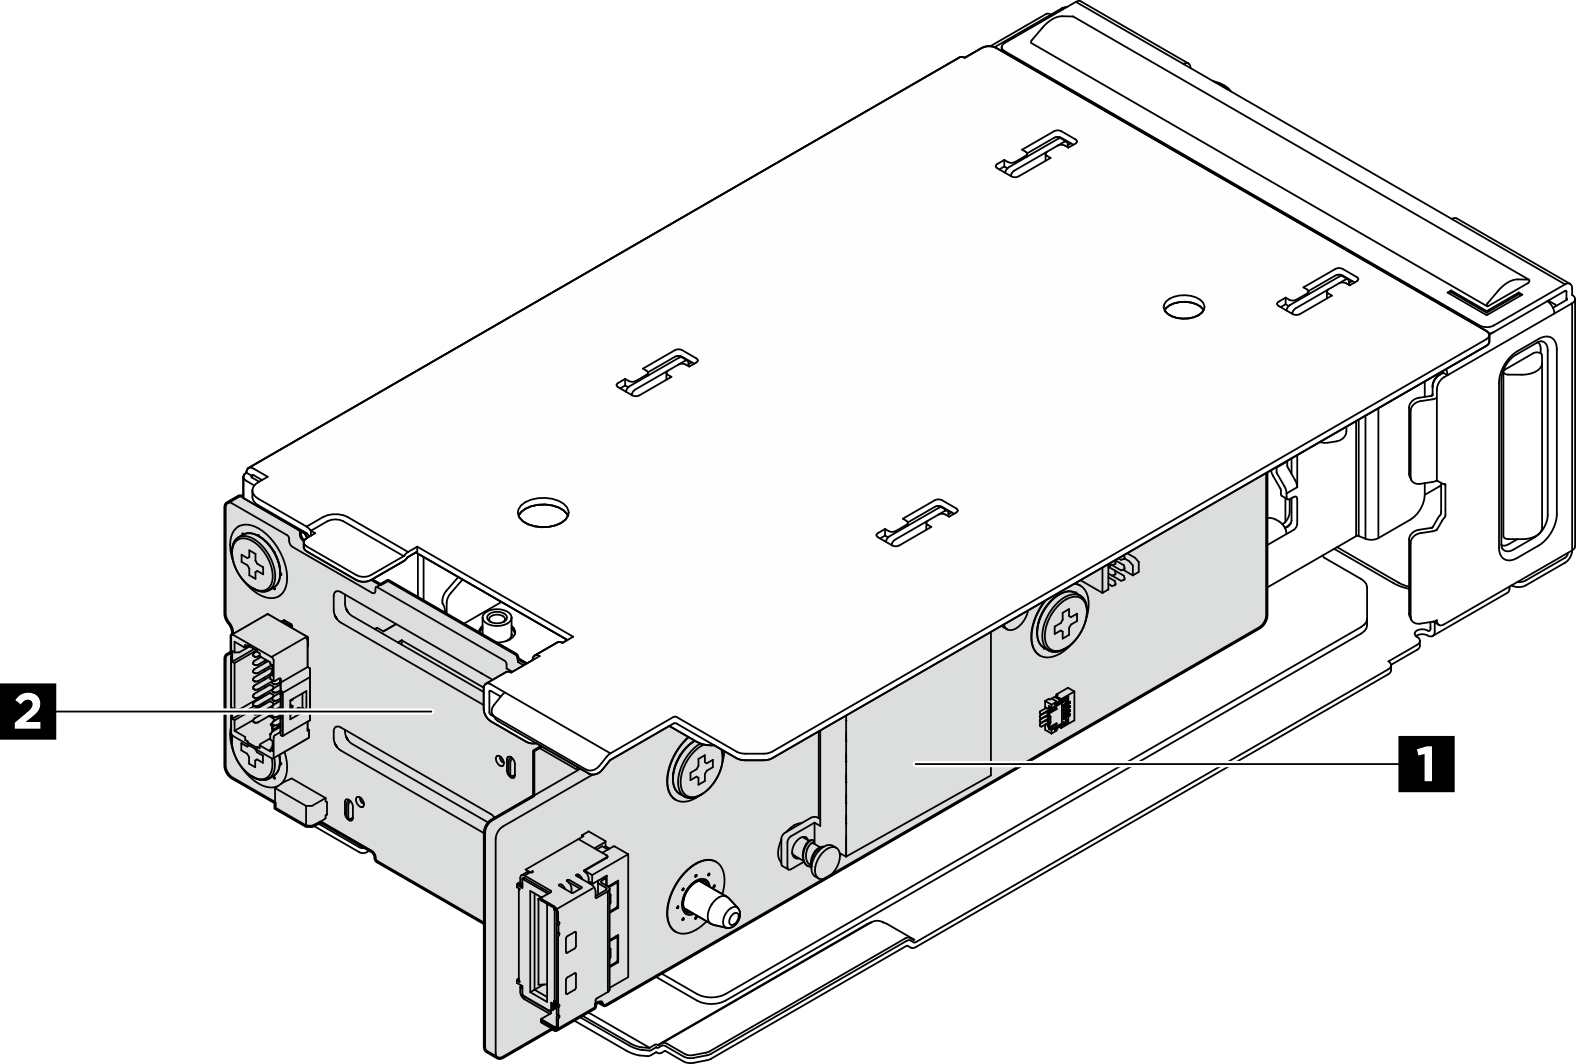
| 1 M.2 控制器板 | 2 M.2 開機背板 |
程序
- 將 M.2 開機背板安裝在框架上。
 將背板的右側插入框架。
 將背板的左側轉向框架。
圖 2. 安裝 M.2 開機背板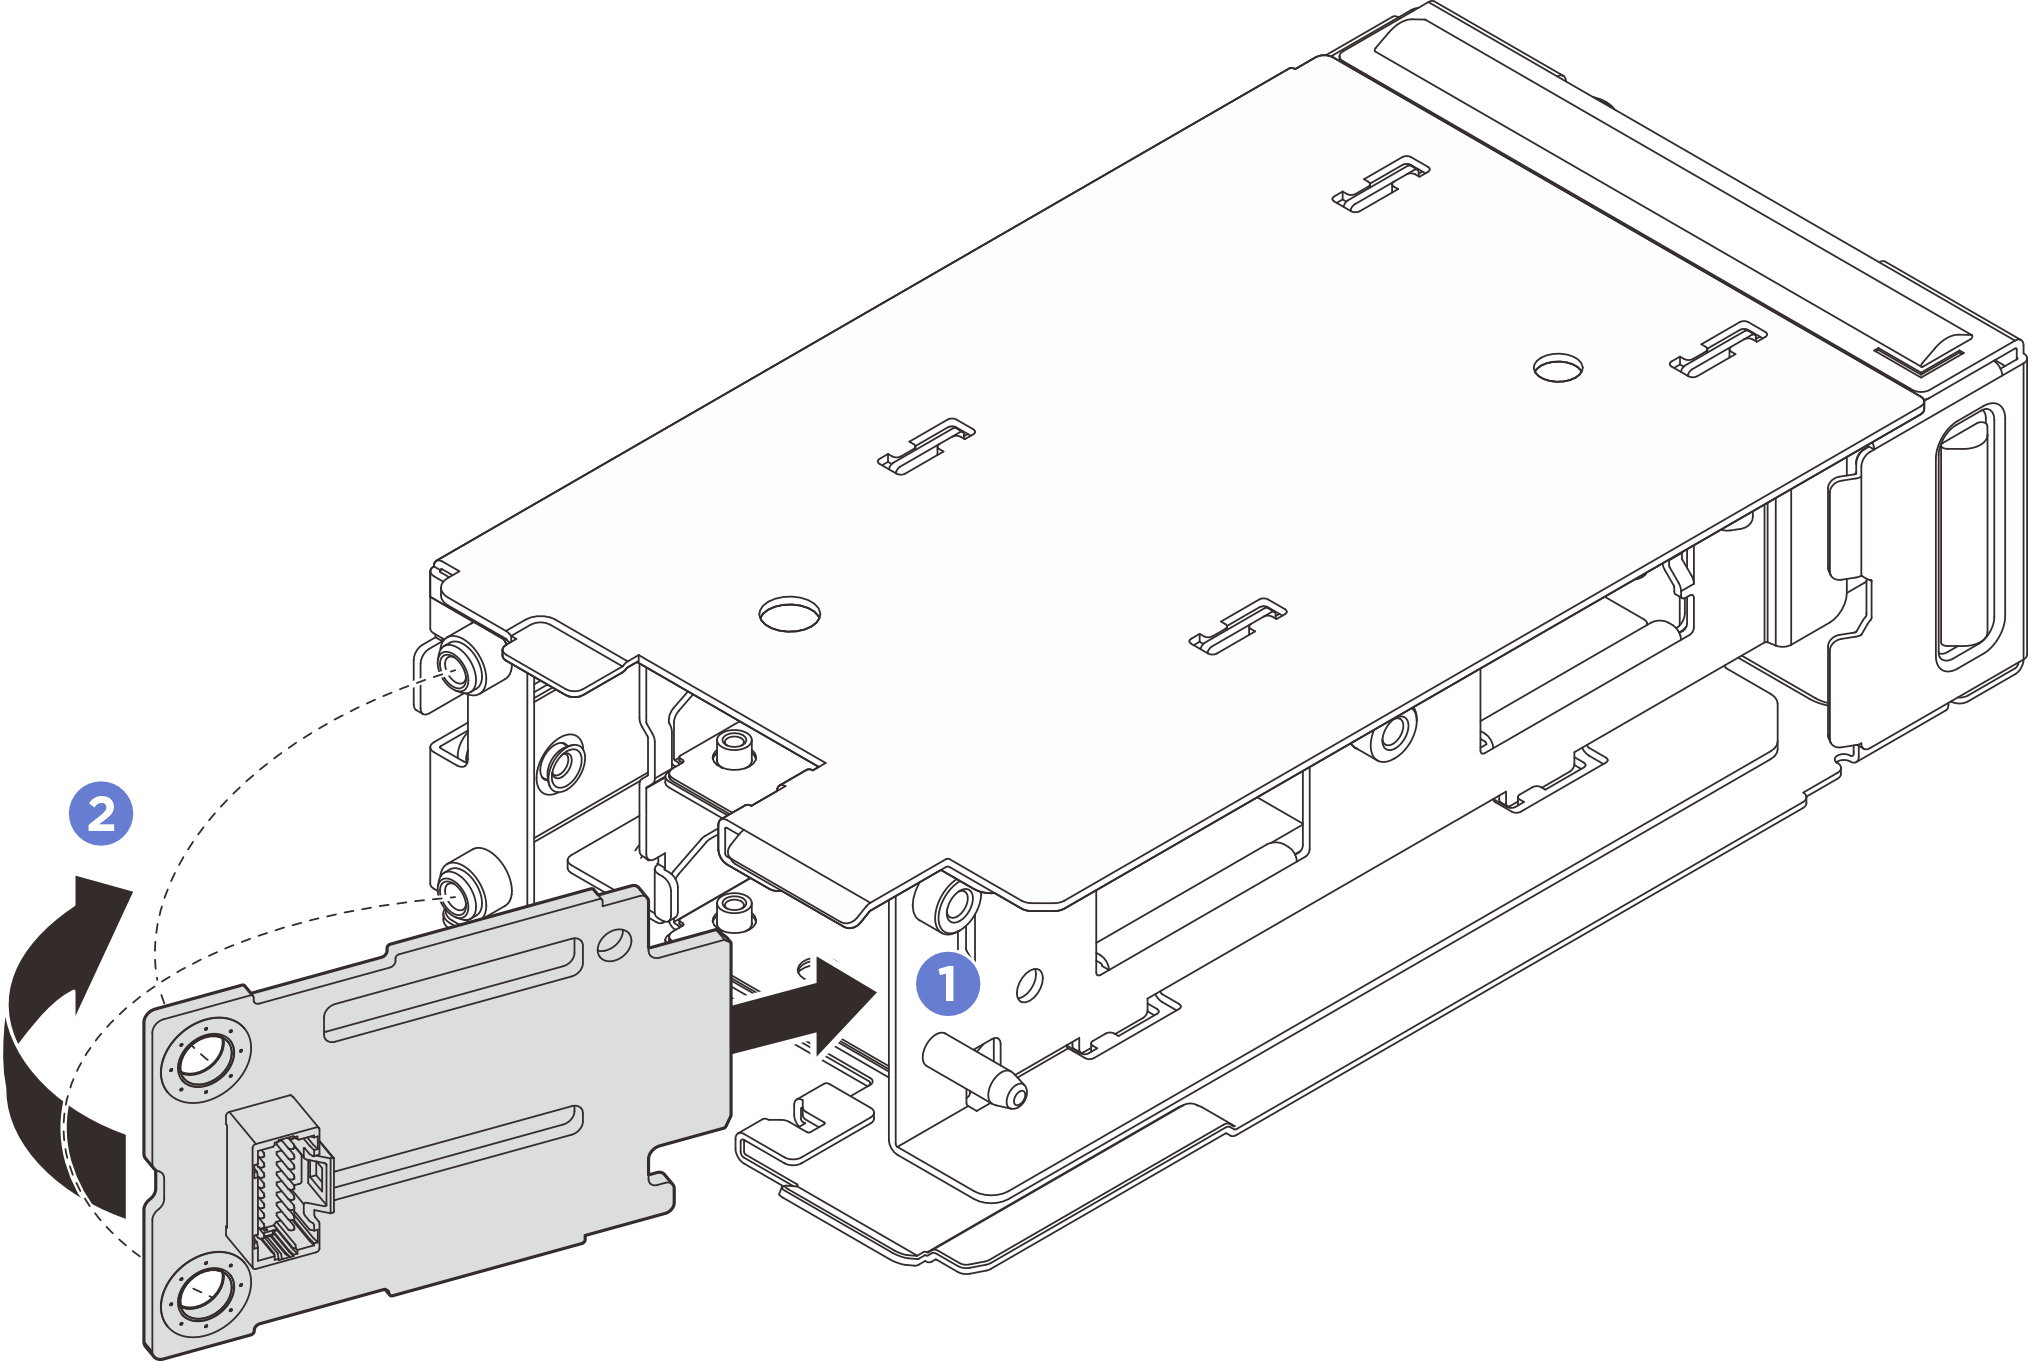
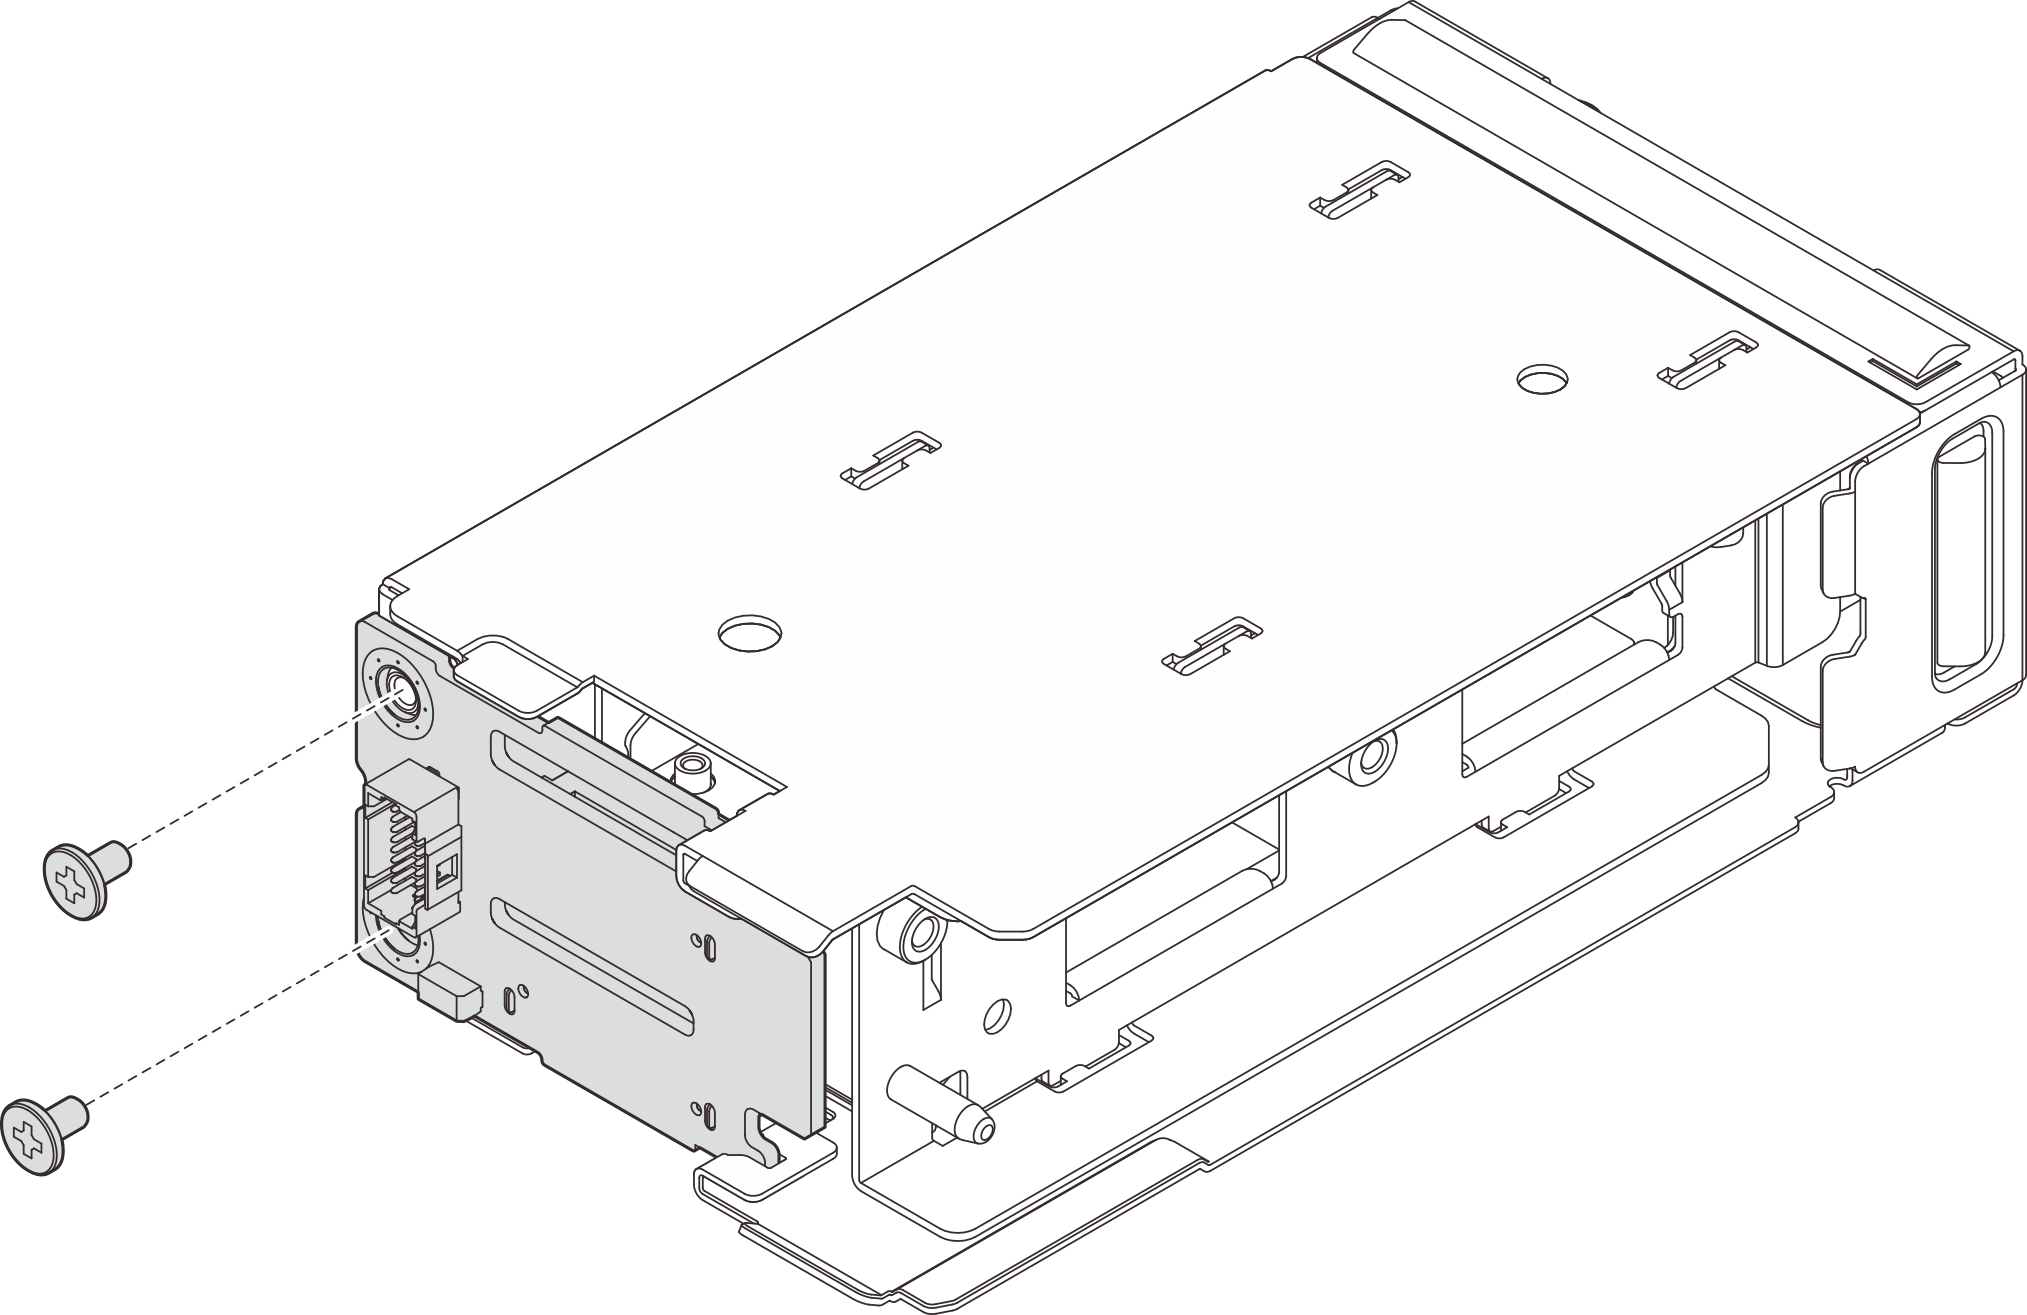
- 鎖緊兩顆螺絲以固定背板。圖 3. 安裝 M.2 開機背板
- 將 M.2 控制器板安裝在框架上。
- 將控制器板安裝在框架上。確保開機背板接觸點完全插入控制器板上的接頭中,如圖所示。
- 鎖緊兩個螺絲以固定控制器板。
圖 4. 安裝前方 M.2 控制器板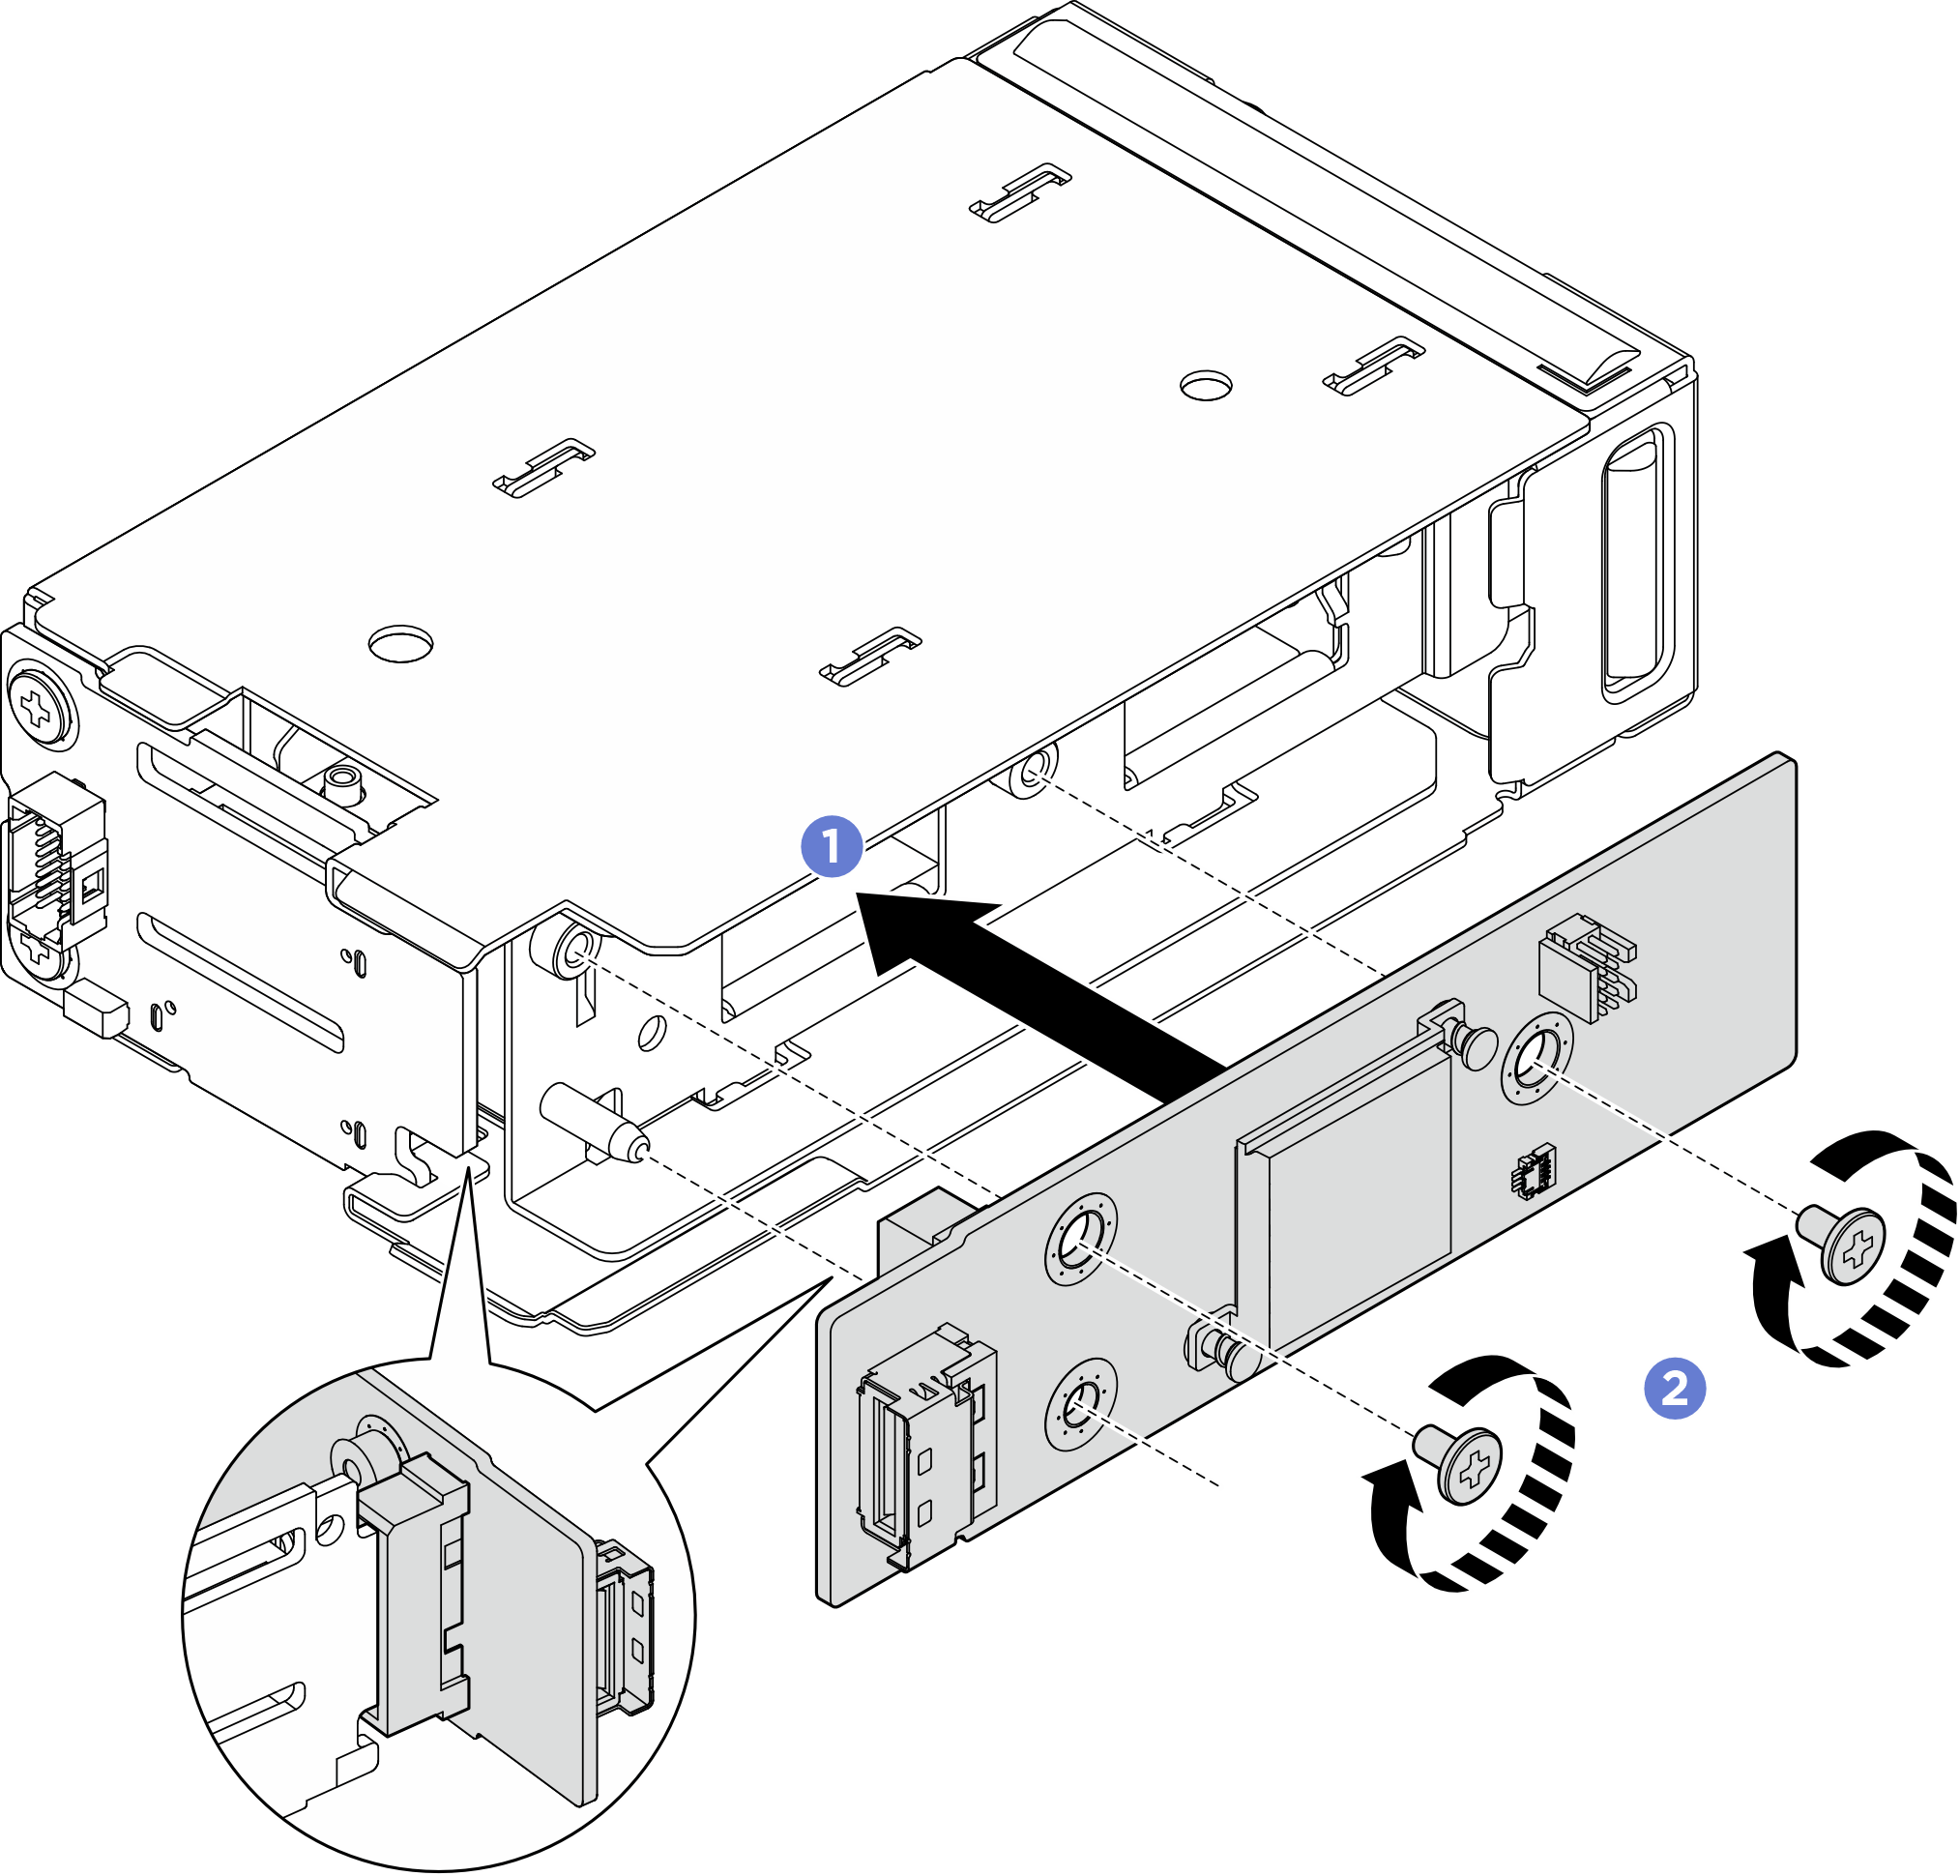
- 安裝前方 M.2 框架。
- 針對伺服器前方有 2.5 吋硬碟的配置,將前方 M.2 框架滑入機箱中,直至卡入定位。
- 針對有 E3.S 硬碟或 CXL 記憶體模組 (CMM) 配置的系統,將前方 M.2 框架滑入機架中,直至卡入定位。
圖 5. 將前方 M.2 框架安裝至機箱中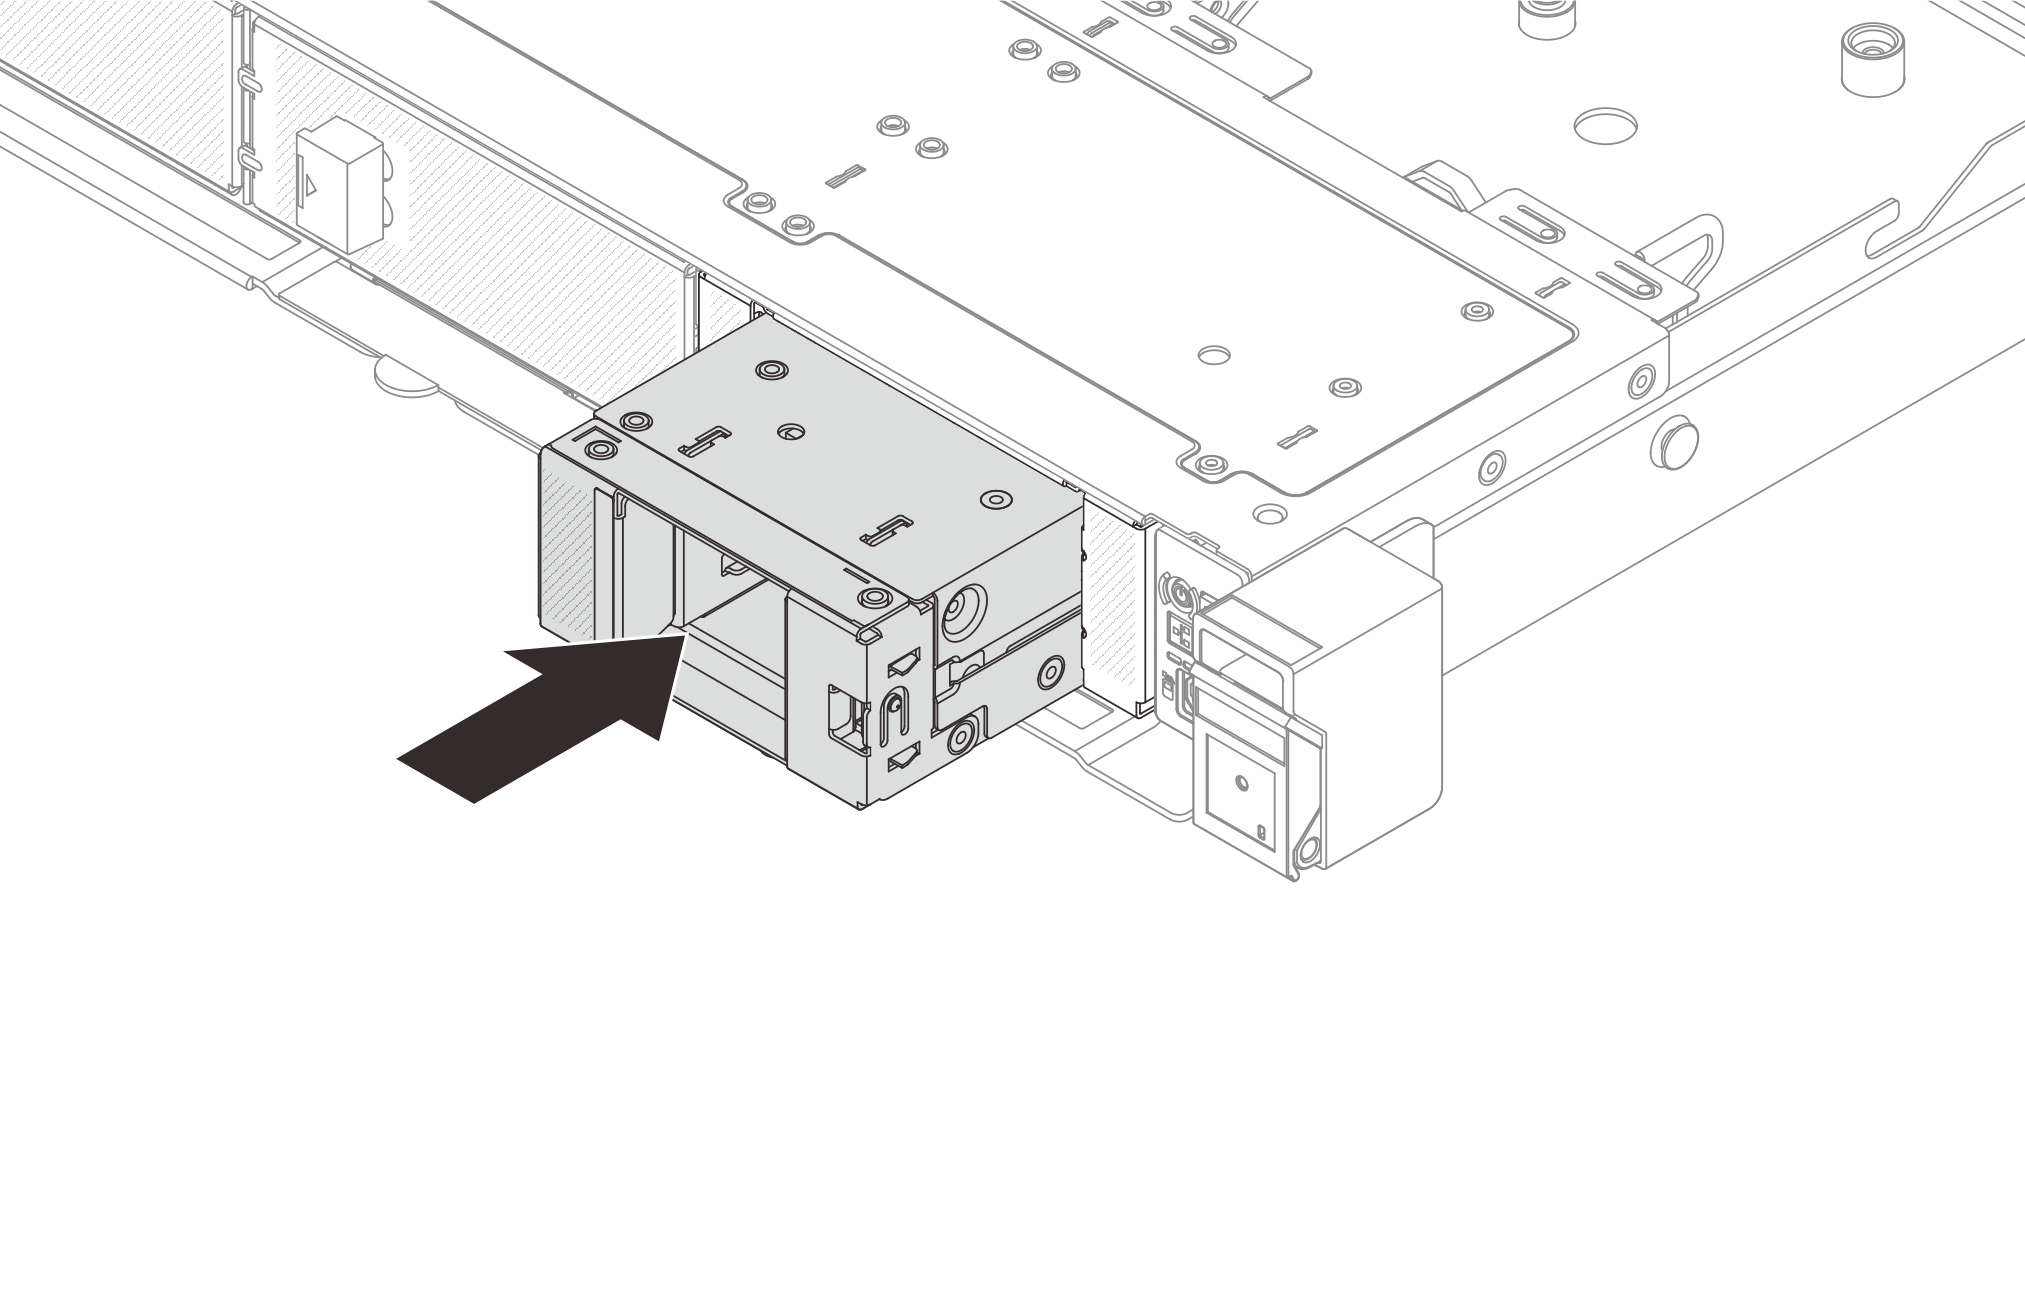 圖 6. 將前方 M.2 框架安裝至機架中
- 對於具有 E3.S 硬碟或 CMM 的配置,將前方 M.2 框架連同機架一起安裝至機箱中。
- 確保閂鎖在開啟位置。
- 將框架連同機架滑入機箱中,直至機箱上的導件插腳固定到位。
 向下按壓閂鎖以固定框架及其機架。
圖 7. 安裝前方 M.2 框架及其機架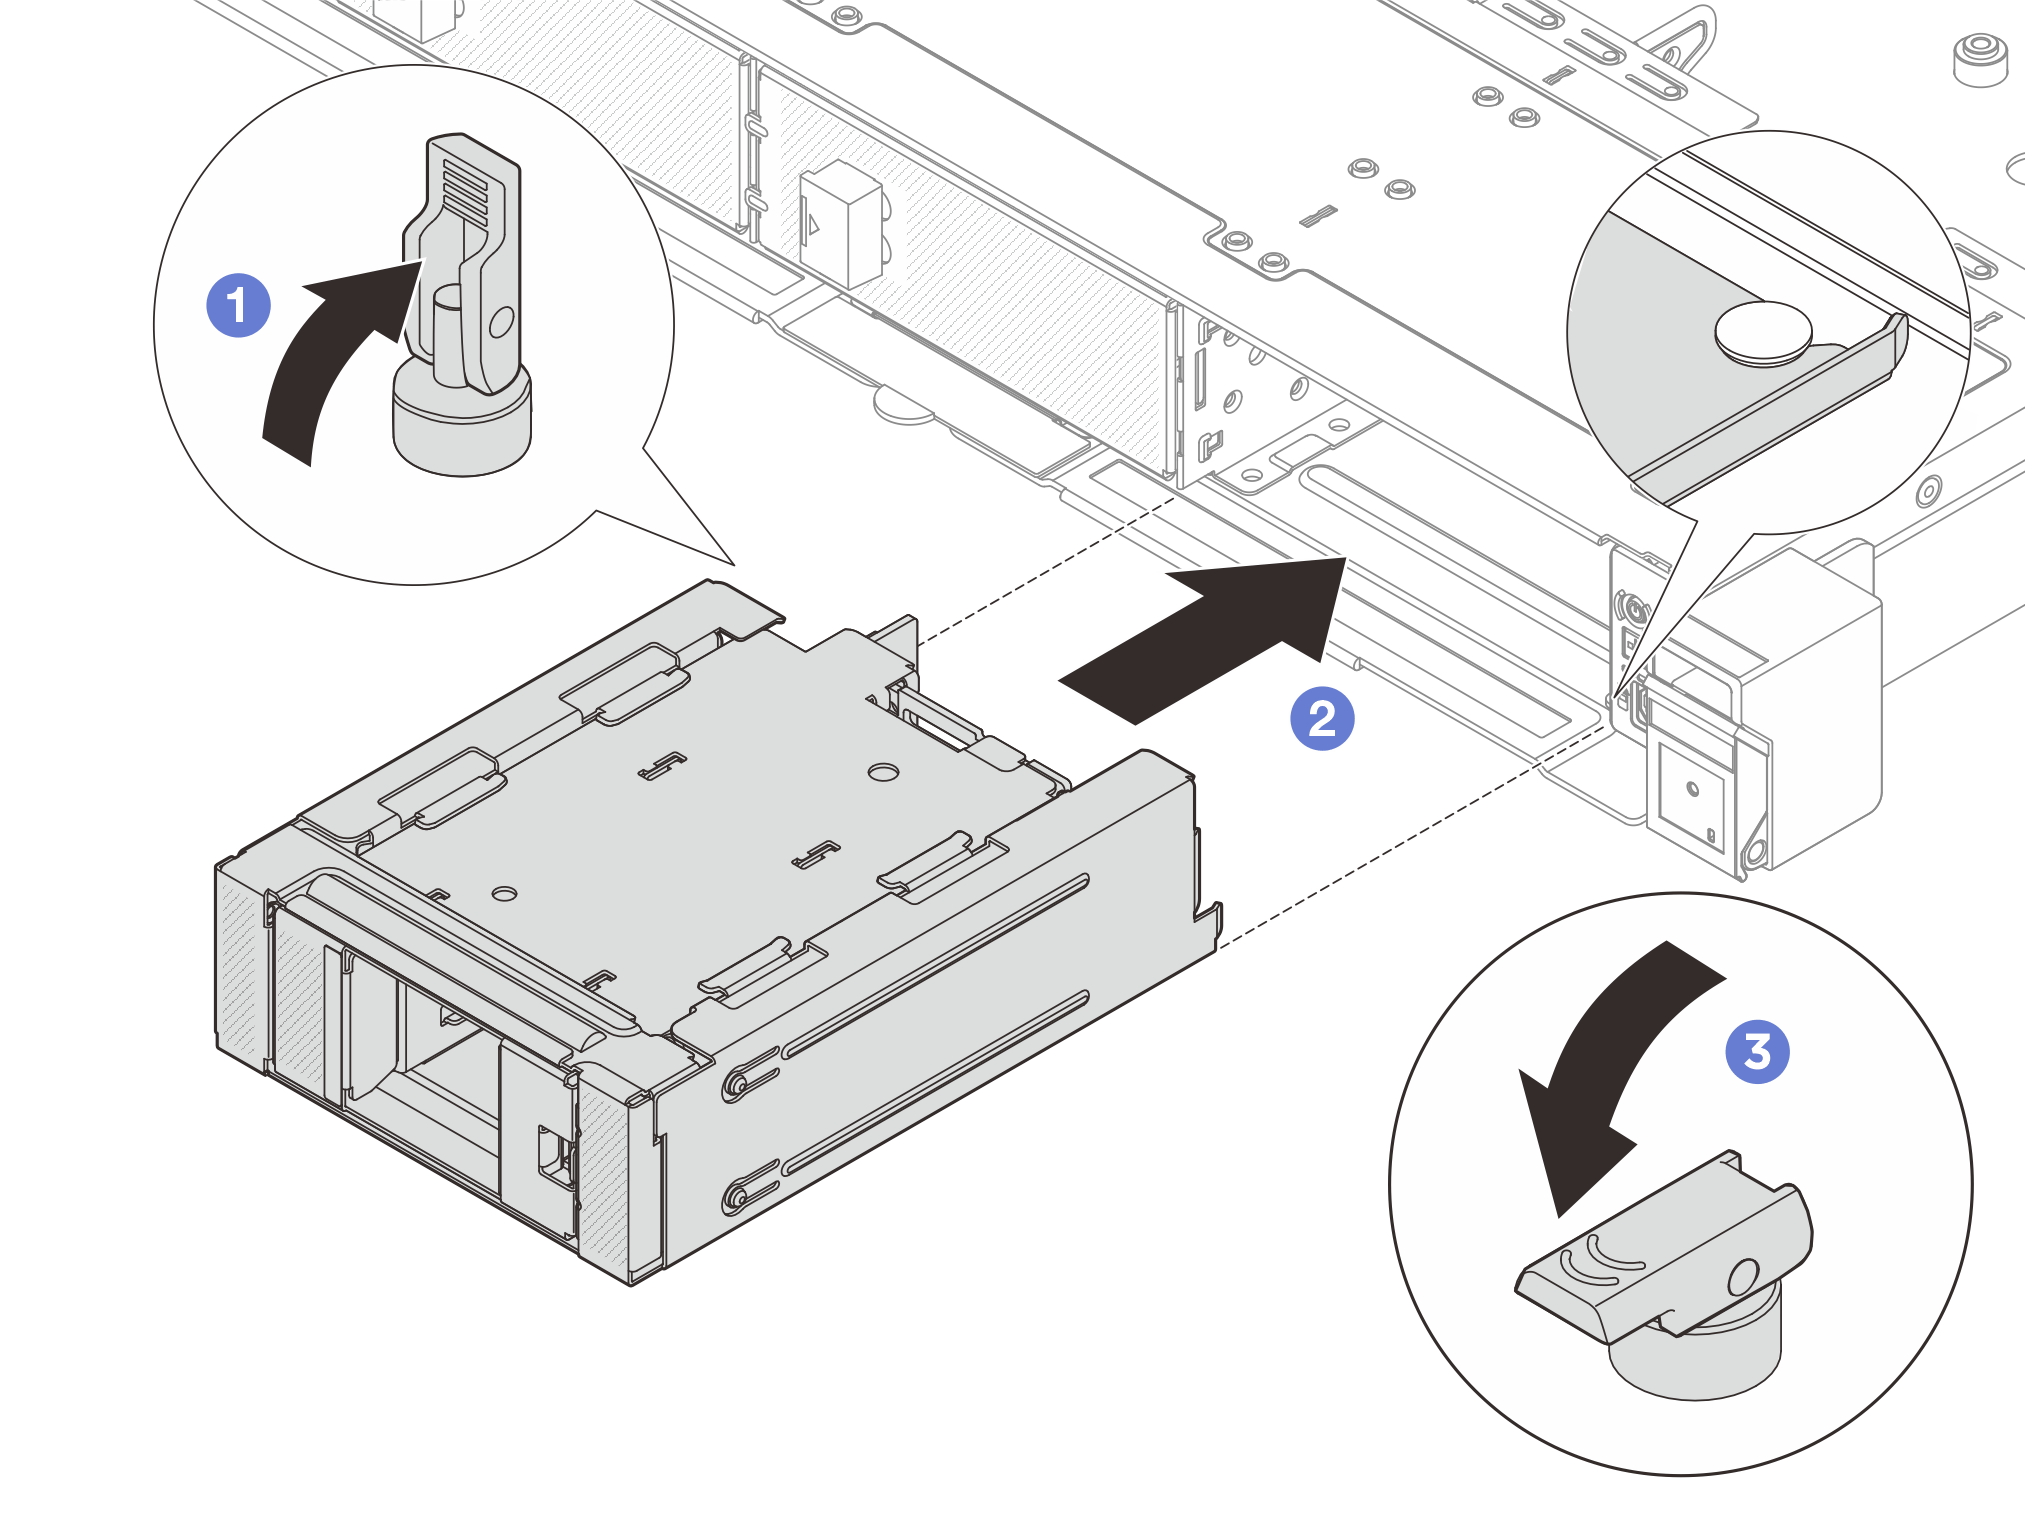
提供意見回饋