Remove a hot-swap power supply unit
Use this information to remove a power supply unit.
About this task
If the power supply unit to be removed is the only one installed, the power supply is non-hot-swap and before removing it, you must turn off the server first. To support redundancy mode or hot-swap, install an additional hot-swap power supply.
You don’t need to set the power redundancy mode yourself. The BMC of the server can automatically set it based on the installed power supply unit quantity.
When only 1 power supply unit is installed, the redundancy mode is set to
Non-redundant mode
.When 2 power supply units are installed, the redundancy mode is set to
Redundant N+N
. If one of the power supply units fails or has been removed, the BMC will report an event and set the redundancy mode toNon-redundant mode
automatically.
Read Installation guidelines to ensure that you work safely.
Prevent exposure to static electricity, which might lead to system halt and loss of data, by keeping static-sensitive components in their static-protective packages until installation, and handling these devices with an electrostatic-discharge wrist strap or other grounding system.
Procedure
- If the server is in a rack, adjust the cable management arm (CMA) to gain access to the power supply bay.Figure 1. CMA adjustment
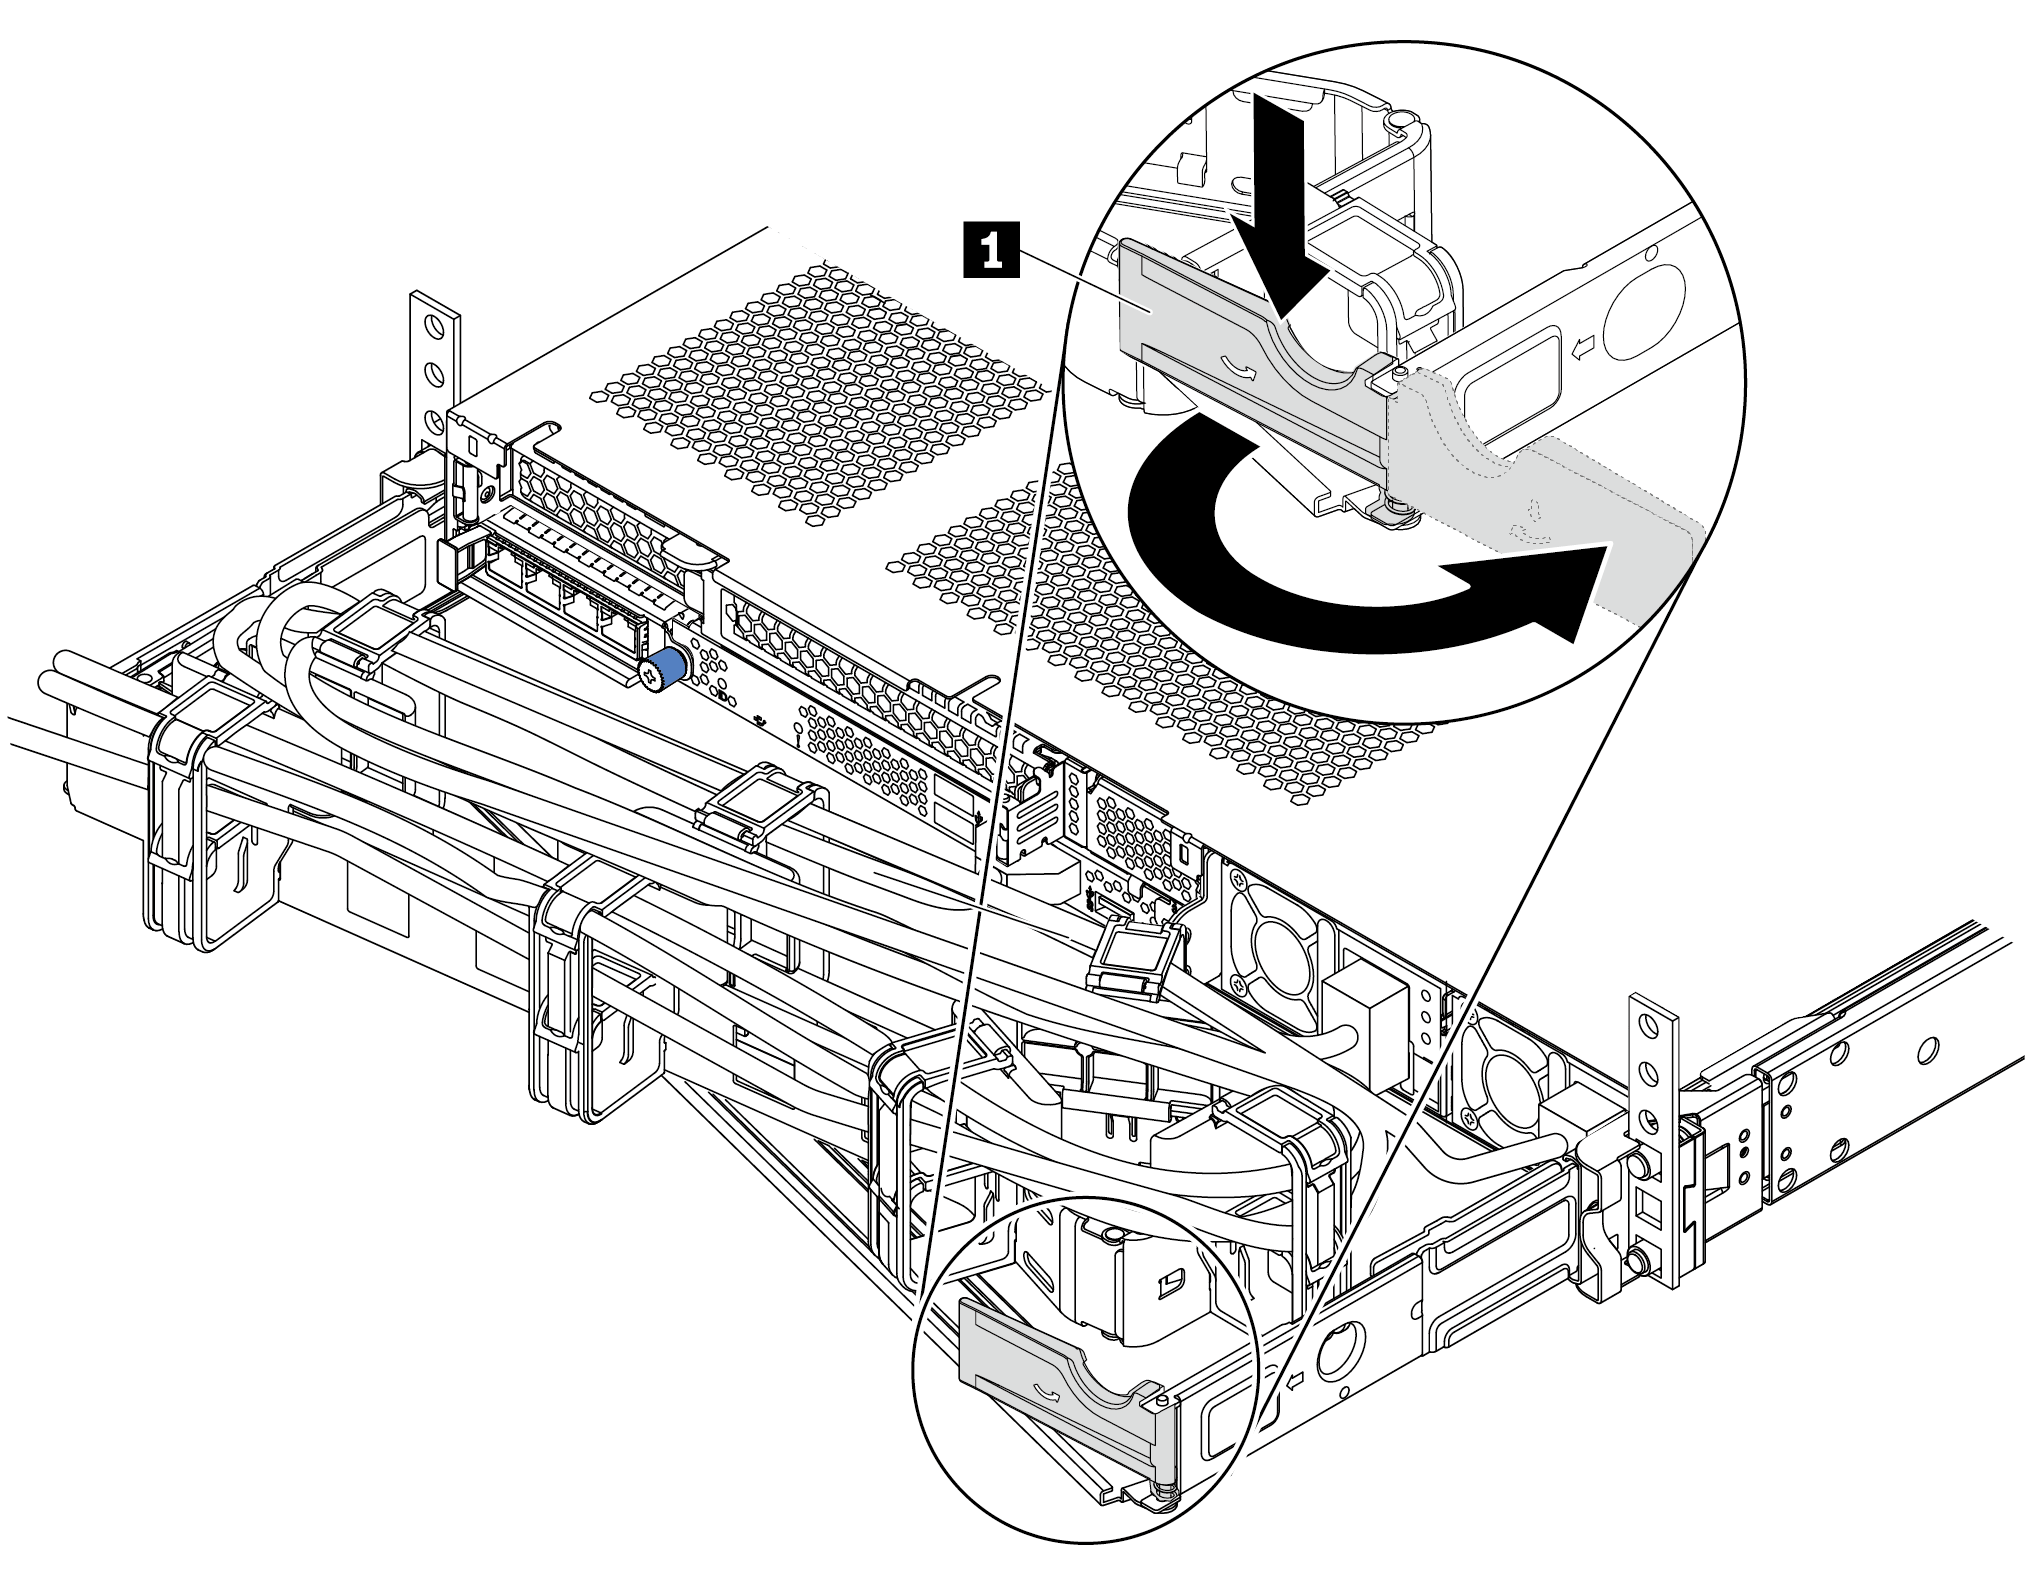
Press down the stop bracket 1 and rotate it to the open position.
Rotate the CMA out of the way to gain access to the power supply.
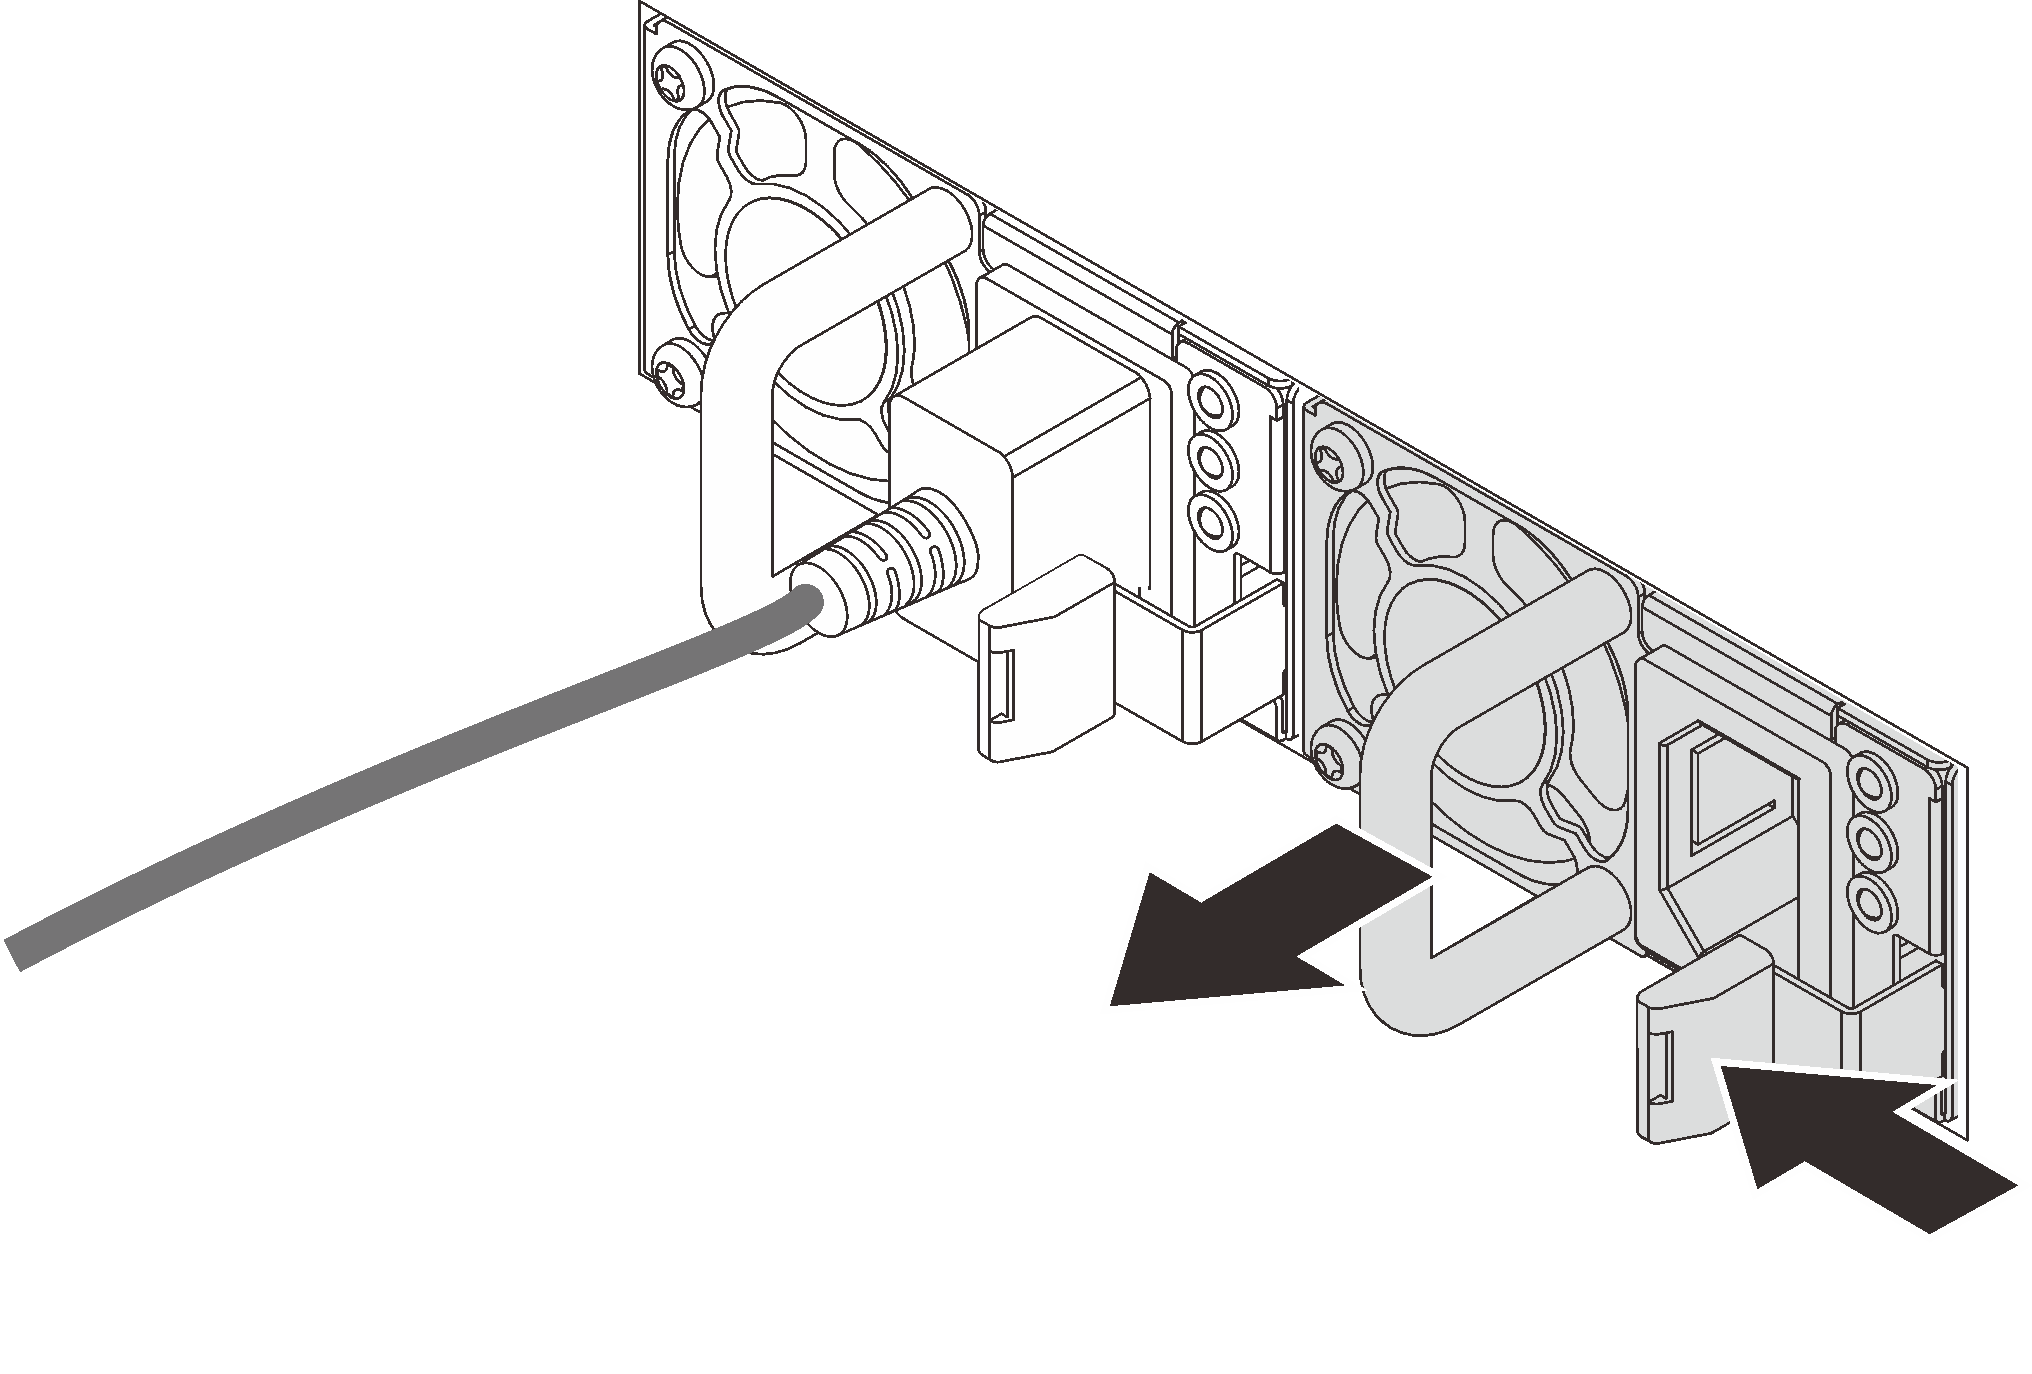
- Press the release tab toward the handle and carefully pull the handle at the same time to slide the hot-swap power supply out of the chassis.Figure 2. Hot-swap power supply removal
After you finish
Install a new power supply or install the power-supply filler to cover the power supply bay. See Install a hot-swap power supply unit.
ImportantTo ensure proper cooling during normal server operation, both of the power supply bays must be occupied. This means that each bay must have a power supply installed; or one has a power supply installed and the other has a power supply filler installed.If you are instructed to return the old hot-swap power supply, follow all packaging instructions and use any packaging materials that are provided.
Demo video