Install the air baffle
Use this information to install the air baffle.


Ensure that no tools or loose screws are left inside your server.
Ensure that all components have been reassembled correctly.
Ensure that all cables inside the server have been properly routed and they will not interfere with installing the air baffle.
Select the appropriate air baffle for your server depending on the server model. See Important information about the air baffle and GPU.
If you are installing the standard air baffle, install the removed plastic filler to the air baffle if necessary.
Figure 1. Plastic filler installation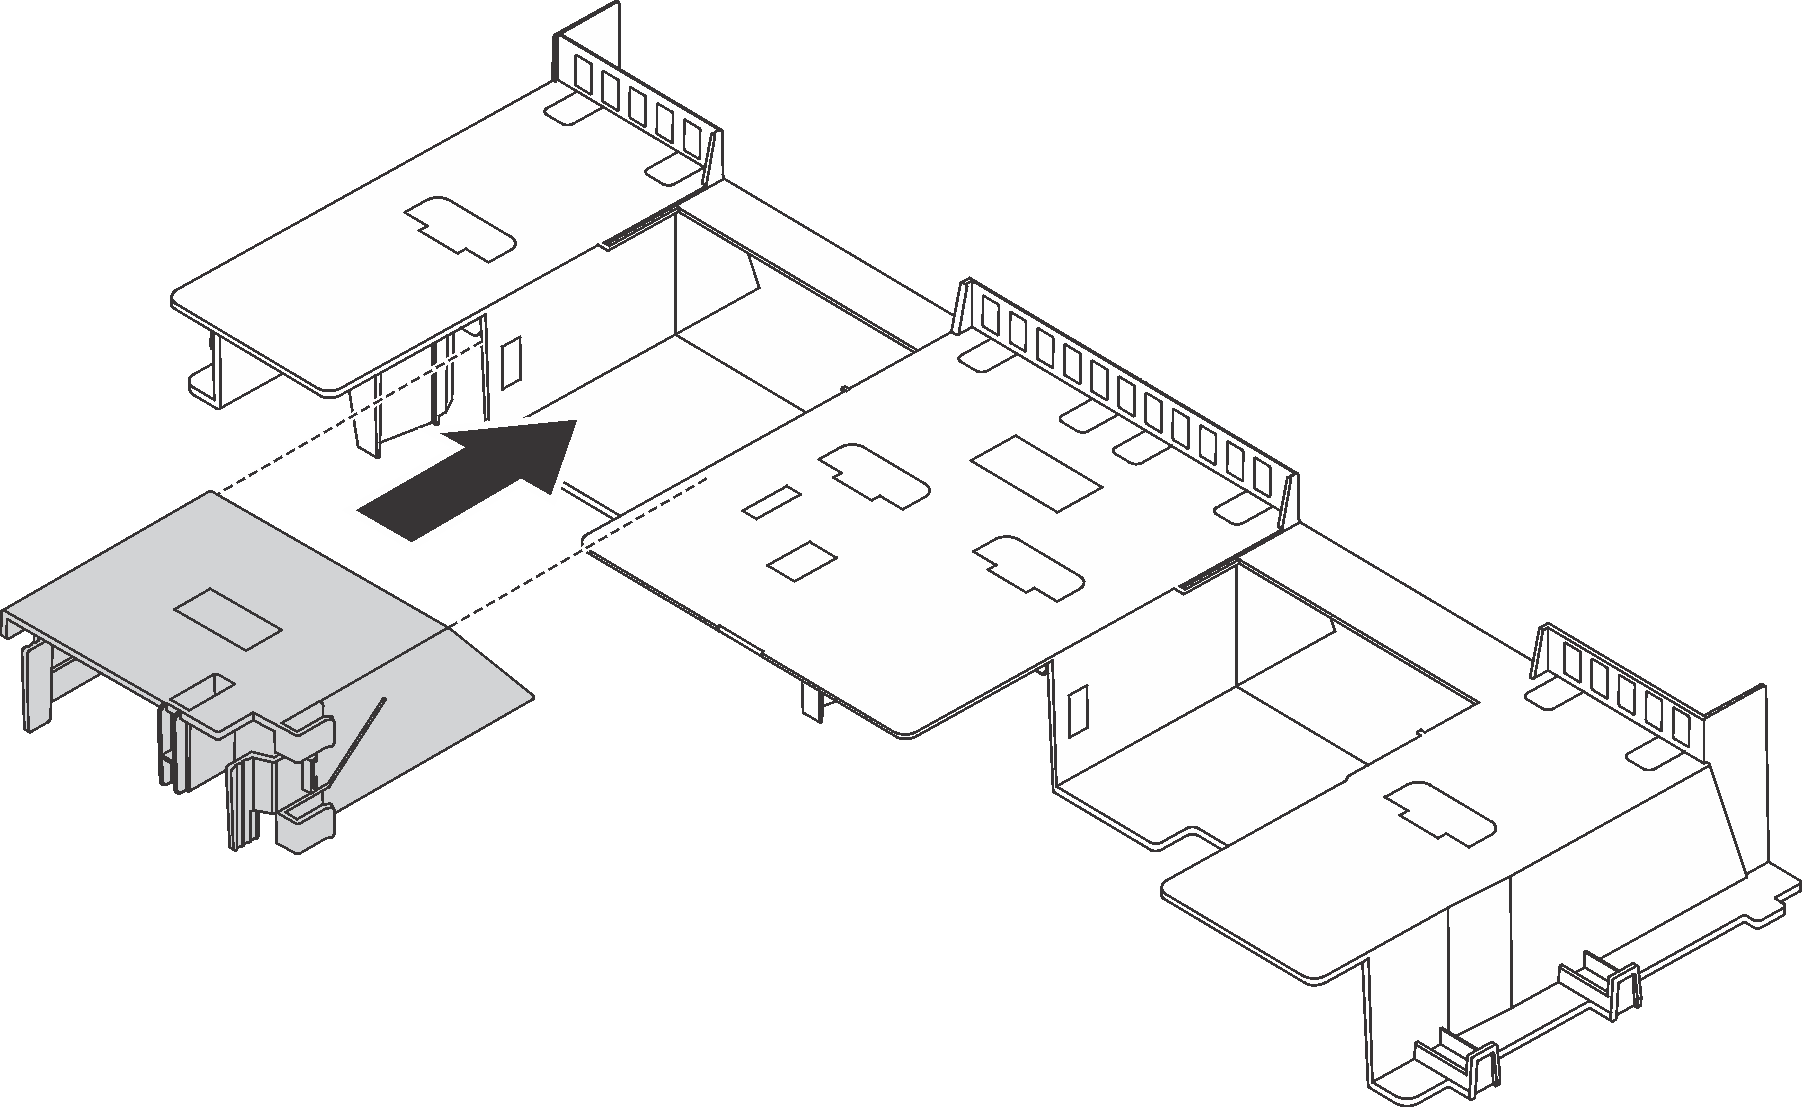
To install the air baffle, complete the following steps:
Watch the procedure
A video of this procedure is available at YouTube.
- Align the tabs on both sides of the air baffle with the corresponding slots on both sides of the chassis. Then, lower the air baffle into the chassis and press the air baffle down until it is securely seated.Figure 2. Installation of the standard air baffle
 Figure 3. Installation of the large-size air baffle
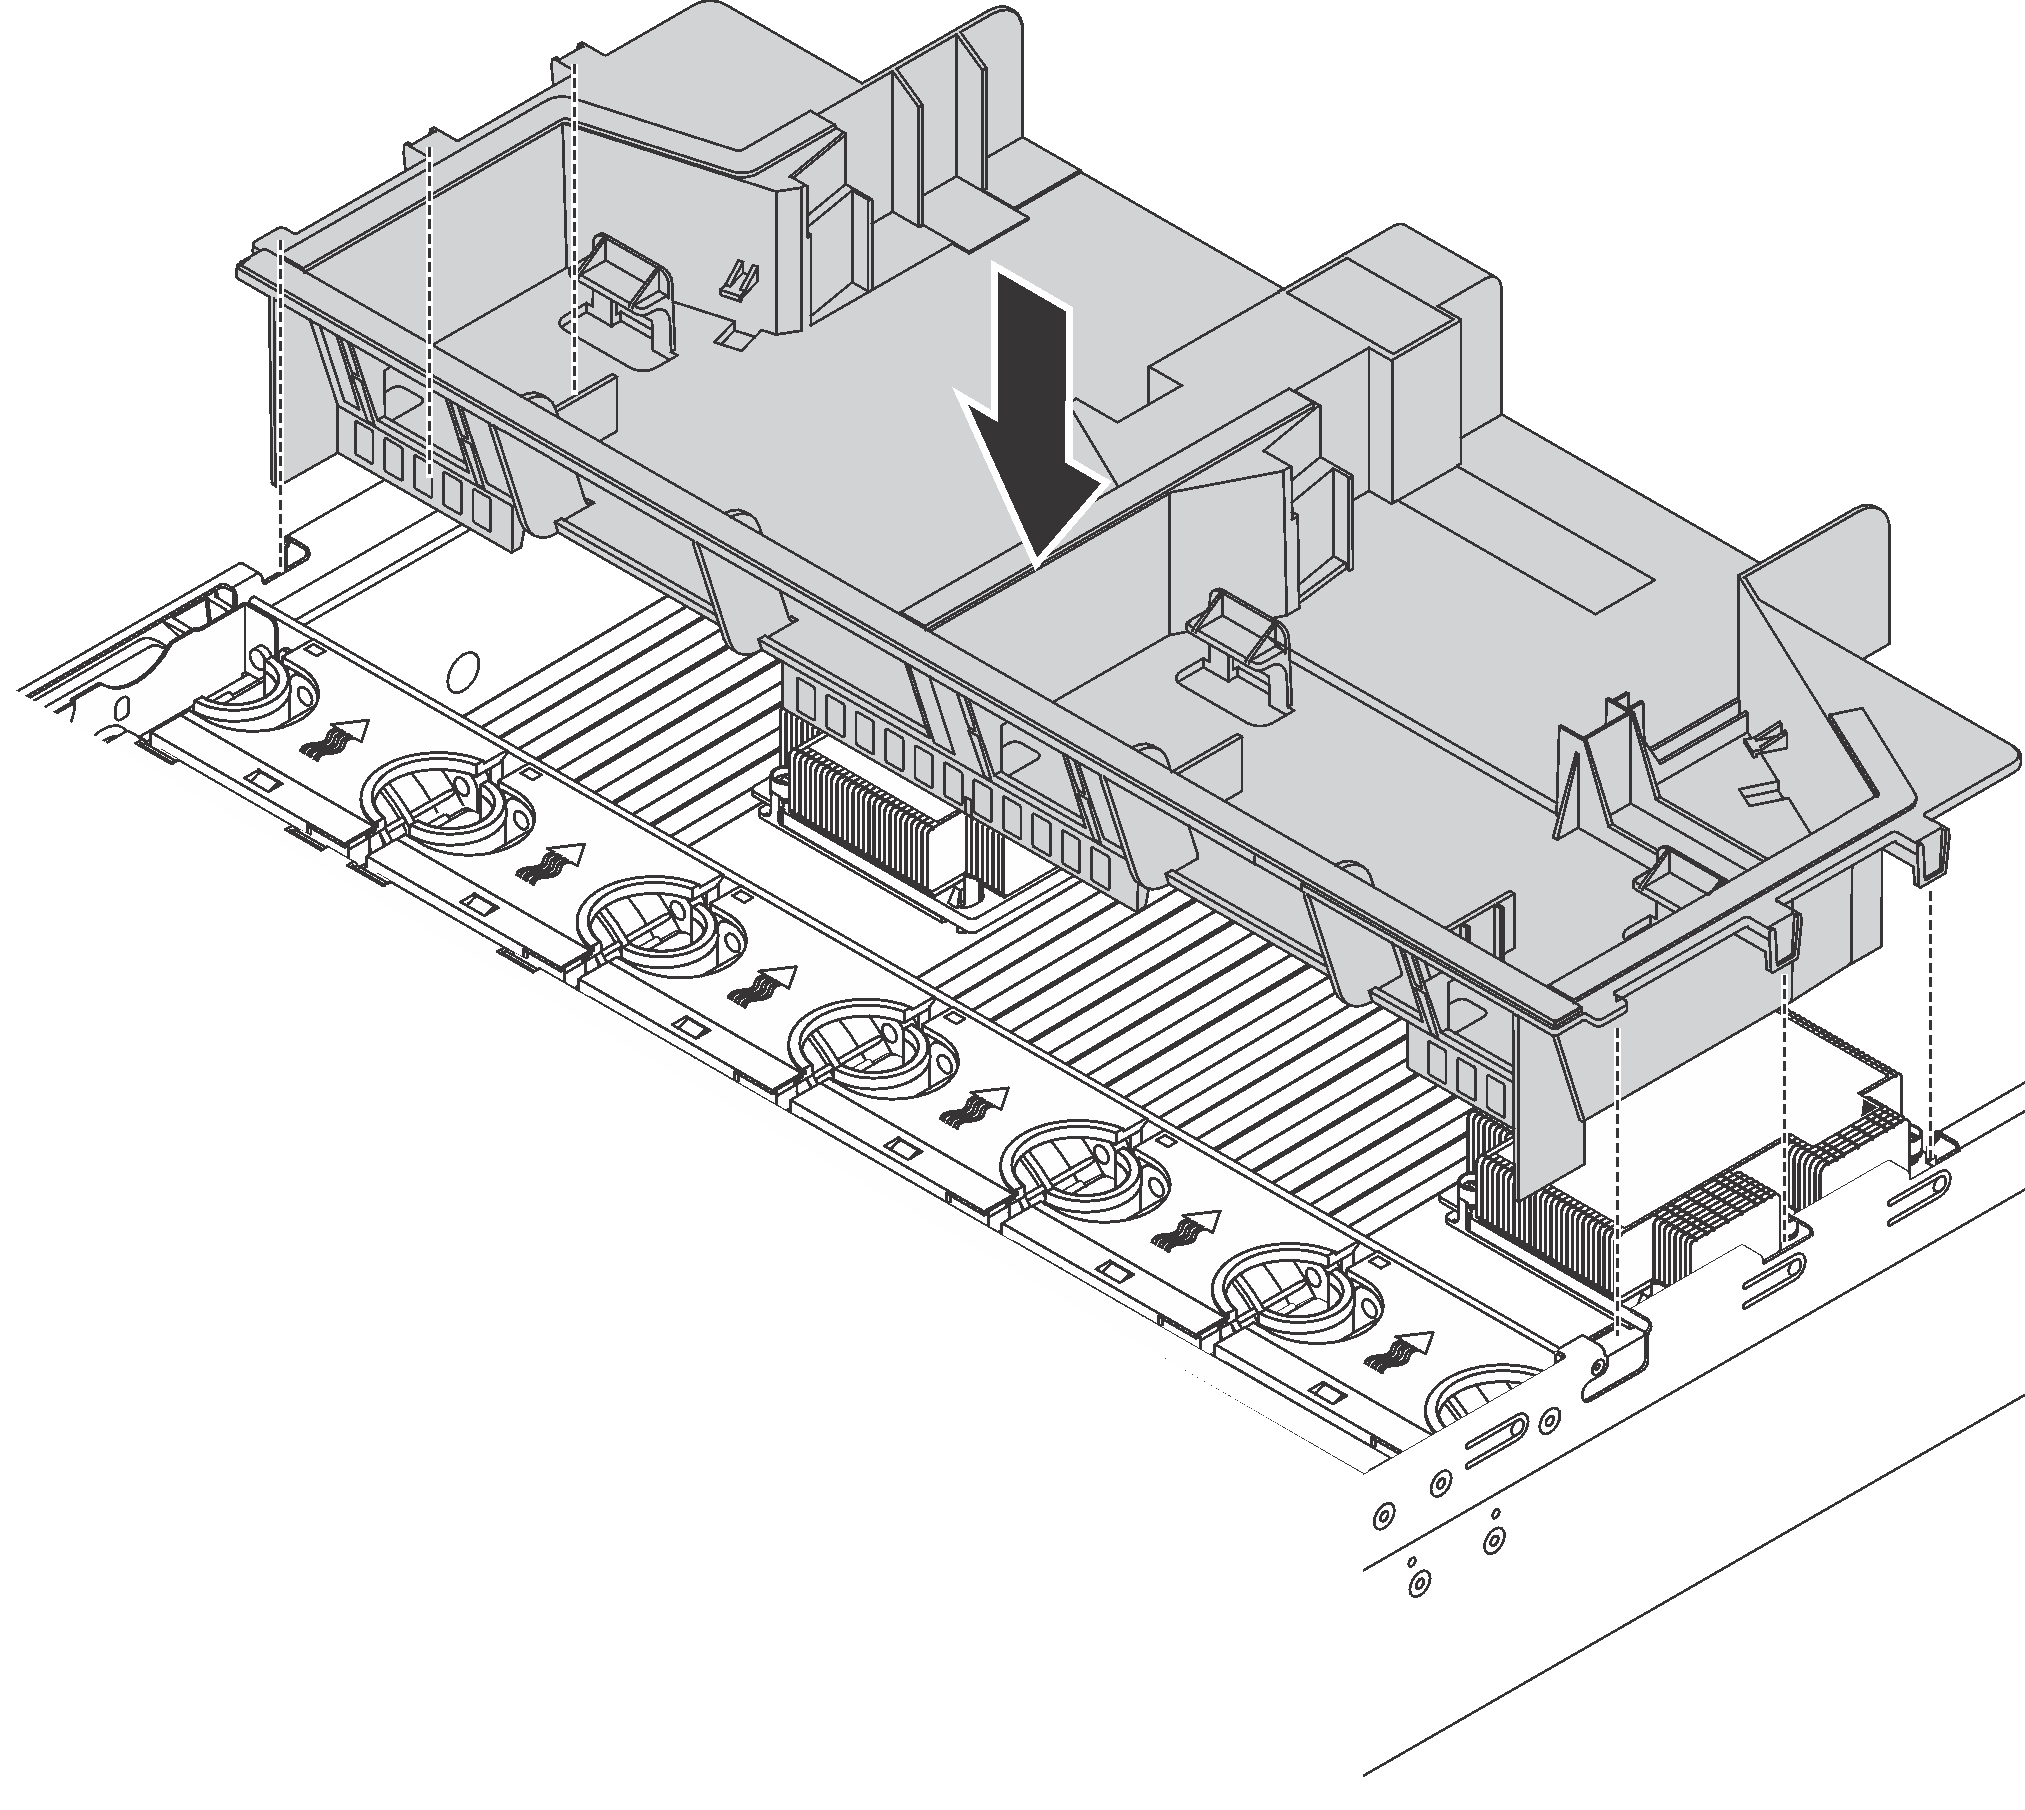
If you have removed a RAID super capacitor module, reinstall it and connect it to the RAID adapter with the extension cable. Install a RAID super capacitor module.
If you have removed a GPU, reinstall it. See Install a GPU.
Complete the parts replacement. See Complete the parts replacement.