Install the 2.5-inch drive cage assembly
Follow instructions in this section to install the 2.5-inch drive cage assembly.
About this task
Read Installation Guidelines and Safety inspection checklist to ensure that you work safely.
Touch the static-protective package that contains the drive to any unpainted metal surface on the server; then, remove the drive from the package and place it on a static-protective surface.
Procedure
- Make sure the 2.5-inch drive backplane module is installed on the assembly. See Install the 2.5-inch drive backplane module.
- Place the 2.5-inch drive cage assembly in the chassis.
 Tilt the assembly so that its rear end is up; then, align the assembly with the upper inner edge of the chassis, and lower it into the chassis.
 Place the rear end of the assembly onto the cross bar.Figure 1. Placing the 2.5-inch drive cage assembly in the chassis
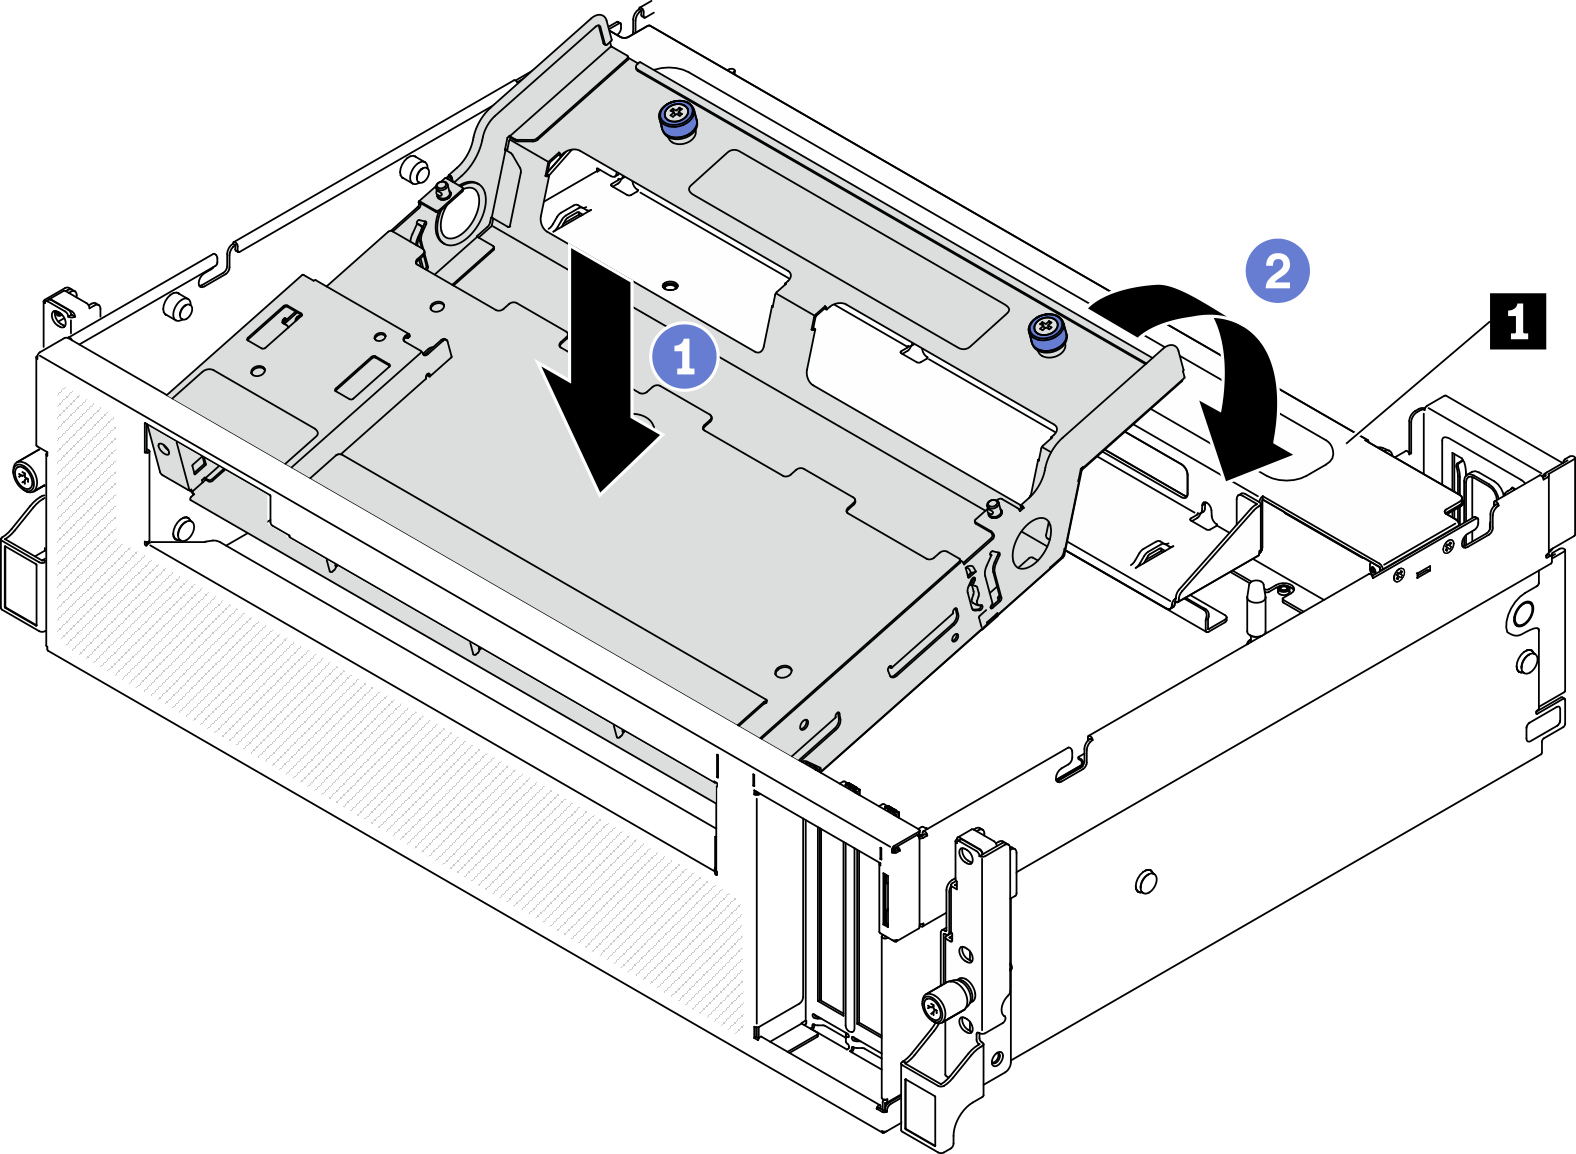
1 Cross bar
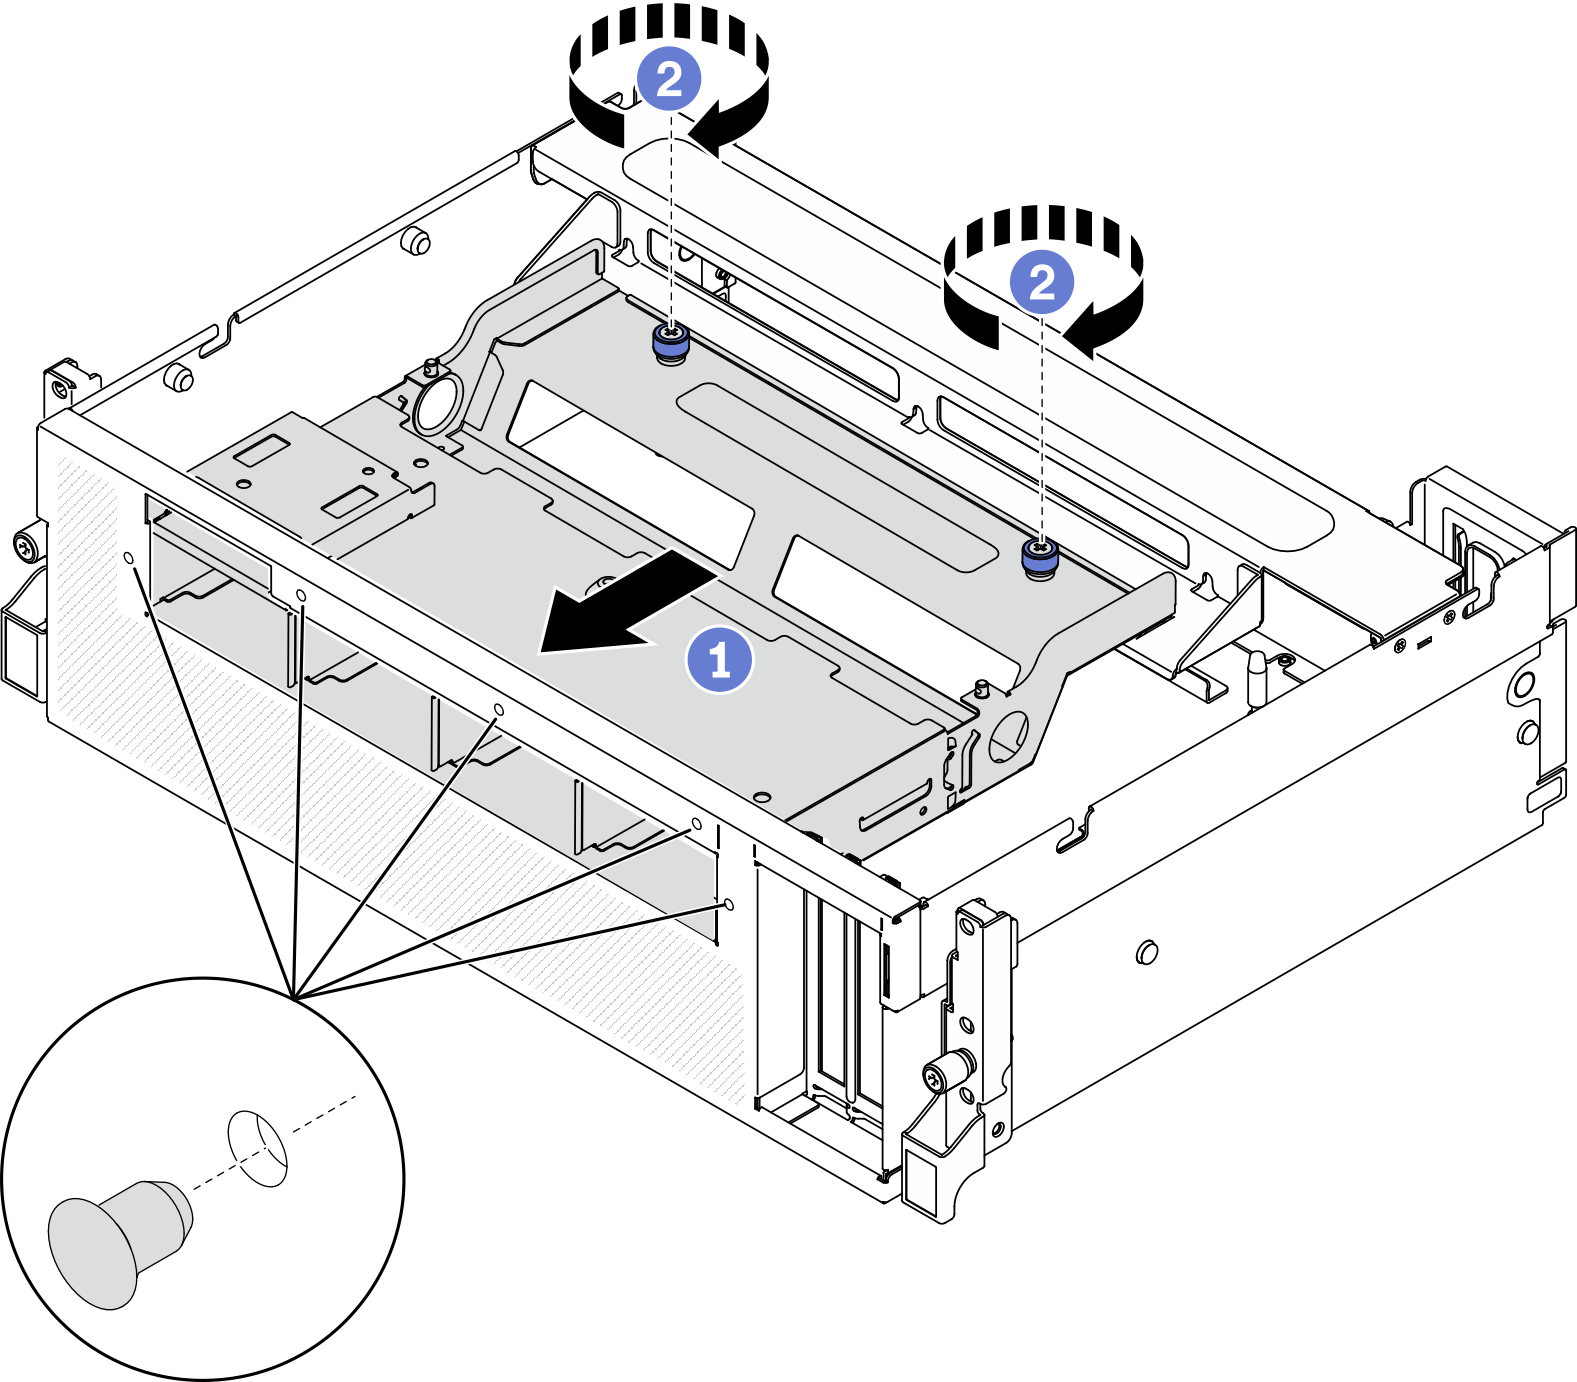
- Installing the 2.5-inch drive cage assembly.
- Align the assembly with the four guide pins on the inside of the chassis; then, slide the assembly into the assembly slot on the chassis.
- Fasten the two thumb screws to secure the assembly to the cross bar.Figure 2. Installing the 2.5-inch drive cage assembly
After you finish
Reinstall the 2.5-inch drive backplane module if needed. See Install the 2.5-inch drive backplane module.
Reconnect the power and signal cables to the 2.5-inch drive backplane.
Reinstall the front panel. See Install the front panel.
Reinstall the 2.5-inch hot-swap drive or drive bay filler (if any). See Install a 2.5-inch hot-swap drive.
Complete the parts replacement. See Complete the parts replacement.
Demo video