Remove the 2.5-inch drive cage assembly
Follow instructions in this section to remove the 2.5-inch drive cage assembly.
About this task
Read Installation Guidelines and Safety inspection checklist to ensure that you work safely.
Power off the server and peripheral devices and disconnect the power cords and all external cables. See Power off the server.
If the server is installed in a rack, slide the server out on its rack slide rails to gain access to the top cover, or remove the server from the rack. See Remove the server from rack.
Procedure
- Prepare your server.
- Remove the top cover. See Remove the top cover.
- Remove all 2.5-inch hot-swap drives from the chassis. See Remove a 2.5-inch hot-swap drive.
- Remove the front panel. See Remove the front panel.
- Disconnect the power and signal cables from the 2.5-inch drive backplane.
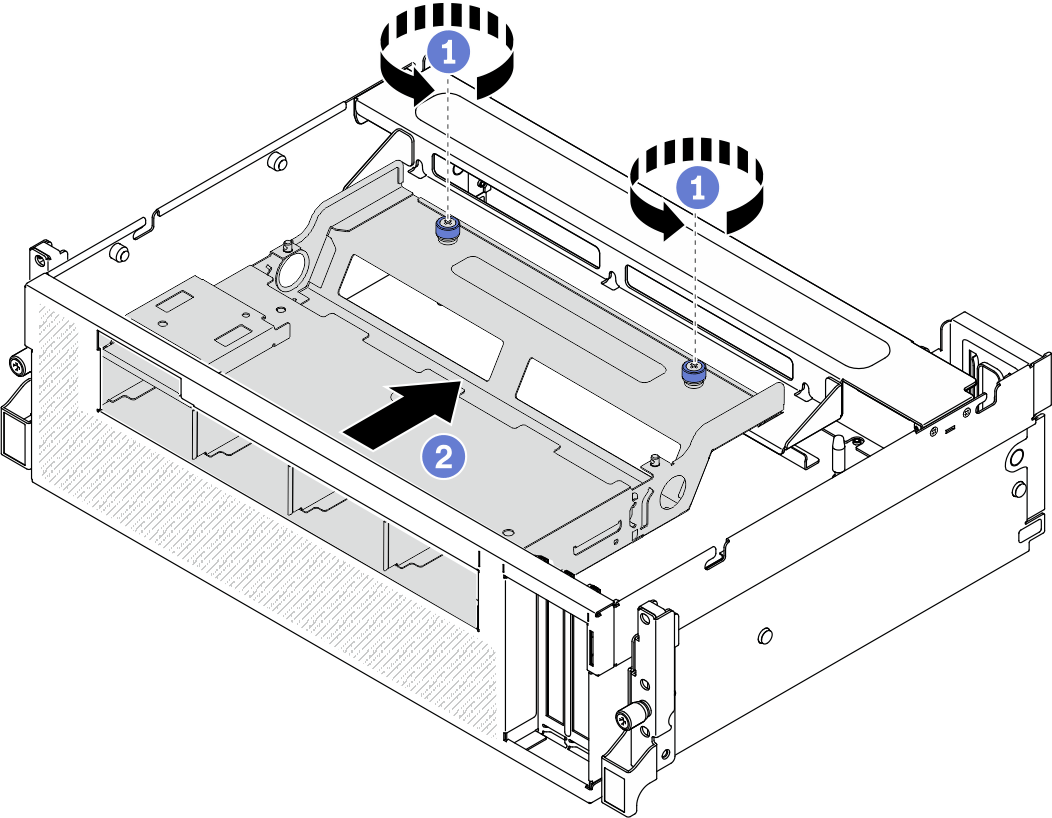
- Remove the 2.5-inch drive cage assembly.
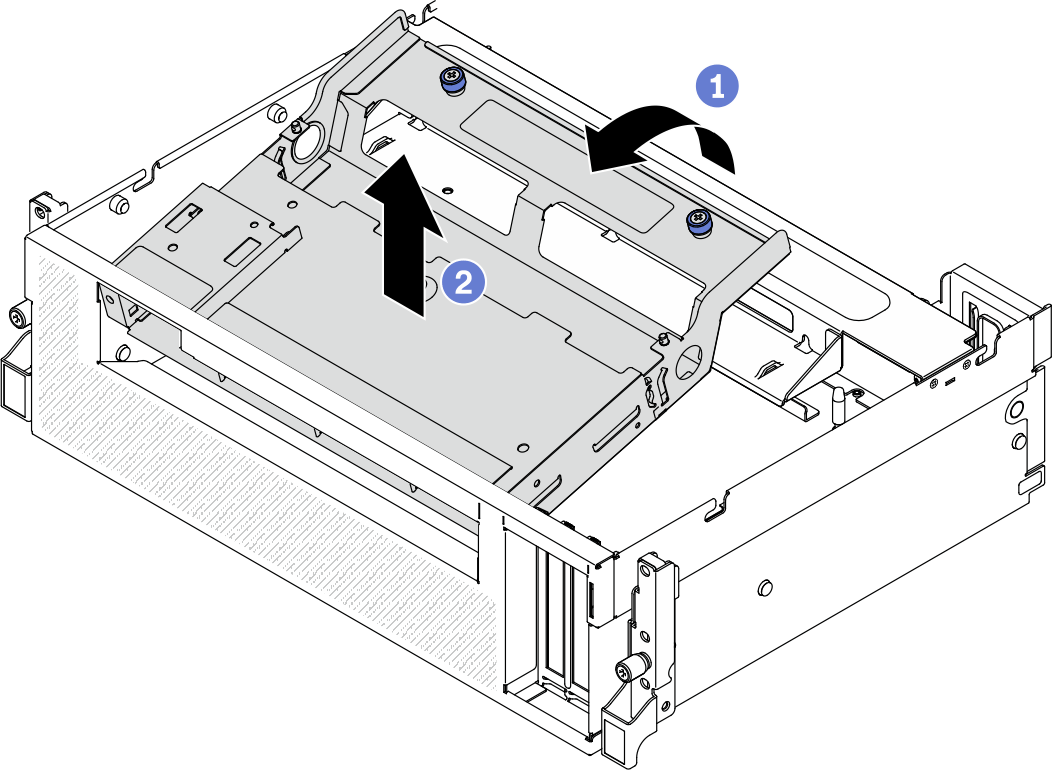
- Remove the 2.5-inch drive cage assembly.
To remove the 2.5-inch drive backplane module. SeeRemove the 2.5-inch drive backplane module.
Install a replacement unit. See Install the 2.5-inch drive cage assembly.
If you are instructed to return the component or optional device, follow all packaging instructions, and use any packaging materials for shipping that are supplied to you.
Demo video
 Unfasten the two thumb screws on the assembly to disengage it from the cross bar.
 Slide the assembly inward to disengage it from the chassis.
