Install the top cover
Use this information to install the top cover.
Ensure that all cables, adapters, and other components are installed and seated correctly and that you have not left loose tools or parts inside the server.
Ensure that all internal cables are connected and routed correctly. See Internal cable routing.
If you are installing a new top cover, attach the service label to the underside of the new top cover first if necessary. The underside of the top cover includes scribe marks to indicate where the service label should be affixed.
NoteA new top cover comes without a service label attached. If you need a service label, order it together with the new top cover. The service label is free of charge.
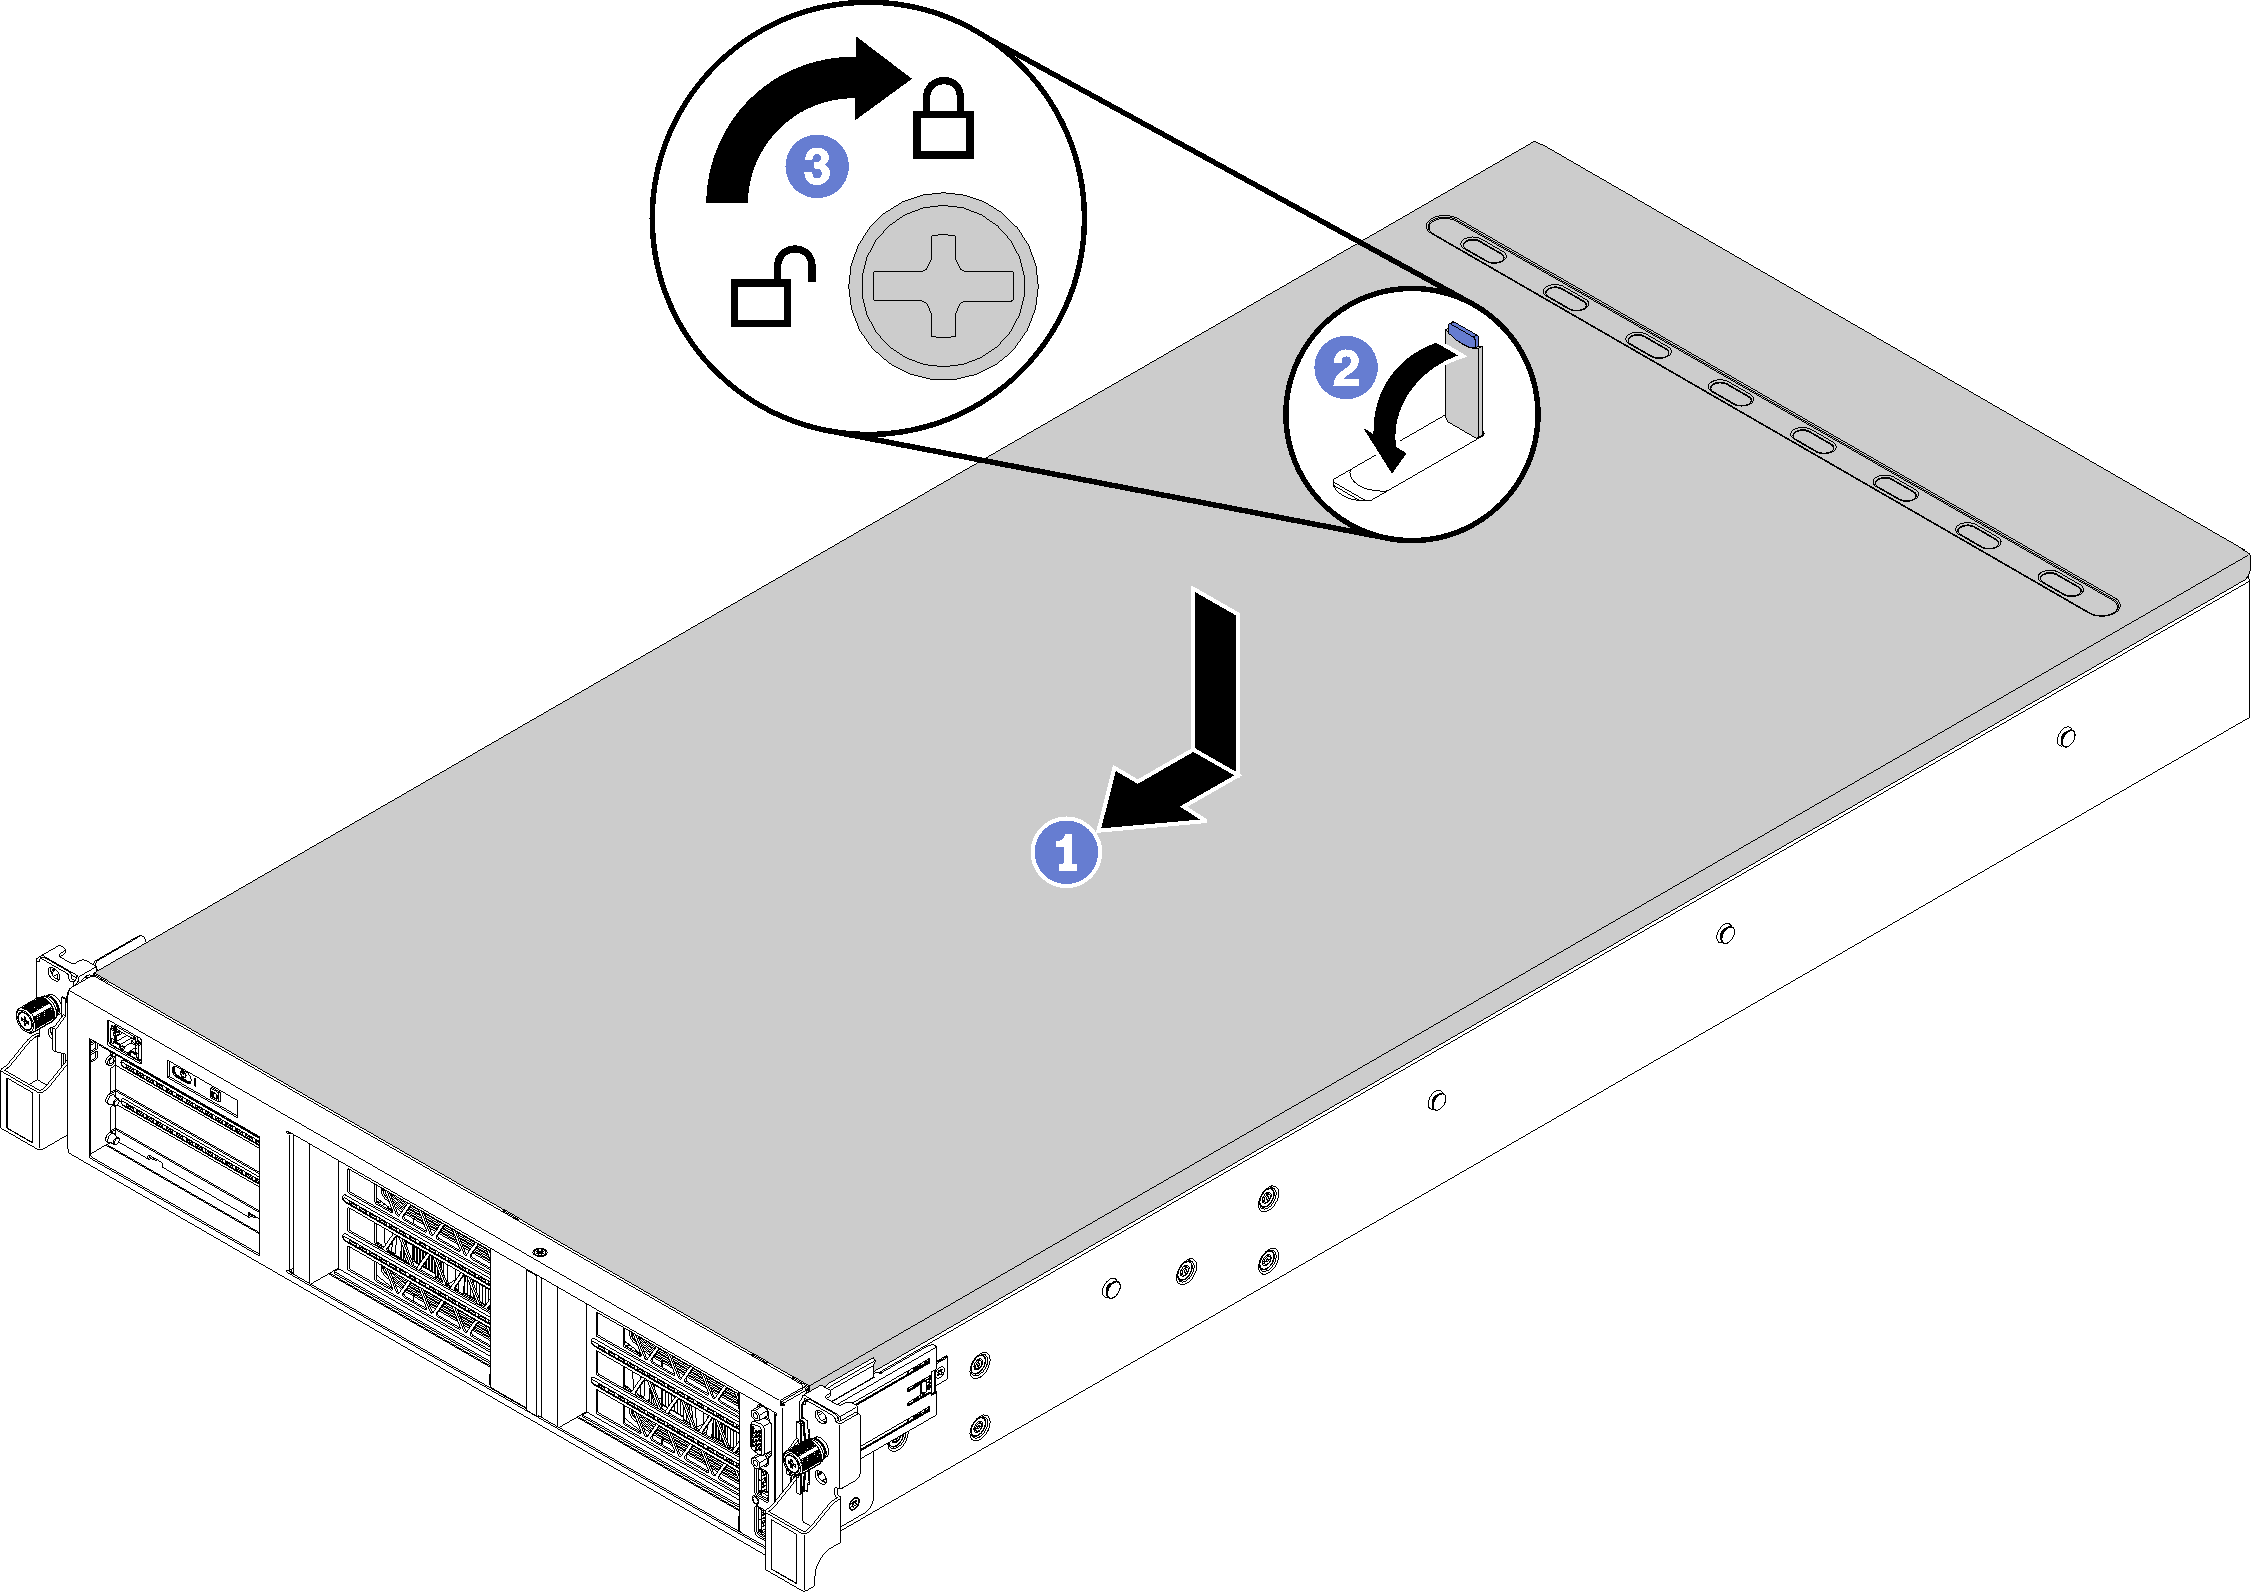
To install the top cover, complete the following steps:

- Ensure that the cover latch is in the open position. Lower the top cover onto the chassis until both sides of the top cover engage the guides on both sides of the chassis.
- Pivot the cover latch and slide the top cover to the front of the chassis at the same time until the top cover snaps into position. Ensure that the cover latch is closed and that the cover sits evenly over the server.
- Optionally, use a screwdriver to turn the cover lock to the locked position.
Push up on the latches on the slide rails and push the server back into the rack.
Tighten the two captive screws located on the front of the server to secure the server in the rack.
NoteAlways secure the system in the rack if your are moving the rack.Connect all cables to the ports on the front of the server, including the management port, if necessary, and all PCIe adapter ports. The management port and PCIe adapter ports are located in the I/O expansion cage.
Connect power cords to both power supplies, which are located at the rear of the server.
Demo video


