Remove a system fan
Use this information to remove a system fan.

Before removing a system fan:
Power off the server. See Power off the server.
Disconnect power cords from both power supplies, which are located in the rear of the server.
Record the location of the cables in the front of the PCIe adapters that are installed in the I/O expansion cage at the front of the server, and disconnect the cables.
Disconnect the management port cable from the management port in the I/O expansion cage, if necessary.
Loosen the two captive screws located on the front of the server. If necessary, use a P2 screwdriver to loosen the screws.
Pull the server forward until the slide rails click into place.
Remove the top cover. See Remove the top cover.
Remove the air baffle. See Remove the air baffle.
To remove a system fan, complete the following steps:
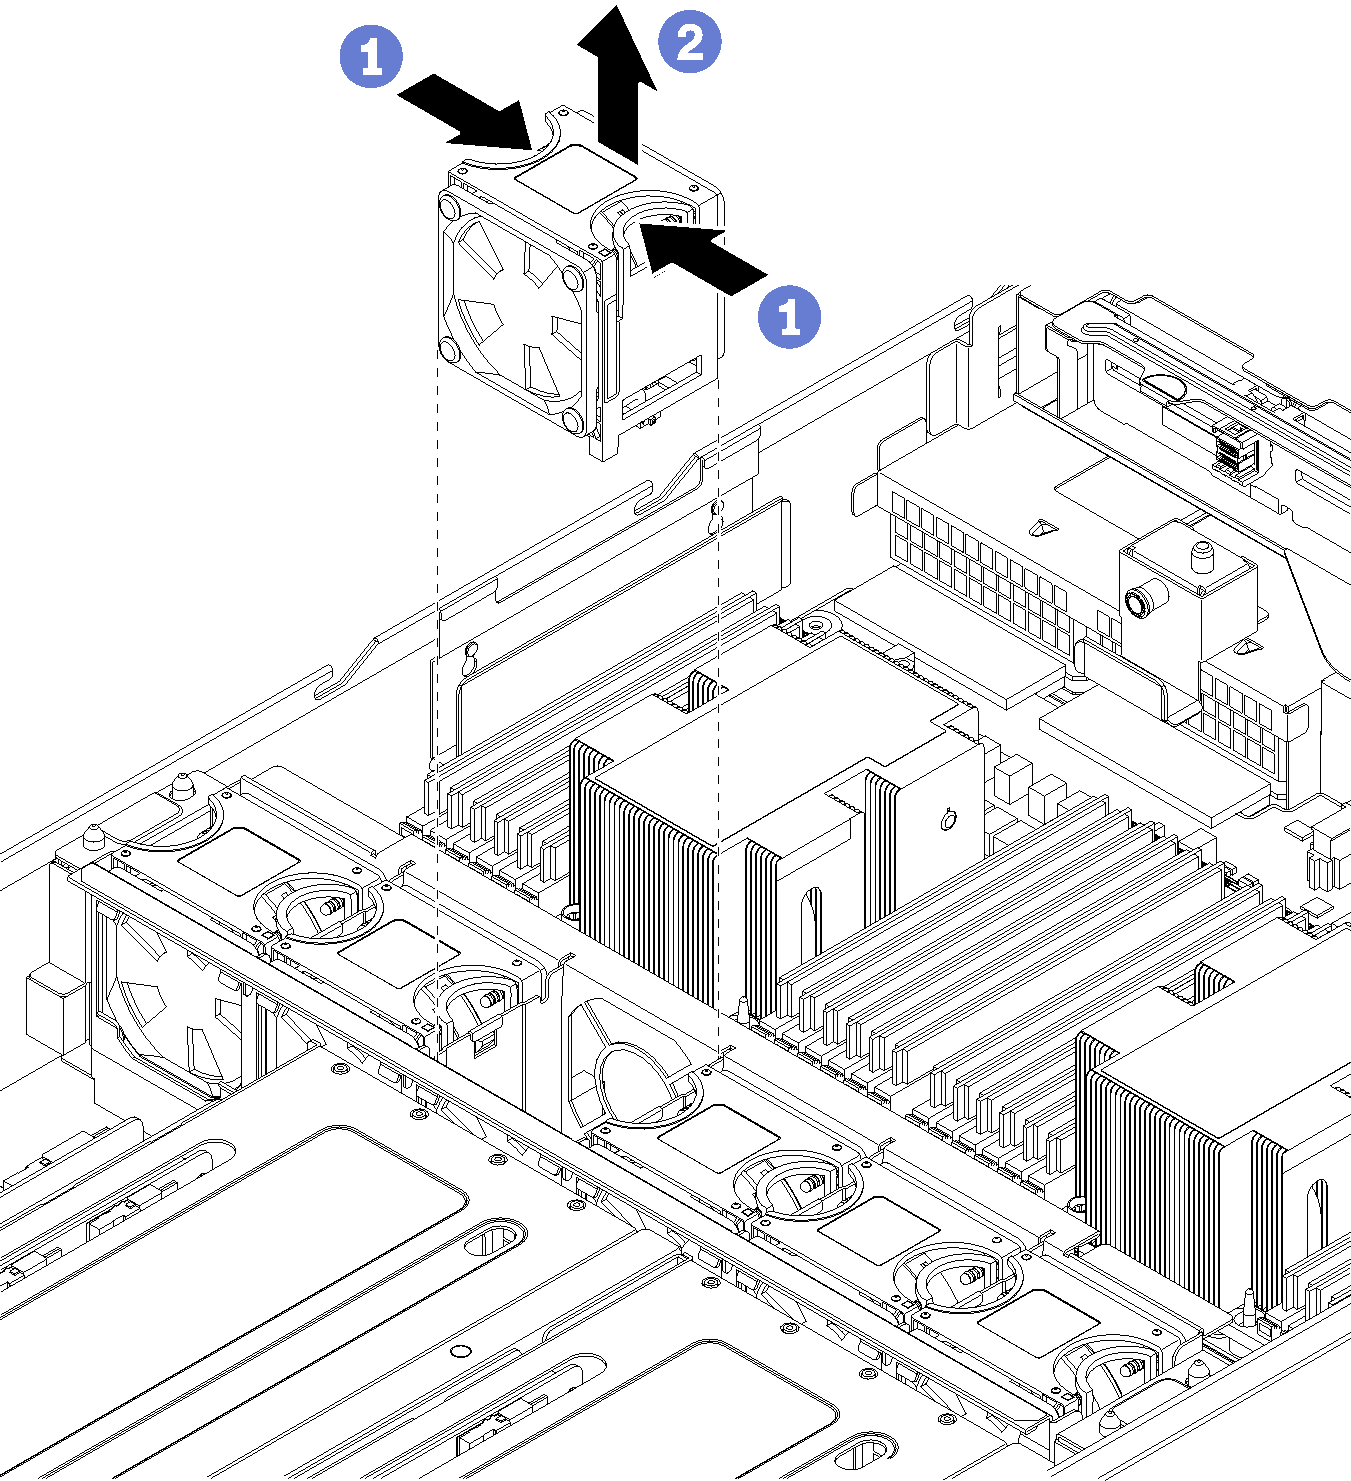
- Grasp the handles on the top of the system fan with your fingers, and pinch the handles together.
- Lift the system fan out of the server.
After removing the system fan, install a new system fan or install a fan filler to cover the place. See Install a system fan.
Demo video