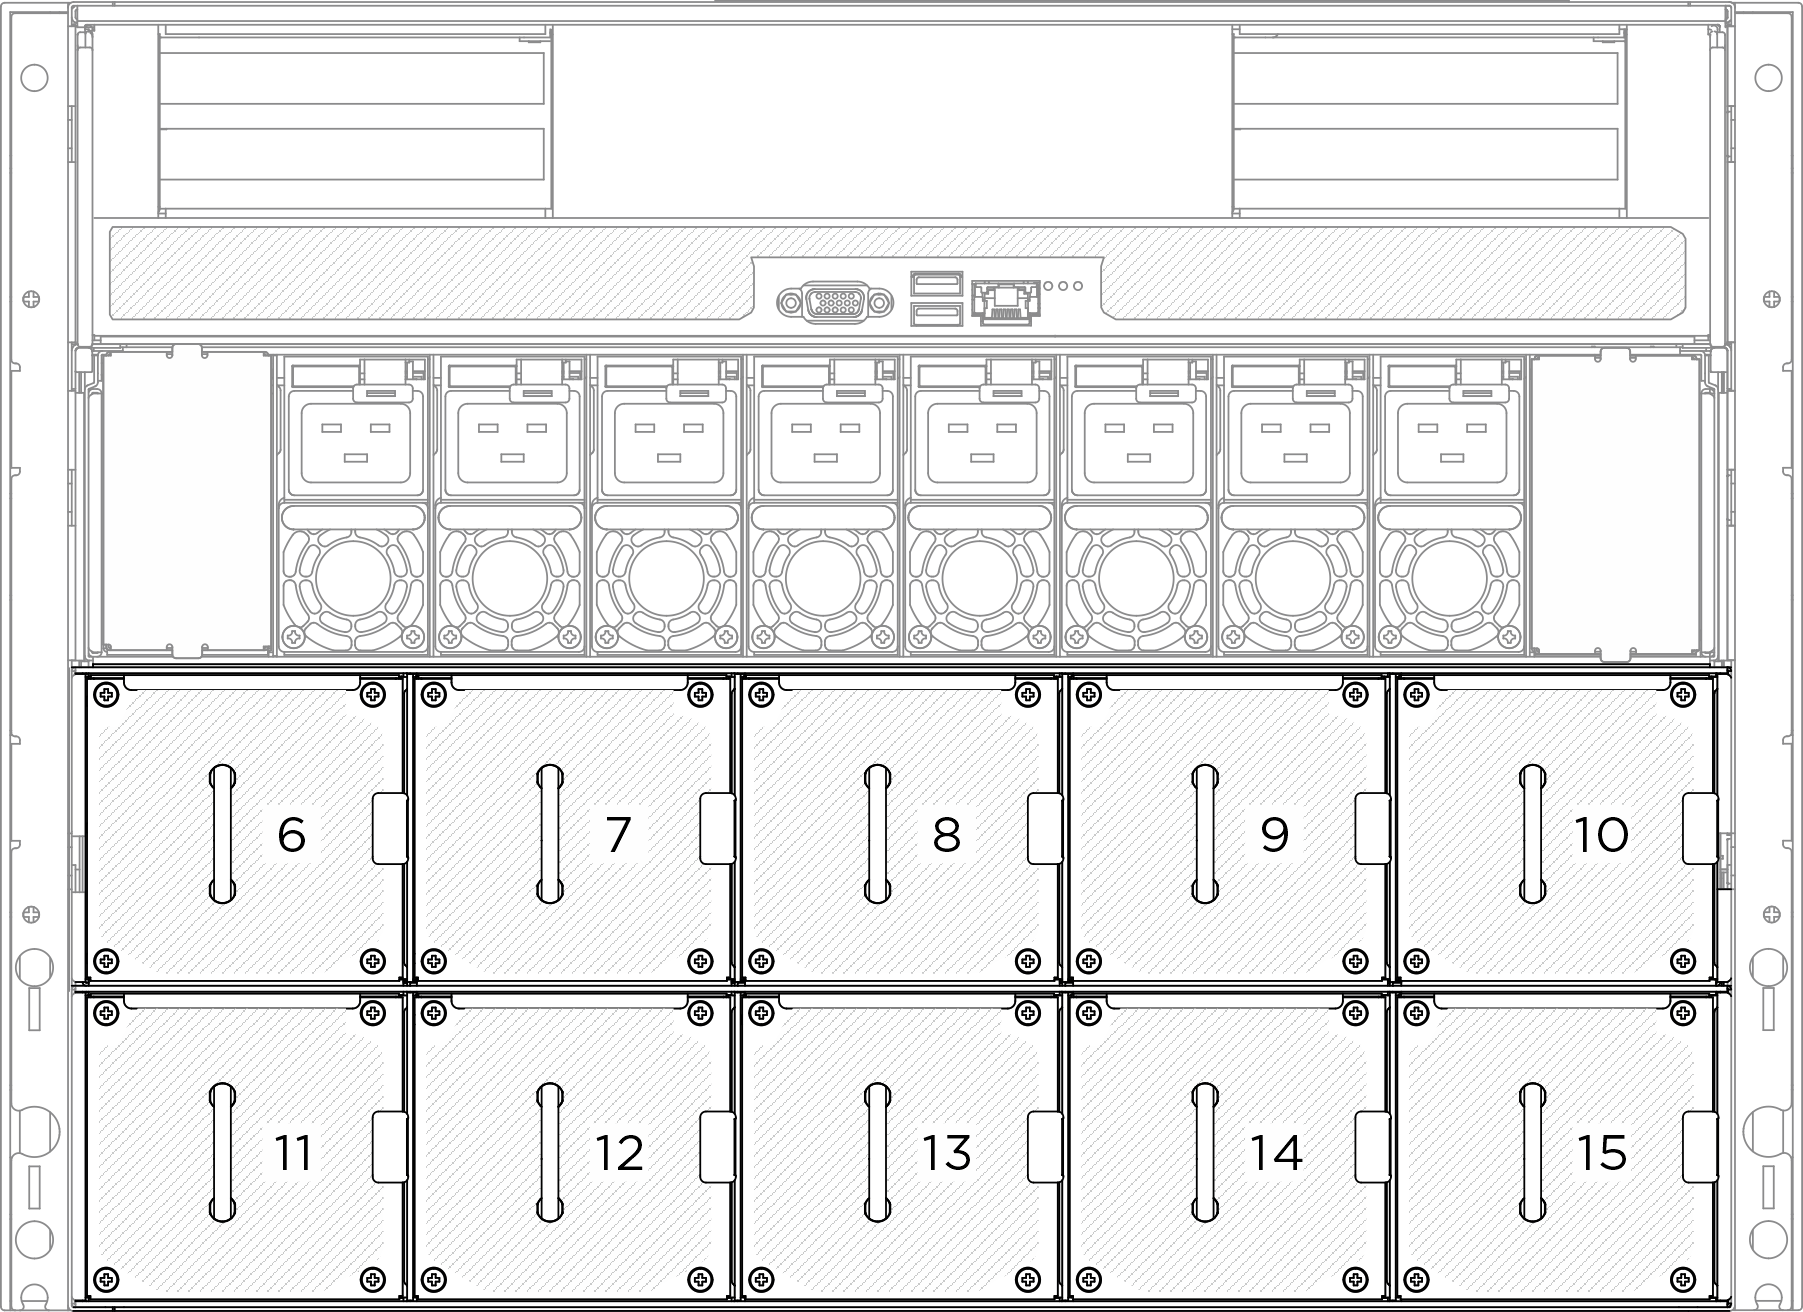
뒷면 핫 스왑 팬 설치
이 섹션의 지침에 따라 뒷면 핫 스왑 팬을 설치하십시오.
이 작업 정보
절차
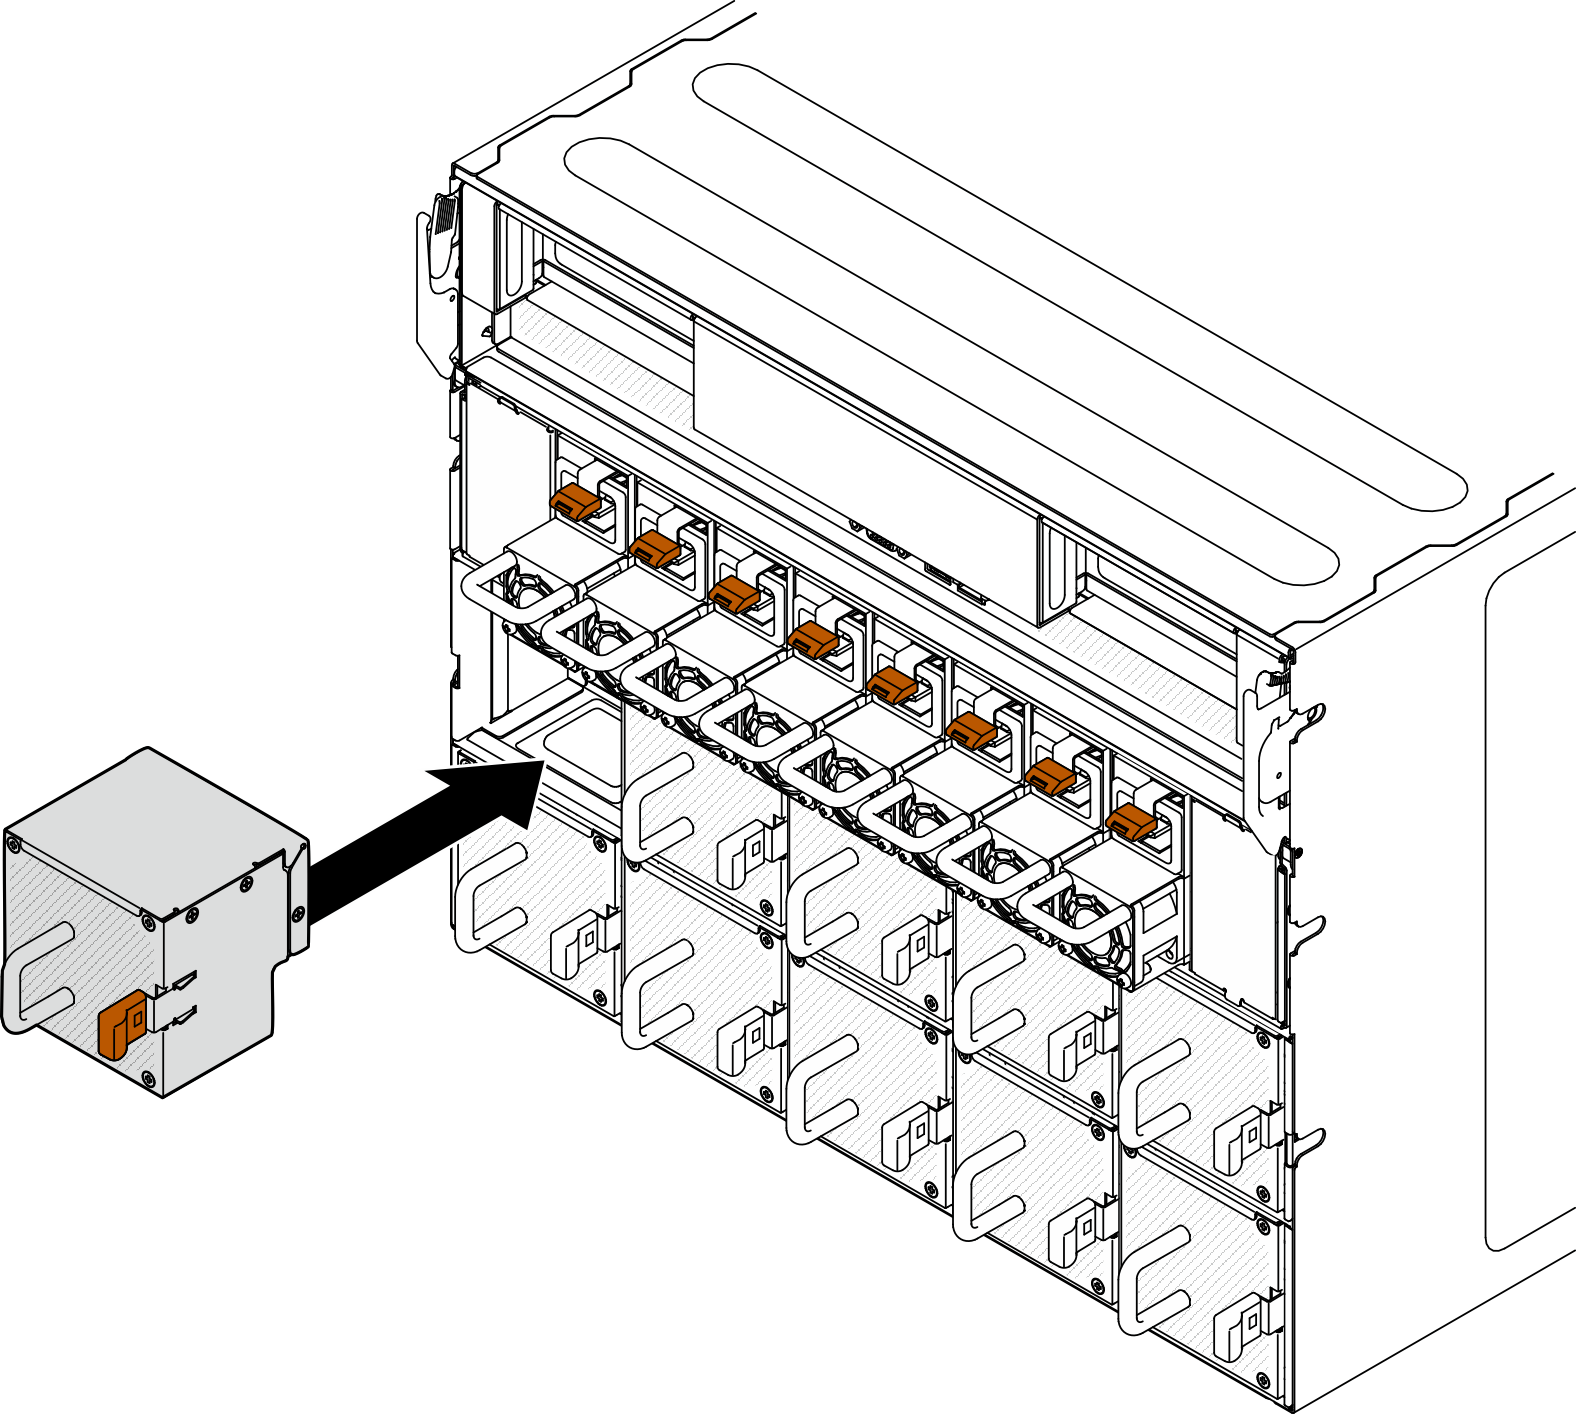
- 주황색 래치를 길게 누릅니다. 그런 다음 딸깍 소리가 나면서 제자리에 고정될 때까지 팬을 소켓에 밀어 넣습니다.그림 2. 뒷면 팬 설치
완료한 후
부품 교체를 완료하십시오. 부품 교체 완료의 내용을 참조하십시오.
피드백 보내기
이 섹션의 지침에 따라 뒷면 핫 스왑 팬을 설치하십시오.
이 작업 정보
절차
완료한 후
부품 교체를 완료하십시오. 부품 교체 완료의 내용을 참조하십시오.