Install the processor and memory expansion tray
Follow instructions in this section to install the processor and memory expansion tray.
About this task
Attention
Go over Installation Guidelines to ensure that you work safely.
Touch the static-protective package that contains the component to any unpainted metal surface on the server; then, remove it from the package and place it on a static-protective surface.
Important
To avoid component damage, DO NOT remove or install memory modules or PHMs when the tray is removed from the server.
Procedure
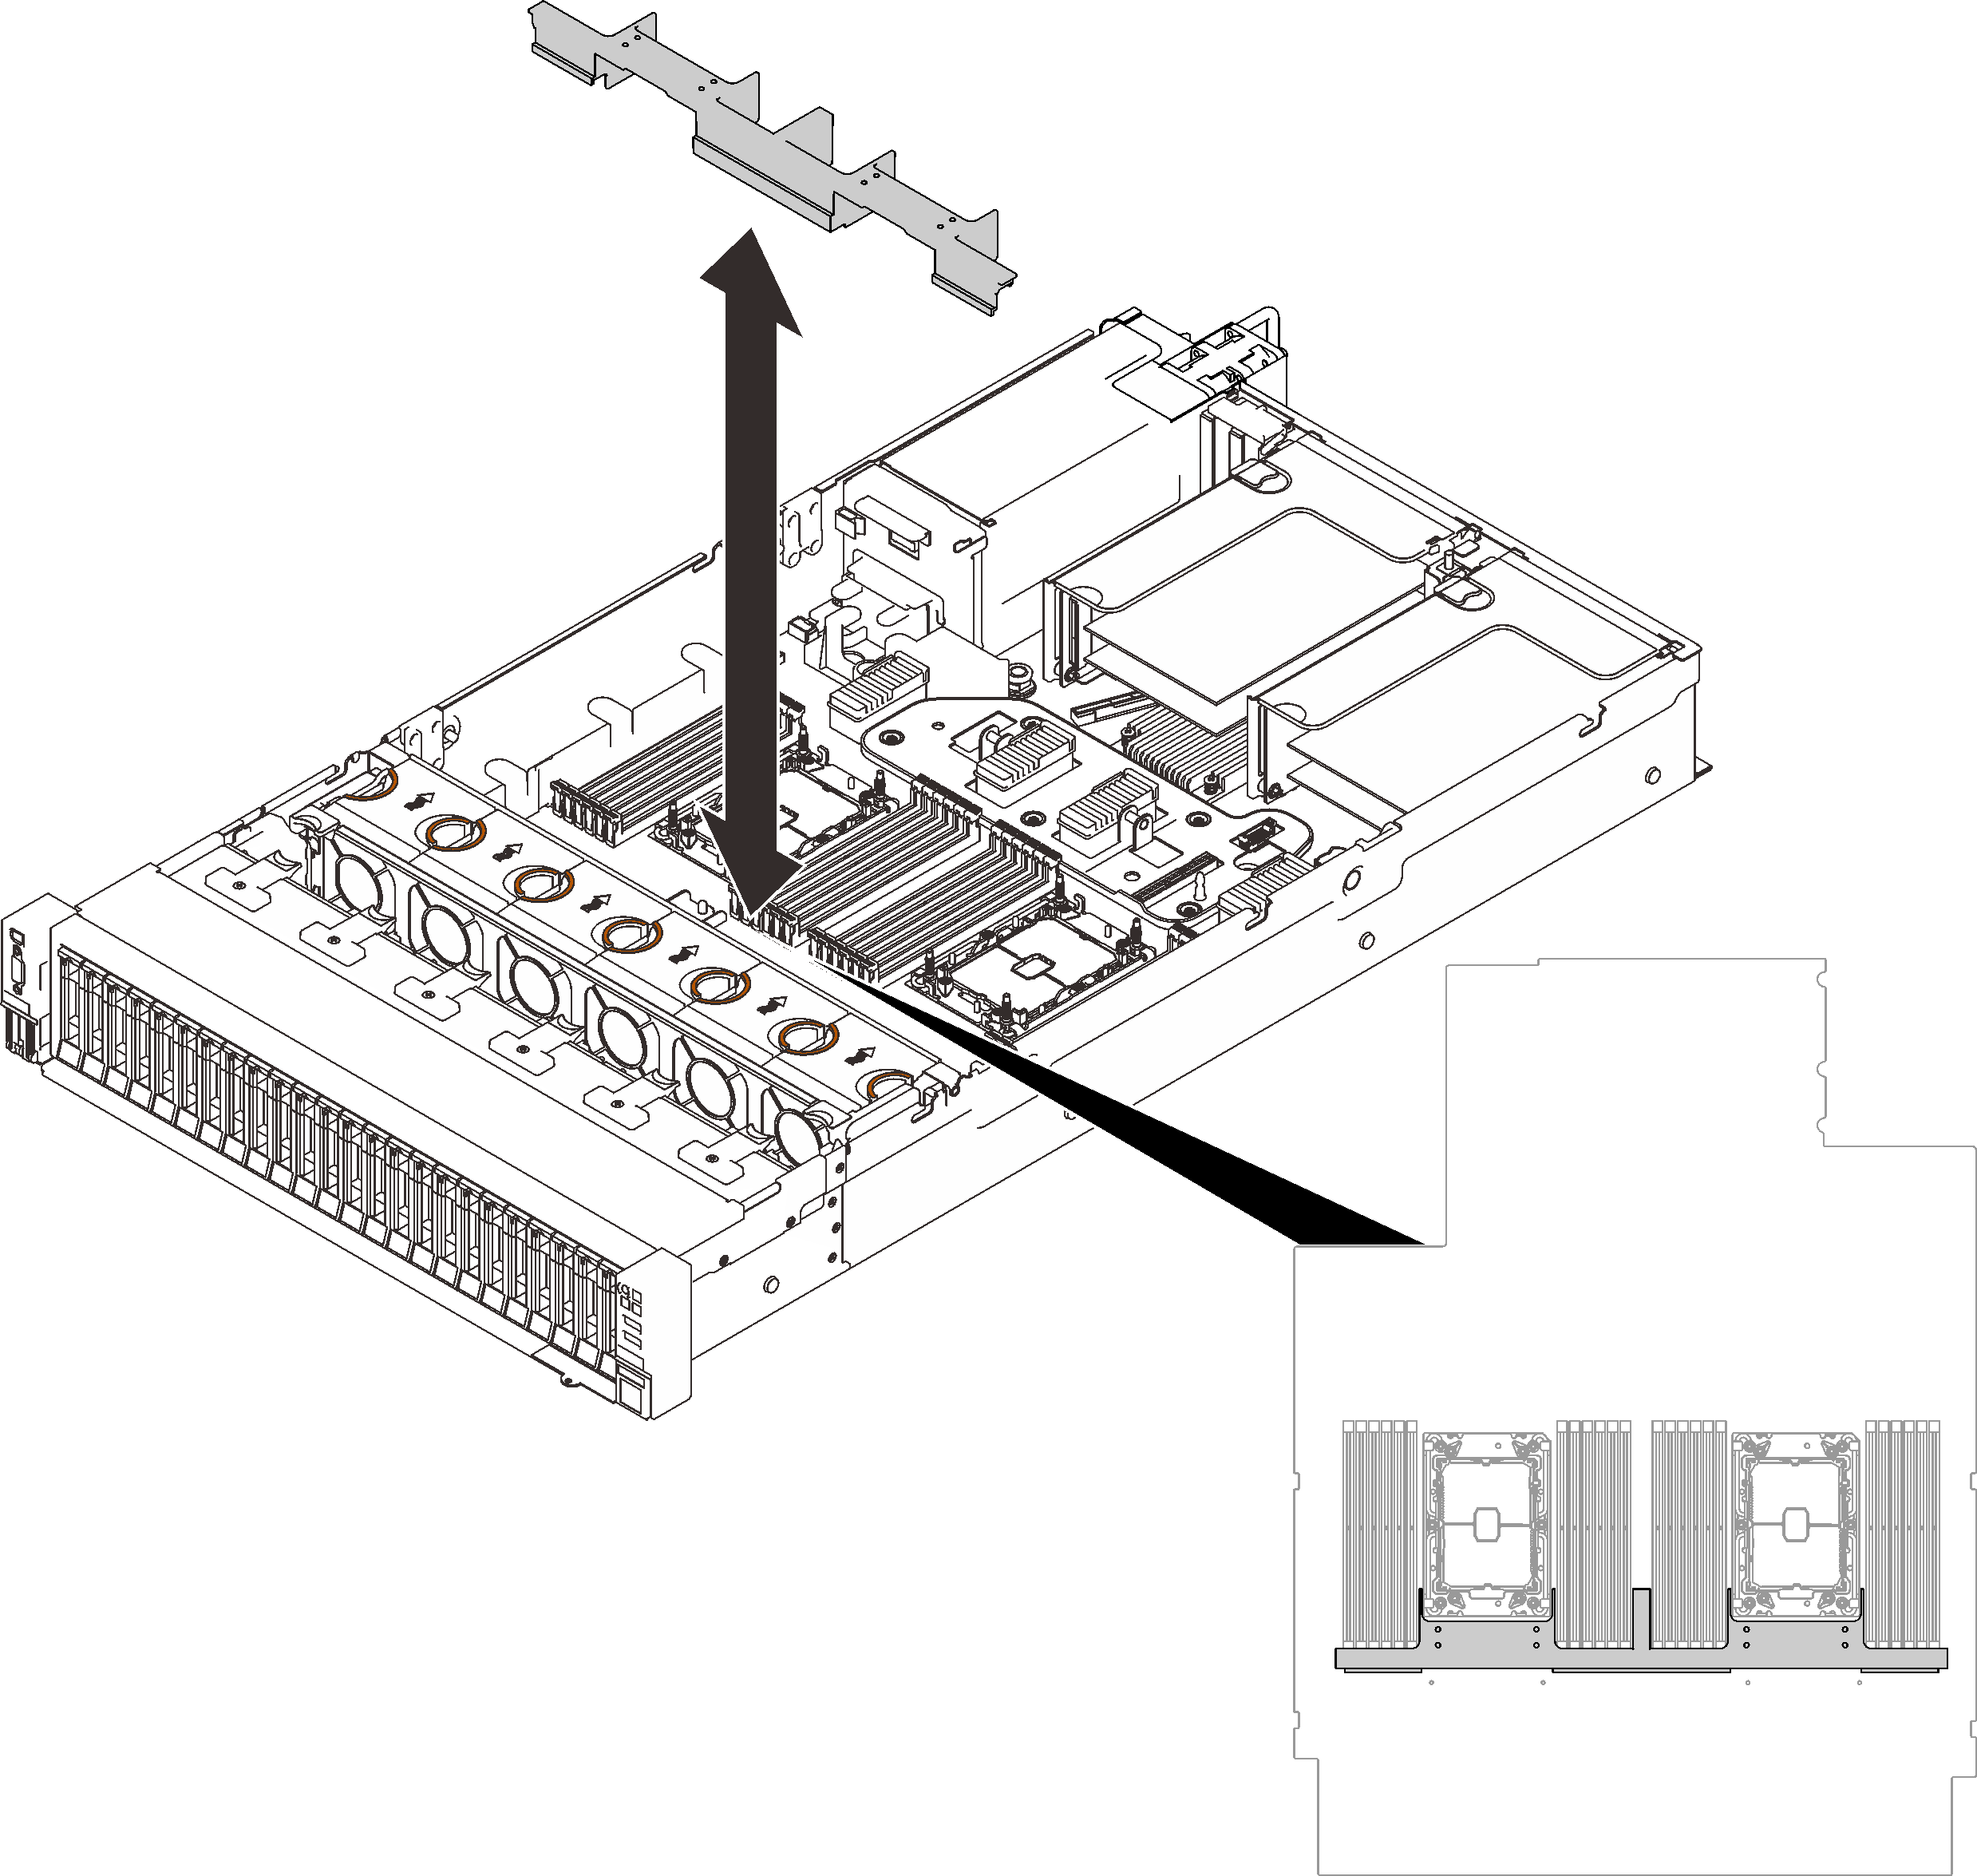
- Make sure the expansion tray air baffle is installed on the system board. If not, install it.AttentionAir baffle is required for airflow that creates proper cooling. Make sure to install proper air baffles for system configuration before the power is turned on.Figure 1. Installing the expansion tray air baffle
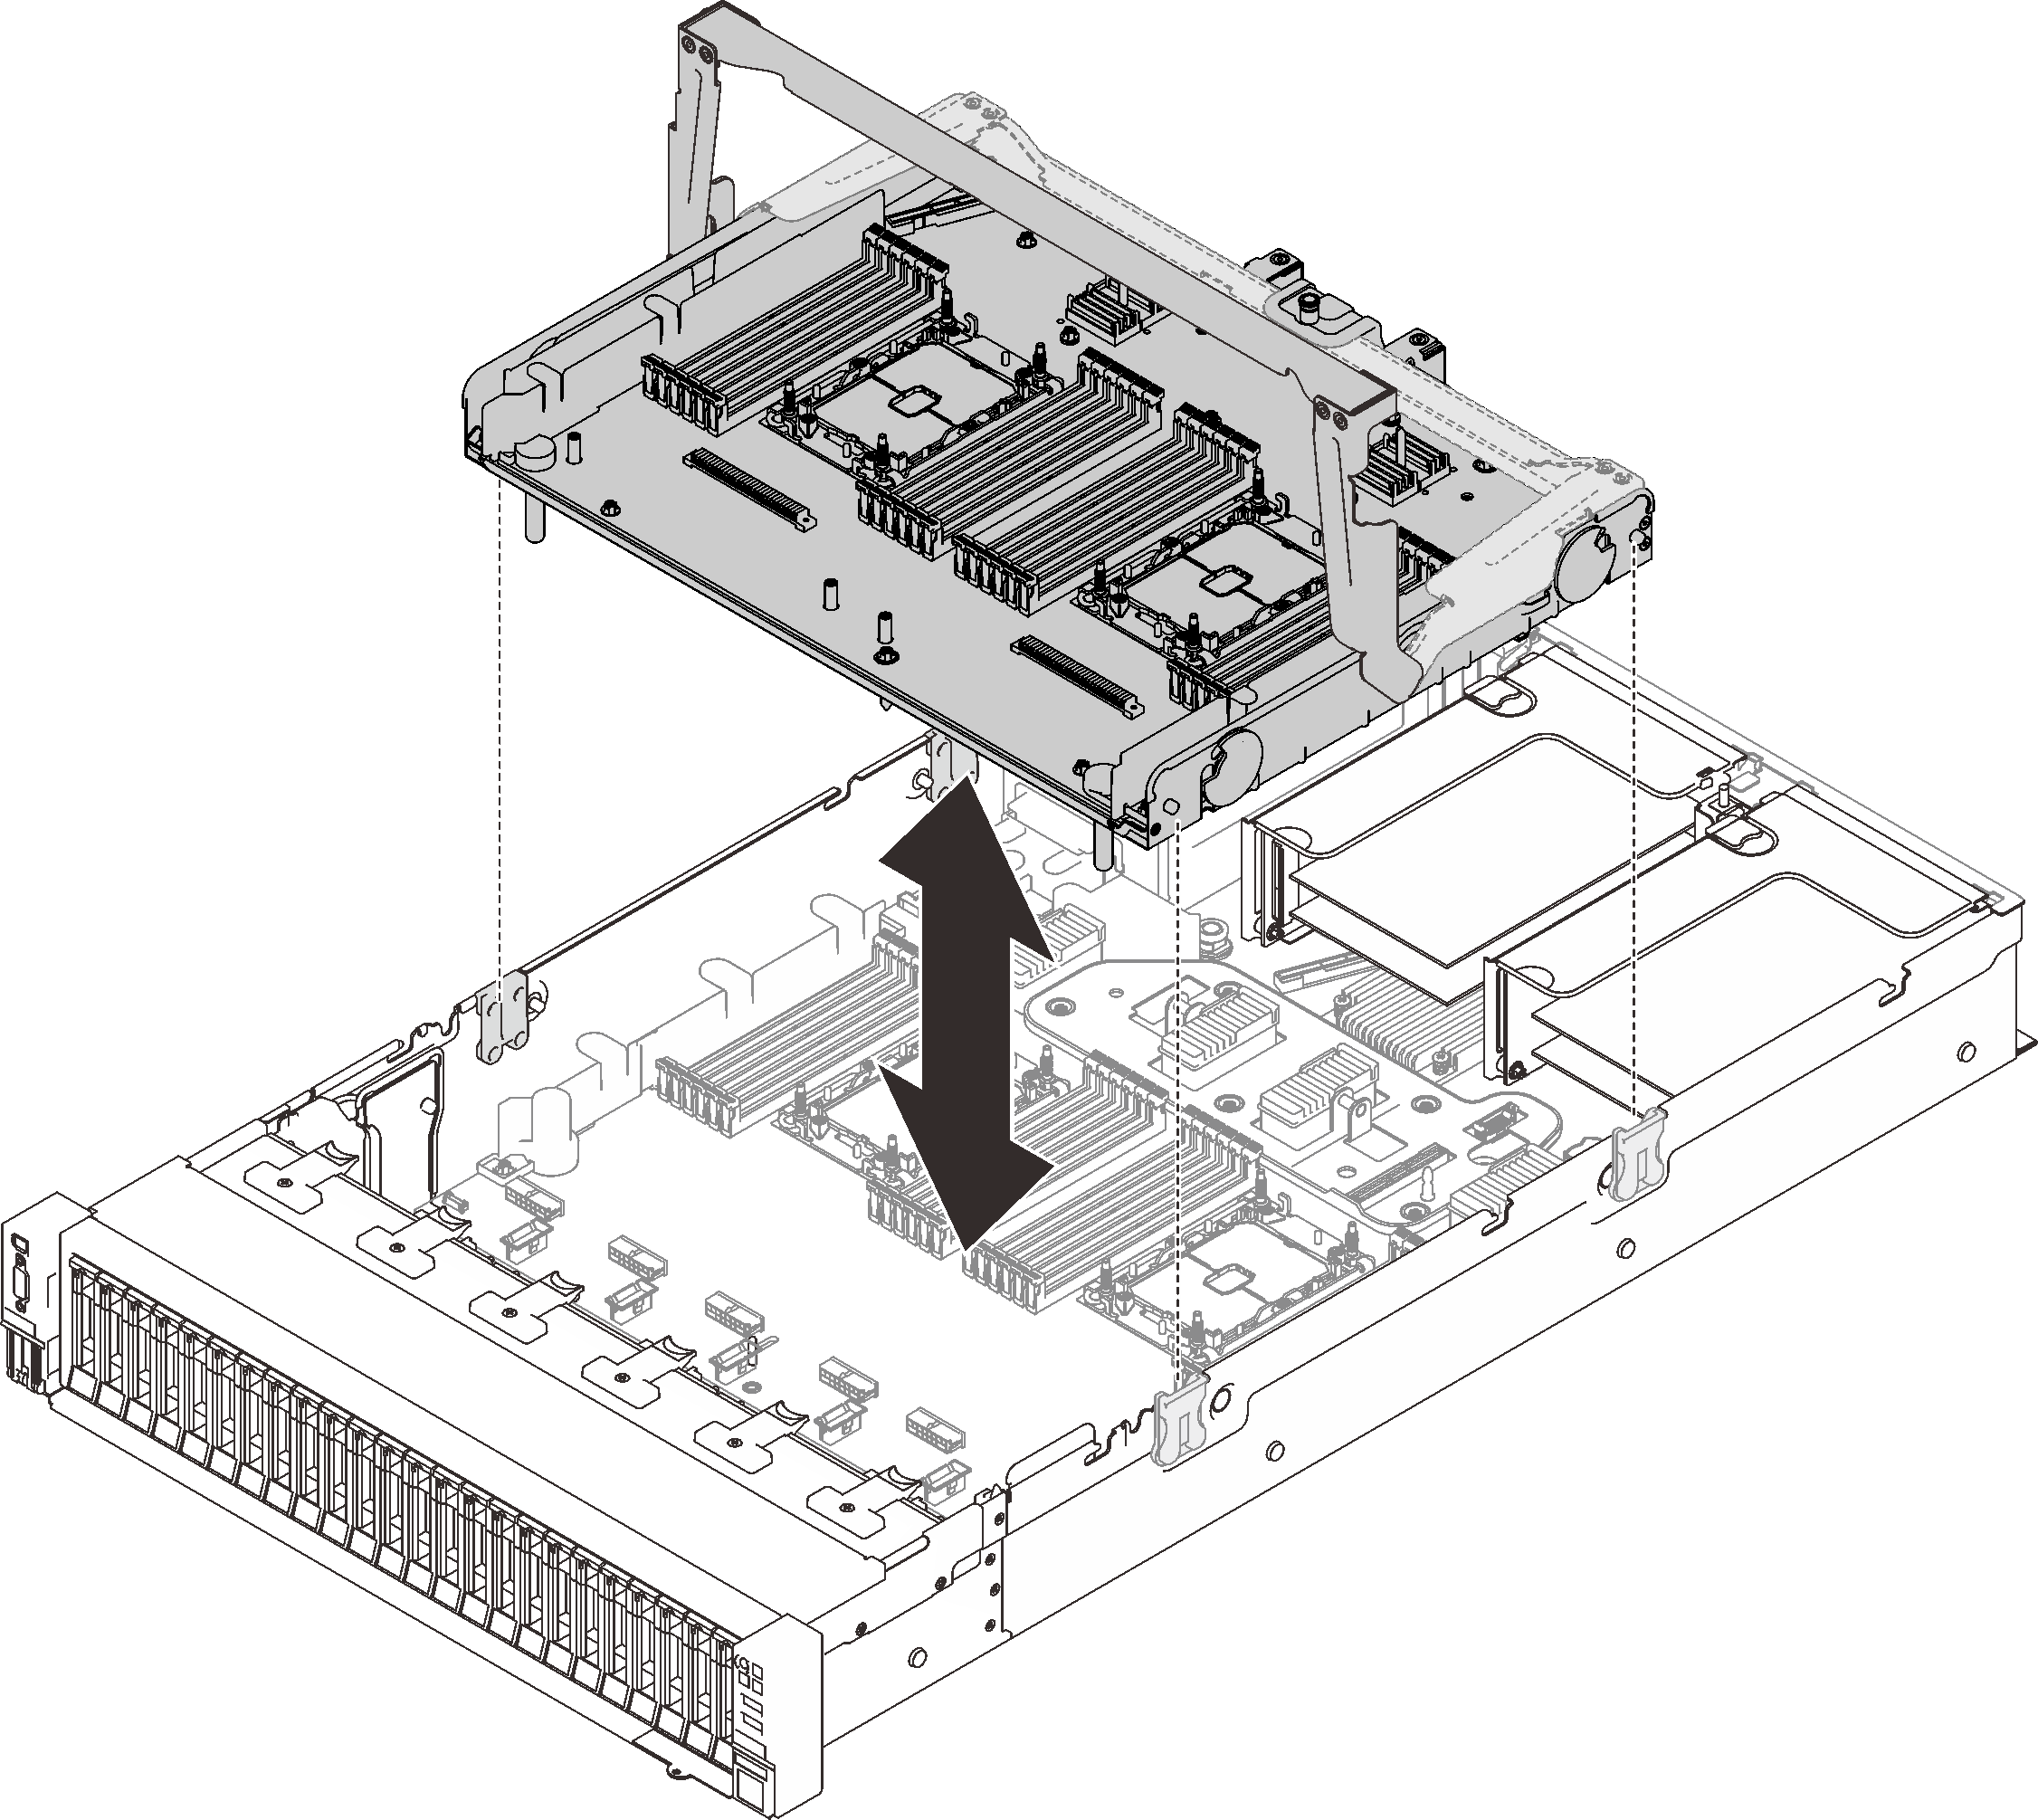
- Align the processor and memory expansion tray with the two pairs of guides on the sides, and lower it into the chassis.Figure 2. Installing the processor and memory expansion tray
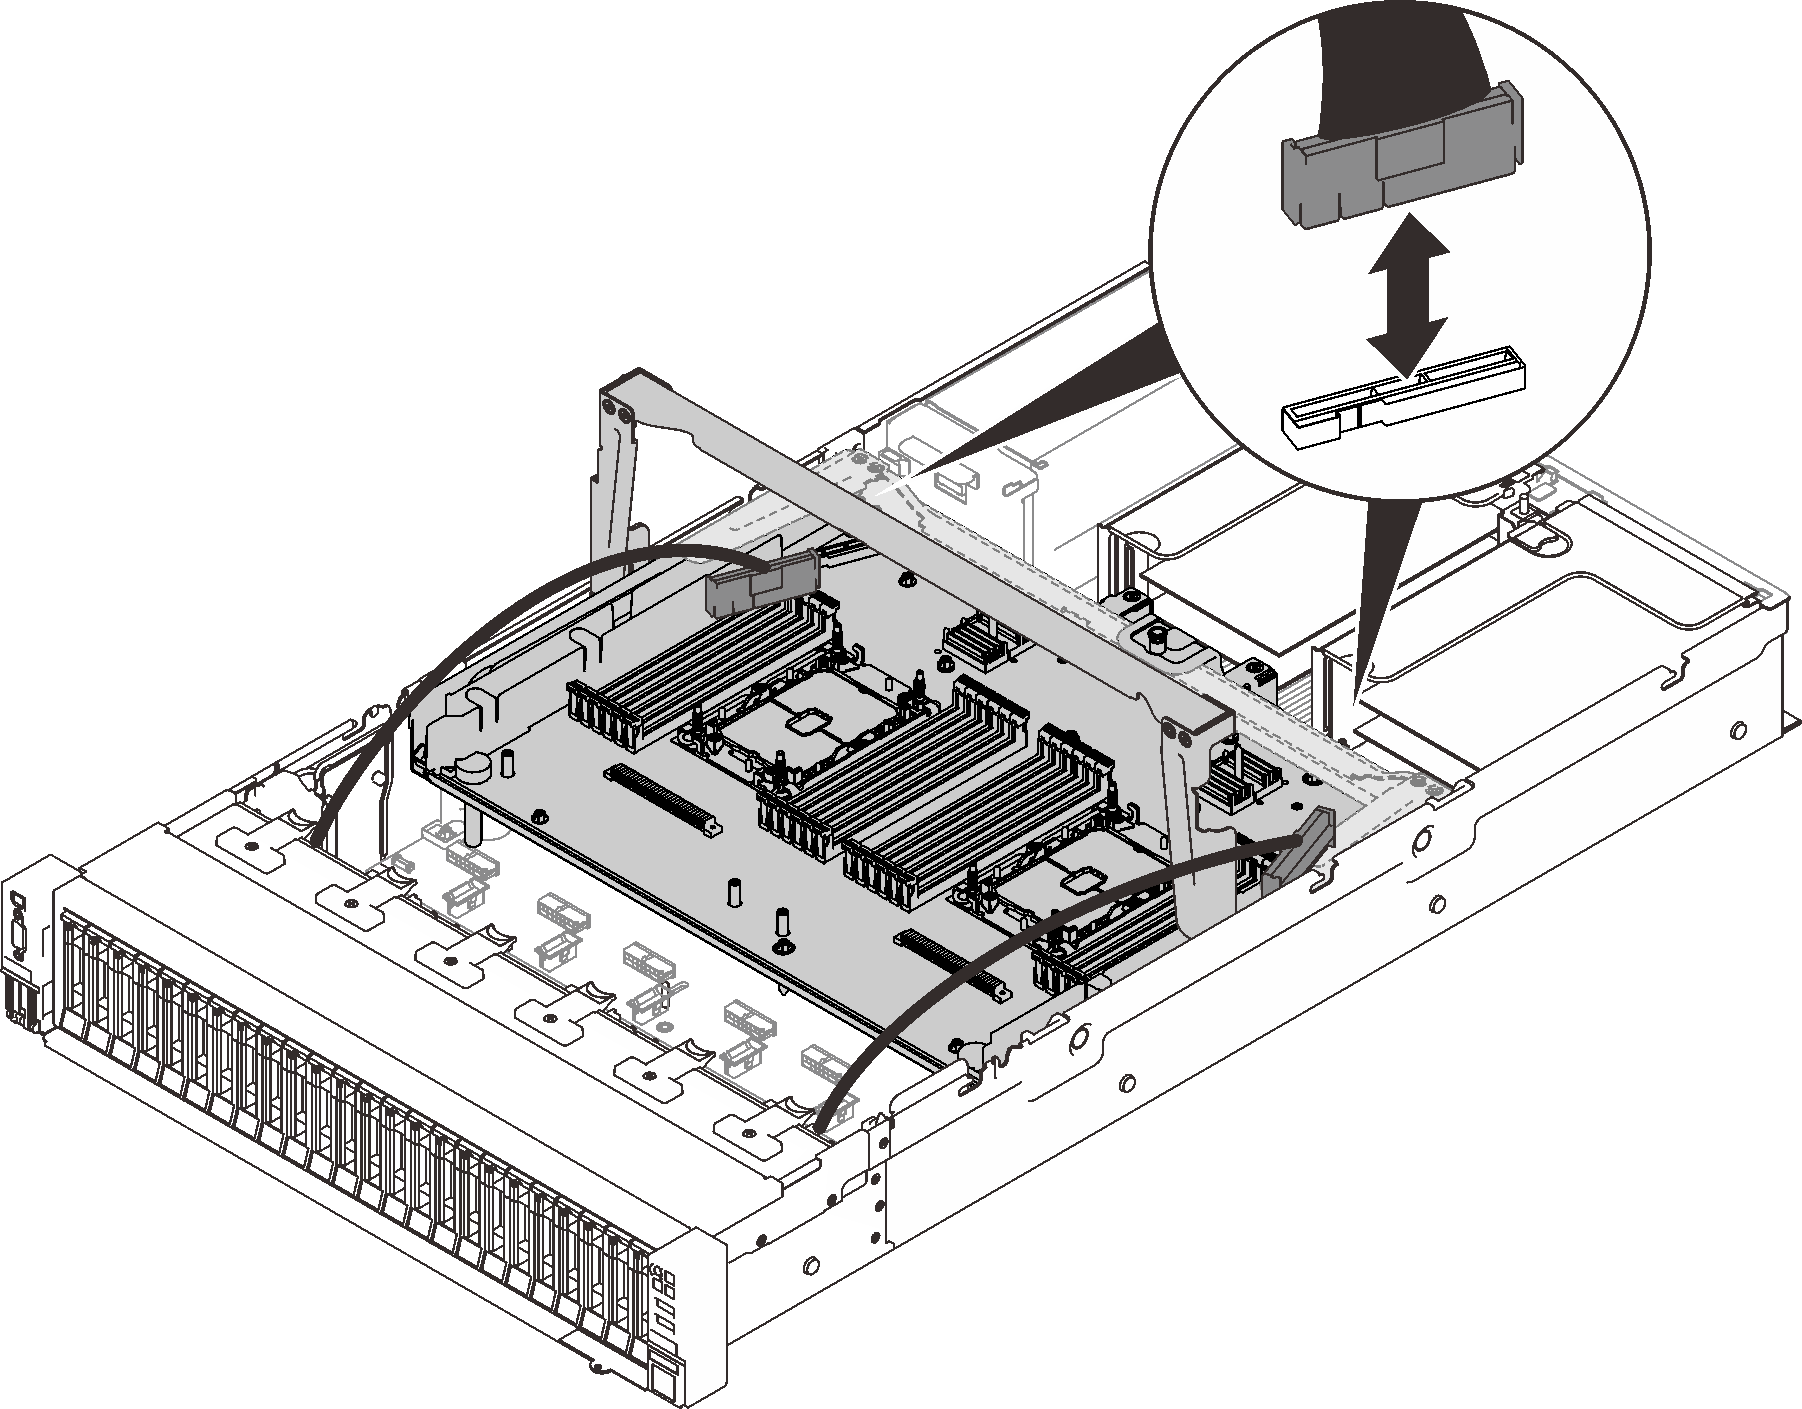
- If applicable, route the two PCIe cables through the cable guides, and connect them to the expansion tray.Figure 3. Connecting cables to the expansion tray
- Secure the processor and memory expansion tray.Figure 4. Securing the processor and memory expansion tray
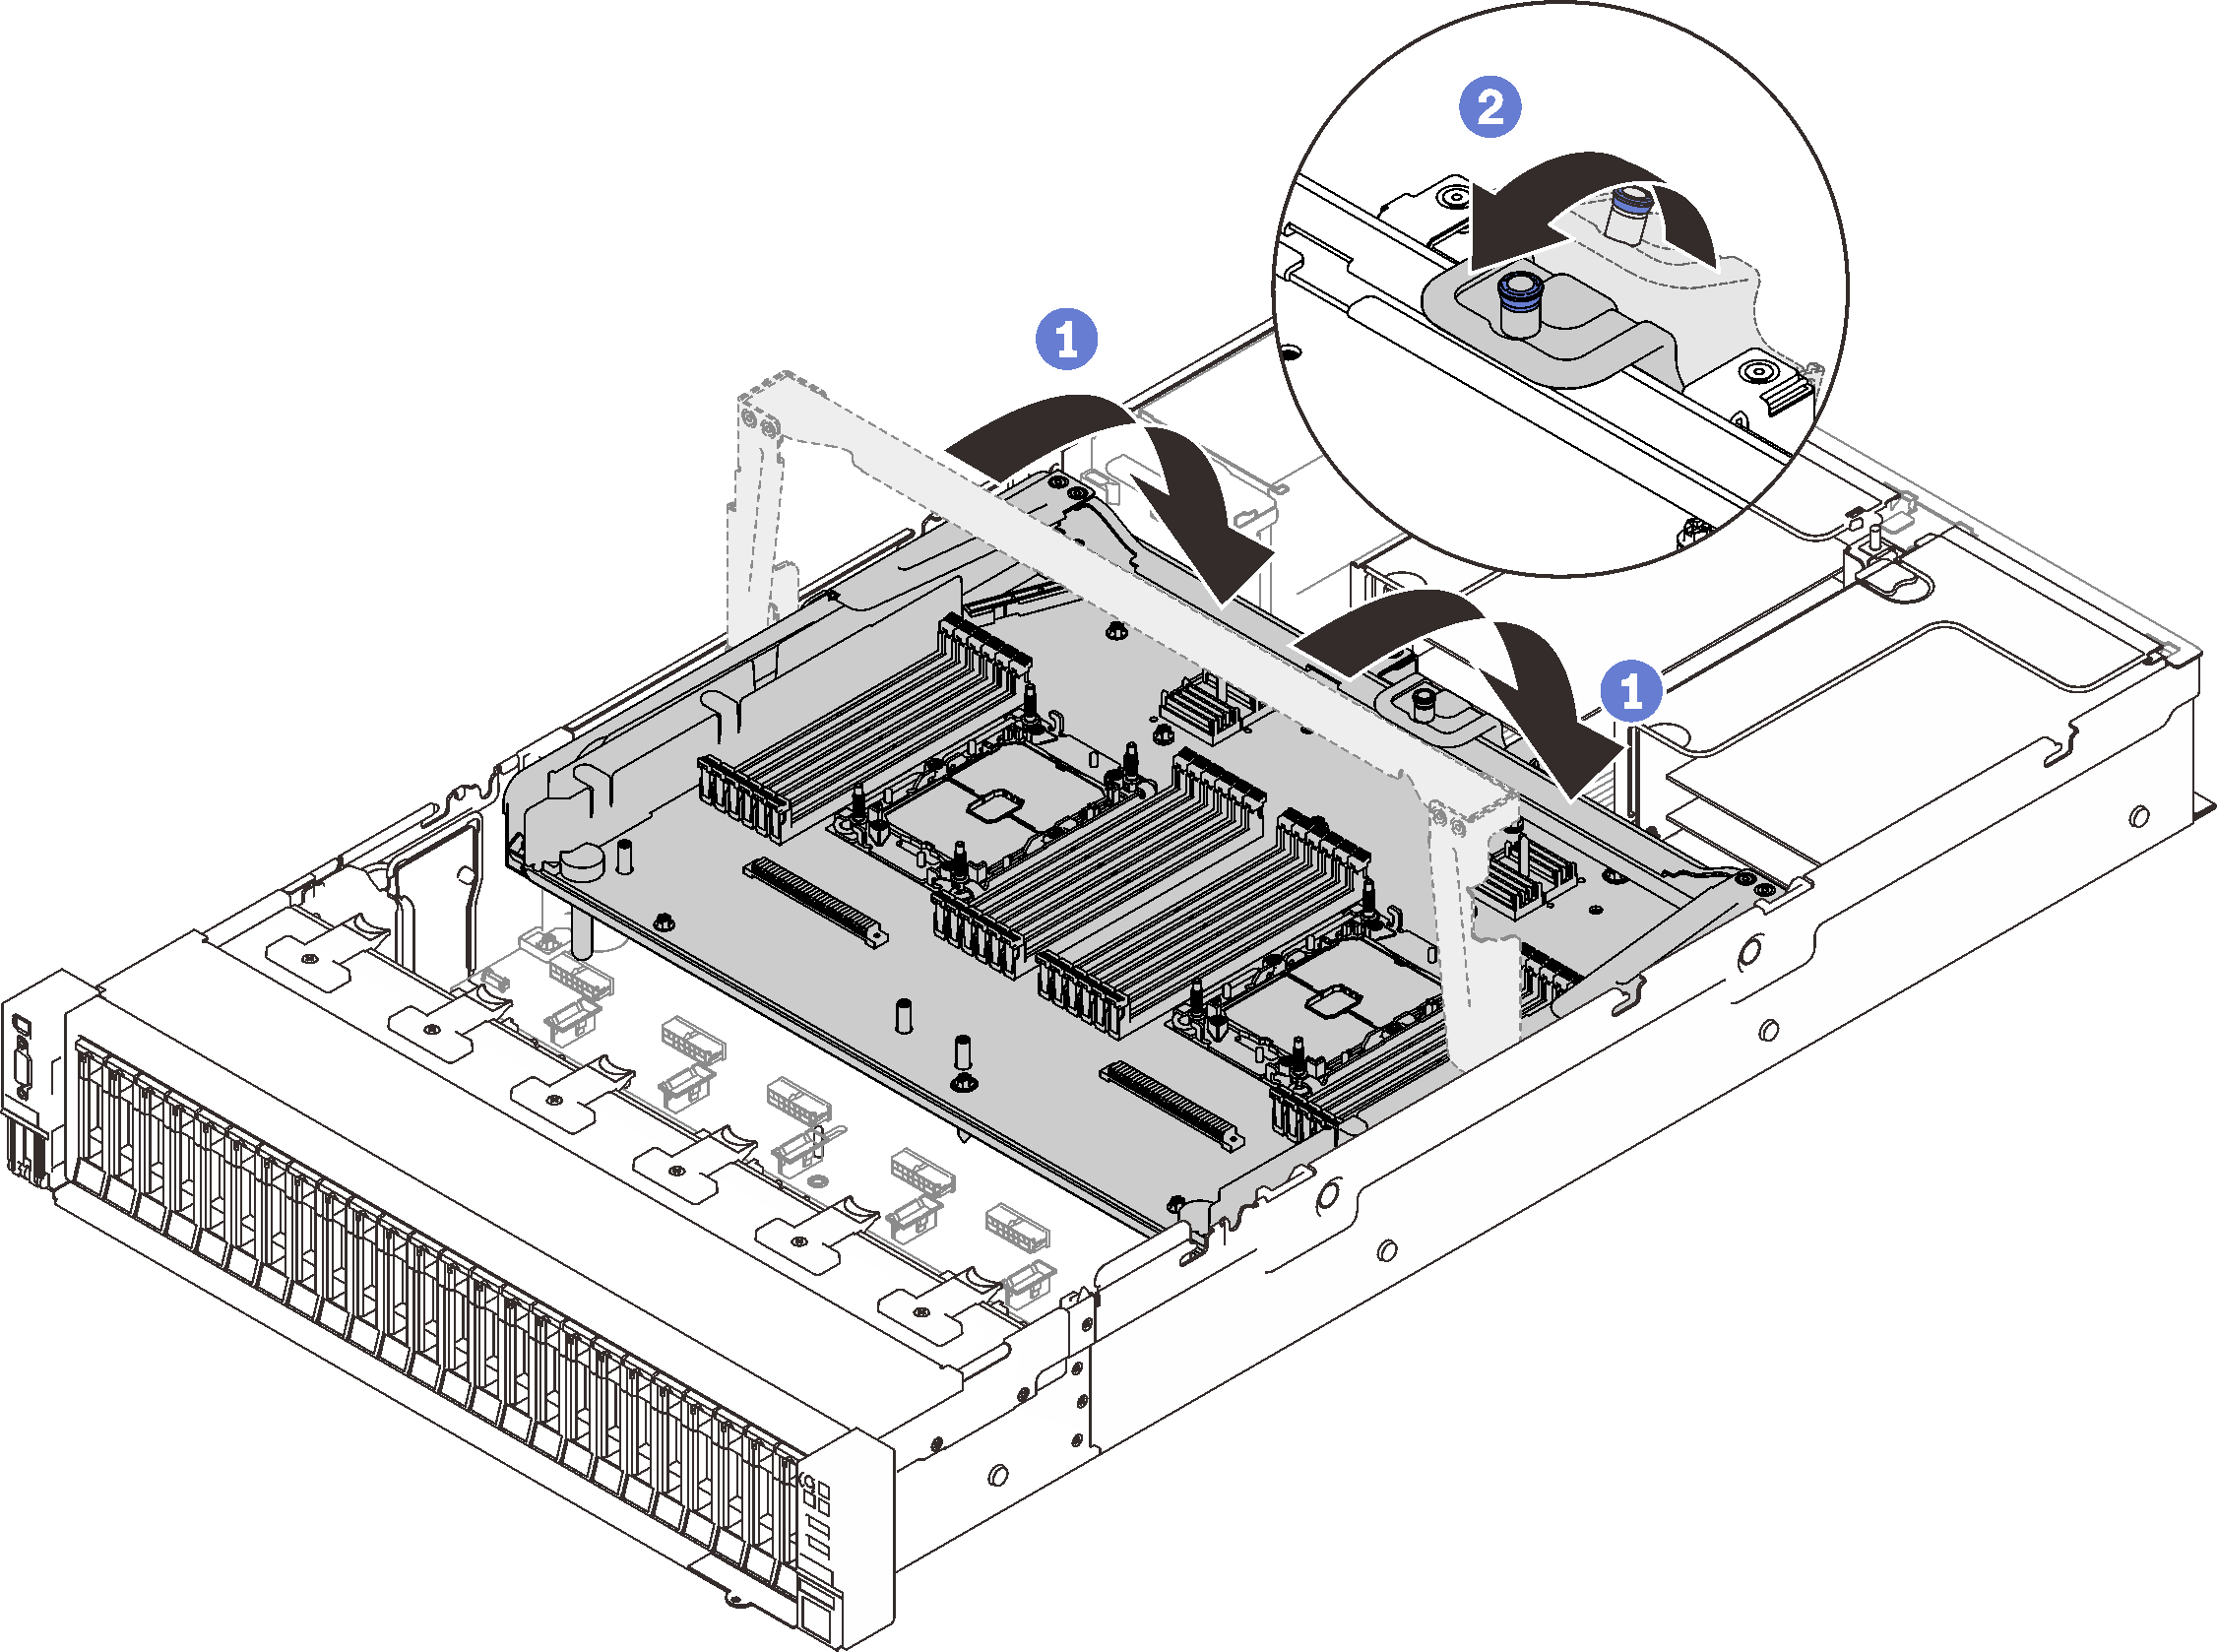
 Rotate the handle all the way down. This connects and fixes the expansion tray to the system board.
 Pull the retaining tab back to secure the handle.
After this task is completed
Proceed to complete the parts replacement (see Complete the parts replacement).
Demo video
Give documentation feedback