Install a hot-swap power supply unit
Follow instructions in this section to install a hot-swap power supply unit.
About this task

To avoid a shock hazard:
- To connect or disconnect -48V dc power cords when you need to remove/replace install redundancy power supply unit(s).
| To Connect: | To Disconnect: |
|---|---|
|
|

Never remove the cover on a power supply or any part that has this label attached. Hazardous voltage, current, and energy levels are present inside any component that has this label attached. There are no serviceable parts inside these components. If you suspect a problem with one of these parts, contact a service technician.
Following are the types of power supply units compatible to this server and notices to take during installation. The server supports a maximum of four power supply units.
- 750-watt Platinum, input power 115 Vac / 230 Vac / 240 VDC
- 750-watt Titanium, input power 230 Vac / 240 VDCNoteWhen only two units of 750-watt Titanium power supply are installed, 240 VDC is not supported.
- 1100-watt Platinum, input power 115 Vac / 230 Vac / 240 VDC
- 1100-watt Titanium, input power 230 Vac / 240 VDC
- 1800-watt Platinum, input power 230 Vac / 240 VDC
- 1800-watt Titanium, input power 230 Vac / 240 VDC
- 2600-watt Titanium, input power 230 Vac / 240 VDC
240 V dc input (input range: 180-300 V dc) is supported in Chinese Mainland ONLY.
Power supply with 240 V dc input cannot support hot-plugging power cord function. Before removing the power supply with dc input, please turn off server or disconnect dc power sources at the breaker panel or by turning off the power source. Then, remove the power cord.
Procedure
- Make preparations for this task.
- If CMA has been installed, do the following:Figure 1. Adjusting CMA
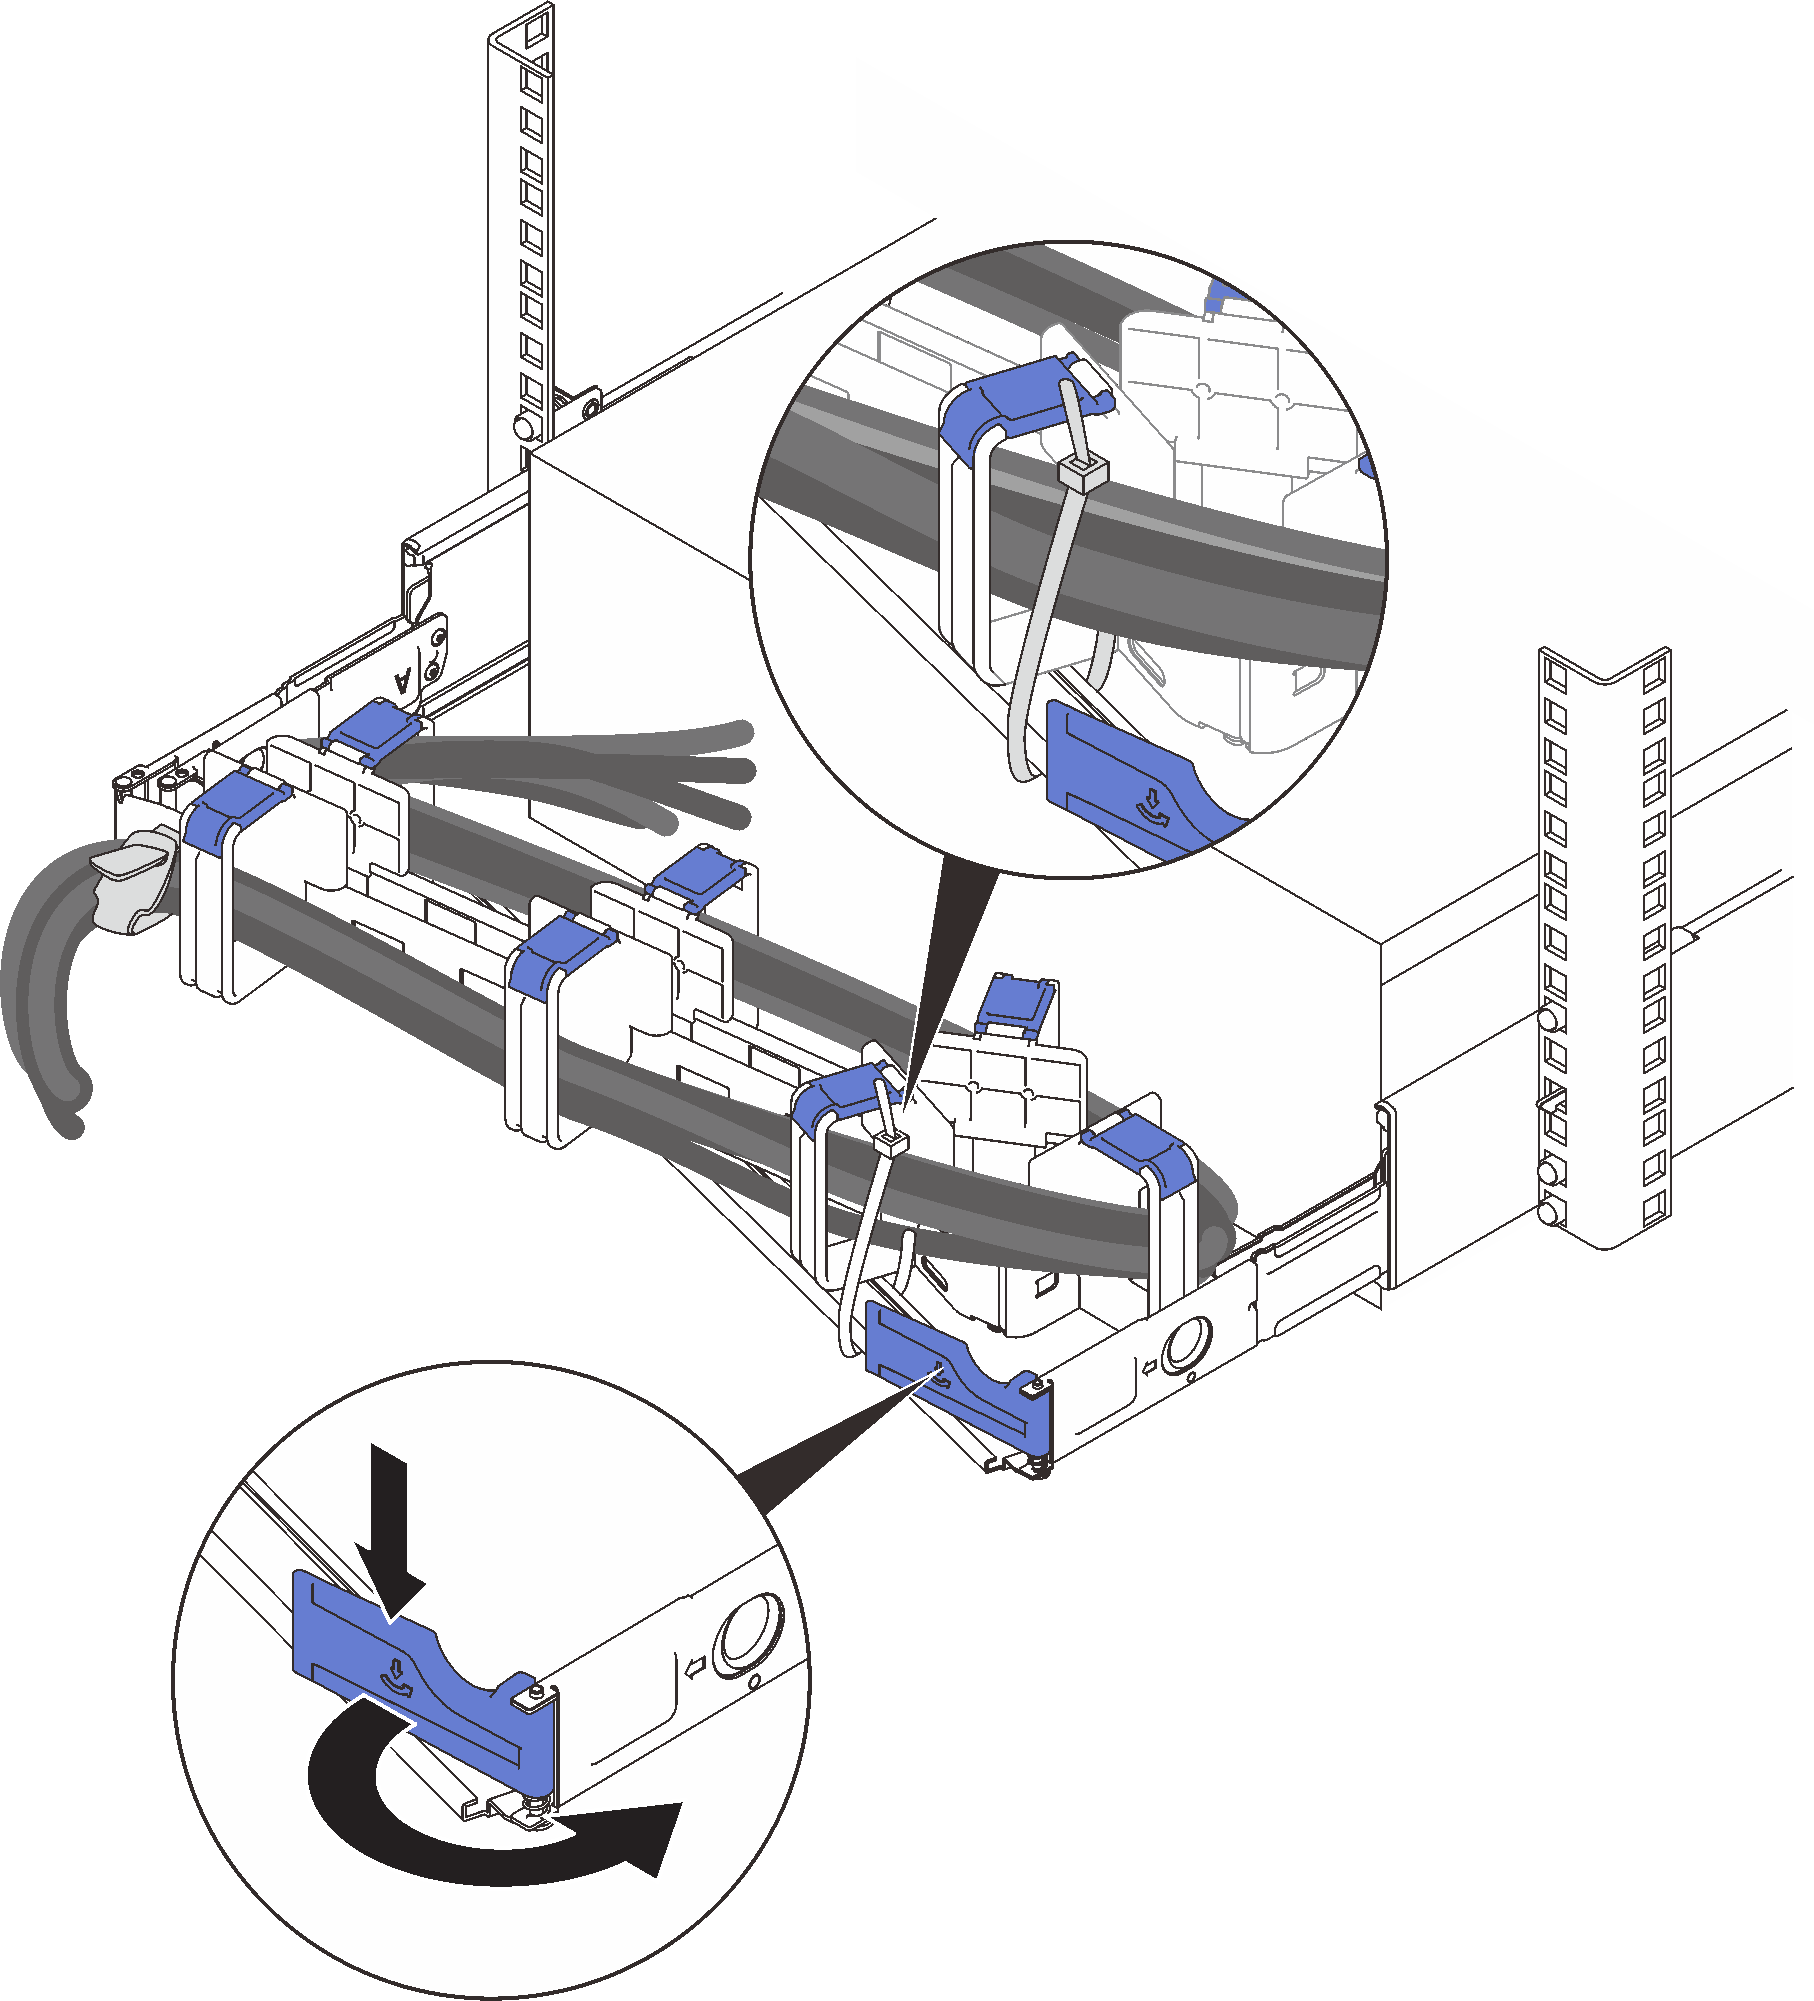
- Press down the stop bracket and rotate it to the open position.
- Rotate the CMA out of the way to gain access to the power supply bay.
NoteMake sure the cables are secured to the CMA with cable straps.
- If CMA has been installed, do the following:
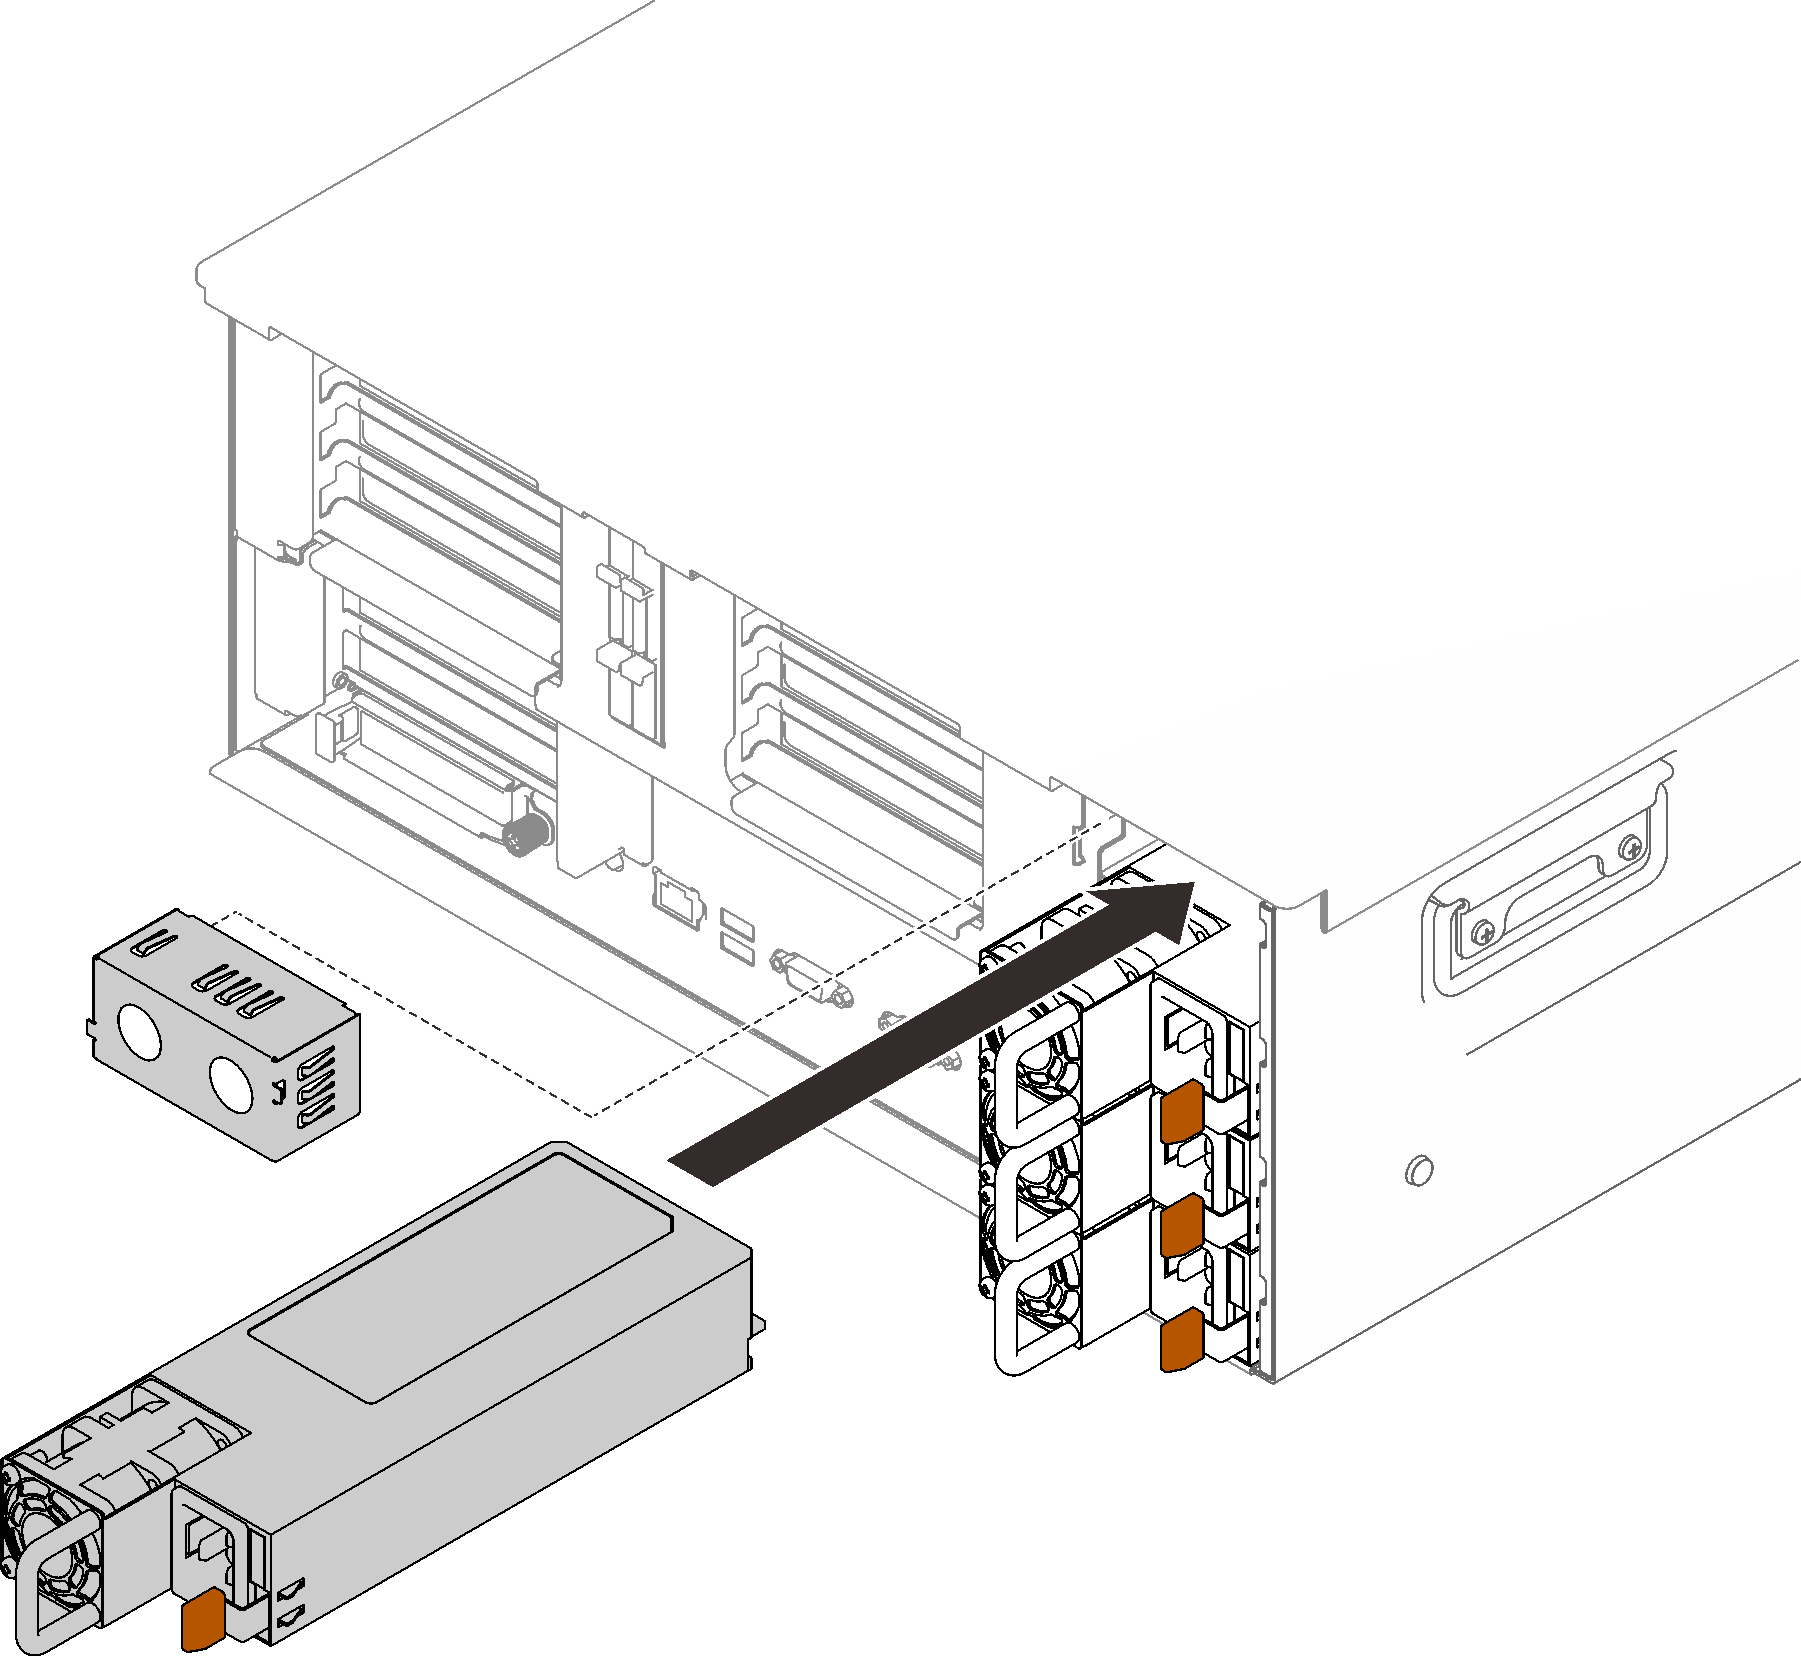
- Grasp the handle on the rear of the power supply, and slide it into the power-supply bay until it clicks into place. Figure 2. Installing a power supply unit
After this task is completed
Connect the power cord to the power supply unit, and make sure it's properly connected to the power.
Pull the handle to try if the power supply unit is properly installed. If it slides out, reinstall it.
Demo video