Install the M.2 backplane and M.2 drive
Use this information to install the M.2 backplane and M.2 drive.


Before installing the M.2 backplane and M.2 drive:
Touch the static-protective package that contains the new M.2 backplane and M.2 drive to any unpainted surface on the outside of the server. Then, take the new M.2 backplane and M.2 drive out of the package and place them on a static-protective surface.
Adjust the retainer on the M.2 backplane to accommodate the particular size of the M.2 drive you wish to install. See Adjust the retainer on the M.2 backplane.
- Locate the connector on each side of the M.2 backplane.Note
Some M.2 backplanes support two identical M.2 drives. When two M.2 drives are installed, align and support both M.2 drives when sliding the retainer forward to secure the M.2 drives.
Install the M.2 drive in slot 0 first.
Figure 1. M.2 drive slot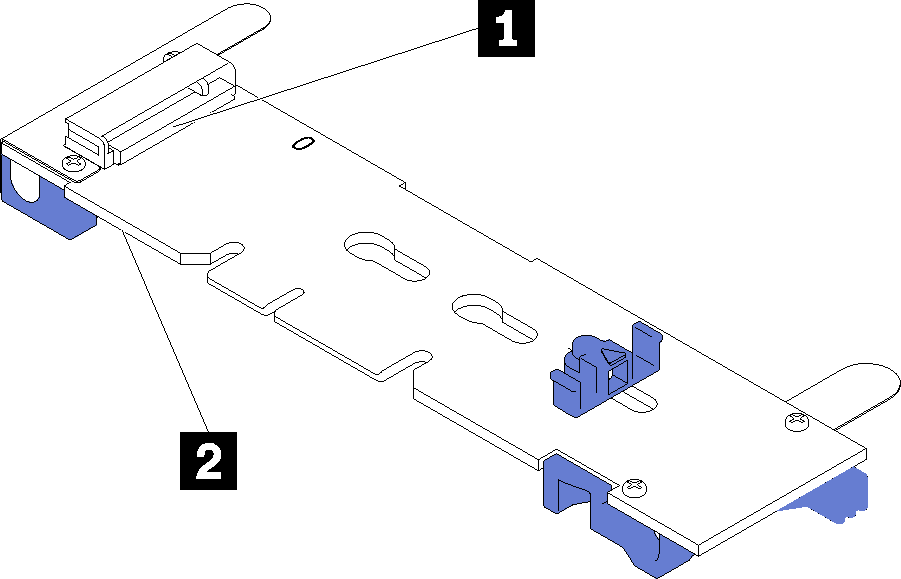
- 1 Slot 0
- 2 Slot 1
To install the M.2 backplane and M.2 drive, complete the following steps:
- A video of this procedure is available at YouTube
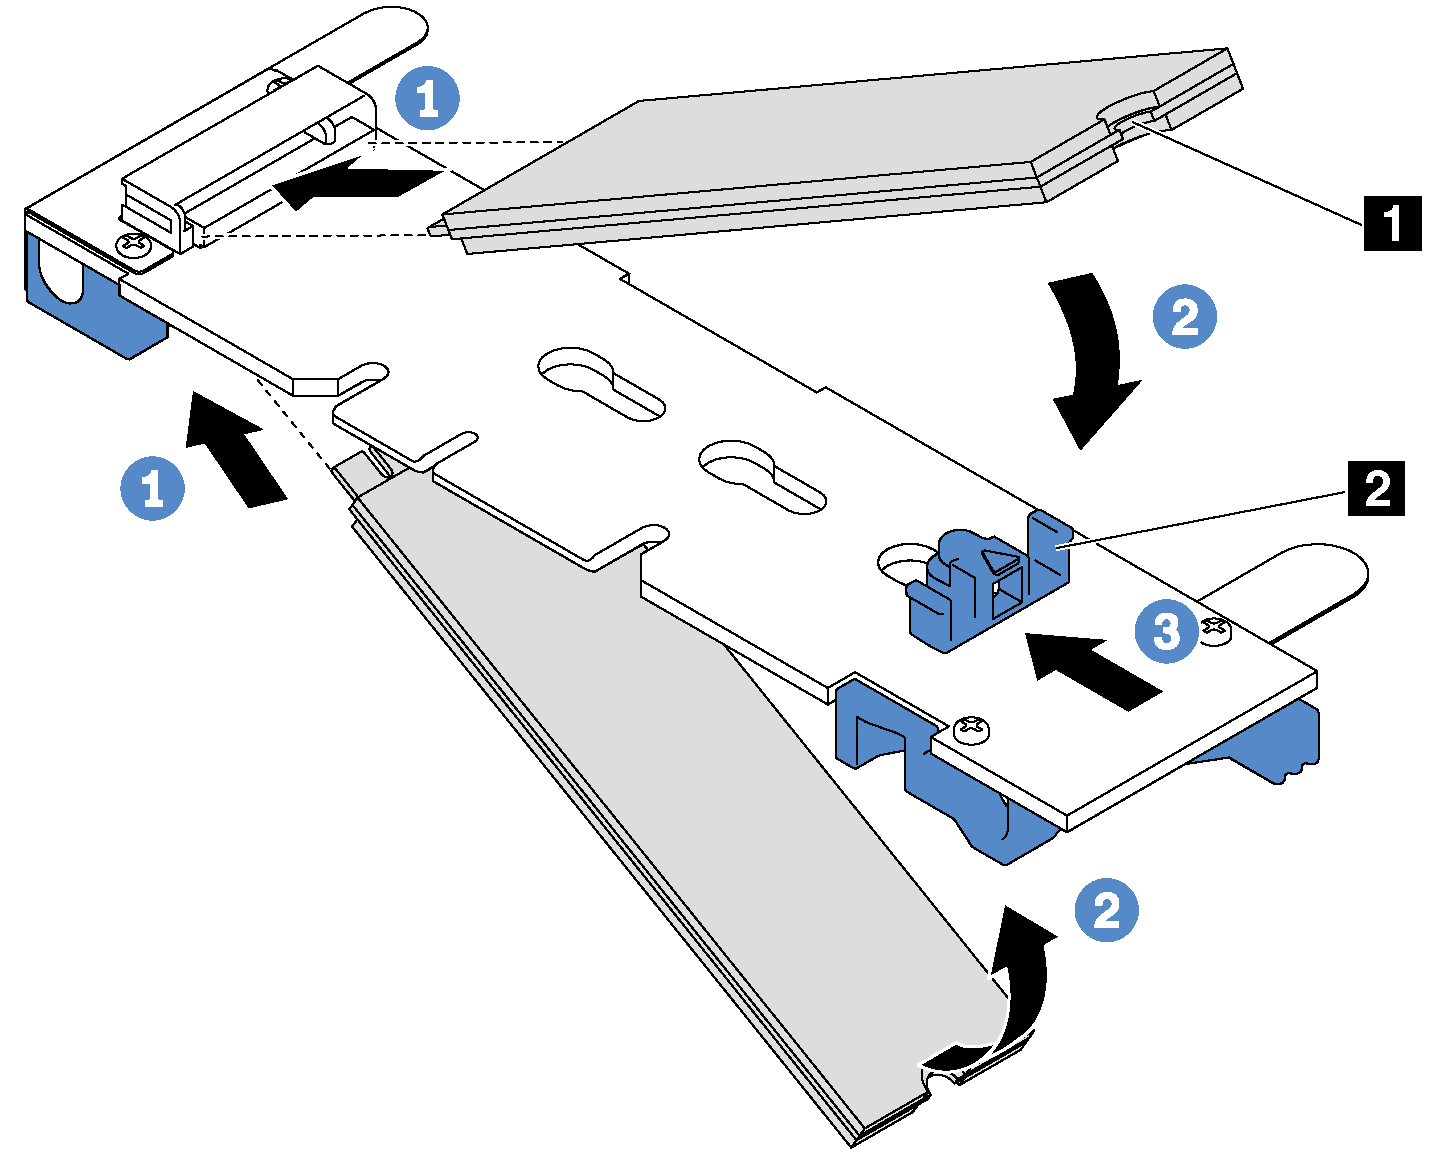
- Slide the retainer forward (toward the connector) to secure the M.2 drive into place.AttentionWhen sliding the retainer forward, ensure that the two nubs
3 on the retainer enter the small holes 4 on the M.2 backplane. Once they enter the holes, you will hear a soft click
sound.Figure 3. Instruction for sliding the retainer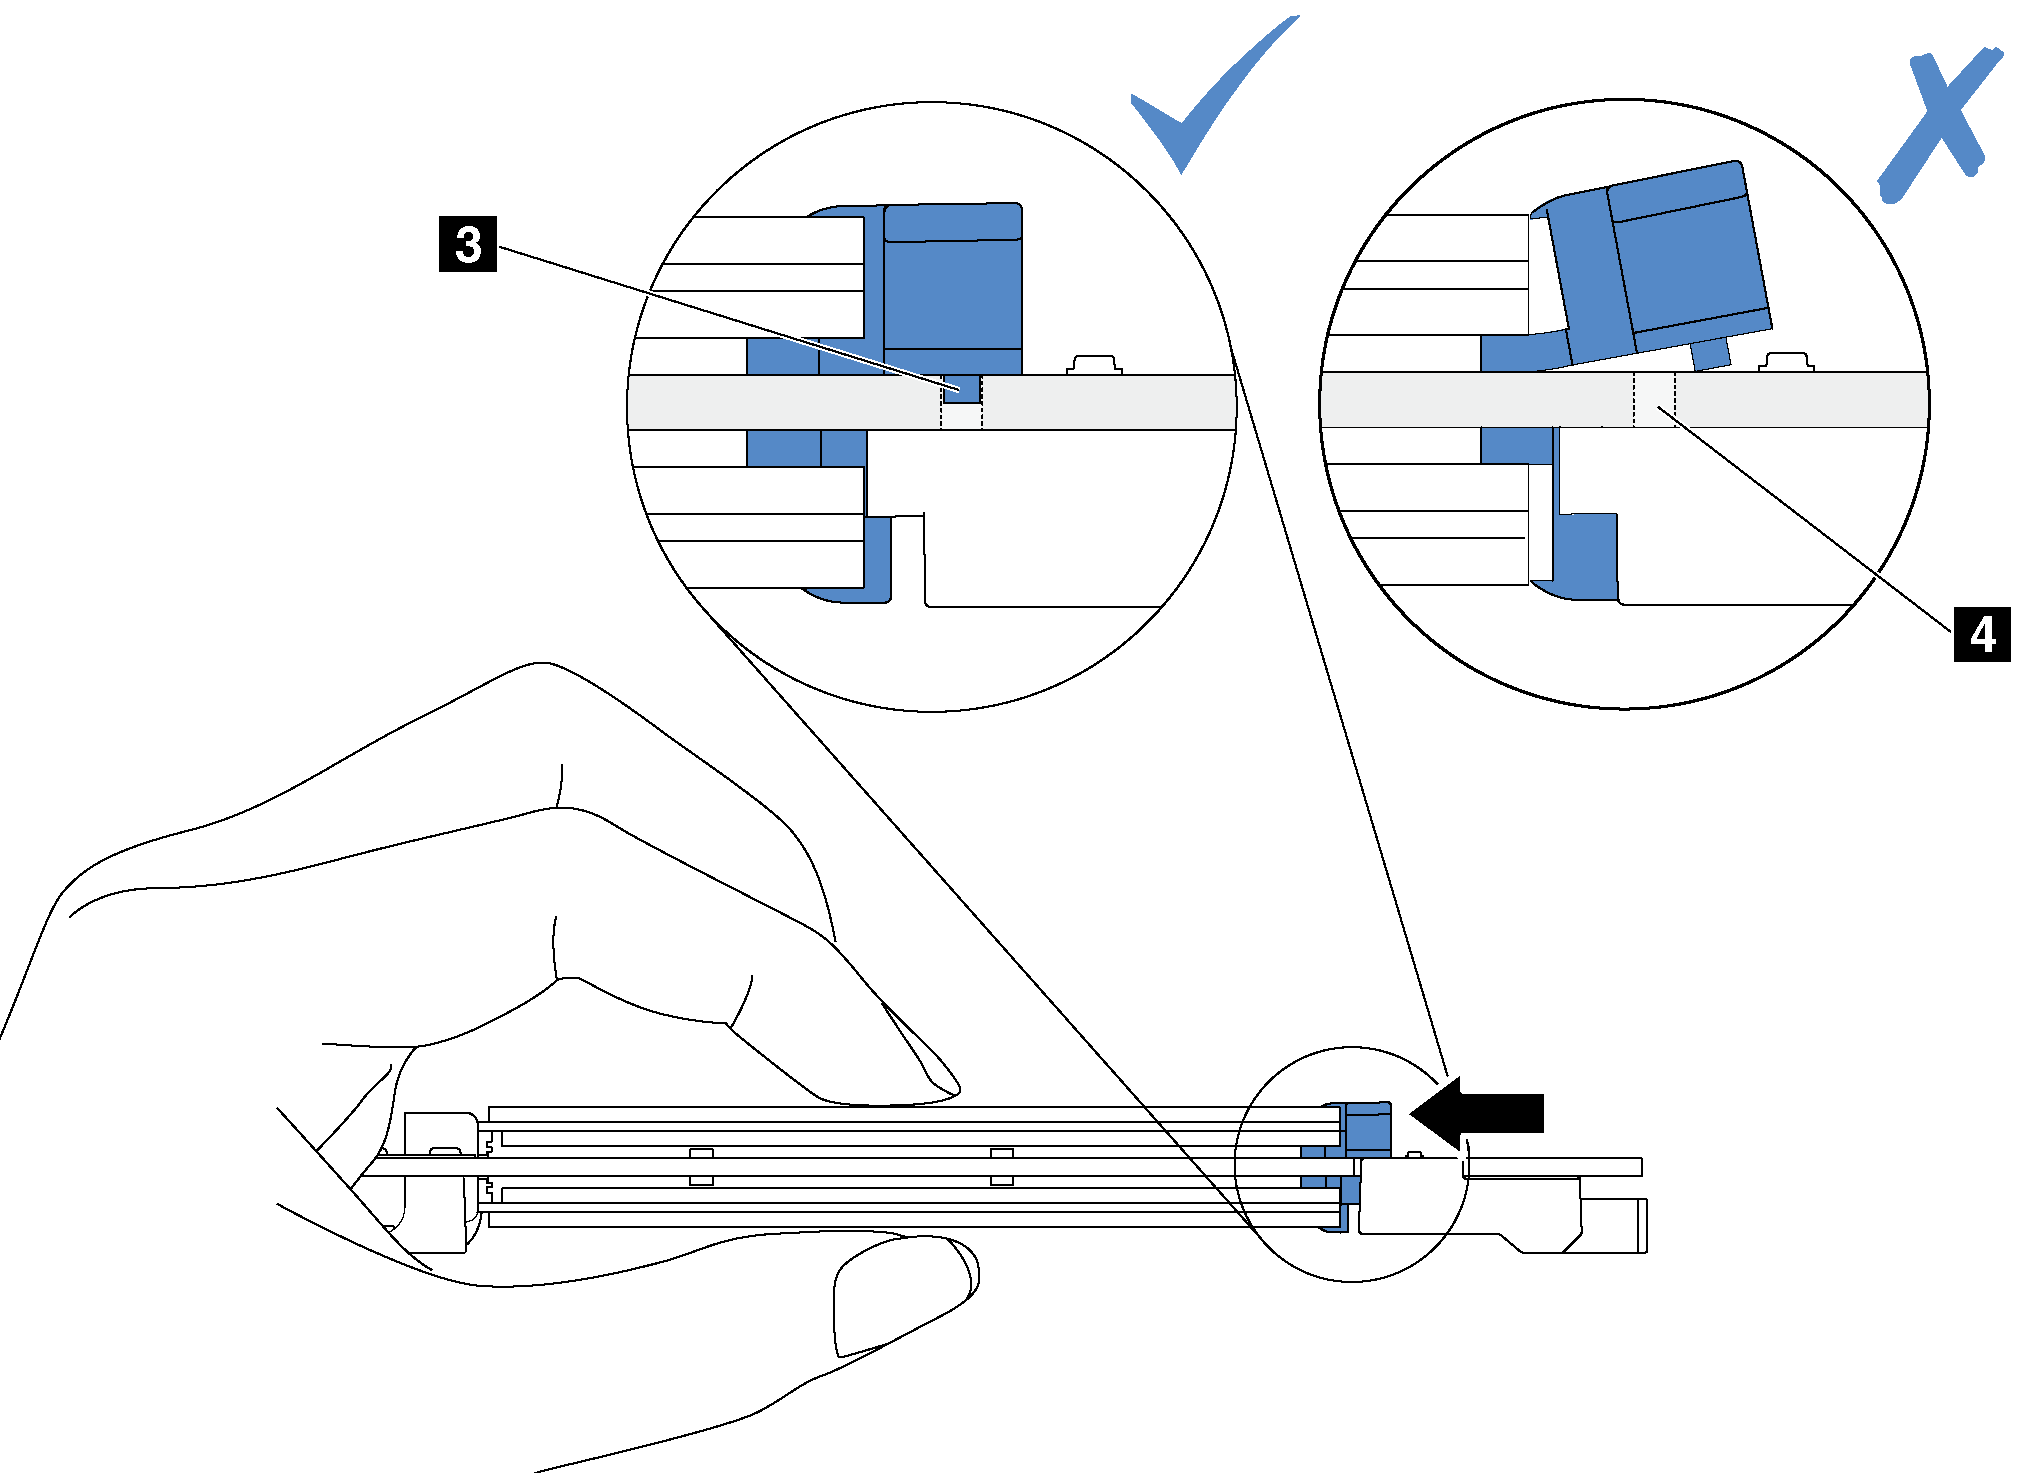
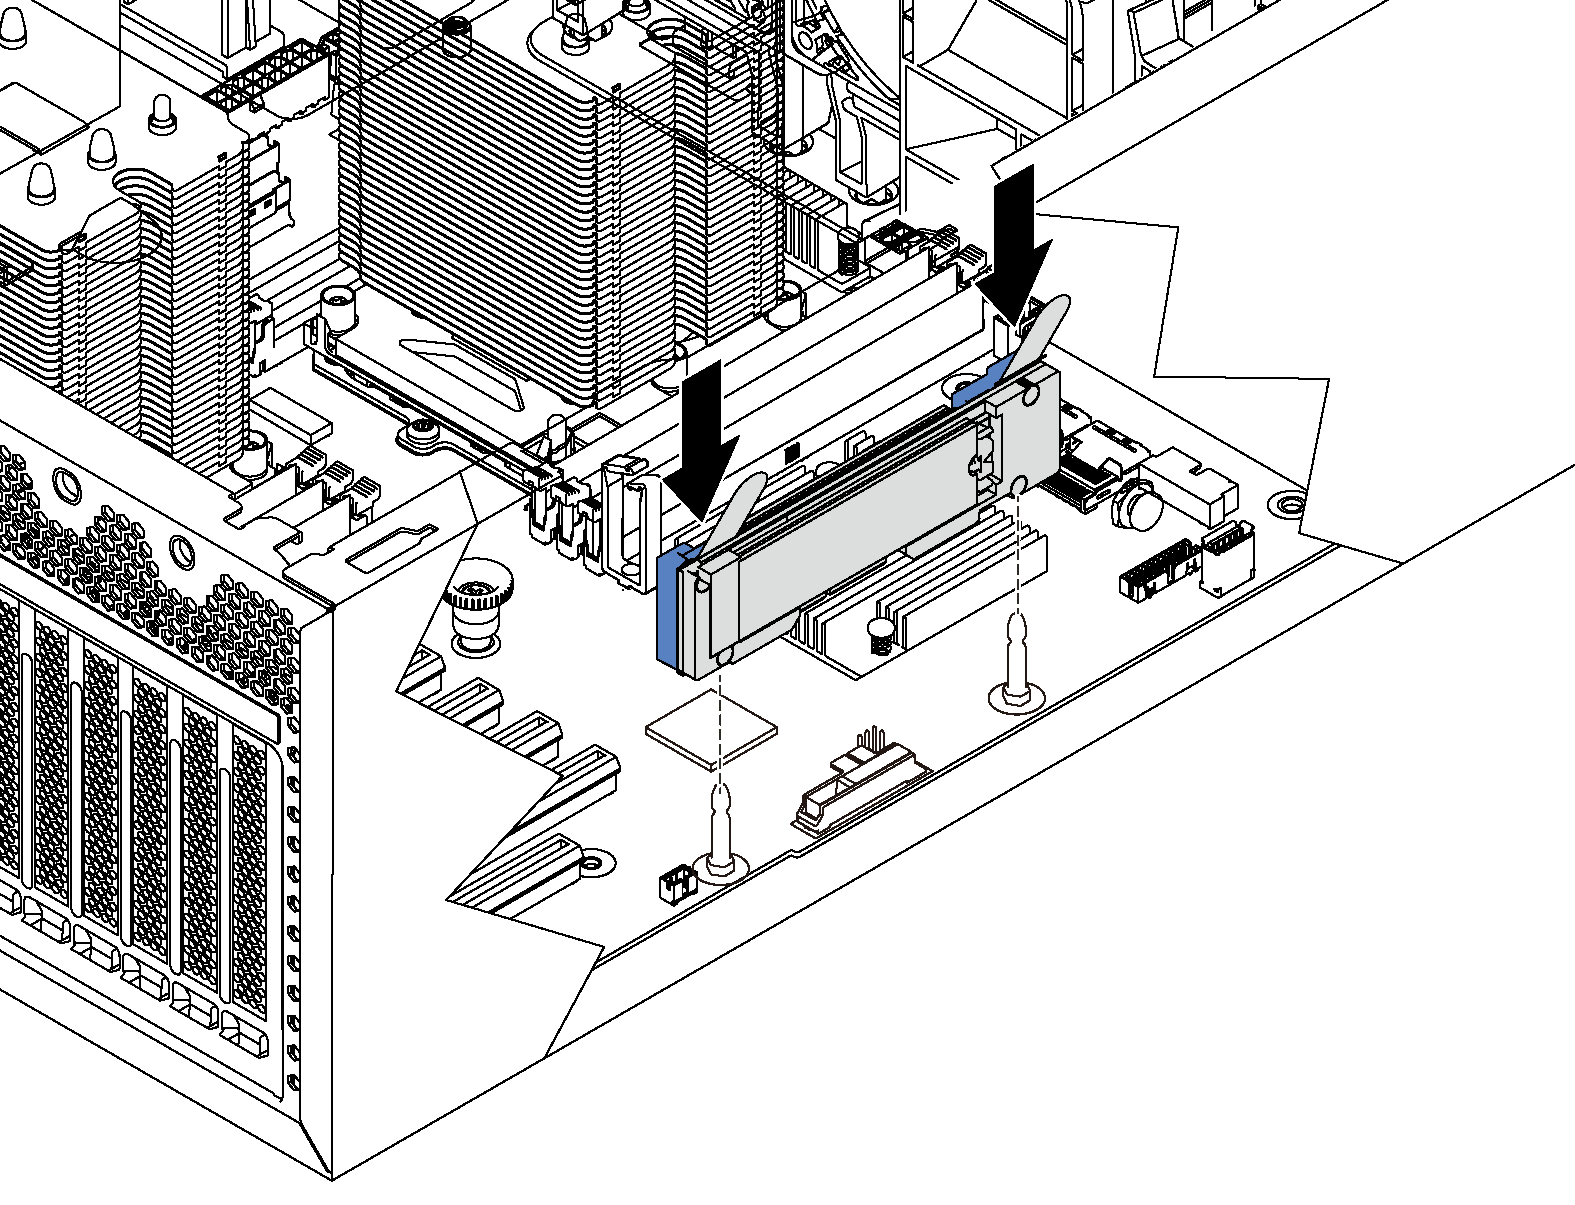
- Align the blue plastic supports at each end of the M.2 backplane with the guide pins on the system board. Then, insert the M.2 backplane into the M.2 slot on the system board and press it down to fully seat it.Figure 4. M.2 backplane installation
Install the PCIe adapter retainer. See Install the PCIe adapter retainer.
Complete the parts replacement. See Complete the parts replacement.
Use the Lenovo XClarity Provisioning Manager to configure the RAID. For more information, see: https://pubs.lenovo.com/lxpm/RAID_setup