Procedures for installing ThinkAgile CP compute enclosure in a rack.
Ensure that at least two people lift and install the enclosure together.
Figure 1. Front latches on slide rails ![Image showing how to unlatch and extend the slide rails](slides_front_latch.jpg)
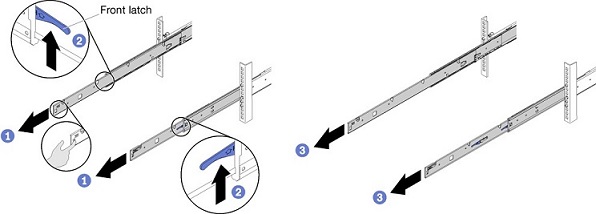
To install the ThinkAgile CP compute enclosure on the slide rails, do the following:
- Pull the slide rails forward until the rails click into place.
- Push up the front latches.
- Pull the slide rails all the way out.
You can only install the compute block enclosure successfully when the slide rails are fully extended.
- Remove all compute nodes and the shuttle from the enclosure.
- Carefully lift the enclosure.
- Tilt and lower the enclosure; then, push the slide rails toward the enclosure and make sure the farthest nailheads on each side go into the slots on the slide rails.
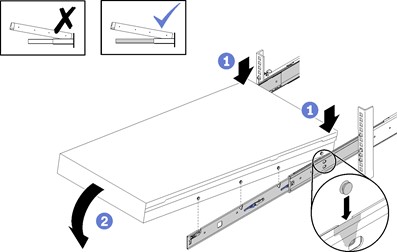
- Slowly lower the enclosure and ensure that the other three nailheads on each side slip into the slots.
Figure 2. ThinkAgile CP compute enclosure installation ![Image showing compute enclosure installation into slide rails](enclosure_installation.jpg)
- To slide the ThinkAgile CP compute enclosure into the rack, first push up the rear latches on the slide rails.
- Push the enclosure until the slide rails click into place.
- Push up the front latches on the slide rails.
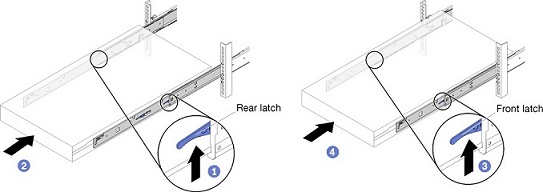
- Push the enclosure all the way into the rack.
Figure 3. Enclosure installation into rack ![Image showing compute enclosure installation into the rack](enclosure_installation_rack.jpg)
- Fasten the two thumbscrews located on the front of the compute enclosure.
Figure 4. Compute enclosure thumbscrews ![Image showing the location of the two thumbscrews on front of the compute enclosure](thumbscrews.jpg)
- Insert back into the enclosure the shuttle and all the previously removed compute nodes.
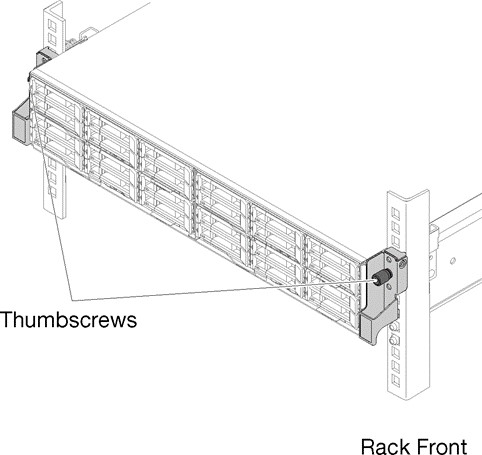
The installation of the compute block in a rack is now complete.