Removing a microprocessor and heat sink
Use this information to remove a microprocessor and heat sink.
Attention
- Be extremely careful, the pins on the socket are fragile. Any damage to the pins may require replacing the system board.
- Do not allow the thermal grease on the microprocessor and heat sink to come in contact with anything.
- Removing the heat sink from the microprocessor destroys the even distribution of the thermal grease and requires replacing the thermal grease.
- Do not touch the microprocessor contacts; handle the microprocessor by the edges only. Contaminants on the microprocessor contacts, such as oil from your skin, can cause connection failures between the contacts and the socket.
- Use the microprocessor installation tool that came with the new microprocessor to remove and install the microprocessor. Failure to use the microprocessor tool may cause damage to the pins on the socket. Any damage to the pins may require replacing the system board.
To remove a microprocessor and heat sink, complete the following steps:
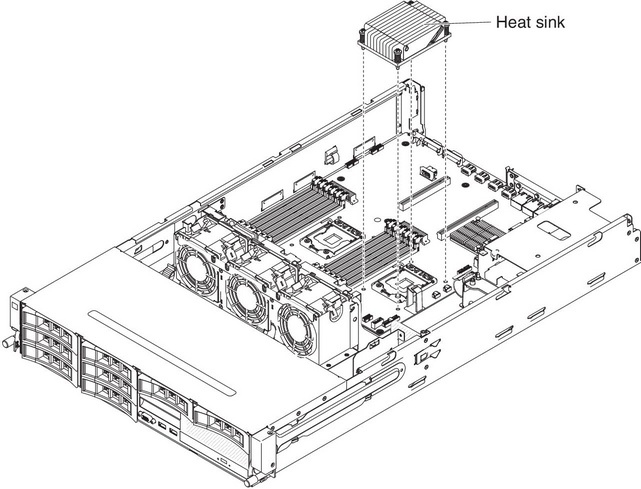
- Gently pull the heat sink off the microprocessor. Lift the heat sink out of the server. If the heat sink sticks to the microprocessor, slightly twist the heat sink back and forth to break the seal. After removal, place the heat sink on its side on a clean, flat surface.NoteRemoving the heat sink from the microprocessor destroys the even distribution of the thermal grease and requires replacing the thermal grease.
- Lift the heat sink out of the server. If the heat sink sticks to the microprocessor, slightly twist the heat sink back and forth to break the seal. After removal, place the heat sink (with the thermal grease side up) on a clean, flat surface.AttentionDo not touch the thermal material on the bottom of the heat sink. Touching the thermal material will contaminate it. If the thermal material on the microprocessor or heat sink becomes contaminated, you must replace it.
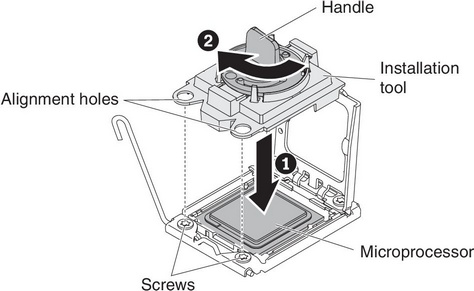
- Open the microprocessor bracket frame by lifting up the tab on the top edge. Keep the bracket frame in the open position.
 NoteDo not touch the connectors on the microprocessor and the microprocessor socket.
 - Align the holes on the installation tool with the screws on the microprocessor bracket, then place the microprocessor installation tool down over the microprocessor. Twist the handle clockwise to attach the tool to the microprocessor. NoteYou can pick up or release the microprocessor by twisting the microprocessor installation tool handle.
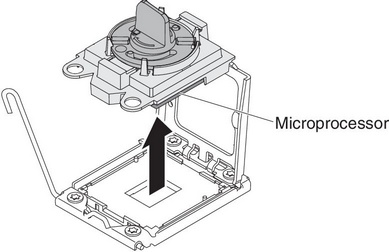
- Carefully lift the microprocessor straight up and out of the socket, and place it on a static-protective surface. Remove the microprocessor from the installation tool by twisting the handle counterclockwise.
Give documentation feedback