Replacing an adapter in the rear two hard-disk-drive kit
Use this information to replace an adapter in the rear two hard-disk-drive kit.
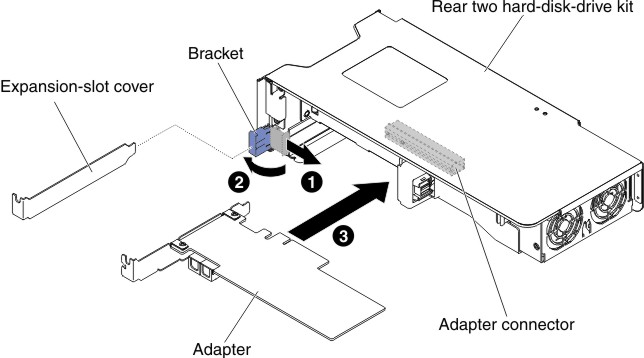
To install an adapter, complete the following steps:
- Read the safety information that begins on Safety and Installation guidelines.
- Turn off the server and peripheral devices and disconnect the power cords and all external cables.
- Remove the server top cover (see Removing the top cover).
- Remove the rear two hard-disk-drive kit (see Removing the rear two hard-disk-drive kit).
- 1 Slide the retention bracket; then, 2 rotate it to the open position.
- Align the adapter with the slot on the rear two hard-disk-drive kit.
- 3 Press the adapter firmly into the slot on the rear two hard-disk-drive kit.Figure 1. Adapter installation
- Connect any required cables to the adapter.Attention
- When you route cables, do not block any connectors or the ventilated space around any of the fans.
- Make sure that cables are not routed on top of components under the rear two hard-disk-drive kit.
- Make sure that cables are not pinched by the server components.
- Perform any configuration tasks that are required for the adapter.
- Replace the rear two hard-disk-drive kit in the server (see Replacing the rear two hard-disk-drive kit).
- Reinstall the top cover (see Replacing the top cover).
- Slide the server into the rack.
- Reconnect the power cords and any cables that you removed.
- Turn on the peripheral devices and the server.
Give feedback