Installing a 750-watt -48 volt to -60 volt dc power supply
Use this information for considerations that you need note when you install 750-watt -48 volt to -60 volt dc power supplies and the instructions for installing the 750-watt -48 volt to -60 dc power supplies in the server.
- This information apply to both the 4-socket and 8-socket servers.
- Four 750-watt -48 dc power supplies is the only 750-watt -48 volt dc power supply configuration that the server supports (per 4-socket node).
- Four 750-watt hot-swap power supplies fed from a -48 volt to -60 volt dc input source provides N+N redundancy support for limited configurations.
- For more notes and information that you must consider when you install power supplies in the server, see Installing power supplies.
The following notes provides information that you must consider when you install a 750-watt -48 V to -60 V dc power supply. To confirm that the server supports the power supply that you are installing, see the Lenovo ServerProven website.
- Only trained service technicians, other than Lenovo approved service technicians, are authorized to install and remove the 750-watt -48 V to -60 V dc power supply, and make connections to or disconnections from the 750-watt -48 V to -60 V dc power source.
- Lenovo service technicians are not certified or authorized to install or remove the 750-watt -48 V to -60 V dc power cable. You are responsible for ensuring that only a trained service technician install or remove the 750-watt -48 V to -60 V dc power cable.
- You can install up to four dc power supplies (per 4-socket node) or four ac power supplies (per 4-socket node) in the server, but you cannot mix dc and ac power supplies in the same server.
- The power supply bays are divided into two power domains (each 4-socket node). Power supply bays 1 and 3 are in power domain A and power supply bays 2 and 4 are in power domain B.
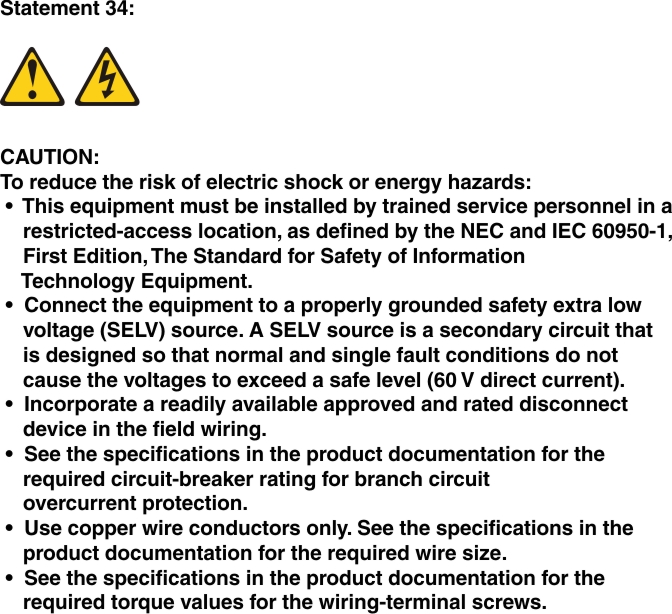
- To reduce the risk of electric shock or energy hazards when installing the 750-watt -48 V to -60 V dc power supplies, take the following steps:
- Use a circuit breaker that is rated 40 amps.
- Use 4 mm2 (10 AWG) at 60° C copper wire.
- Cut the power cable wires to the correct length, but do not cut the wires shorter than 150 mm (6 inches).
- Torque the wiring-terminal screws to 0.50 ~ 0.60 newton-meters (4.43 ~ 5.31 inch-pounds).
Hazardous voltage, current, and energy levels are present inside any component that has this label attached. There are no serviceable parts inside these components. If you suspect a problem with one of these parts, contact a service technician.

To install a 750-watt -48 V to -60 V dc power supply, complete the following steps:
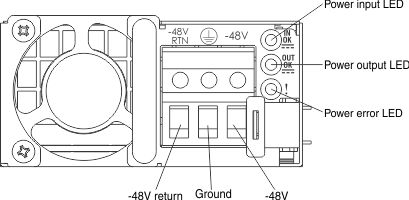
- Attach the dc power cable to the new power supply. Make sure that the power cable wires are connected securely to the -48 V, ground, and to the -48 V return terminals (as shown in the following illustration). Make sure that:
- You use 4 mm2 (10 AWG) at 60° C copper wire.
- Cut the power cable wires to the correct length, but do not cut the wires shorter than 150 mm (6 inches).
- Torque the wiring-terminal screws to 0.50 ~ 0.60 newton-meters (4.43 ~ 5.31 inch-pounds).
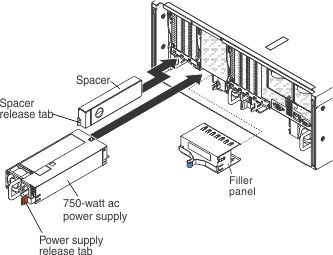
- Insert the power-supply spacer into the left side of the power-supply bay (against the bay wall) and slide it in until it snaps into place on the tabs on the side of the power supply bay.
- Connect the other ends of the dc power cable to the dc power source.NoteWhen you install additional power supplies, place the following power rating label that comes with the power supply option on the rear of the server.
