Installing the half-length I/O book
This information provides notes and other information that you need to consider when you install the half-length I/O book and the instructions for installing the I/O book in the server.
The following notes provide information that you must consider when you install the half-length I/O book.
- For additional information about the supported adapters, see Installing an adapter in the standard or half-length I/O book, Supported ML2 (Ethernet) adapters, Supported RAID adapters, Supported RAID cache cards, and Supported host bus adapters.
- The half-length I/O book is hot-swappable if no adapters are installed in the I/O book. However, if adapters are installed in the I/O book, you must first press the Power button on the I/O book and power-off all three PCIe slots before you remove the I/O book from the server. The slots LED lights will be off when the slots are off-line.
- You can remove and install PCIe adapters in this I/O book without powering off the server.
- This I/O book supports Gen3 half-length adapters, which are either full-height or low profile.
- When this I/O book is installed in the server, it connects to compute book 3 or compute book 4. See Table 1 for more information.
- You can install up to two half-length I/O books in the server.
- You can also install one half-length I/O book and one full-length I/O book in the server.
- For additional about this I/O book, see Half-length I/O book.
The following table lists the I/O book PCIe slot numbering and the slots associated with each compute book (when two I/O books are installed):
| PCIe slot number (facing the rear of the server) | Compute book associated with the PCIe slot |
|---|---|
| 1 | Compute book 4 |
| 2 | Compute book 4 |
| 3 | Compute book 4 |
| 4 | Compute book 3 |
| 5 | Compute book 3 |
| 6 | Compute book 3 |
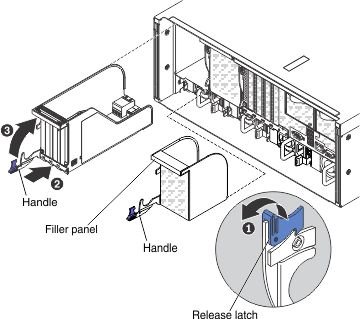
To install the half-length I/O book, complete the following steps:
- Align the I/O book with the slot in the server and slide it into the server.
If you have other devices to install or remove, do so now. Otherwise, go to Completing the installation.
Give documentation feedback