Removing a memory module

Use this information to remove a memory module from the blade server.

The following illustration shows how to remove a DIMM from the blade server. This information also applies to removing a DIMM filler.
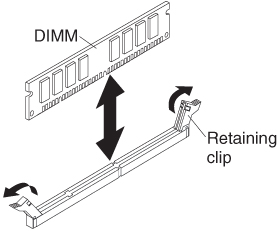

Graphic illustrating the removal of DIMMs in the blade server

To remove a DIMM, complete the following steps.

  1. Before you begin, read Safety and Installation guidelines.
  2. If the blade server is installed in a BladeCenter unit, remove it (see Removing the blade server from the BladeCenter unit).
  3. Remove the blade server cover (see Removing the blade server cover).
  4. If an optional expansion unit is installed, remove the expansion unit (see Removing an optional expansion unit).
  5. Locate the DIMM connectors (see Blade server connectors). Determine which DIMM you want to remove from the blade server.
    Attention
    To avoid breaking the retaining clips or damaging the DIMM connectors, handle the clips gently.
  6. Move the retaining clips on the ends of the DIMM connector to the open position by pressing the retaining clips away from the center of the DIMM connector.
    Note
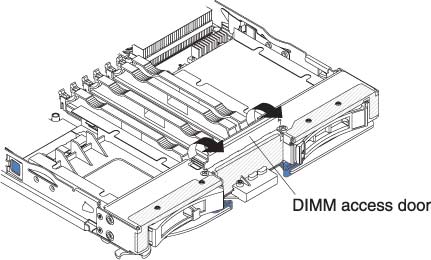
    To access DIMM connector seven through twelve, use your fingers to lift the DIMM access door.
    Graphic illustrating how to open the DIMM access door
  7. Using your fingers, pull the DIMM out of the connector.
  8. Install a DIMM or DIMM filler in each empty DIMM connector (see Installing a memory module).
    Note
    A DIMM or DIMM filler must occupy each DIMM socket before the blade server is turned on.
  9. If you are instructed to return the DIMM, follow all packaging instructions, and use any packaging materials for shipping that are supplied to you.