Install the chassis to the rack
Follow instructions in this section to install the chassis to the rack.
About this task
To avoid potential danger, make sure to read and follow the safety information.
R006


CAUTION
Do not place any object on top of a rack-mounted device unless that rack-mounted device is intended for use as a shelf.
Attention
Read Installation Guidelines and Safety inspection checklist to make sure that you work safely.
To install the rails into a rack, follow the instructions below:
ThinkSystem L Shaped Rail Kit Installation Guide
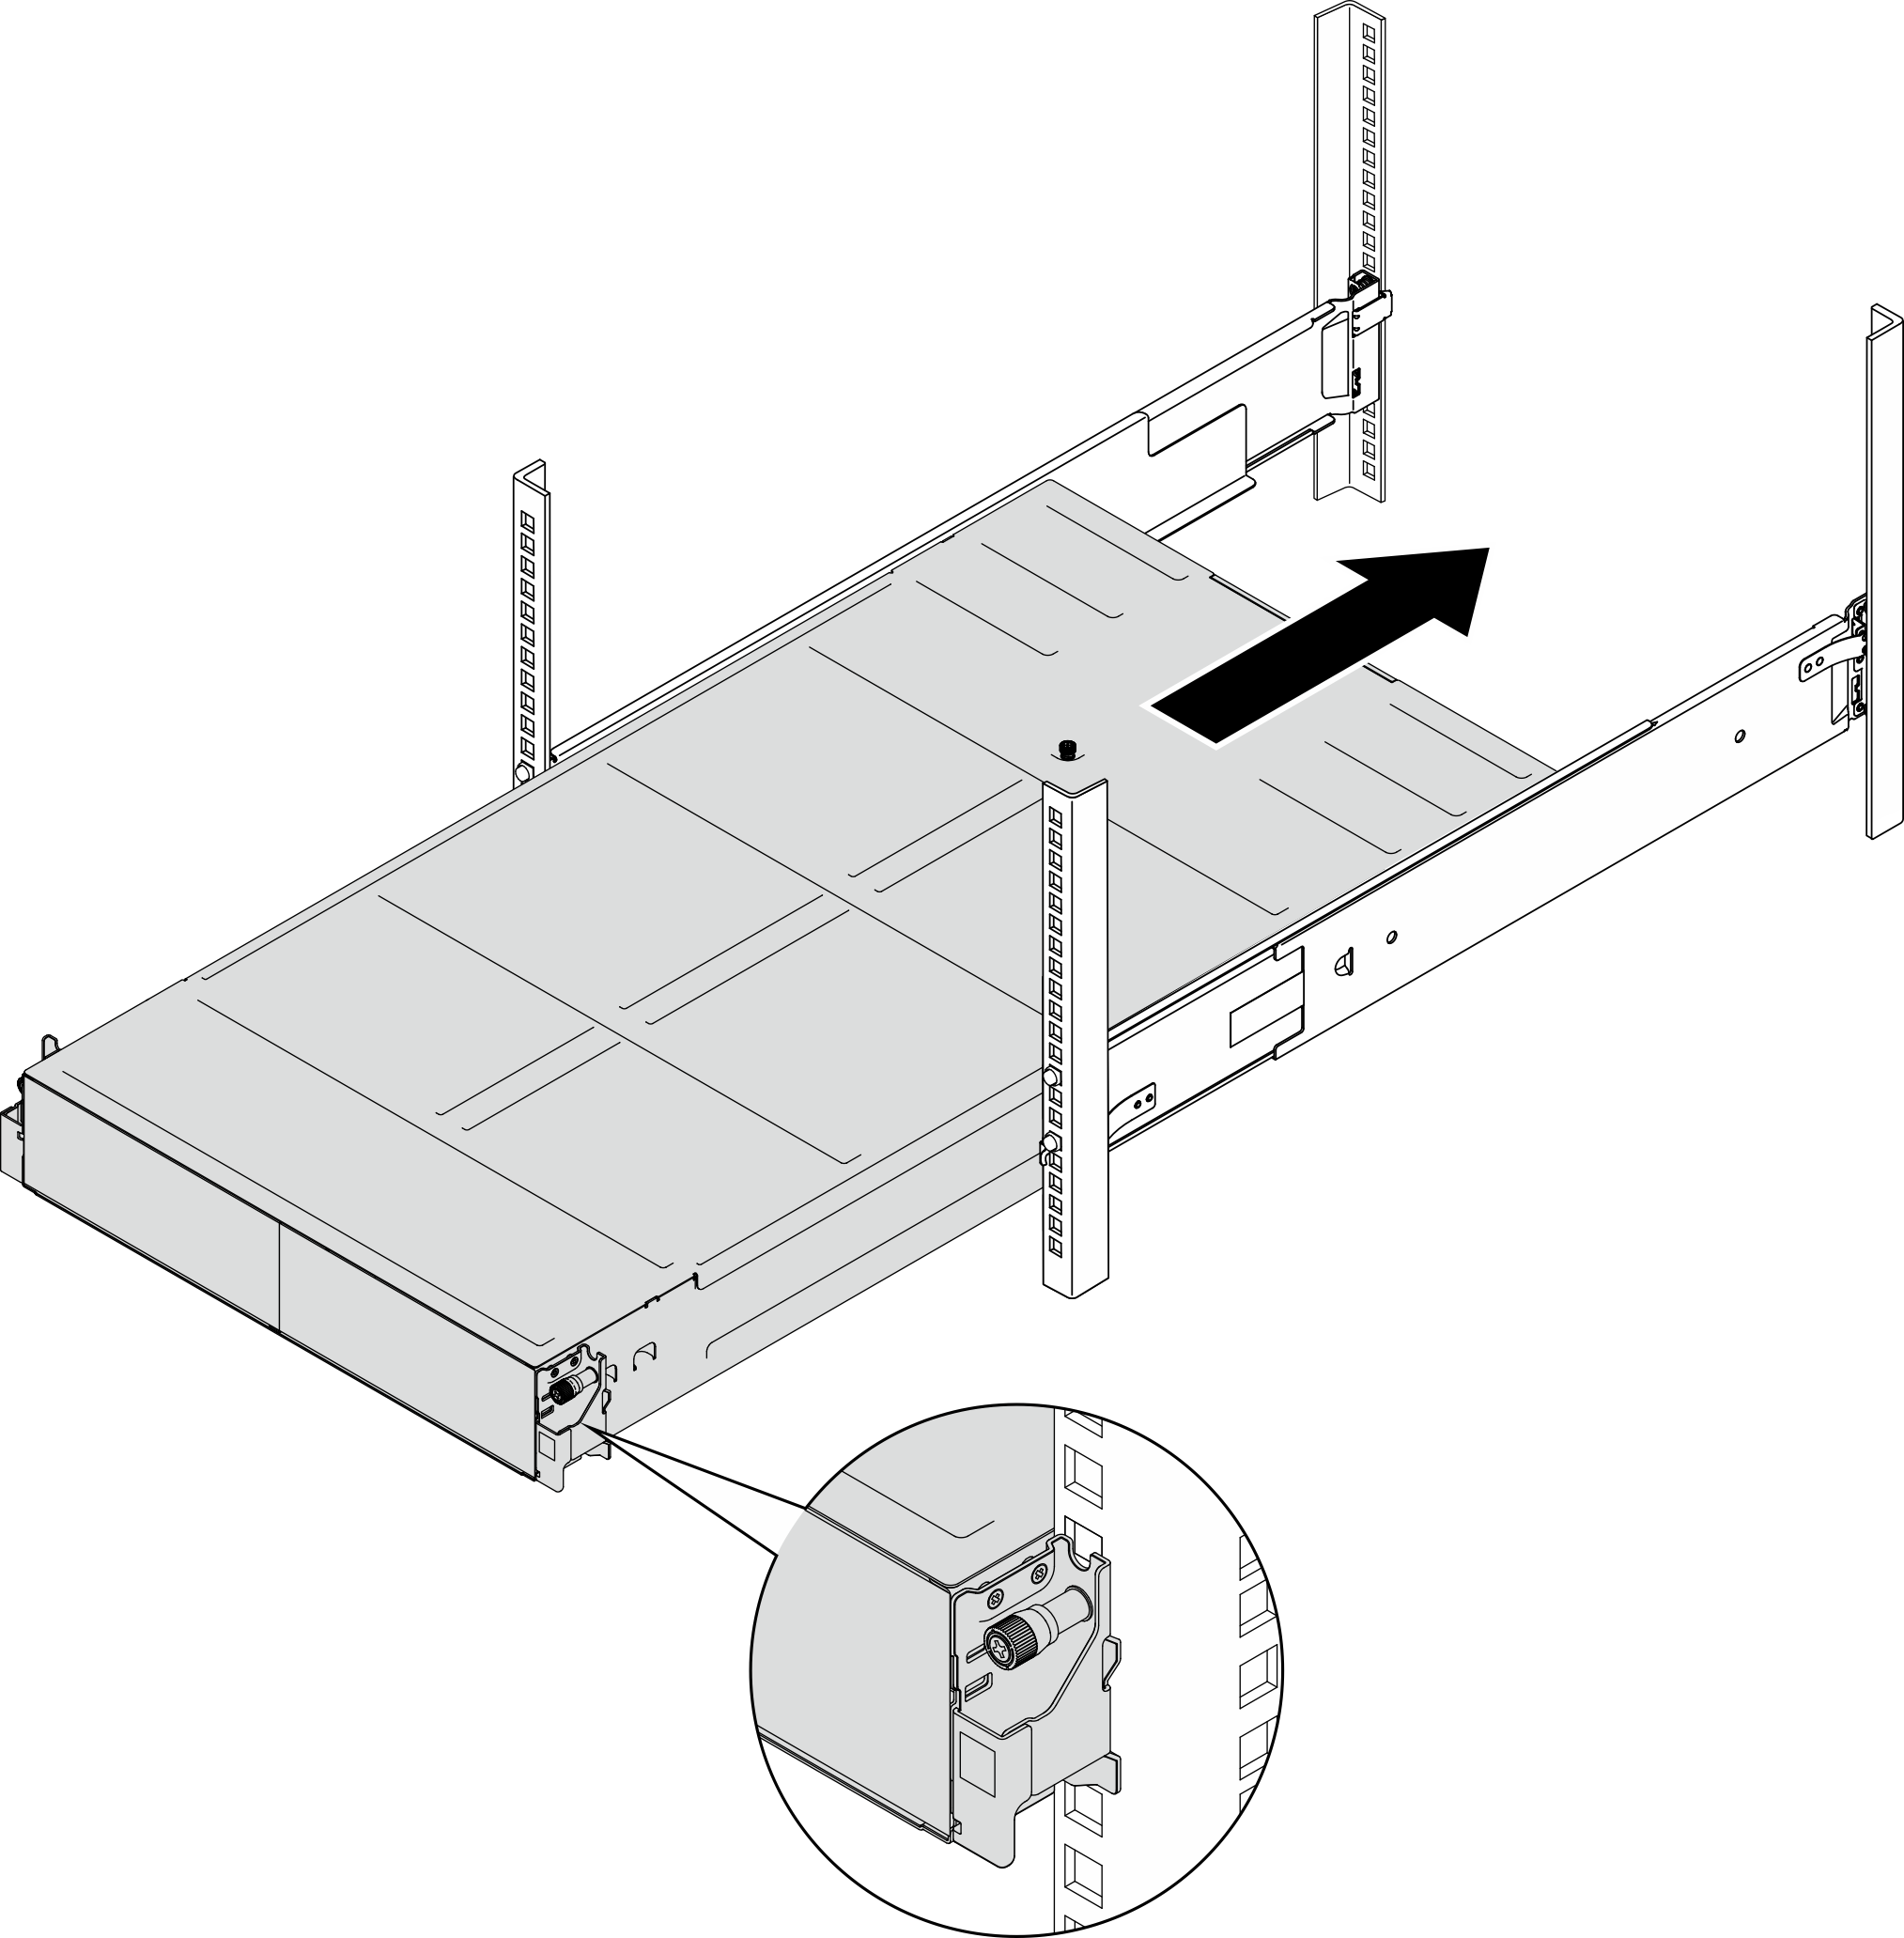
After the rails are installed successfully, complete the following steps to install the chassis to the rack.
CAUTION
Use safe practices when lifting the chassis.
Procedure
After you finish
- Reinstall each PSU slot with a PSU or PSU filler (see Install a hot-swap power supply and Installation of a PSU filler).
- Reinstall the nodes into the chassis.For the procedures of installing a specific node, see the links below:
- SD530 V3: Install a node to the chassis
- SD550 V3: Install a node to the chassis
- SD535 V3: Install a node to the chassis
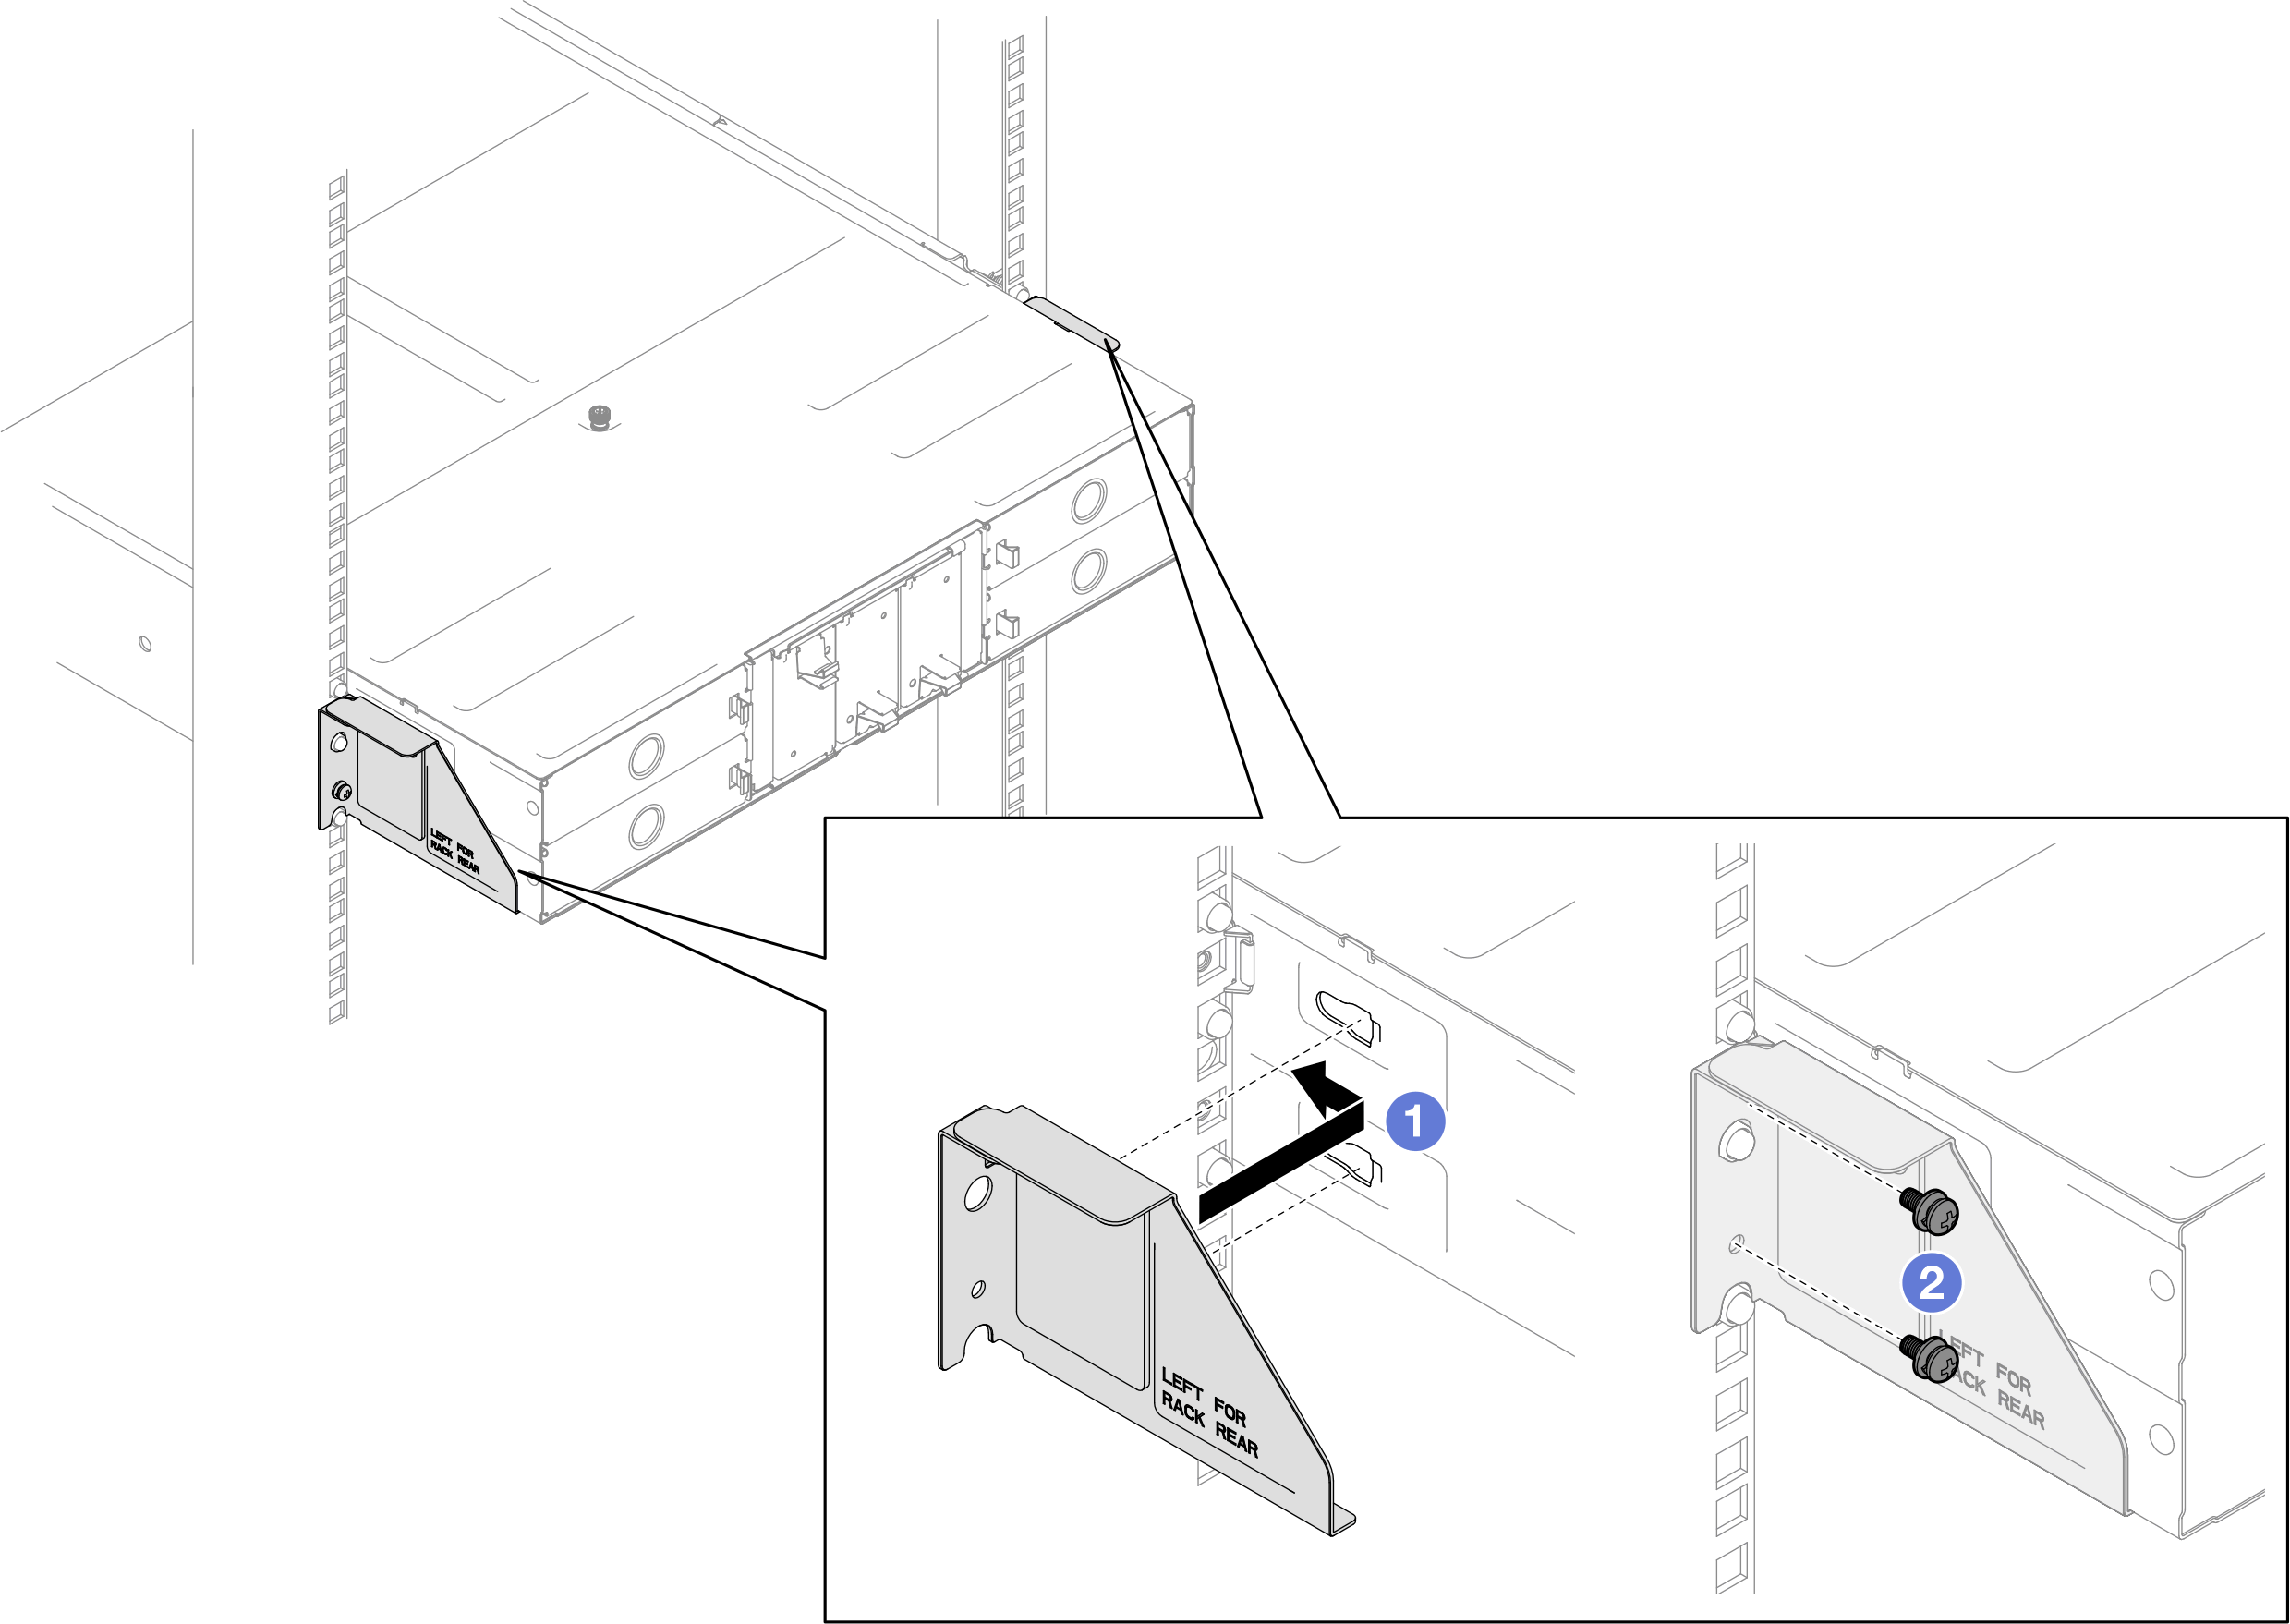
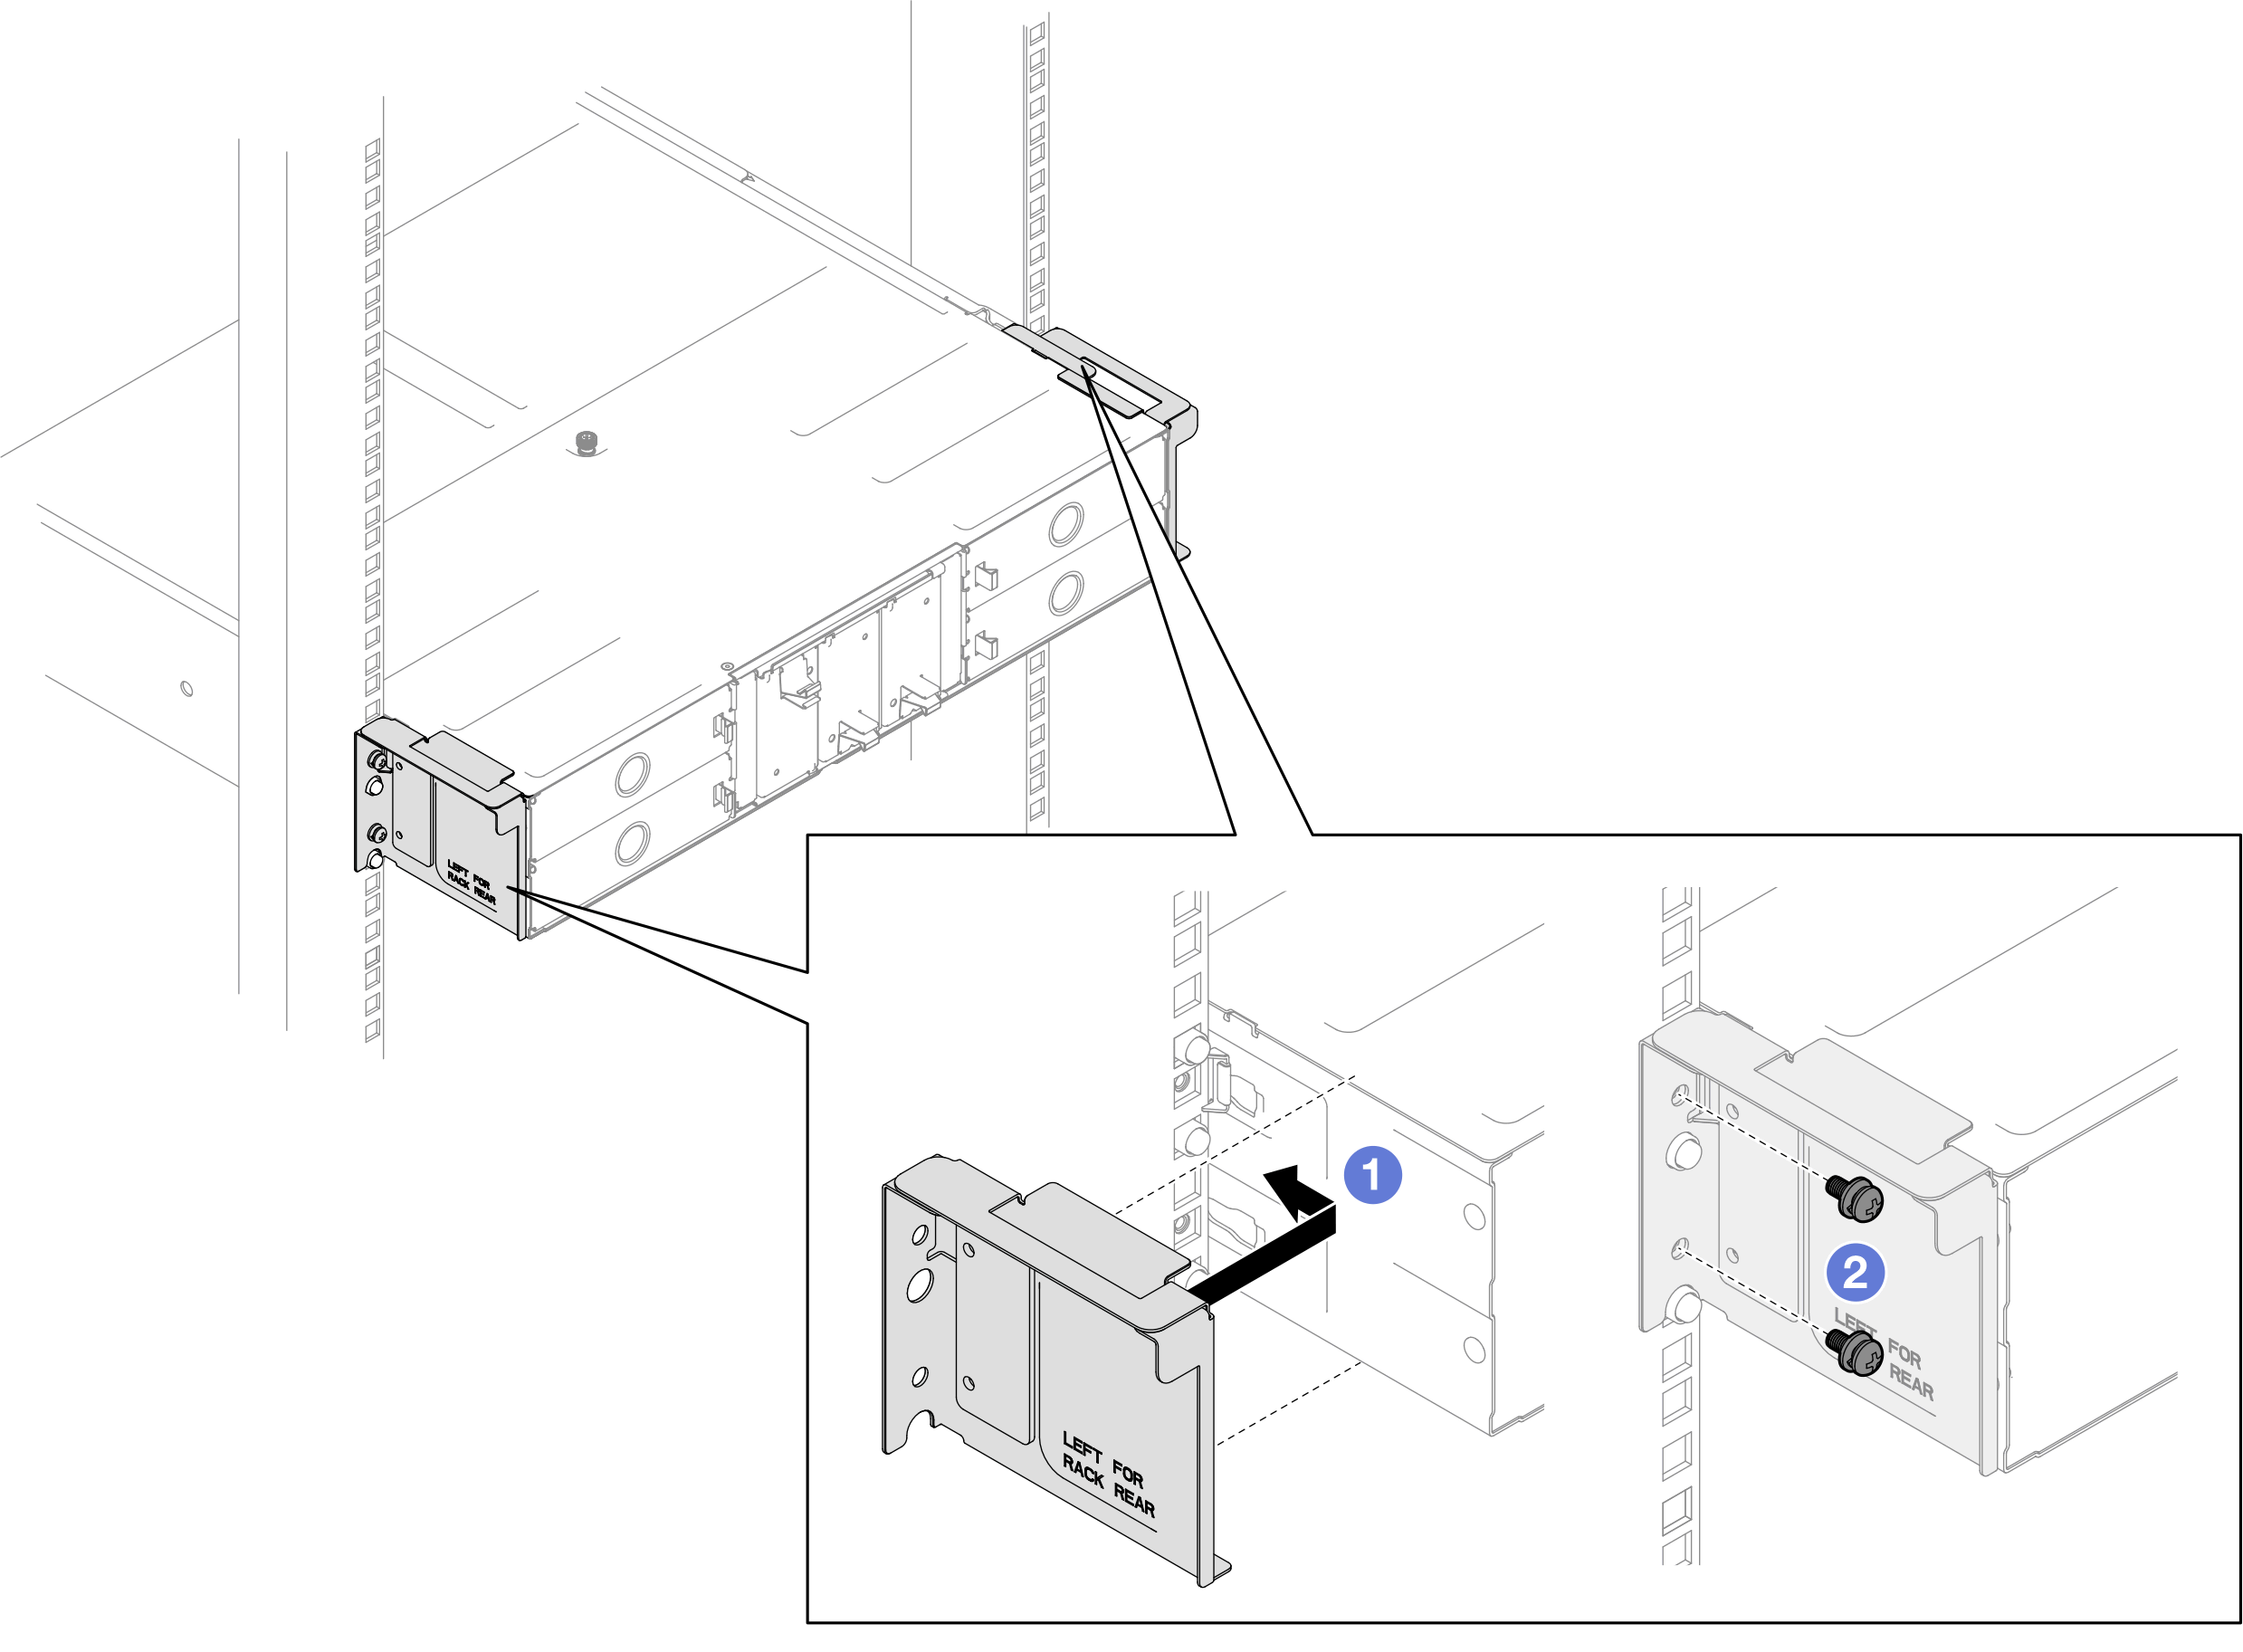
- If the chassis is to be shipped in the cabinet, install shipping brackets on the rear to secure the chassis to the rack.NoteFor reference, the torque required for the screws to be fully tightened/removed is 10.0+/- 0.5 lbf-in, 1.13+/- 0.05 N-M.Shipping brackets for 29-inch deep racks
 Align the shipping brackets with the guide holes on the rack and the chassis; then, insert the brackets and push it toward the front to engage the brackets in place.
 Tighten the screws to secure the shipping brackets to the chassis and the rack.
Figure 2. Installation of shipping brackets for 29-inch or 28.31-inch deep racks Shipping brackets for 29.5-inch deep racks
 Align the shipping brackets with the chassis; then, slide the brackets towards the rack post.
 Tighten the screws to secure the shipping brackets to the rack post.
Figure 3. Installation of shipping brackets for 29.5-inch deep racks
Demo video
Give documentation feedback
