Configuring network settings
To configure the network settings, do the following:
- Click
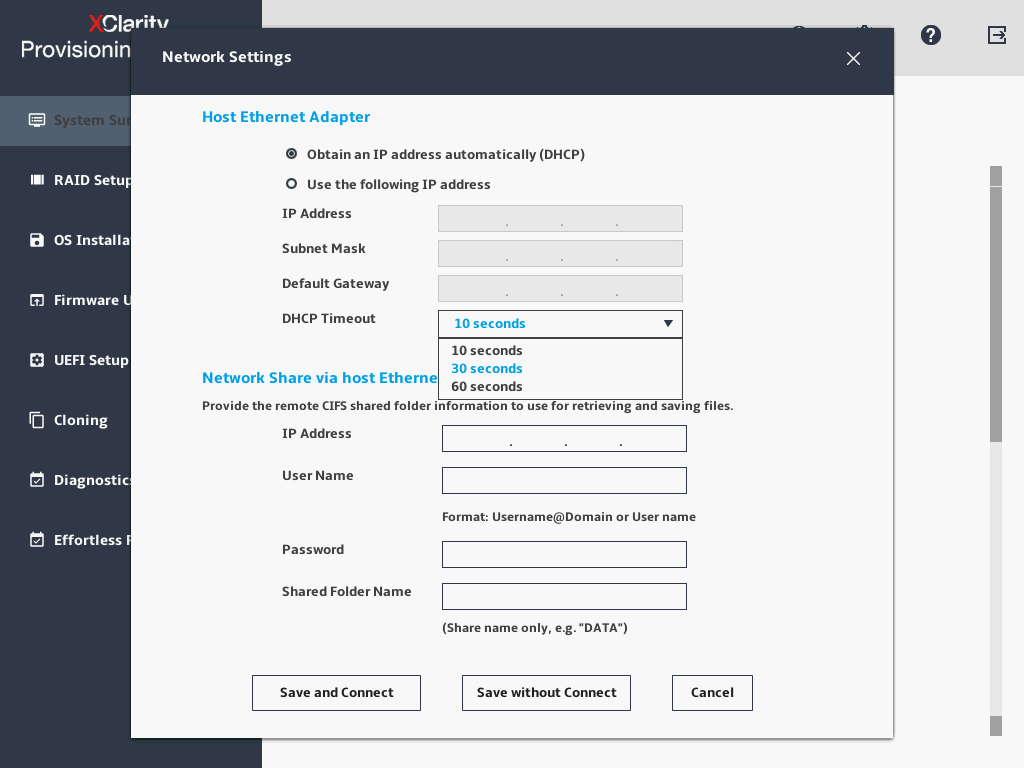
 on the top right corner of the LXPM V3 main interface. The following Network Settings window is displayed.Figure 1. Network Settings window
Follow the instructions on the screen to configure the network settings.
NoteIf DHCP fails to obtain IP address, select30 seconds or more in the DHCP Timeout field. - After configuring the network settings, click one of the following buttons according to your needs:
Save and Connect: Save the settings and connect to the shared network. If the network cannot be connected, an error message will be displayed.
Save without Connect: Save the settings without connecting to the shared network. When you click the button, a confirmation window is displayed. Click Continue to save the settings without connecting, or click Cancel to go back to the Network Settings window.
Cancel: Discard the changes and exit the Network Settings window.
Give documentation feedback