RAID Setup
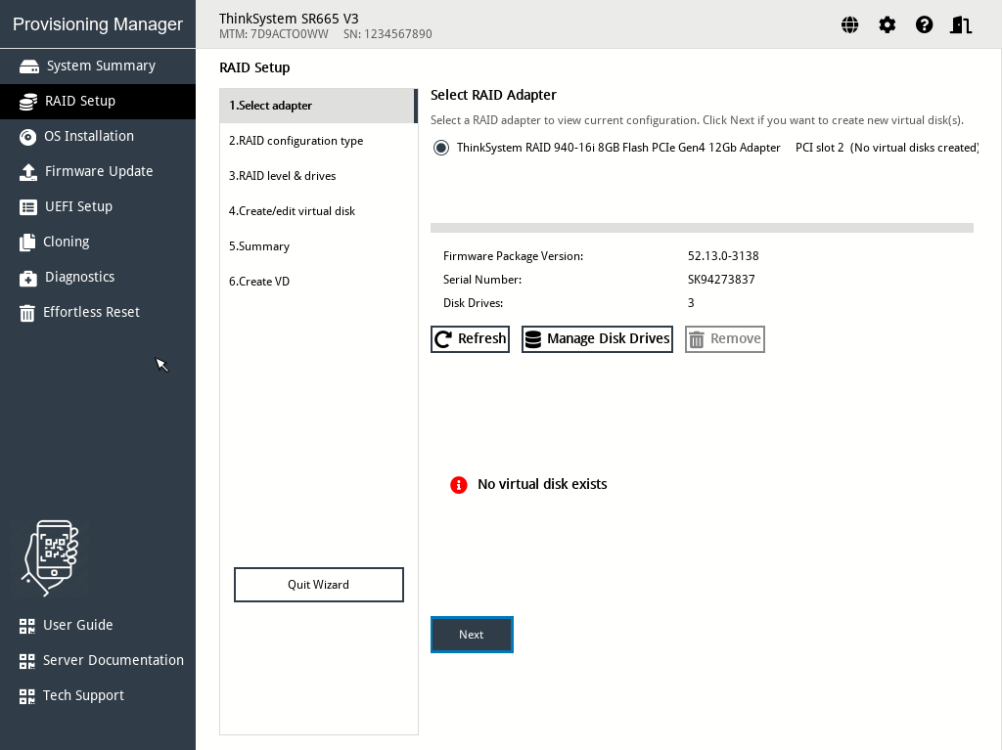
Click the RAID Setup tab in the left pane to enter the wizard for configuring RAID and disk settings for the installed RAID adapters. The following is the first interface for the wizard.
NVMe RAID Adapter initializes the HDD to JBOD mode with RAID0 default, so you can find every disk become the virtual disk with RAID0 when you delete all the virtual disks from the controller and reboot the host.
Lenovo 5330/9350 series adapters support HBA mode, RAID mode and Mixed mode (RAID and HBA devices can be used simultaneously). Mixed mode the default mode. It can create RAID array and functions a HBA adapter at the same time, so LXPM take it as UGOOD in RAID Setup. When one adapter set the HBA mode and Mixed mode/RAID mode for different channels, then LXPM will show the drive status as
HBA
(HBA mode) andUGOOD
(Mixed and RAID mode). When deleting volumes in one array, volumes must be deleted in the reverse order or volume creation.For Intel® VROC series RAID adapters, after you created arrays/volumes in RAID Setup, then they can be shown/deleted normally and the volumes also can be used to install the OS directly in OS Deployment without reboot host. But for firmware limitation of Intel® VROC adapters, you could not find the new arrays/volumes in HII of the UEFI Setup without rebooting the host.
- Select the RAID adapter you want to configure. The basic information and current configuration for the selected RAID adapter will be displayed. And you can do the following:
Click Refresh to update RAID adapter information.
Click Manage Disk Drives to view or change the drive status of the selected RAID adapter.
Click Remove to delete the disk array or virtual disks of the selected RAID adapter. In the Manage Disk Drives interface, all the drives connected to the selected RAID adapter are listed. You can change the drive status according to your needs. Then, click Save and save changes and return to the
RAID Setup - Select RAID Adapter
interface or click Cancel to discard changes and return to theRAID Setup - Select RAID Adapter
interface.
- Select RAID configuration type. Click RAID configuration type to enter the
RAID Setup - Select RAID configuration type
interface and do one of the following:Select Simple configuration and go to step 3.
Select Advanced configuration and select Create new disk array and virtual disk in the drop-down list box. Then, go to step 4.
Select Advanced configuration and select Use free capacity on the existing disk array in the drop-down list box. Then, go to step 5.
Set up RAID and level and hot spare. Click Next to enter the
RAID Setup - Set RAID level and hot spare
interface. Select the RAID level. Then go to step 7.Select RAID level and drives. Click Next to enter the
Select RAID level and drives
interface. Select the RAID level and the drives for the new disk array, and set the role for each drive. Then, go to step 6.Select disk array. Click Next to enter the
RAID Setup - Select disk array
interface. All the disk arrays that have free space will be displayed. Select a disk array for the new virtual disk. Then, go to step 6.Create and edit virtual disk. Click Next to enter the
RAID Setup - Create and Edit Virtual Disk
interface. You can create new virtual disks. Then, you can edit or remove the new virtual disks. Follow the instructions on the screen to do the configuration.Click Next to enter the
RAID Setup - Verify settings
interface. Double check the settings and click Next. A confirmation window is displayed.Click Yes to enter the
RAID Setup - Creating Virtual Disk
interface. The virtual disk creation result is displayed.Click Next to return to the first interface of the wizard and view the current configuration of the selected RAID adapter.