Install the rear cable cover
Use this information to install the rear cable cover.
Before you install the rear cable cover:
- Read the following section(s) to ensure that you work safely.
If the PCIe#2-B cable is connected to the rear riser assembly, make sure it is routed under the PCIe#1-A cable through the gap between the two front riser power connectors.
If the PCIe#1-A cable is connected to the rear riser assembly, make sure it is routed above the PCIe#2-B cable through the gap between the two front riser power connectors.
- When both riser assemblies are installed, make sure the front riser auxiliary power cable is looped back into the gap between the two front riser power connectors, and routed above the PCIe#2-B cable.Figure 1. Routing PCIe#1-A, PCIe#2-B and the front riser auxiliary power cable

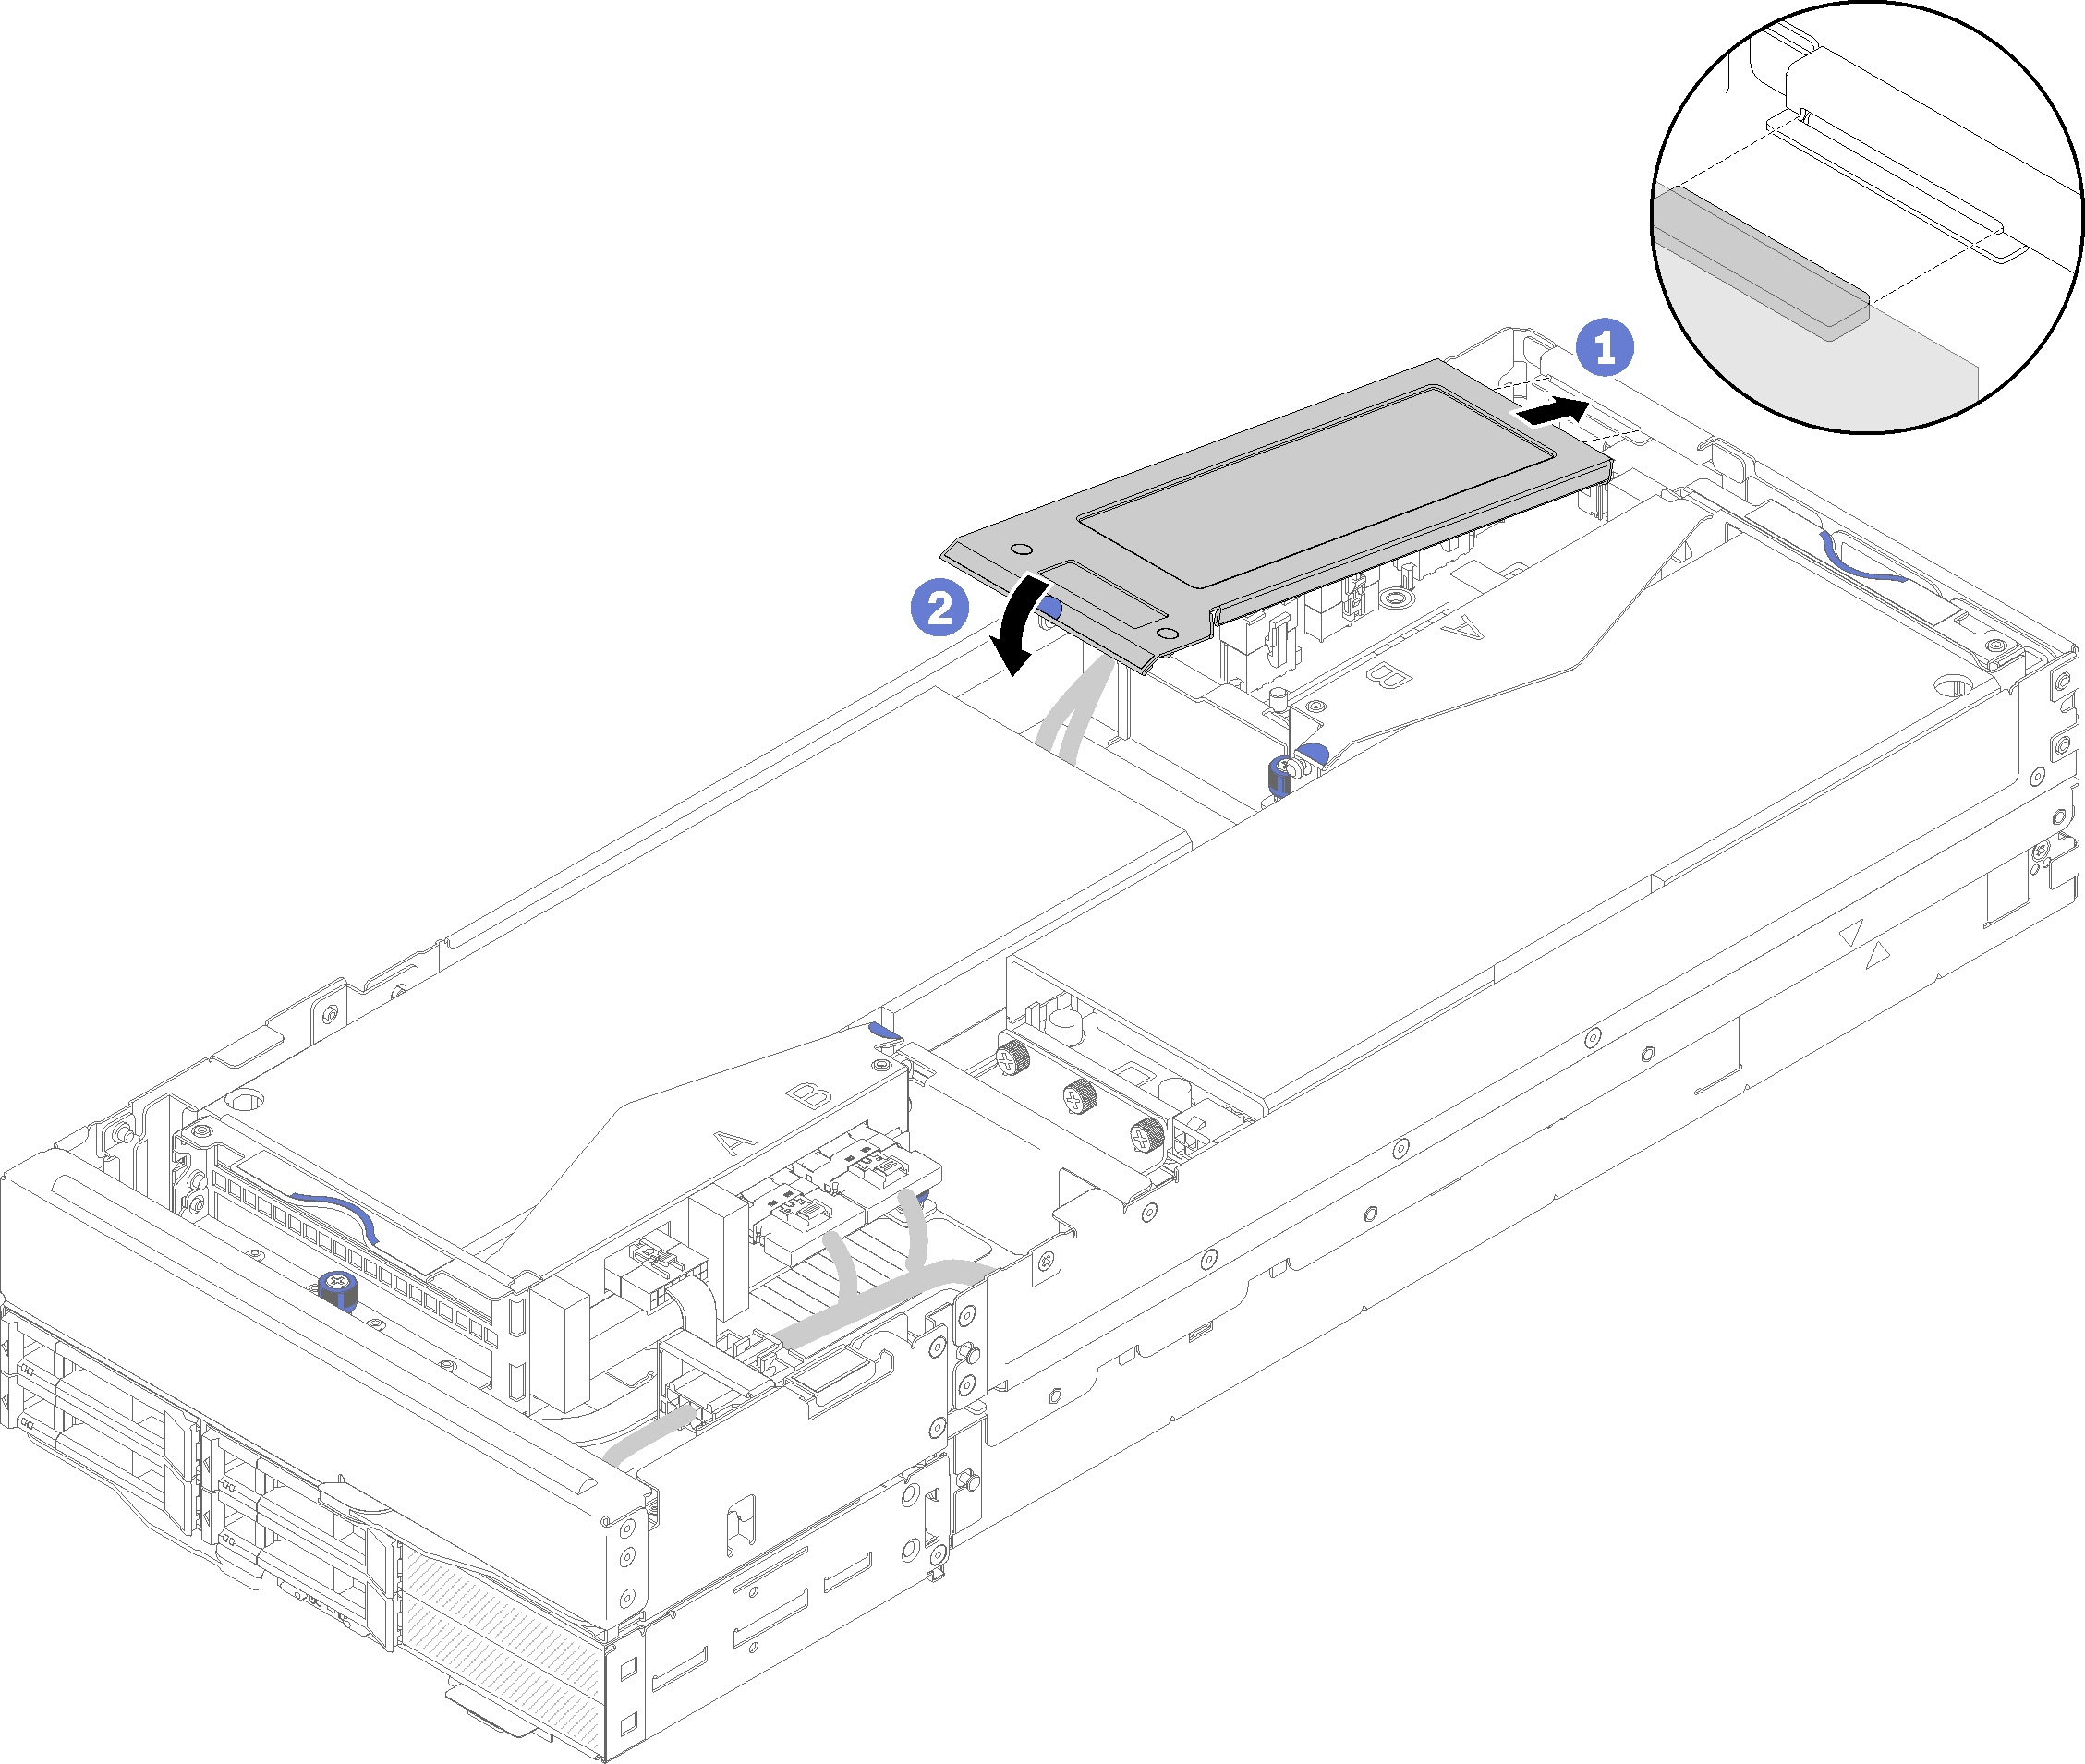
Complete the following steps to install the rear cable cover.
- Align the side of the rear cable cover to the slot on the end of the expansion node. Figure 2. Rear cable cover installation
After you install the rear cable cover, complete the following steps:
Install the PCIe expansion node assembly into the enclosure (see Install the compute-expansion node assembly into the enclosure).
Power on the compute node.
Give documentation feedback