Remove the KVM breakout module
Use this information to remove the breakout module.
Before you remove the KVM breakout module:
- Read the following section(s) to ensure that you work safely.
Turn off the corresponding compute node that you are going to perform the task on.
Remove the node (see Remove a compute node from the enclosure).
Remove the compute node cover (see Remove the compute node cover).
Remove the air baffle (see Remove the air baffle).
Complete the following steps to remove the KVM breakout module.
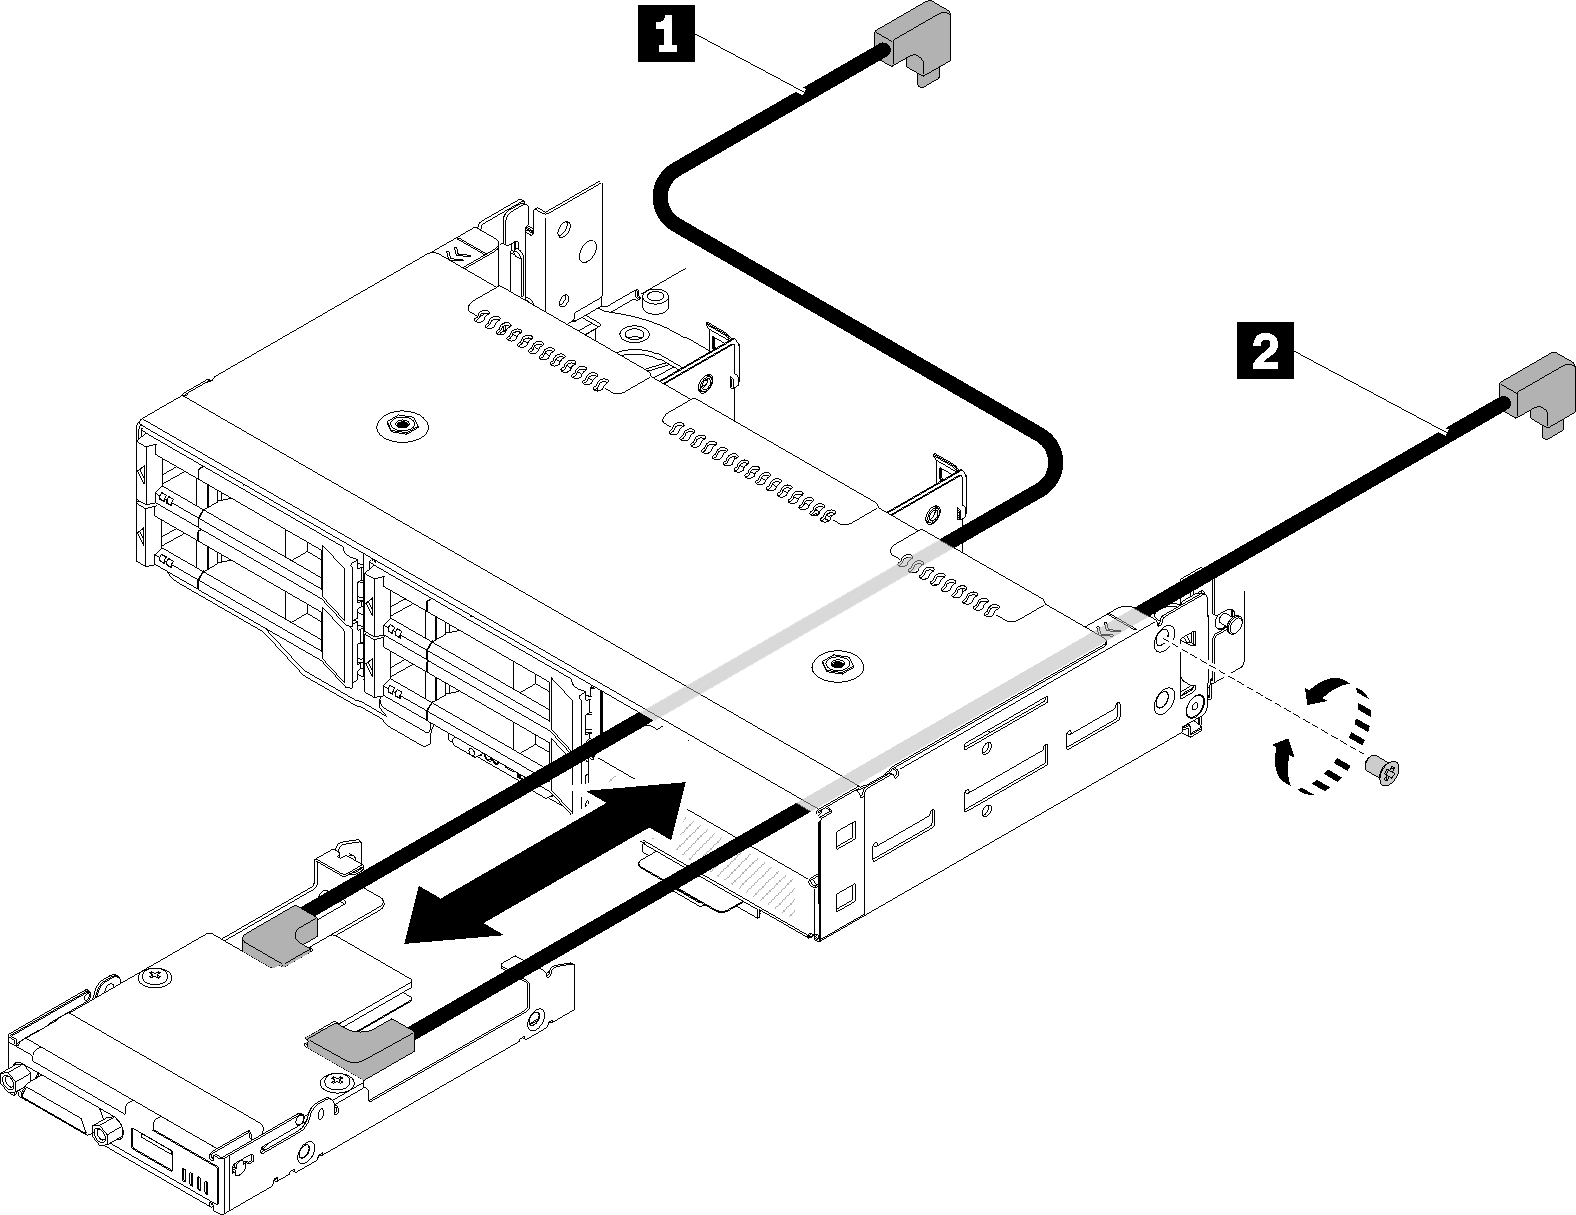
The right KVM breakout module (for four 2.5-inch-drive model)
Figure 1. Right KVM breakout module removal


| 1 Long signal cable | 2 Short signal cable |
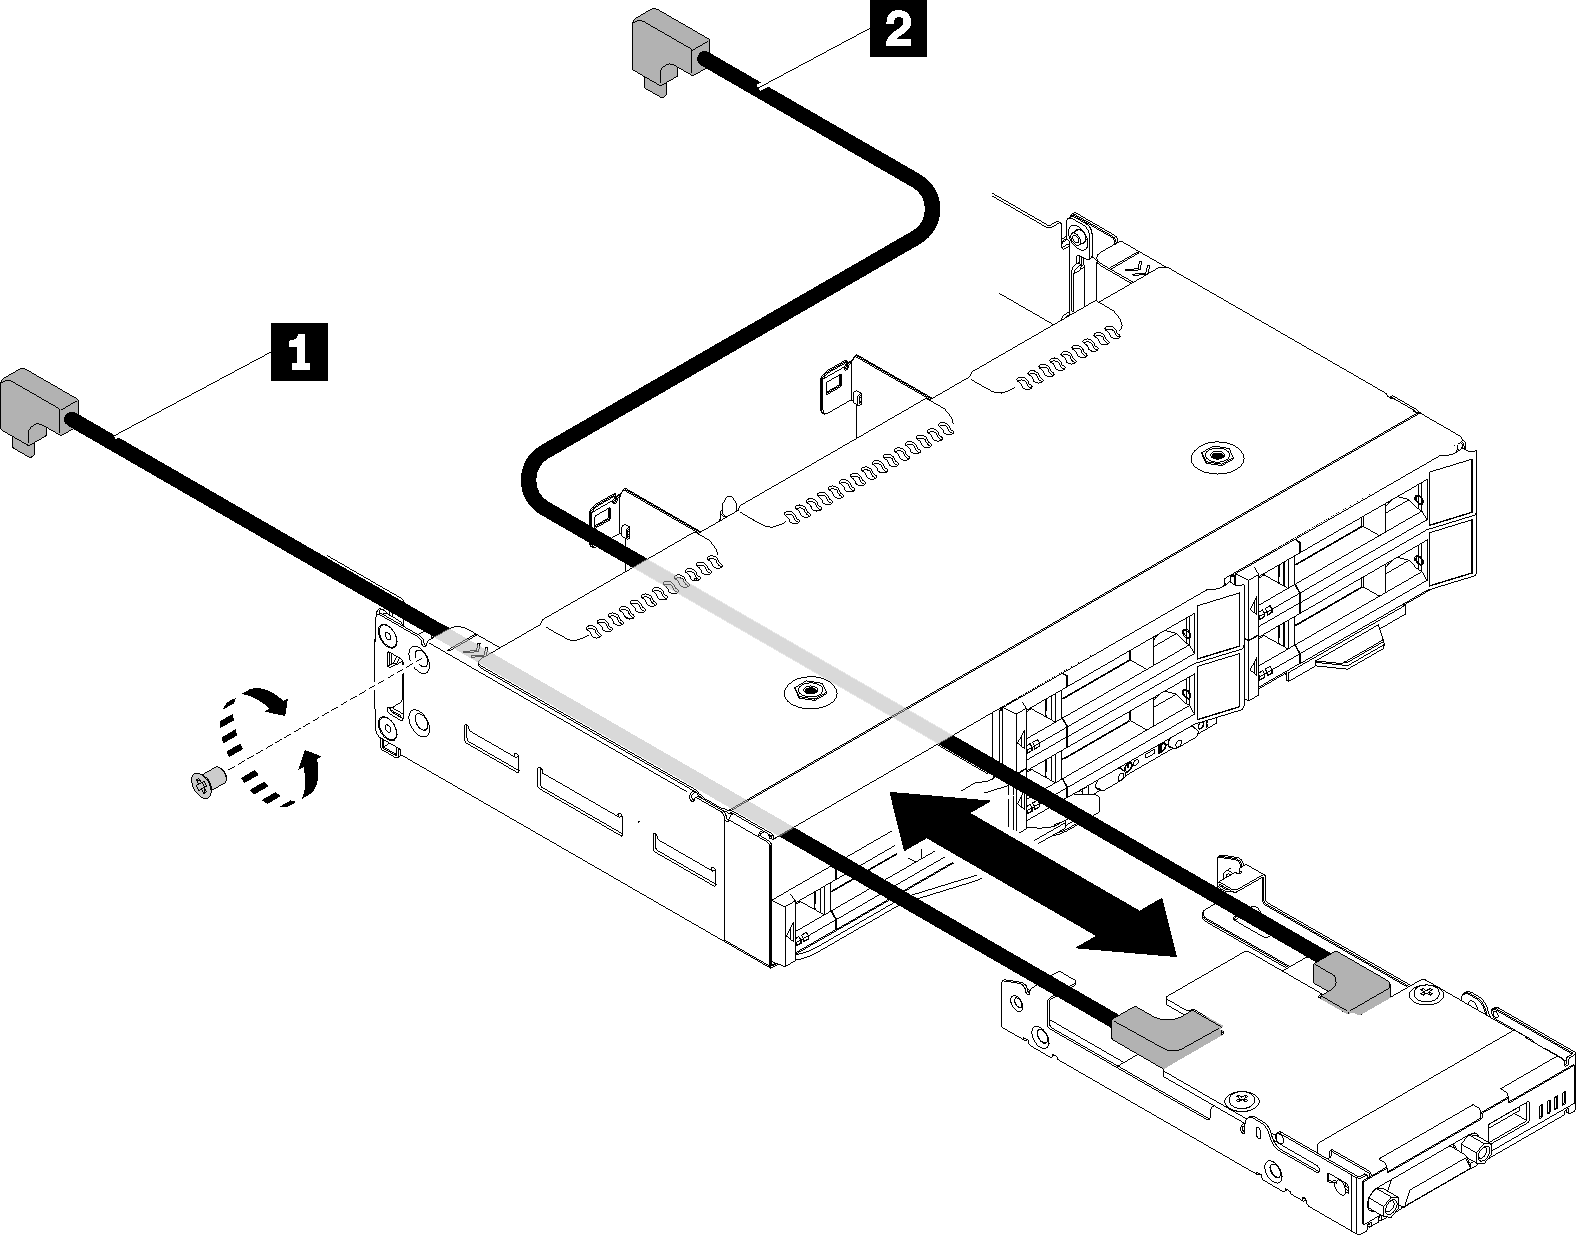
The left KVM breakout module (for six 2.5-inch-drive model)
Figure 2. Left breakout module removal


| 1 Short signal cable | 2 Long signal cable |
If you are instructed to return the component or optional device, follow all packaging instructions, and use any packaging materials for shipping that are supplied to you.
Demo video
Give documentation feedback