Remove the PCIe expansion node from a compute node
Use this information to remove the PCIe expansion node from the compute node, to which it is installed.
Before you remove the PCIe expansion node from the compute node:
- Read the following section(s) to ensure that you work safely.
If the compute-expansion node assembly is installed in the enclosure, remove it (see Remove the compute-expansion node assembly from the enclosure).
Complete the following steps to remove the PCIe expansion node from the compute node.
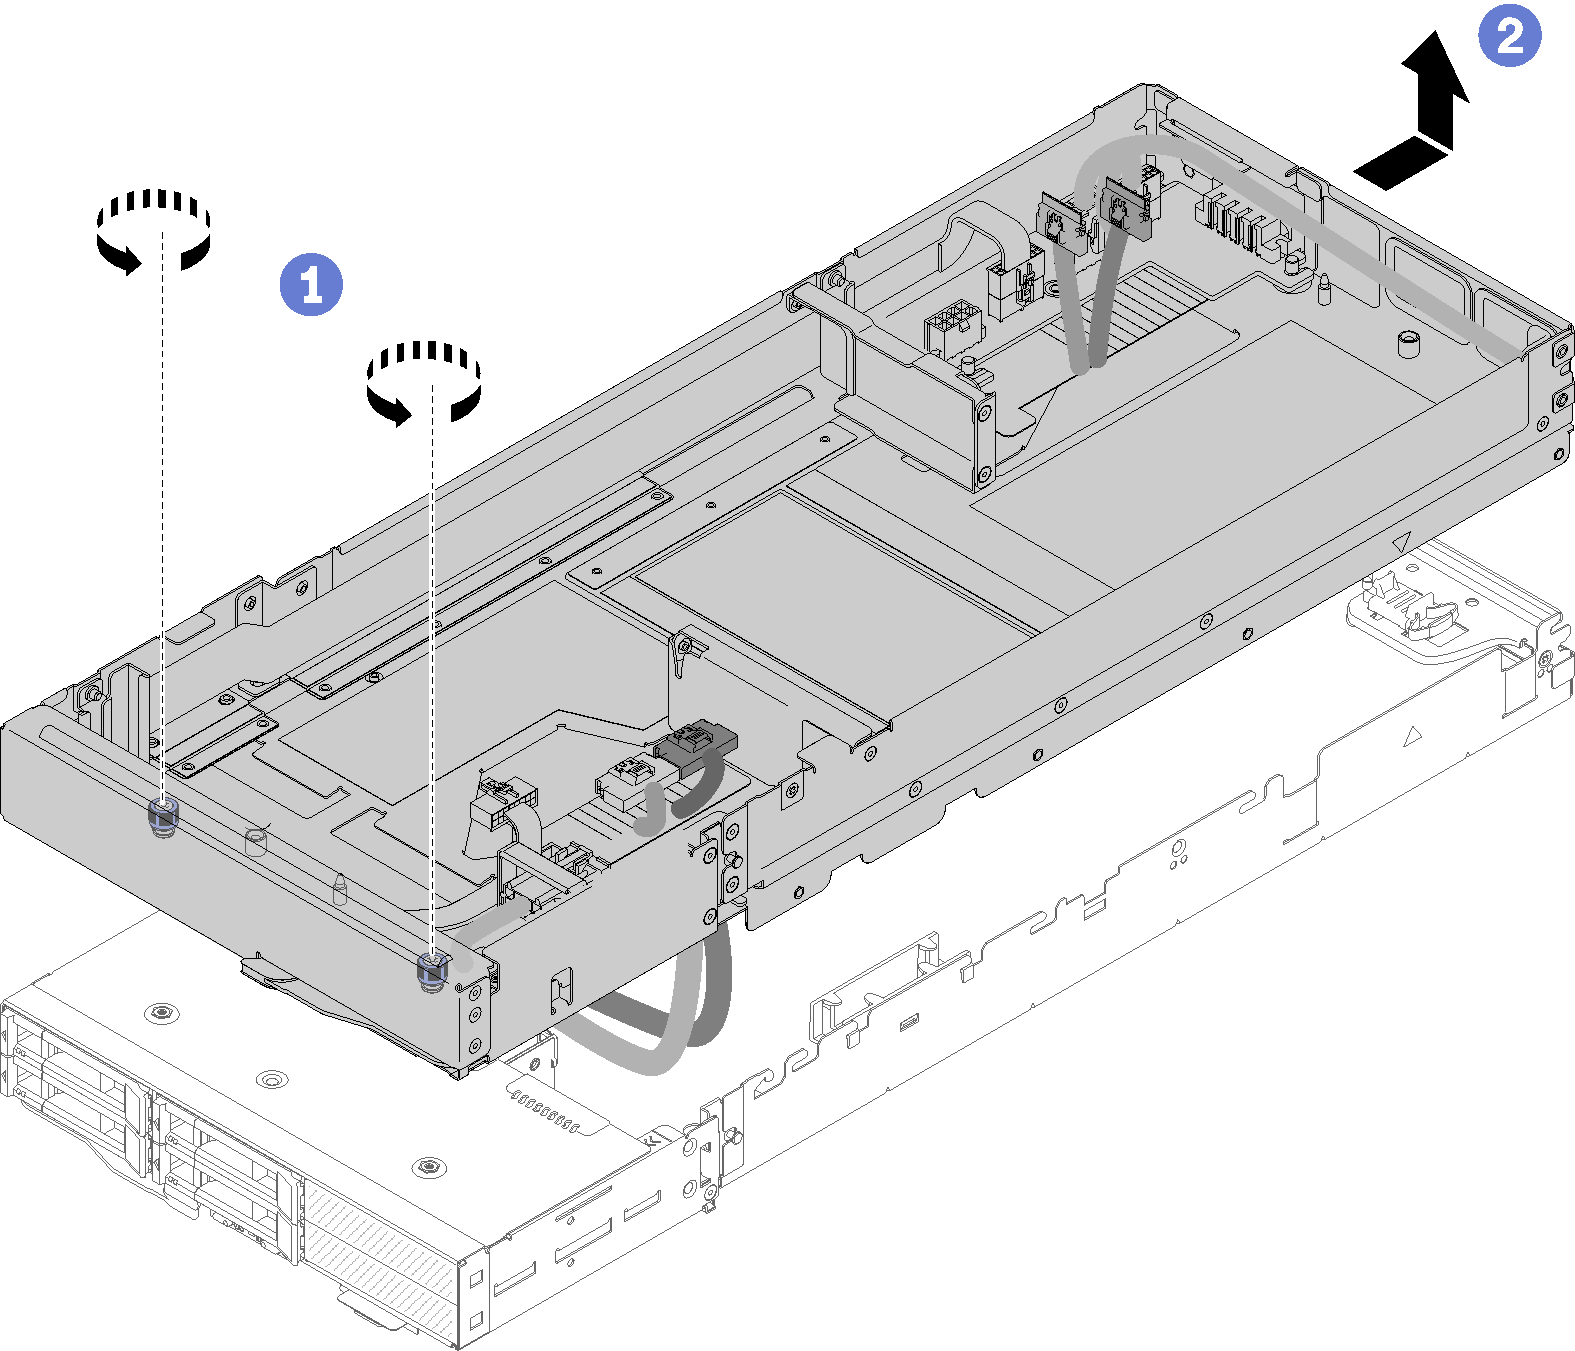
- Loosen the two captive screws near the front of the expansion node; then, slide the expansion node slightly backward to disengage it from the compute node.Figure 1. Disengaging the expansion node from the compute node
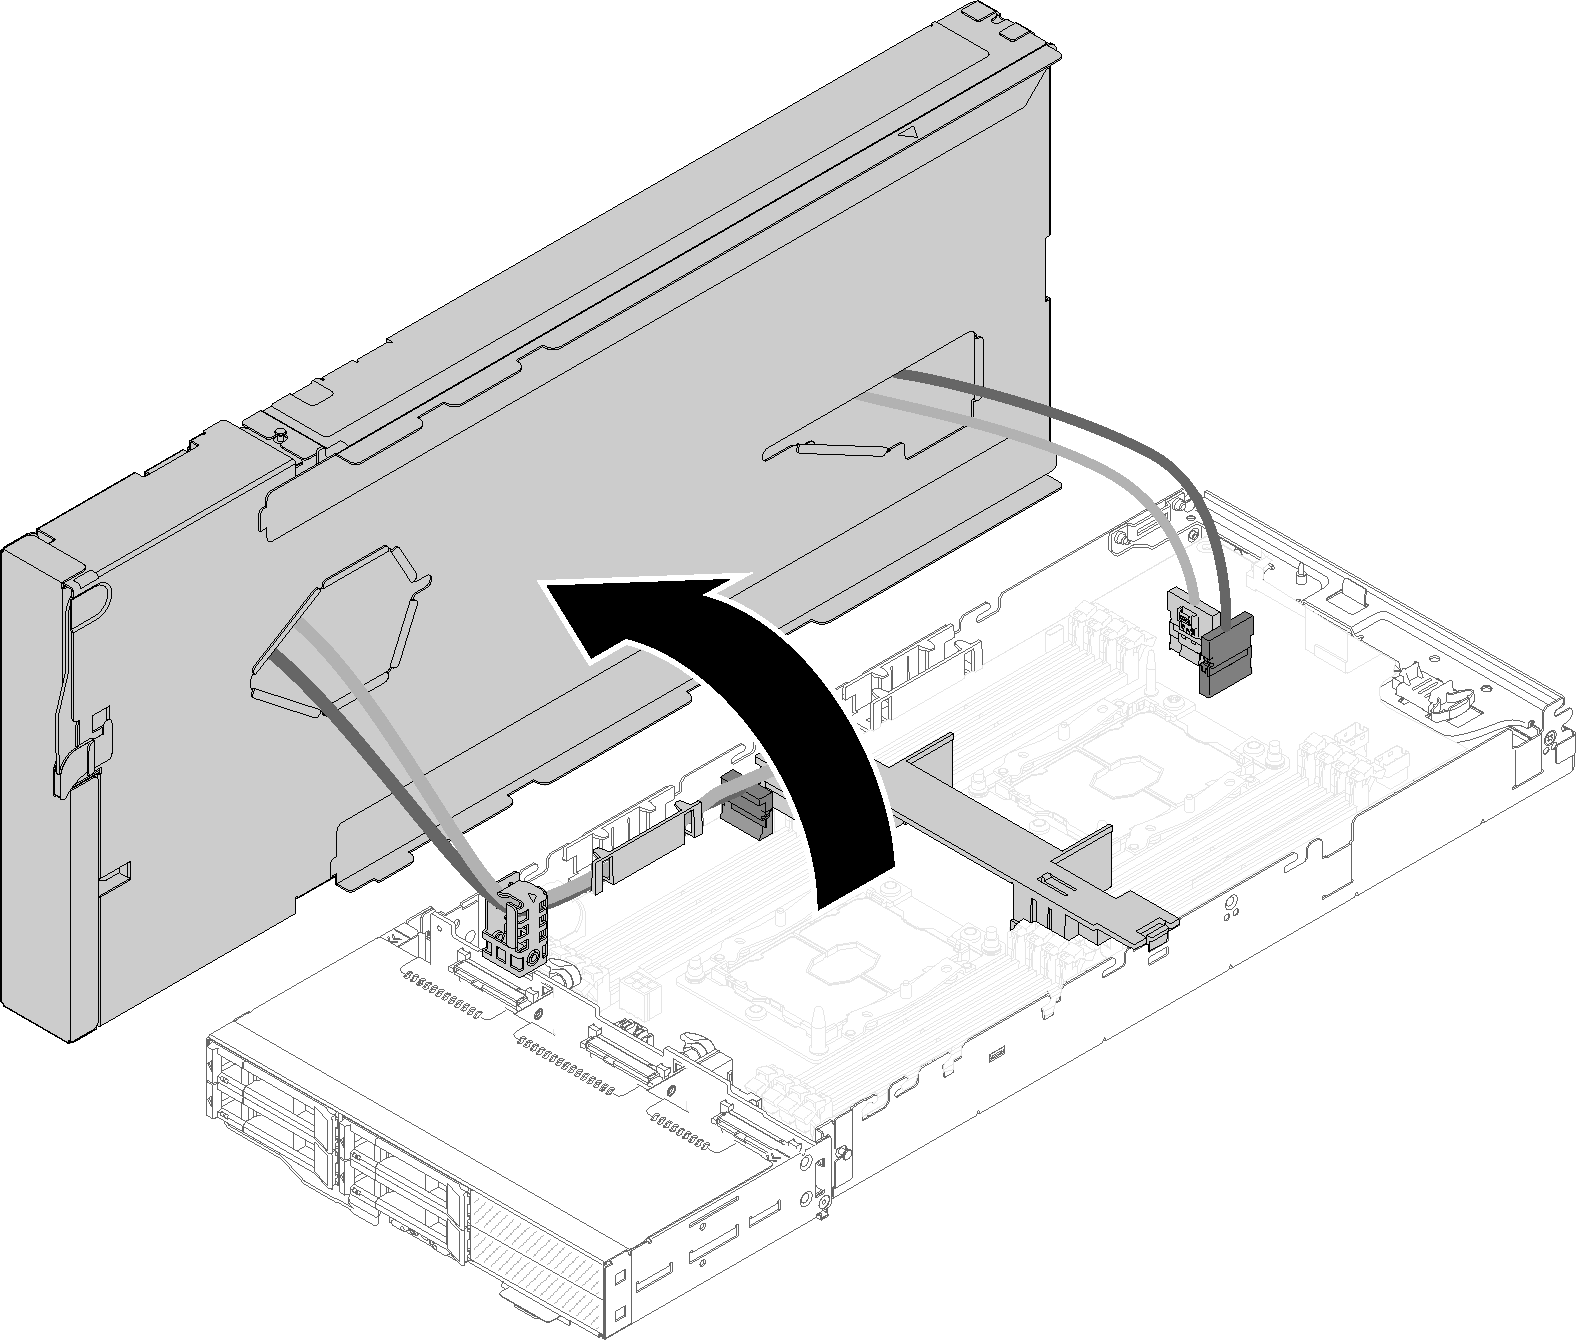
- Pivot the disengaged expansion node with the bottom next to the compute node as illustrated.Figure 2. Pivoting the expansion node away from the compute node
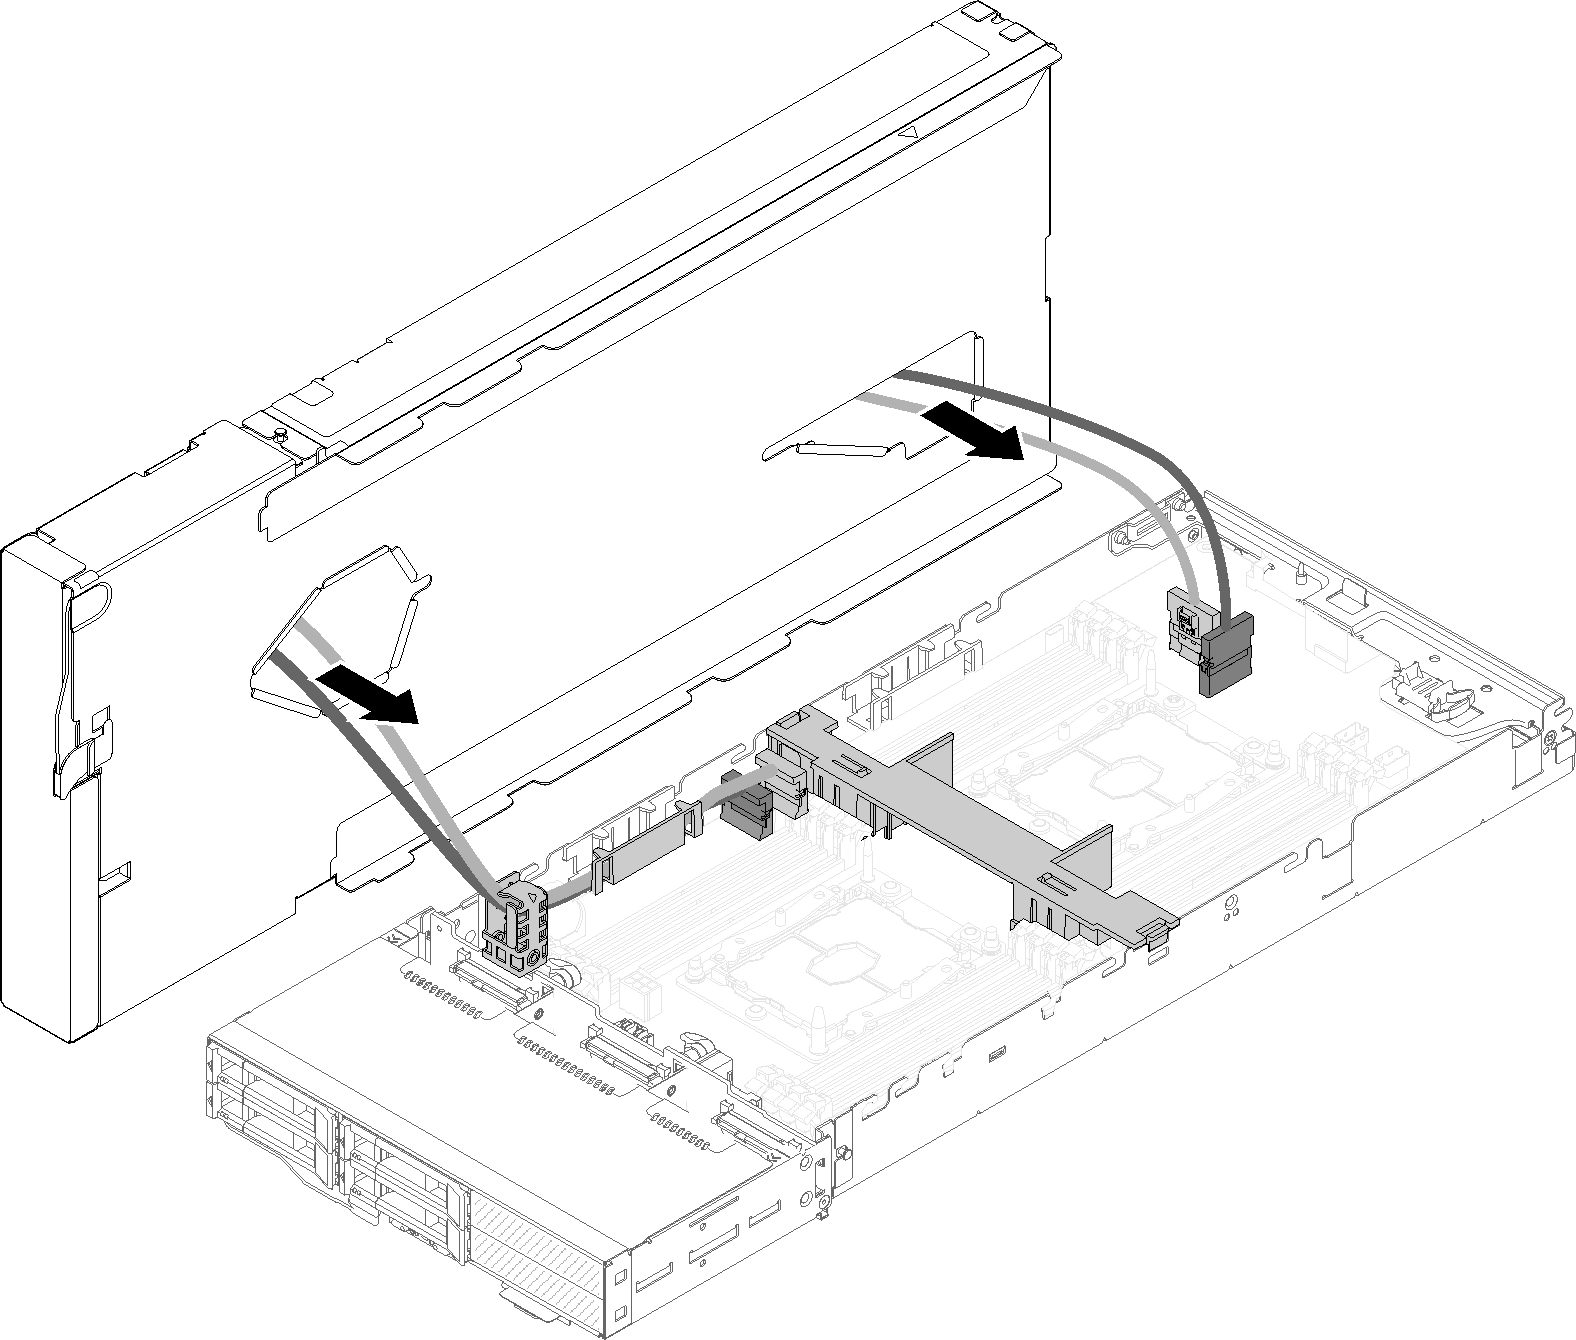
- Remove the four PCIe cables from the underside of the expansion node.Figure 3. Removing the four PCIe cables from the underside of the expansion node
- If necessary, complete the following steps to remove the cable bracket from the compute node:
- Remove the screw and the cable bracket.Figure 4. Cable bracket removal from the compute node
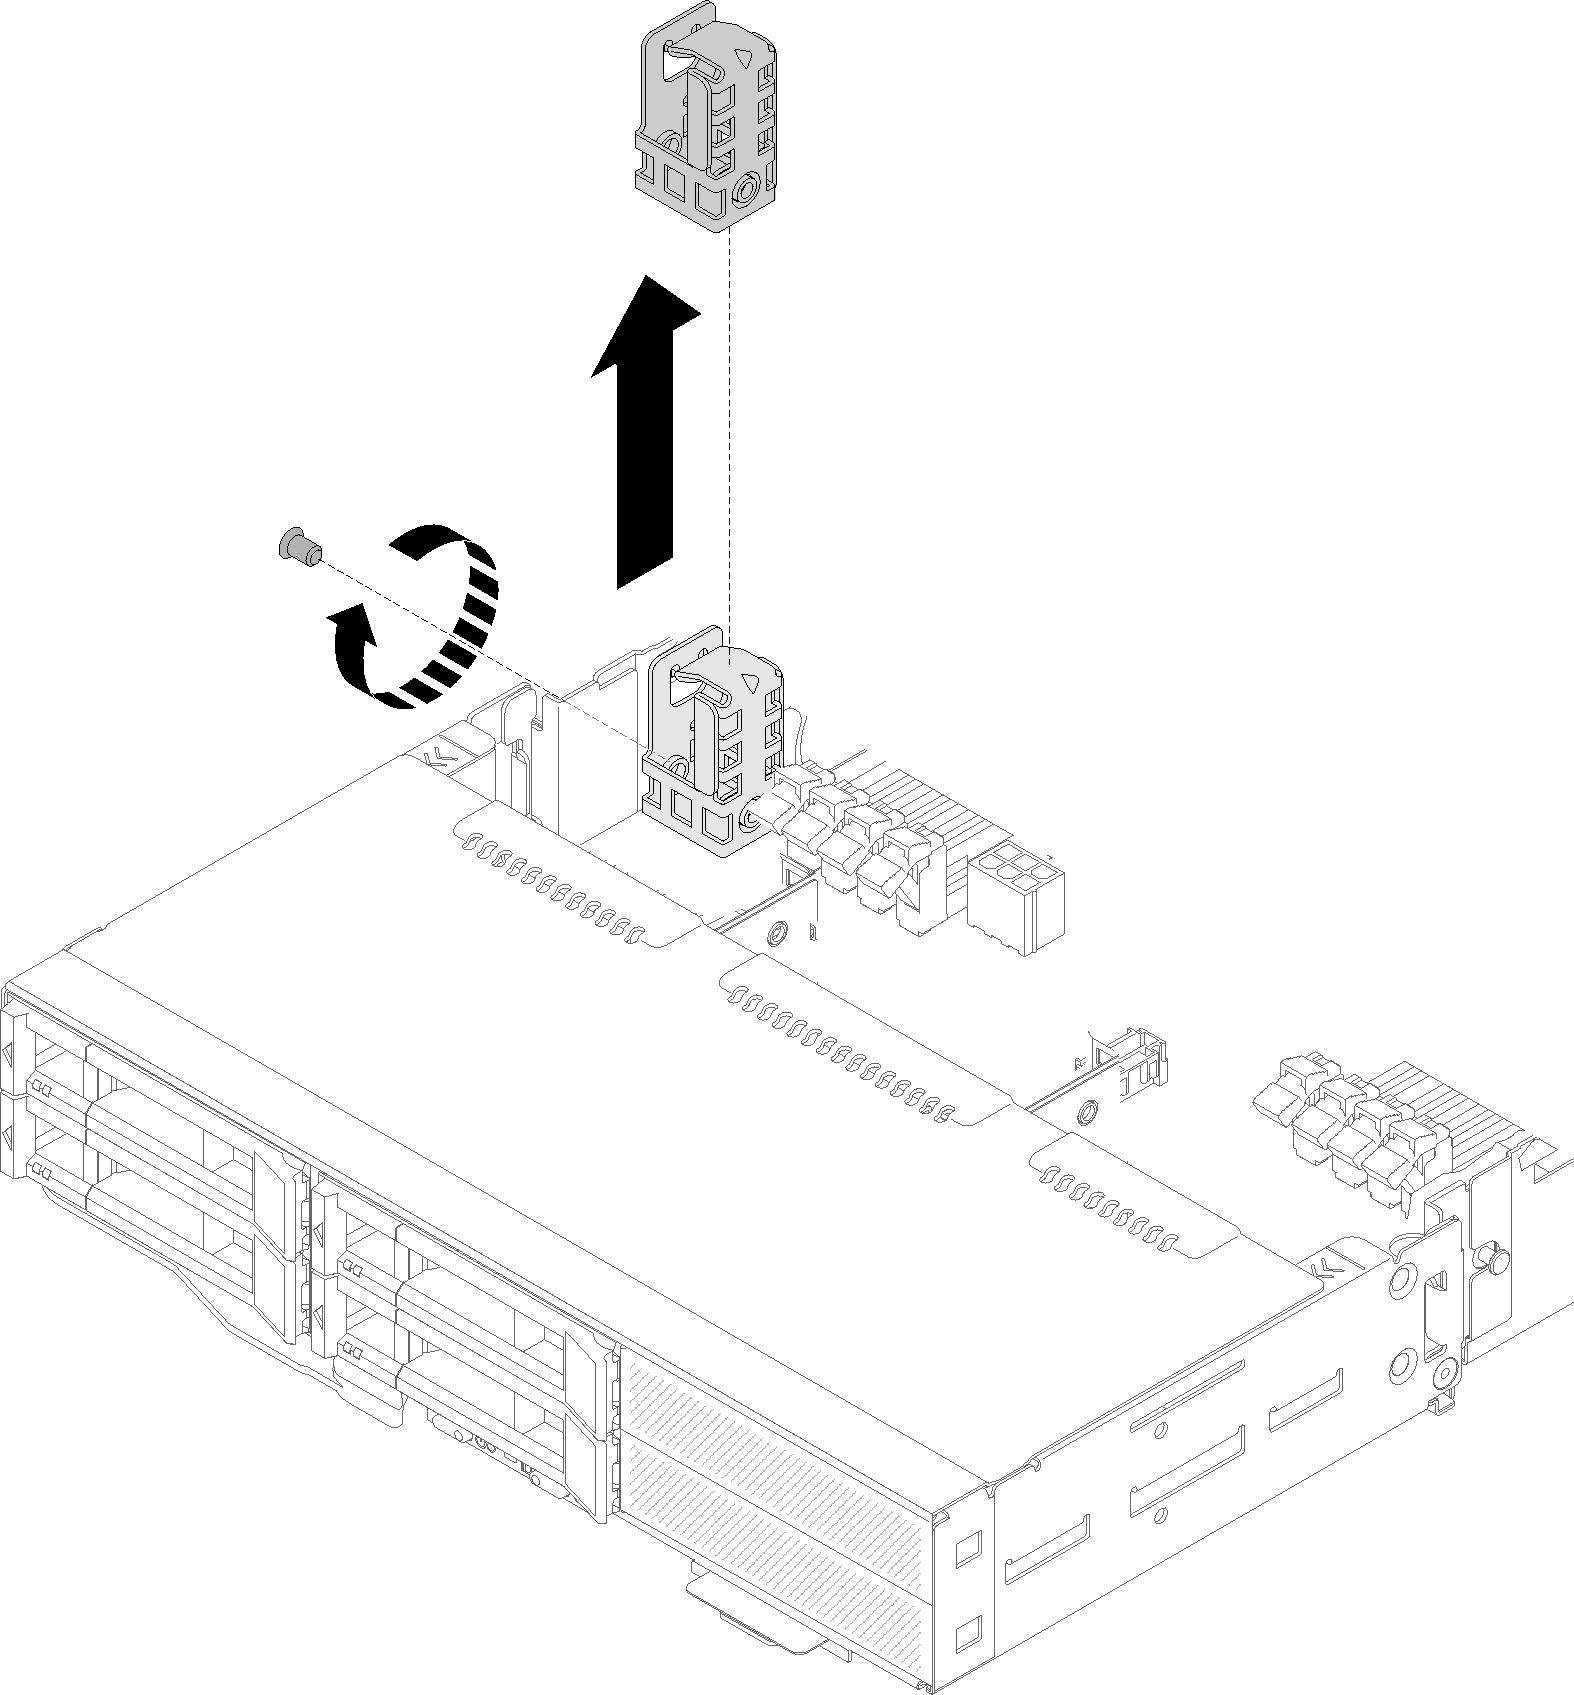
- Remove the screw and the cable bracket.
If you are instructed to return the component or optional device, follow all packaging instructions, and use any packaging materials for shipping that are supplied to you.
Give documentation feedback