Remove an M.2 drive
Follow instructions in this section to remove an M.2 drive.
About this task
To avoid potential danger, make sure to read and follow the safety information.
Attention
Read Installation Guidelines and Safety inspection checklist to make sure that you work safely.
Depending on your configuration, follow the corresponding procedures below for proper removal procedure.
Remove an M.2 drive from the system board
Procedure
- Make preparations for this task.
- Locate the M.2 connectors on the system board.Figure 1. Location of the M.2 bays on the system board
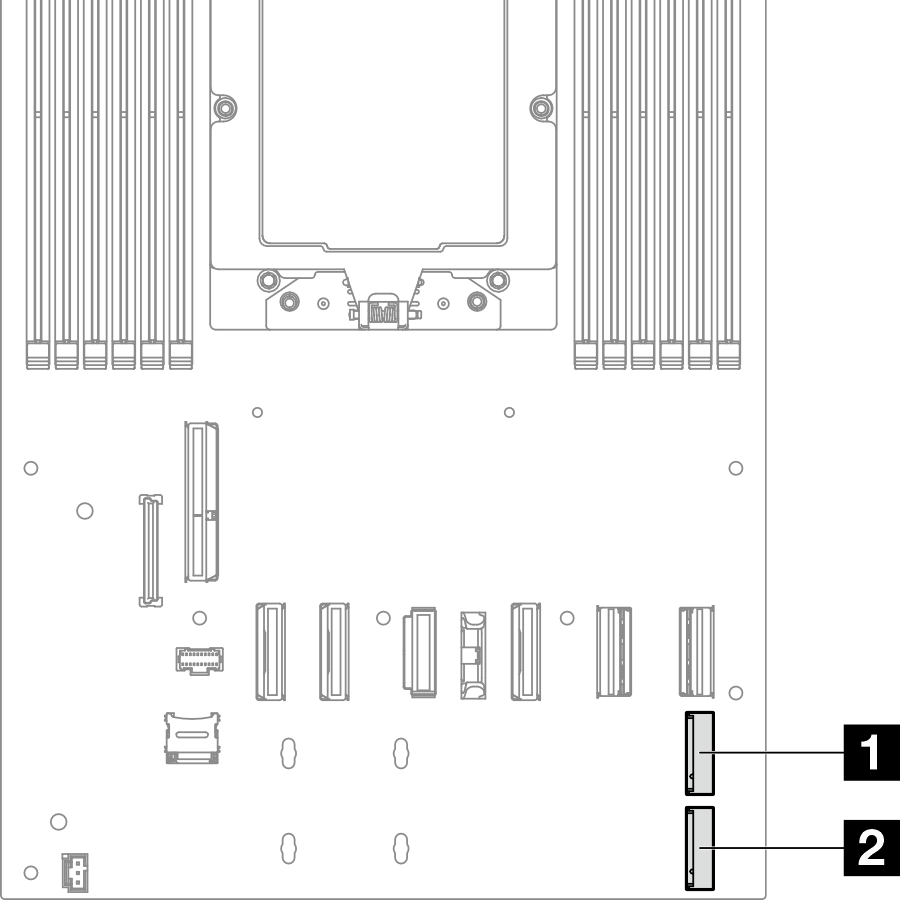
1 M.2 bay 2 2 M.2 bay 3
- Locate the M.2 connectors on the system board.
- Remove the M.2 drive from the system board.
 Slightly press the retainer away from the M.2 drive to disengage the M.2 drive.
 Pivot the rear side of the M.2 drive slightly away from the system board.
 Pull the M.2 drive out of the connector at an angle of approximately 15 degrees.Figure 2. Removal of an M.2 drive
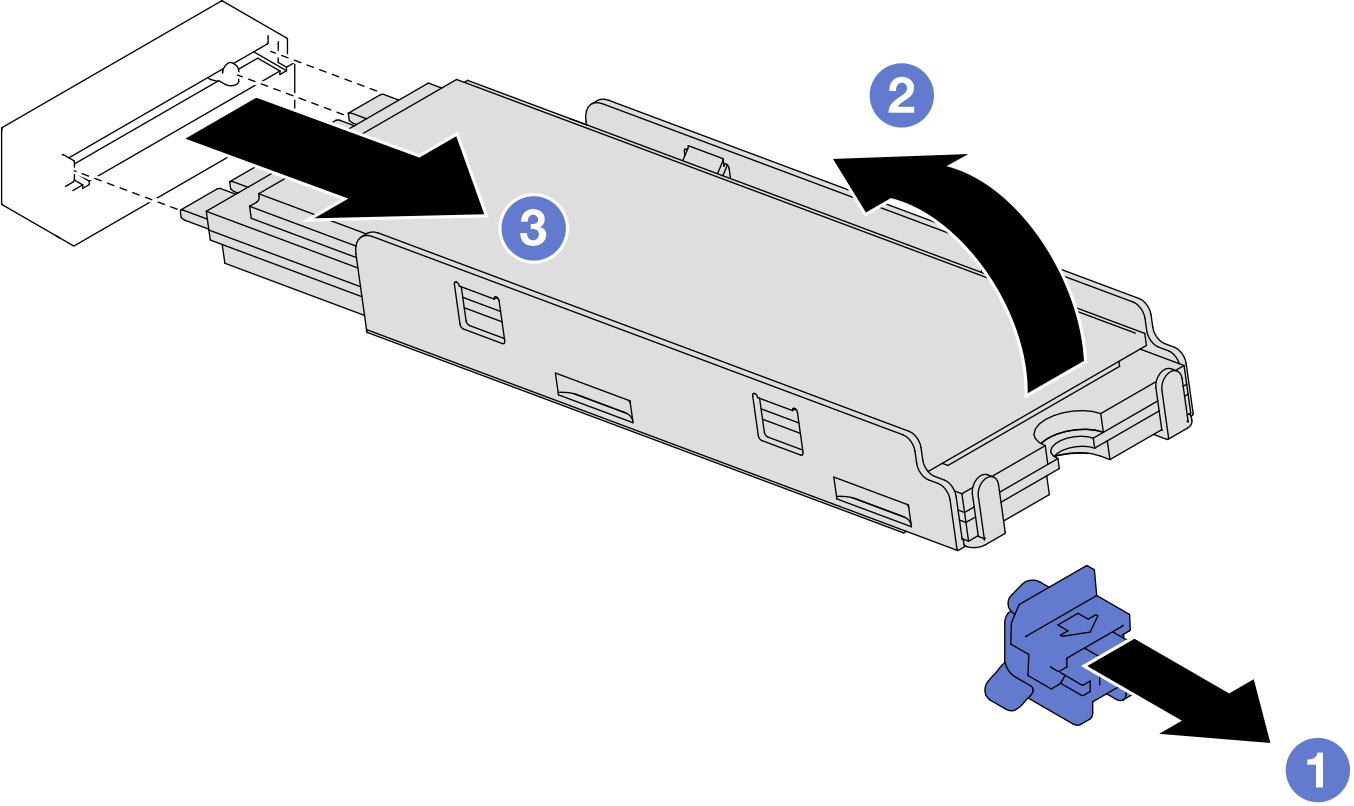
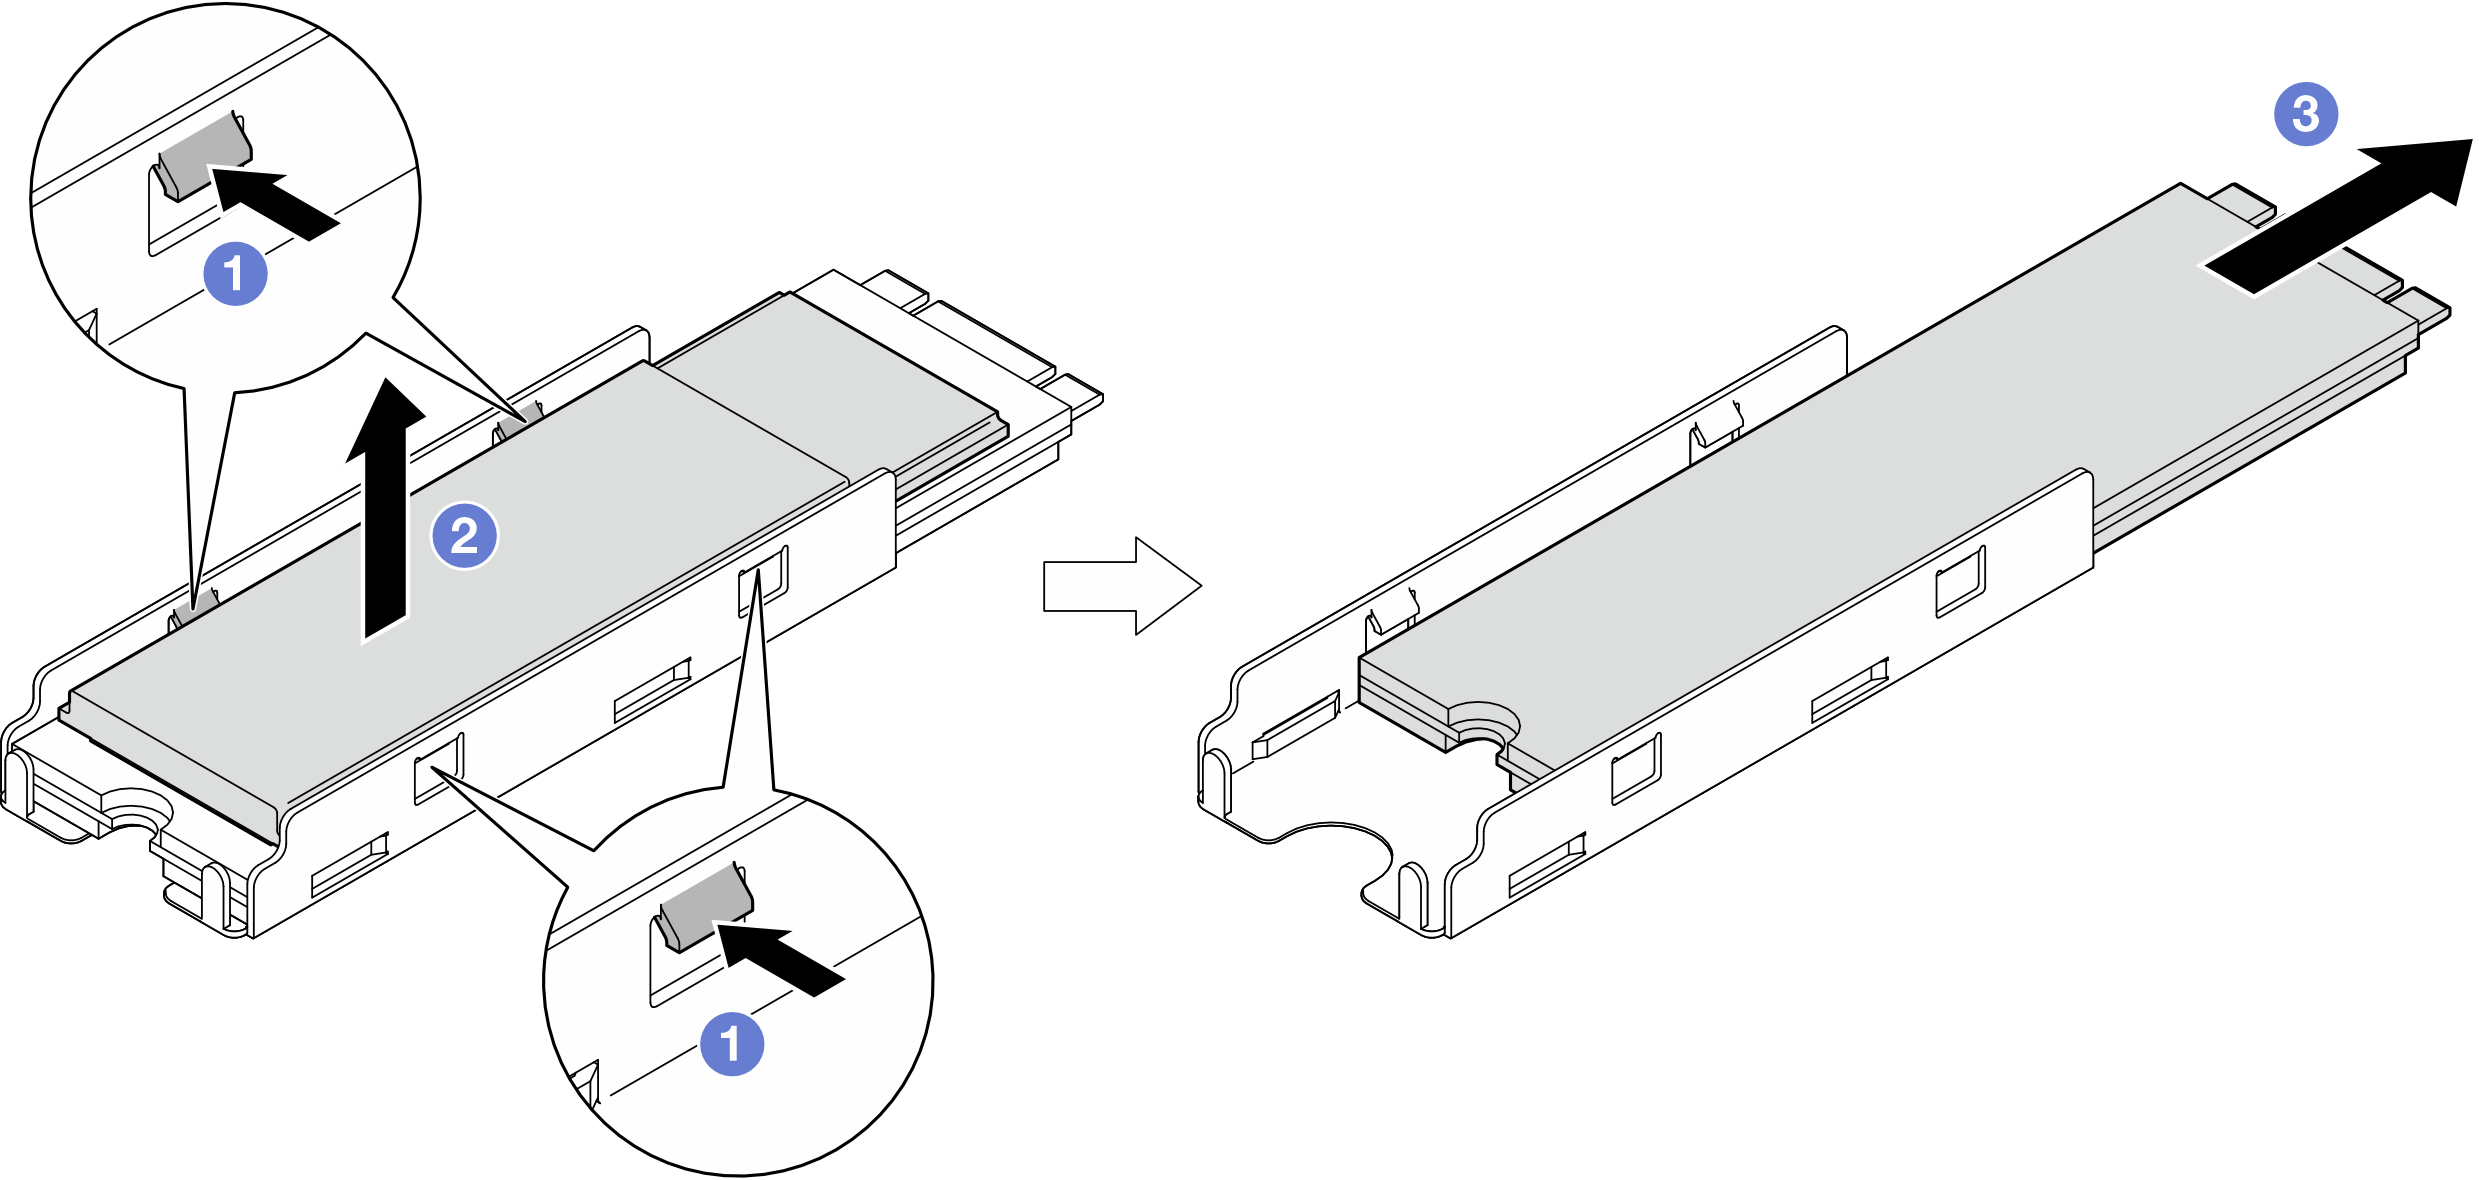
- (Optional) If necessary, remove the M.2 heat sink and the M.2 drive from the tray.
- Press the tabs on the M.2 and heat sink tray to disengage the heat sink.NoteIf necessary, press the tabs with a flat-head screwdriver.
- Lift the M.2 heat sink out of the tray.
- Slide the M.2 drive outward and remove it from the tray.Figure 3. Removal of the M.2 heat sink
After you finish
- If necessary, adjust location of the M.2 drive retainer to accommodate another M.2 drive of a different size (see Adjust an M.2 drive retainer).
- Install a replacement unit (see Install an M.2 drive).
- If you are instructed to return the component or optional device, follow all packaging instructions, and use any packaging materials for shipping that are supplied to you.
Demo video
Remove an M.2 drive from the M.2 boot adapter
Procedure
- Remove the M.2 drive from M.2 boot adapter.
- Pinch and hold on the retainer clip.
- Slide the retainer backward to loosen the M.2 drive from the M.2 boot adapter.
- Pivot the rear side of the M.2 drive away from the M.2 boot adapter.
 Pull the M.2 drive away from the slot at an angle of approximately 30 degrees.
Figure 4. Removal of an M.2 drive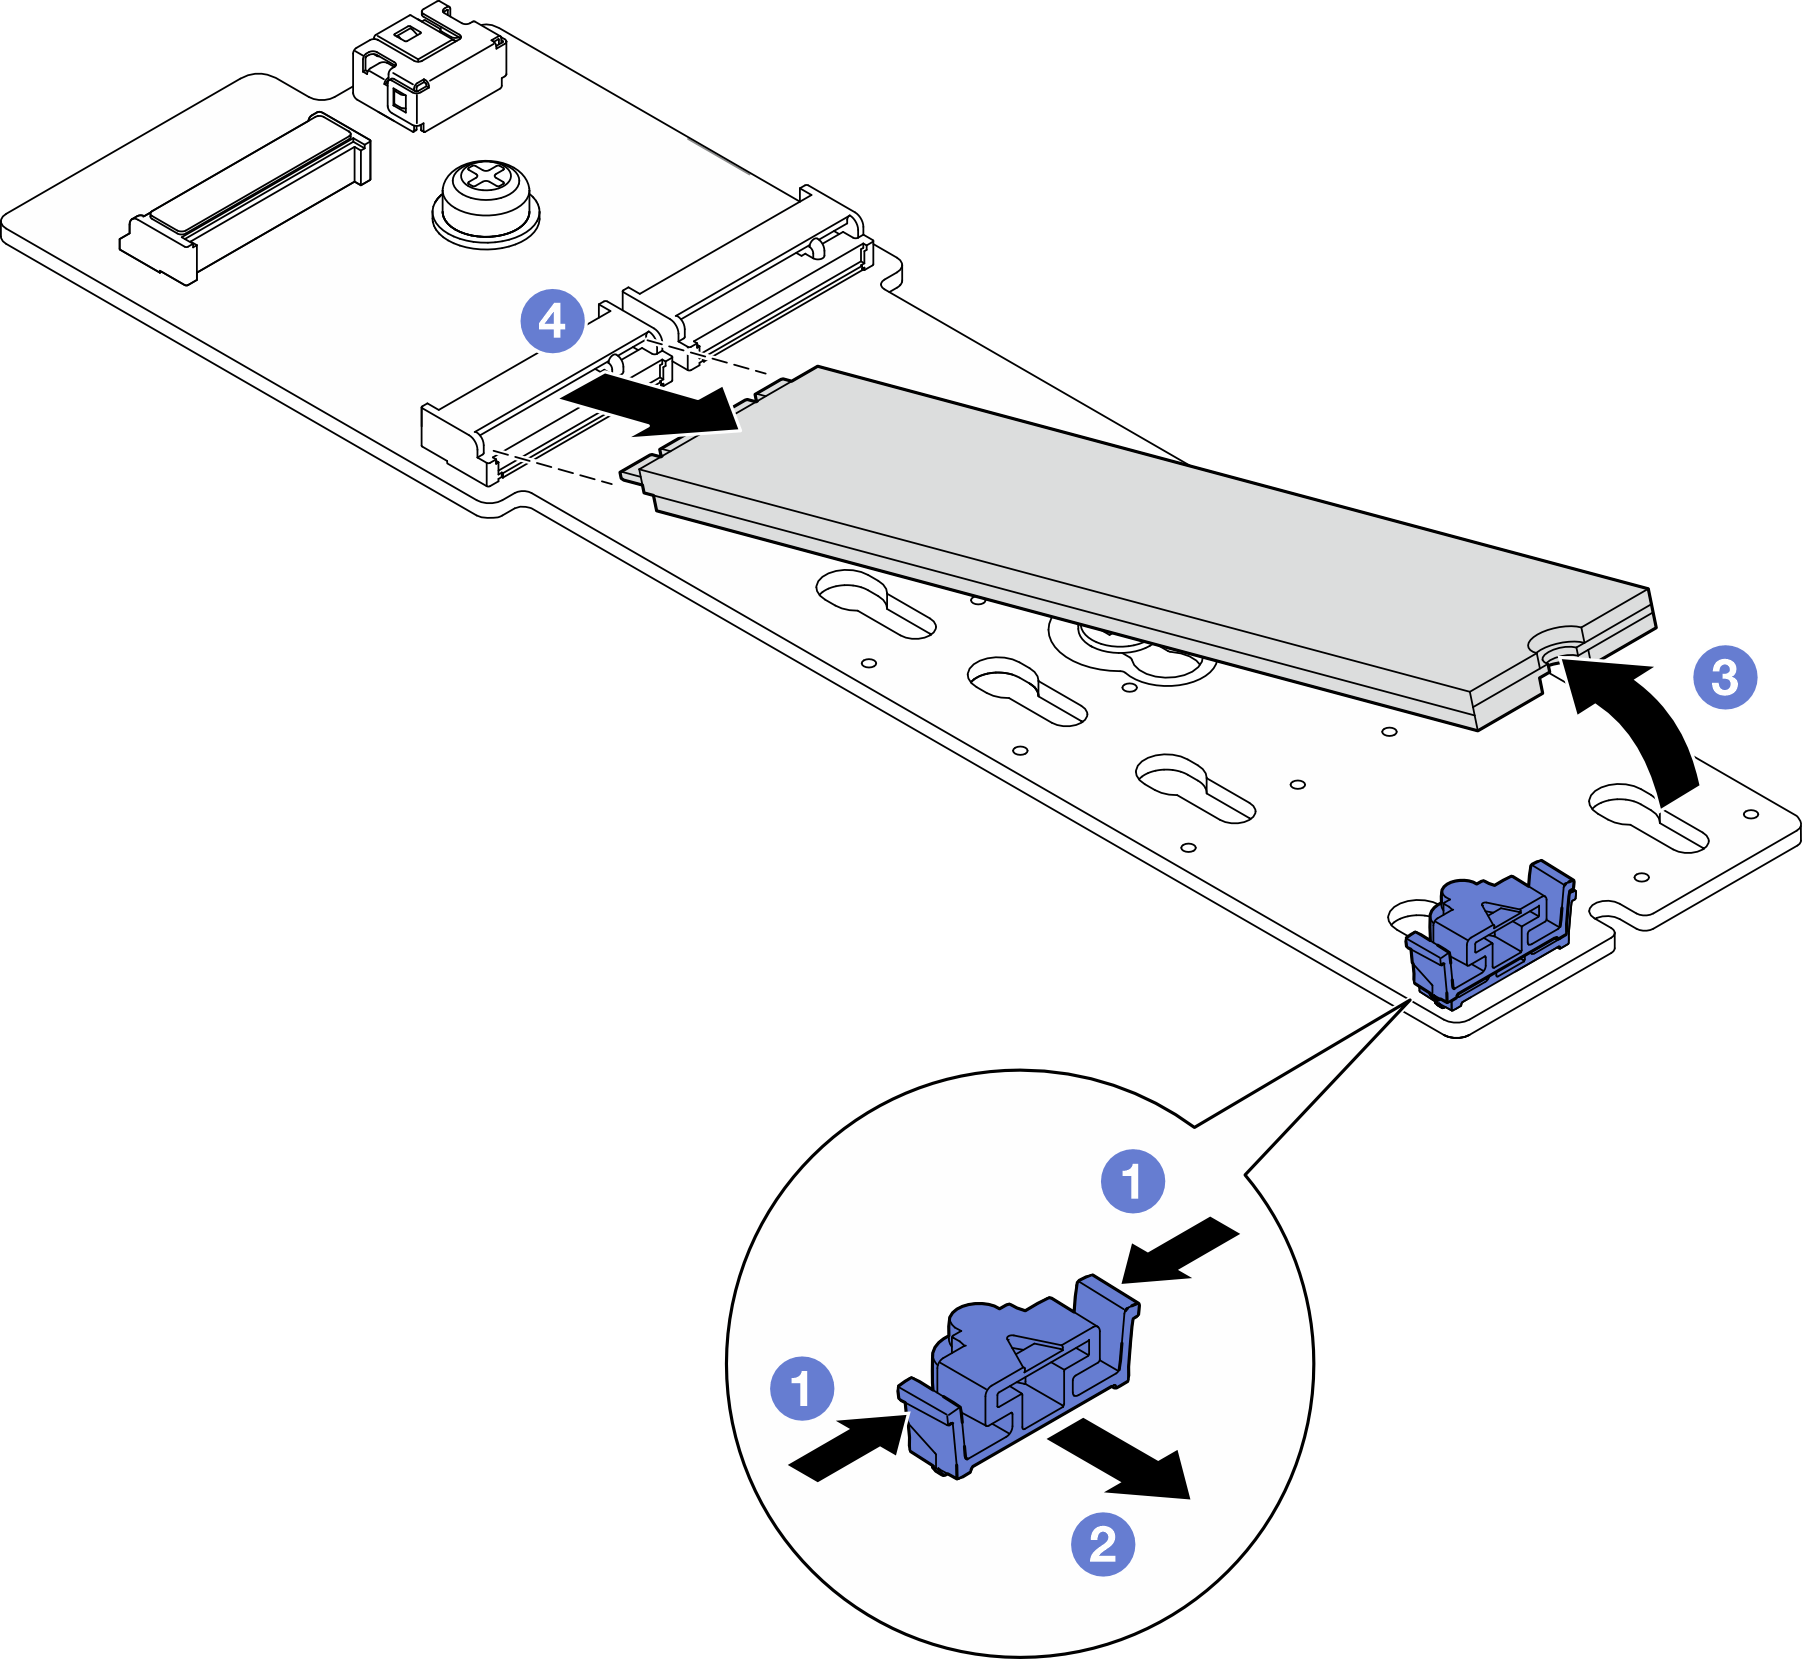
After you finish
- If necessary, adjust location of the M.2 drive retainer to accommodate another M.2 drive of a different size (see Adjust an M.2 drive retainer).
- Install a replacement unit (see Install an M.2 drive).
- If you are instructed to return the component or optional device, follow all packaging instructions, and use any packaging materials for shipping that are supplied to you.
Give documentation feedback