Install an M.2 drive

Follow instructions in this section to install an M.2 drive.

About this task

To avoid potential danger, make sure to read and follow the safety information.

Attention
  • Read Installation Guidelines and Safety inspection checklist to make sure that you work safely.

  • Touch the static-protective package that contains the component to any unpainted metal surface on the node and chassis; then, take the component out of the package and place it on a static-protective surface.

Depending on your configuration, follow the corresponding procedures below for proper installation procedure.

Install M.2 drive to system board

Procedure

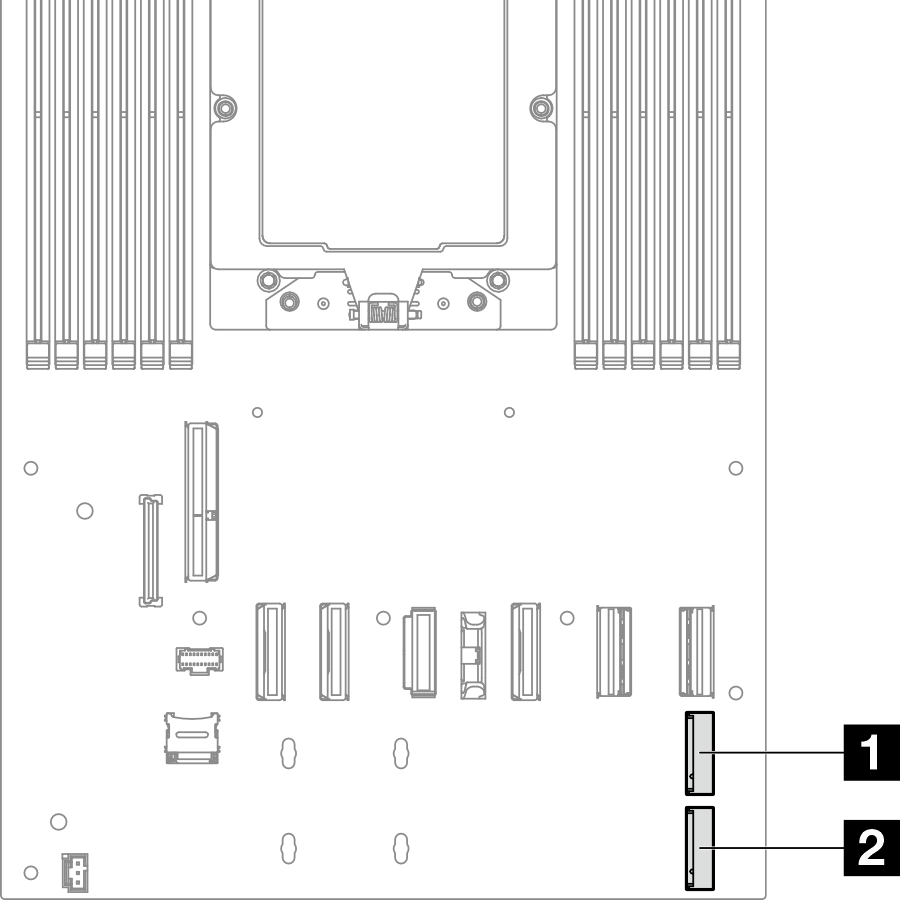
  1. Locate the M.2 connectors on the system board. Then, determine to which connector the M.2 drive is to be installed.
    Figure 1. Location of the M.2 bays on the system board
    Location of the M.2 bays
    1 M.2 bay 22 M.2 bay 3
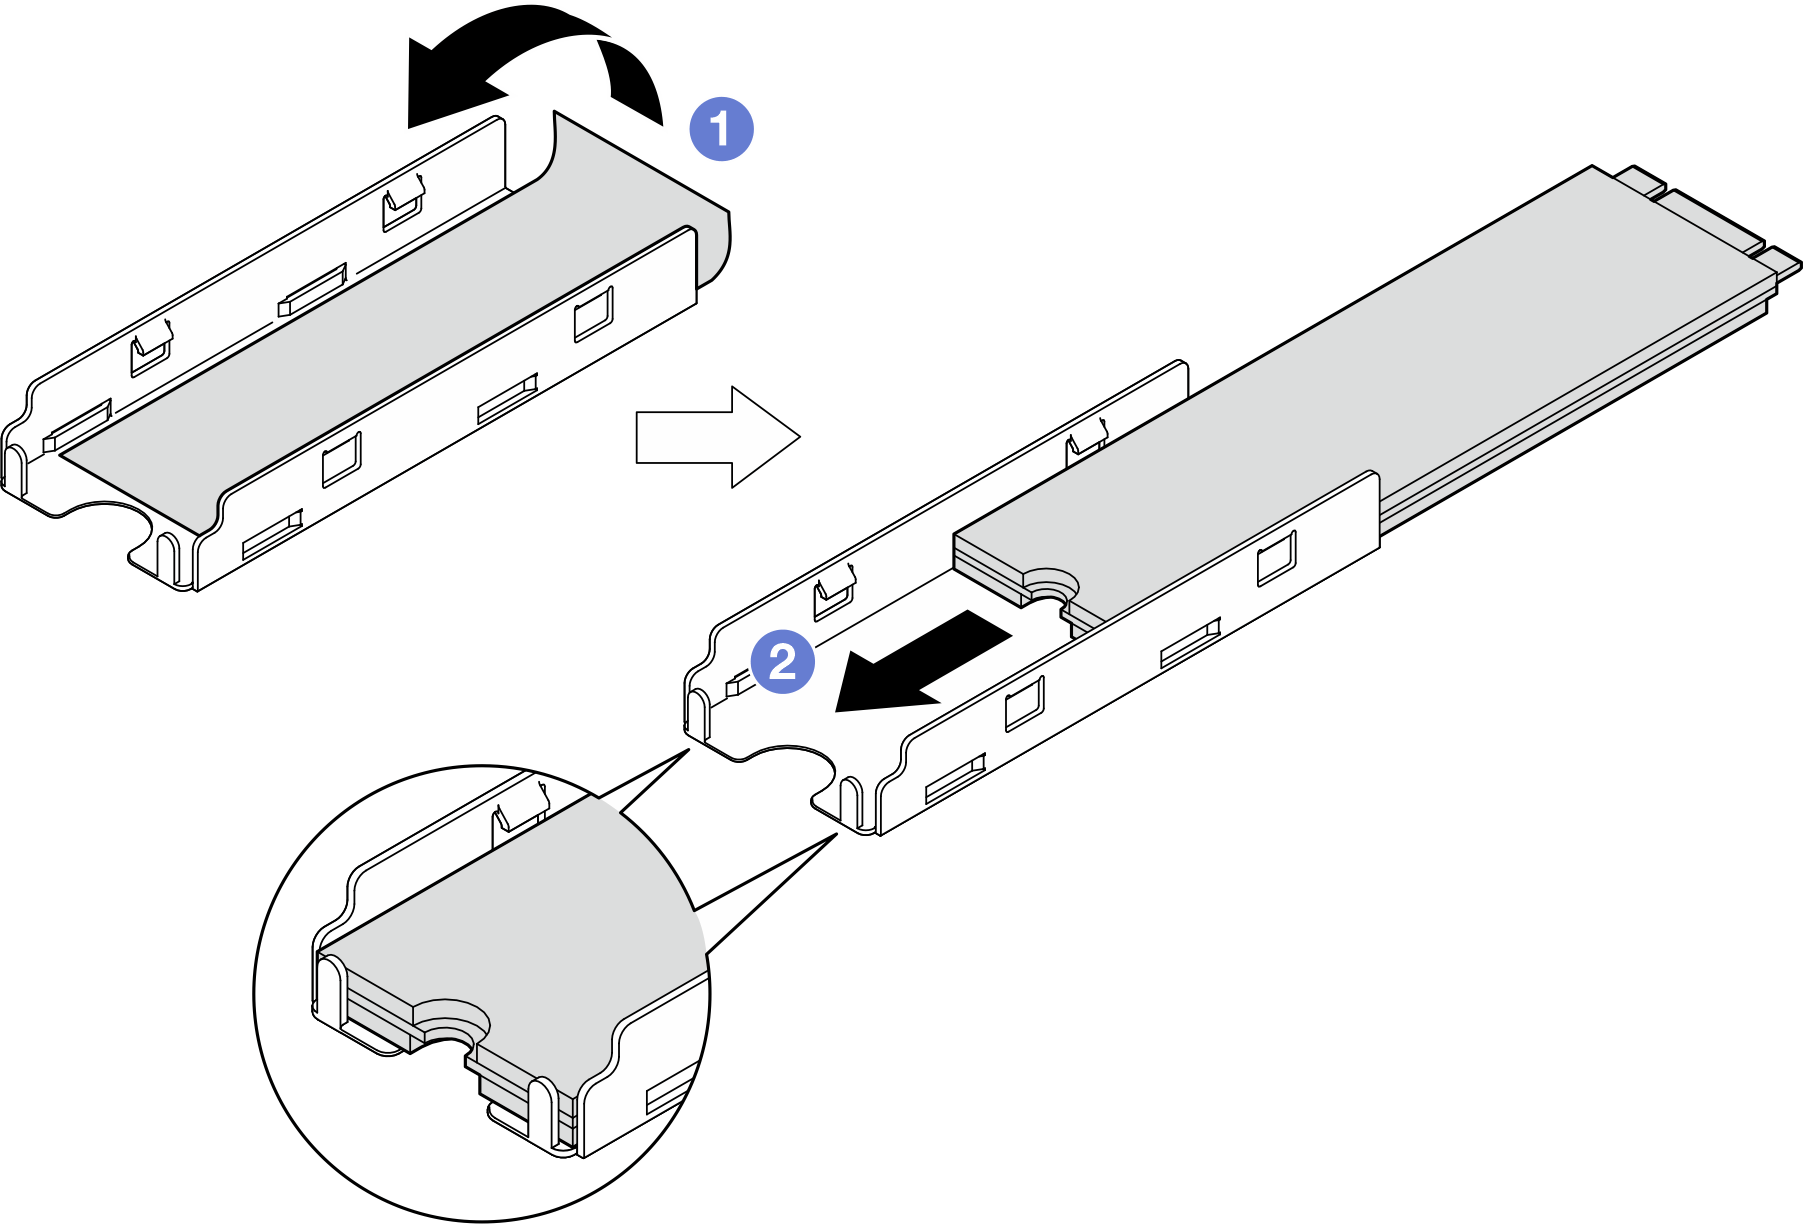
  2. For NVMe M.2 drive to be installed on the system board, install the M.2 drive into the M.2 tray.
    1. Peel off the plastic liner from the thermal pad in the tray.
    2. Slide the M.2 drive all the way into the tray, the side with the label of the M.2 drive facing up. Make sure that the screw cutout of the drive is aligned with the cutout of the tray.
      Figure 2. Installation of a thermal pad and M.2 drive to the tray
      M.2 drive installation into the tray
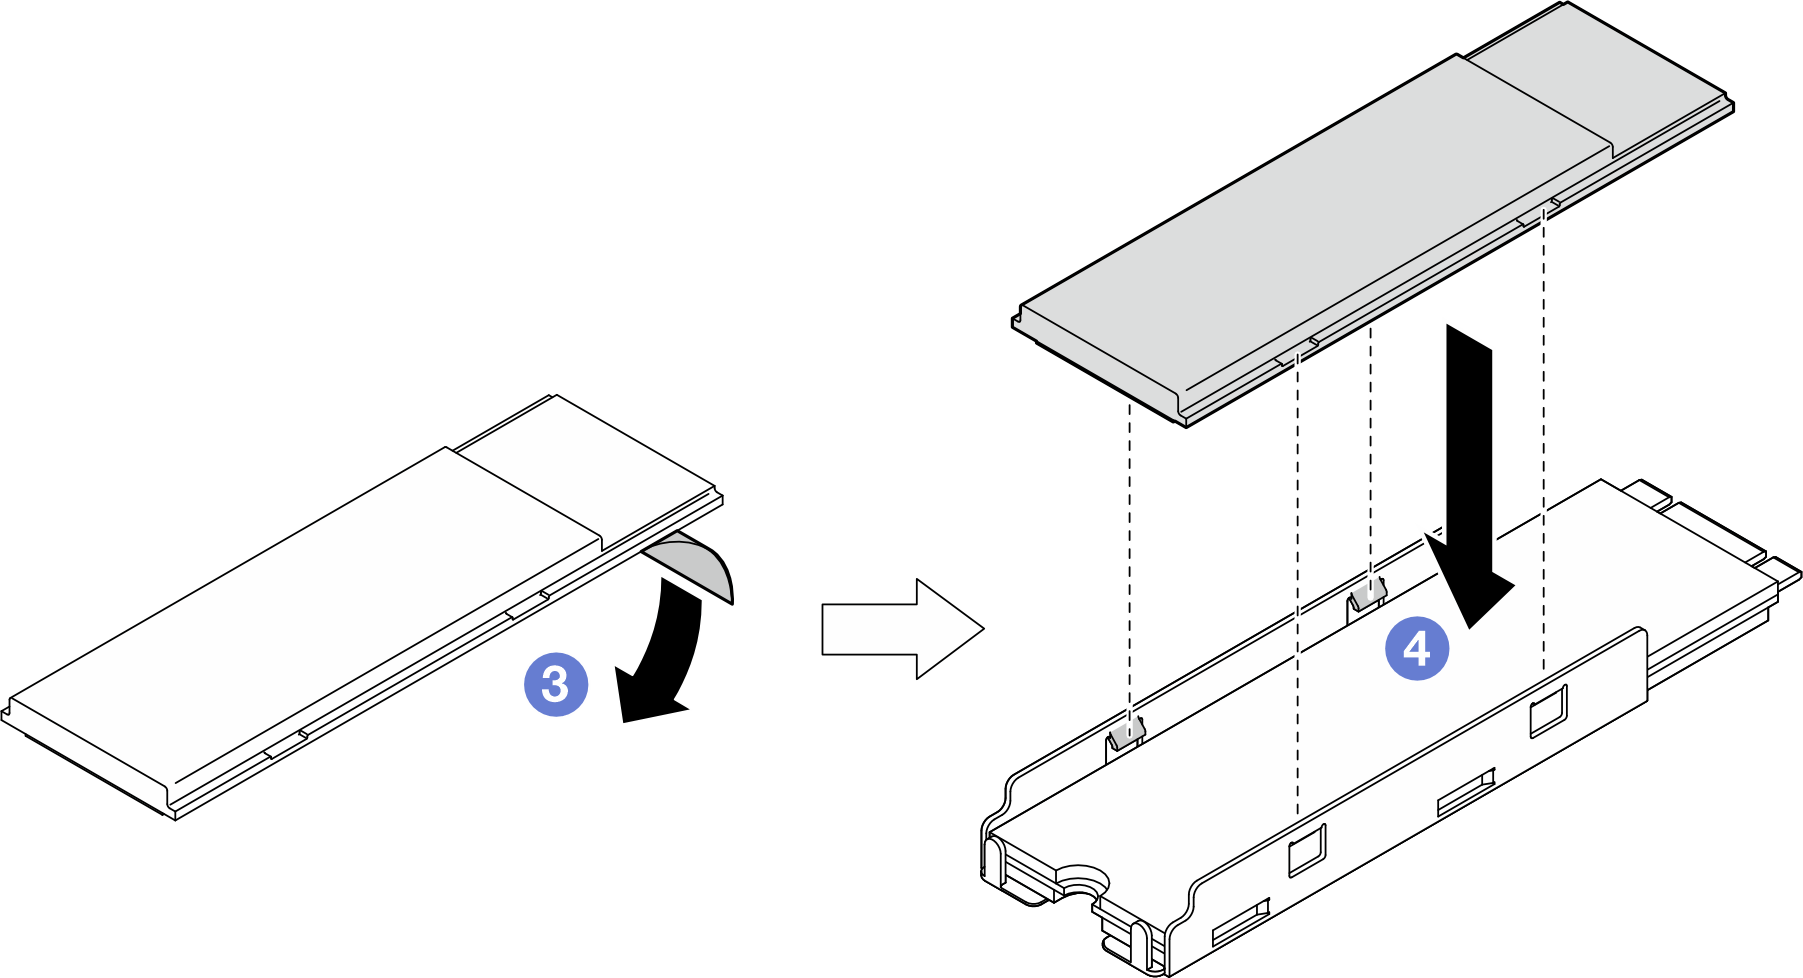
    3. Peel off the plastic liner from the thermal pad at the bottom side of the heat sink.
    4. Align the heat sink with the four clips of the tray; then, insert and press down the heat sink until it clicks into place.
      Figure 3. Installation of an M.2 heat sink to the M.2 tray
      M.2 heat sink installation into the tray
  3. Install the M.2 drive to the system board.
    1. Insert the M.2 drive into the M.2 connector at an angle of approximately 15 degrees.
    2. Slightly press the retainer to accommodate the M.2 drive.
    3. Pivot and press down the M.2 drive; then, make sure the M.2 drive is engaged securely by the retainer.
      Figure 4. Installation of an M.2 drive
      M.2 drive installation

After you finish

  1. Reconnect all the cables to the drive backplane (see 2.5-inch drive backplane cable routing).
  2. Make sure that all the required cables are routed and connected correctly; then, reinstall the top cover (see Install the top cover).
  3. Reinstall the node into the chassis (see Install a node to the chassis).
  4. Make sure that the required power supply units are installed and power cords are connected; then, power on the node (see Install a hot-swap power supply and Power on the node).
  5. Proceed to complete the parts replacement (see Complete the parts replacement).

Install M.2 drive to M.2 boot adapter

Procedure

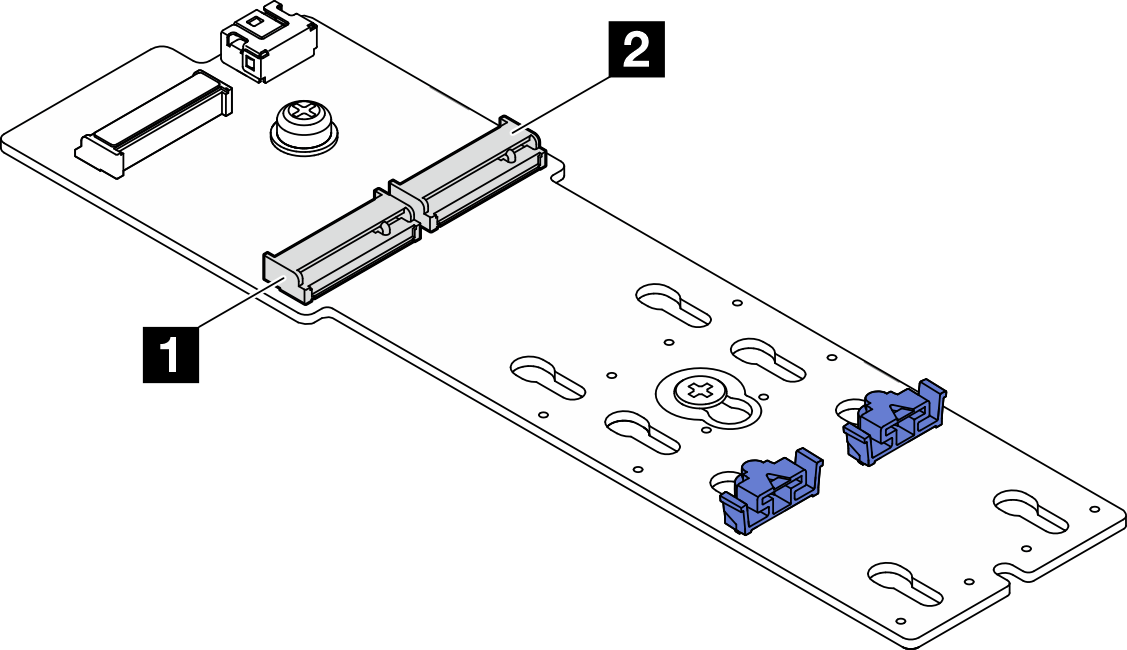
  1. Locate the connector on the M.2 boot adapter.
    Note
    • Your M.2 boot adapter might look different from the following illustrations, but the installation method is the same.

    • Some M.2 boot adapters support two identical M.2 drives. Install the M.2 drive in slot 0 first.

    Figure 5. M.2 drive slots
    M.2 drive slots
    1 M.2 bay 02 M.2 bay 1
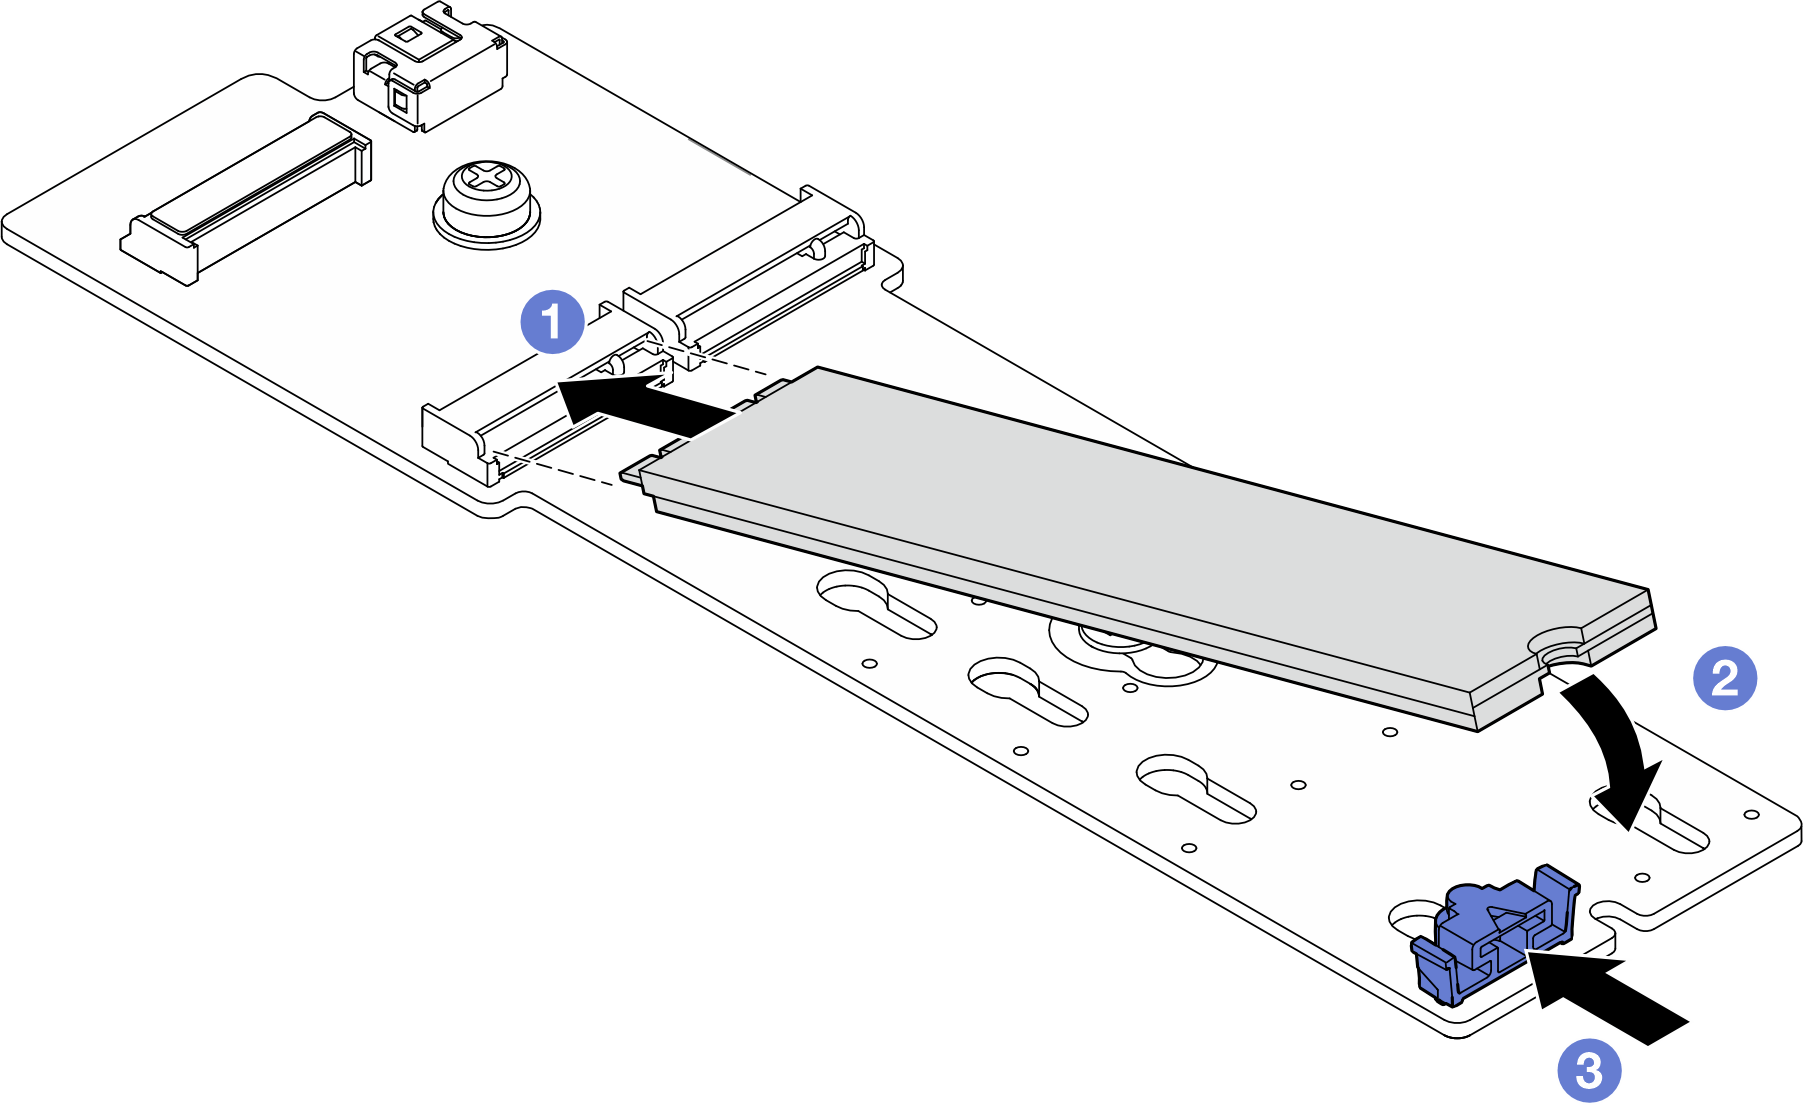
  2. Install M.2 drive into M.2 boot adapter.
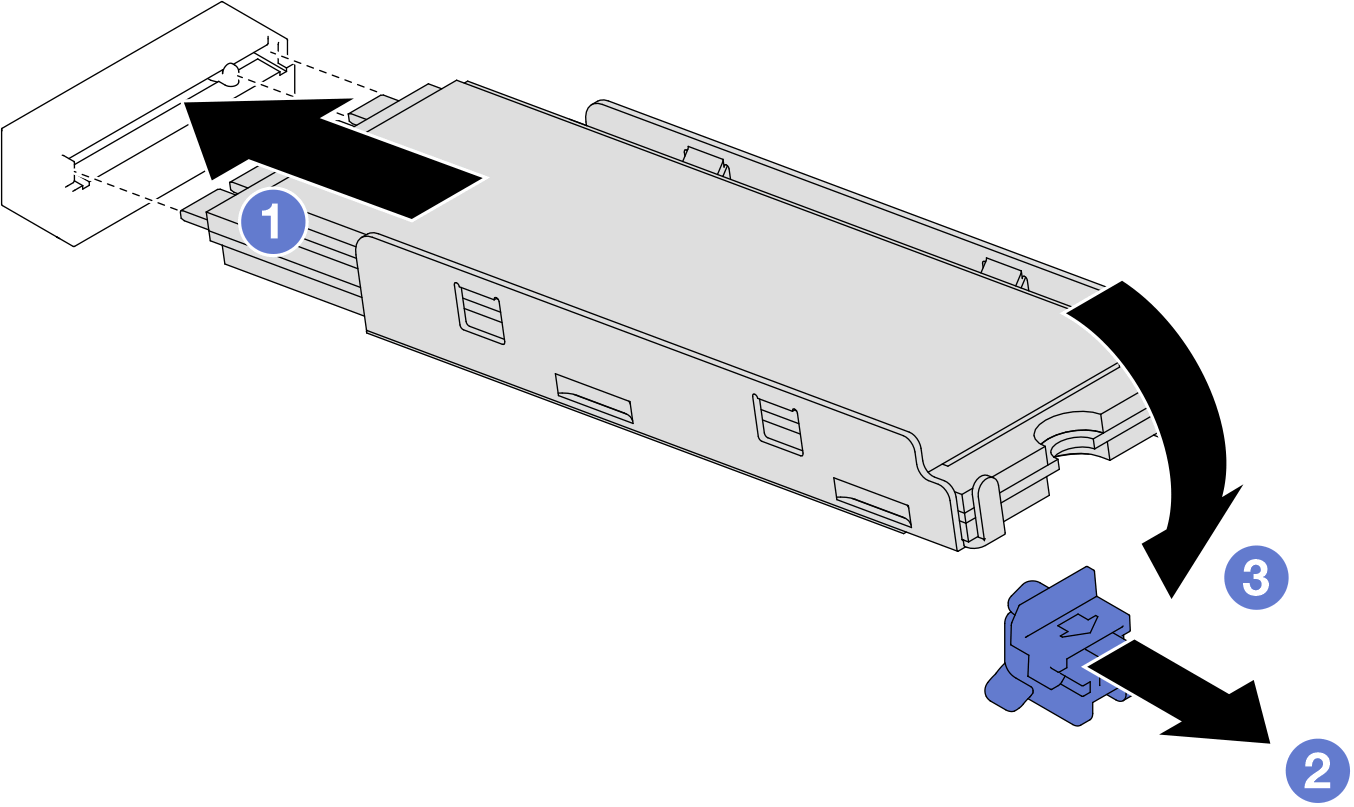
    1. Insert the M.2 drive into the slot at an angle of approximately 30 degrees.
    2. Pivot down the M.2 drive until the notch at the end of the M.2 drive catches on the lip of the retainer.
    3. Slide the retaining clip forward to secure the M.2 drive to the M.2 boot adapter.
    Figure 6. Installation of an M.2 drive
    M.2 drive installation

After you finish

  1. Make sure that all the required cables are routed and connected correctly; then, reinstall the top cover (see Install the top cover).
  2. Reinstall the node into the chassis (see Install a node to the chassis).
  3. Make sure that the required power supply units are installed and power cords are connected; then, power on the node (see Install a hot-swap power supply and Power on the node).
  4. Proceed to complete the parts replacement (see Complete the parts replacement).