Install a heat sink Torx T30 nut
This task has instructions for installing a PEEK (Polyether ether ketone) Torx T30 nut on the heat sink.
About this task
Read the Installation Guidelines to ensure that you work safely.
Prevent exposure to static electricity, which might lead to system halt and loss of data, by keeping static-sensitive components in their static-protective packages until installation, and handling these devices with an electrostatic-discharge wrist strap or other grounding system.
Do not touch the processor contacts. Contaminants on the processor contacts, such as oil from your skin, can cause connection failures.
Procedure
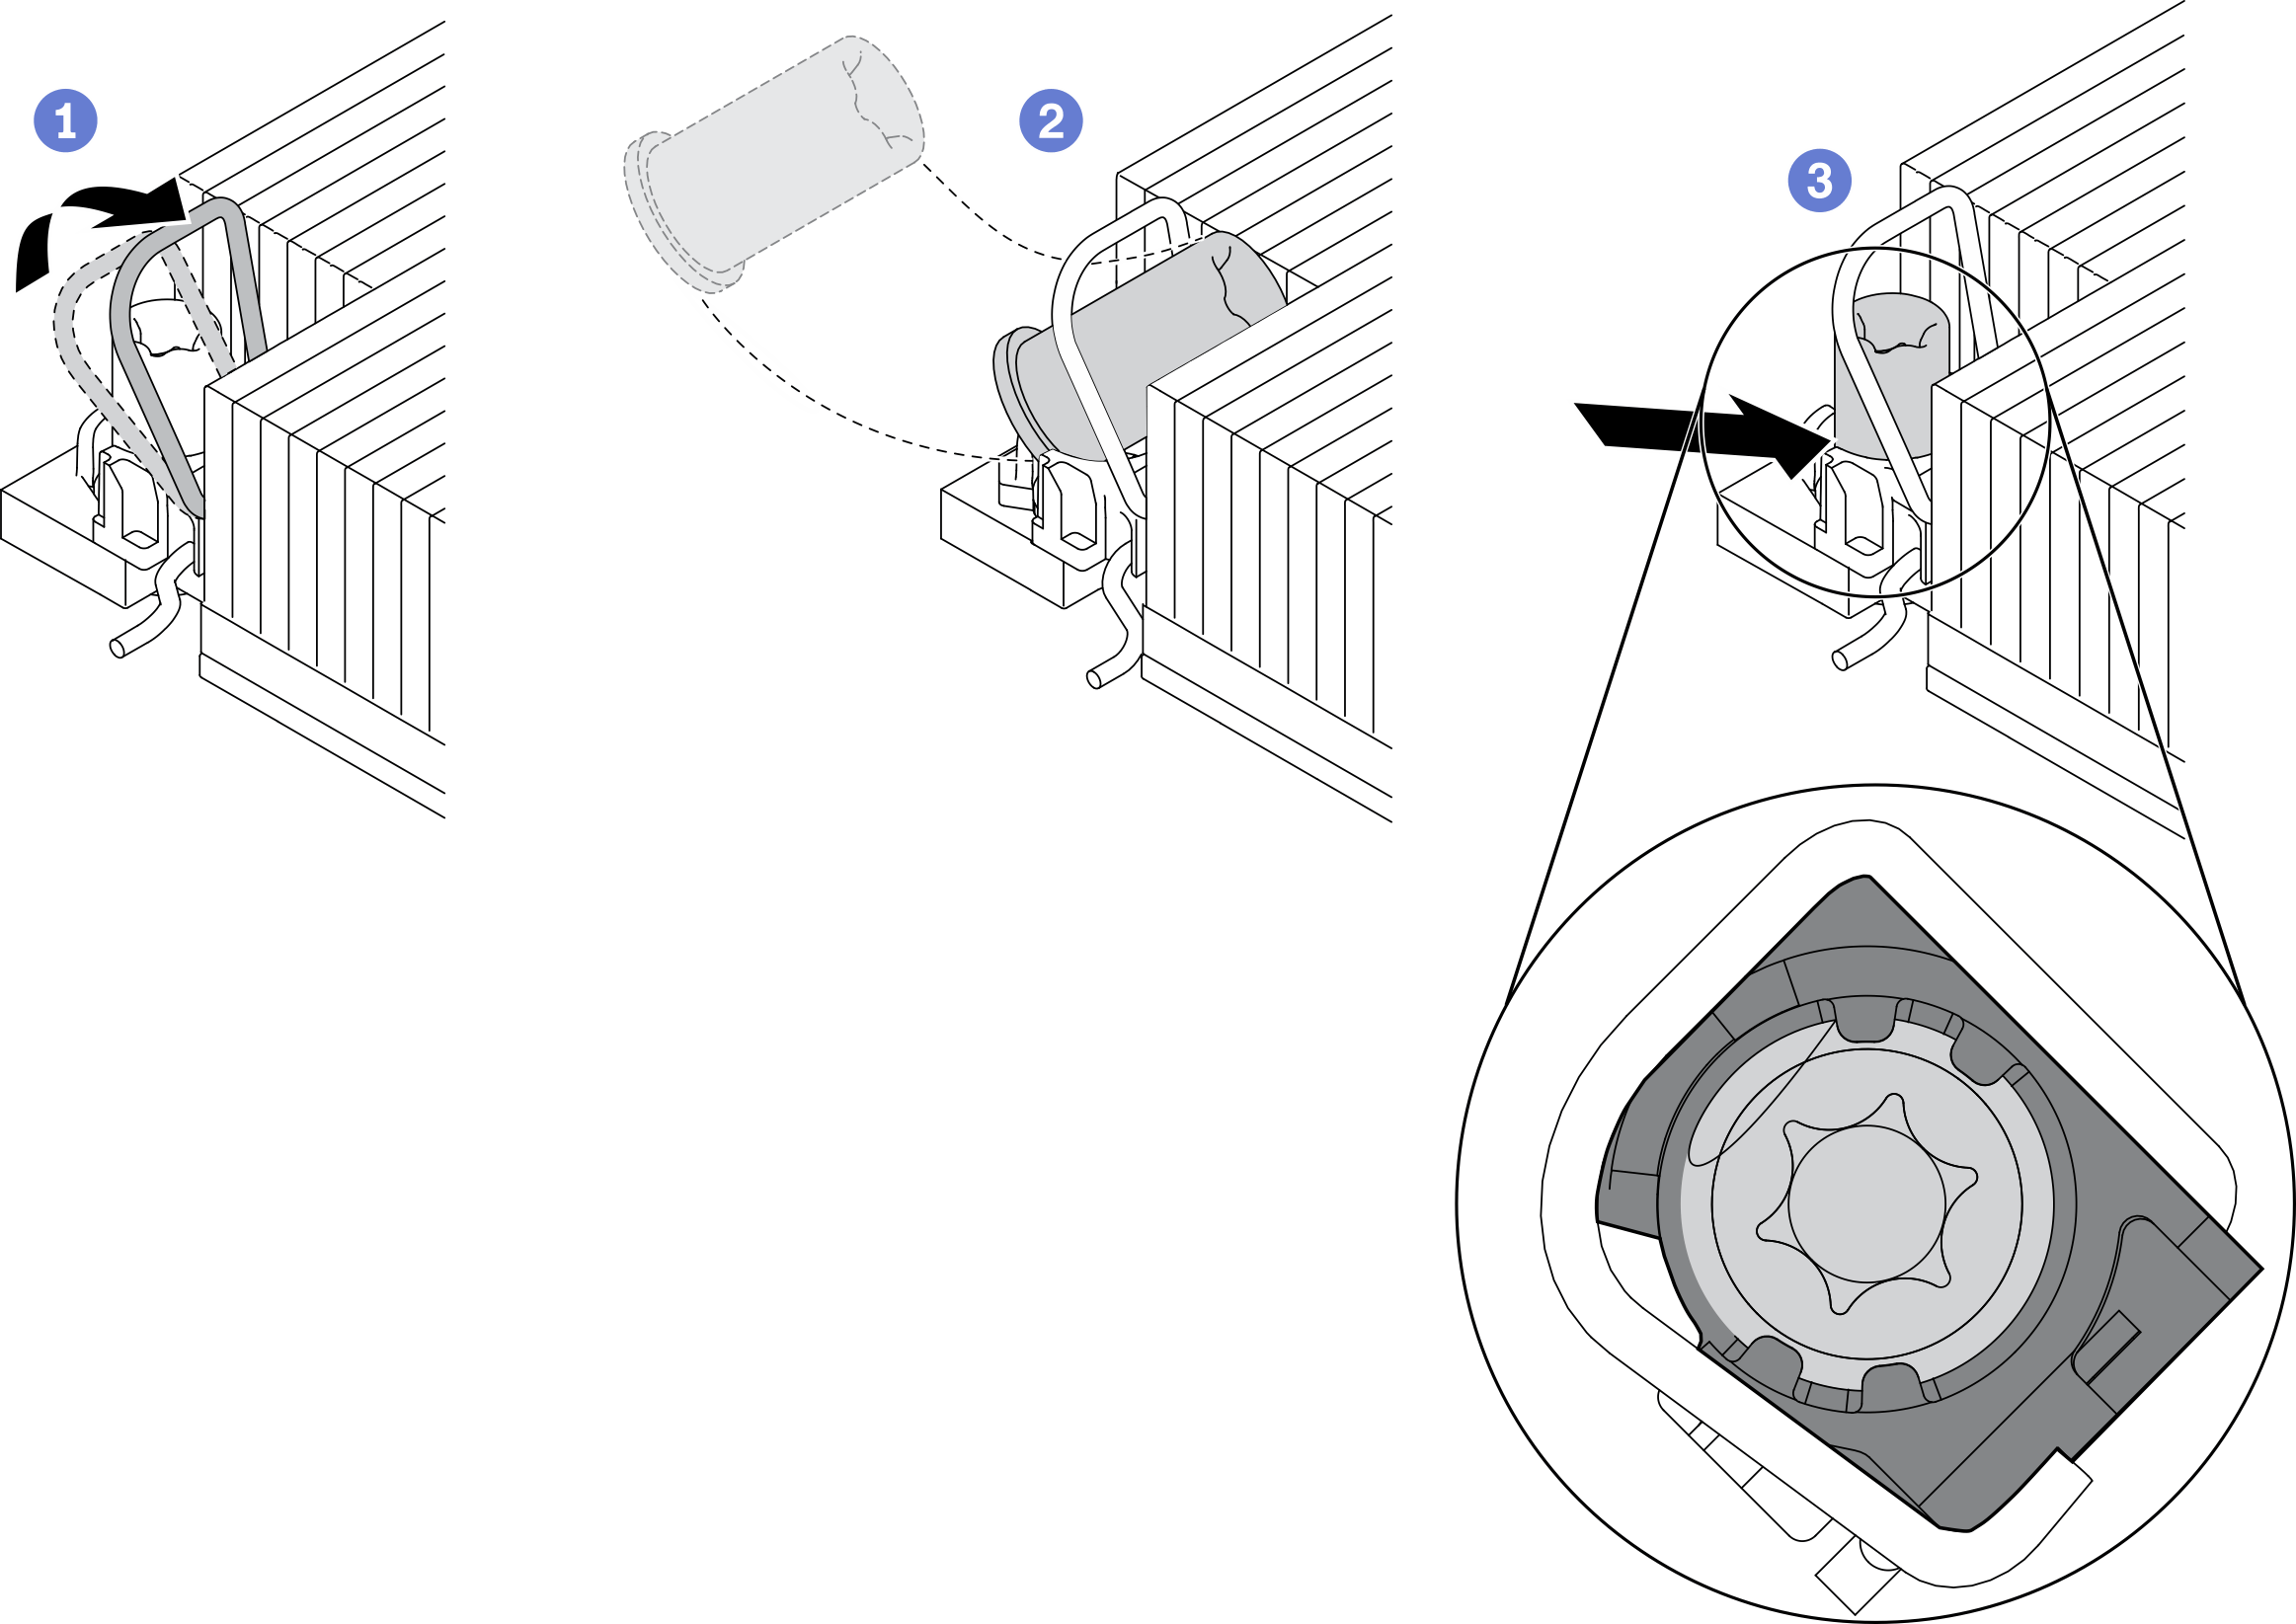
 Rotate the anti-tilt wire bail inwards.
 Orient the Torx T30 nut under the anti-tilt wire bail; then, align the Torx T30 nut with the socket at an angle as shown.
 Push the lower edge of the Torx T30 nut into the socket until it clicks into place. Make sure the Torx T30 nut is secured under the four clips in the socket.
After you finish
- Reinstall the components listed below into the compute node in the following order:
Processor and heat sink (see Install a processor and heat sink).
Node air baffles (see Install the front air baffle and Install the middle air baffle).
- Reinstall the compute node into the enclosure (see Install a compute node in the enclosure).
Check the power LED on each node to make sure it changes from fast blink to slow blink to indicate the node is ready to be powered on.
Demo video