Install a drive cage assembly
Use this information to install a drive cage assembly.
Read the Installation Guidelines to ensure that you work safely.
Ensure the drive cage assembly is empty without any drive installed.
Complete the following steps to install a drive cage assembly.
- Install the connector into the drive cage if needed.
- Insert connectors into the drive cage and tighten screws..
1x2.5-inch drive model
Figure 1. Connector installation - 1x2.5-inch drive model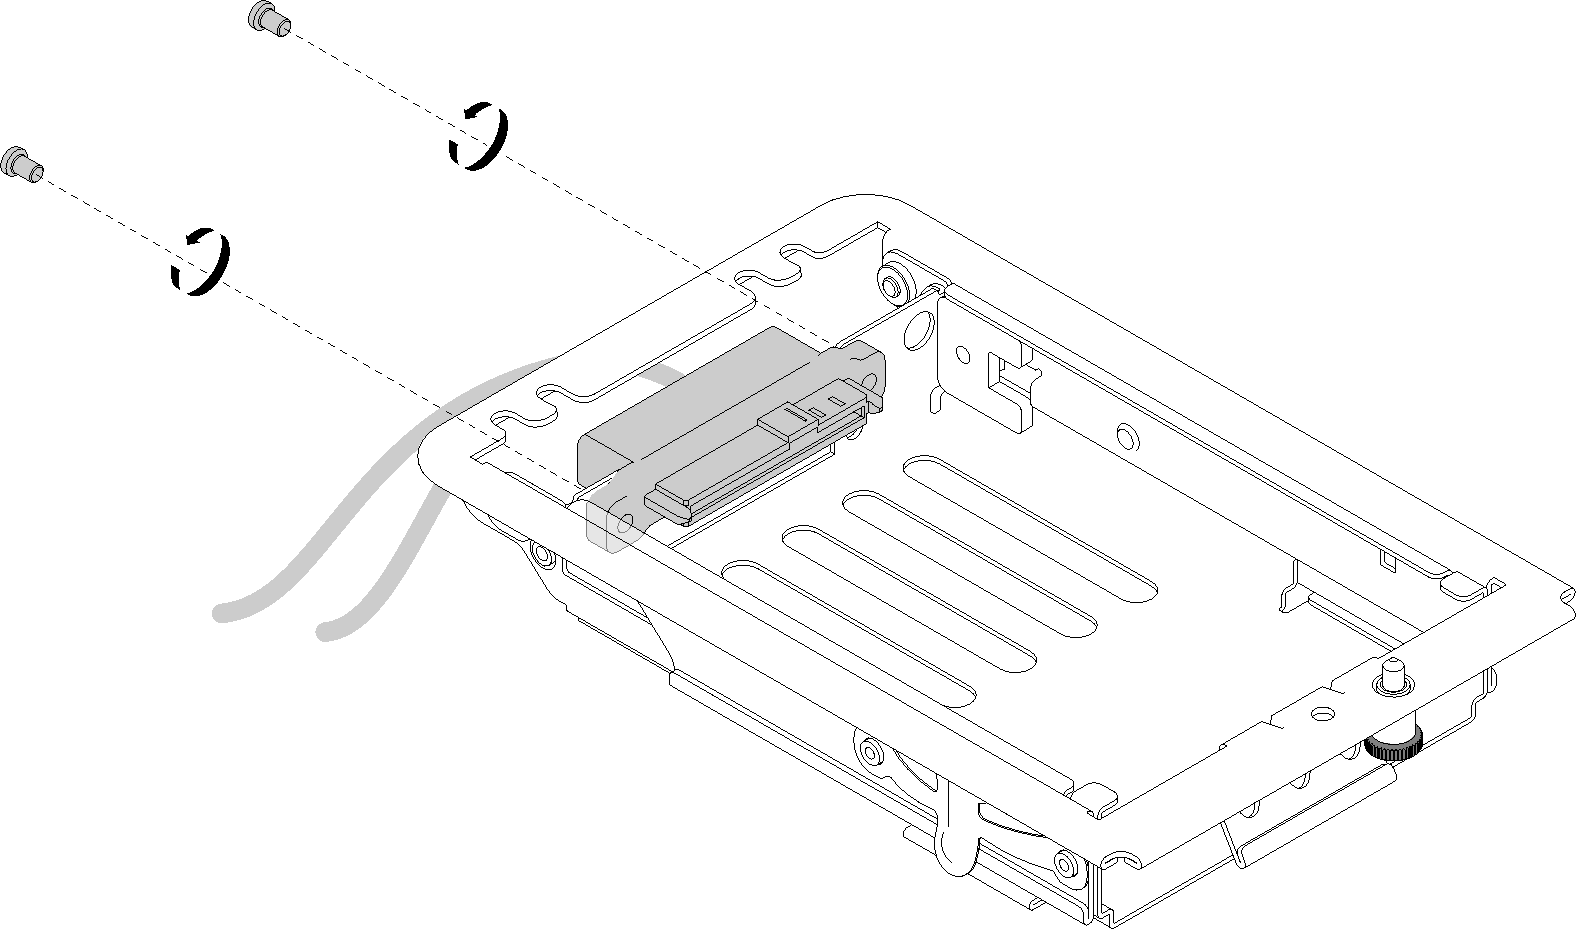
2x2.5-inch drive model
Ensure dirve 0 and drive 1 connectors are installed correctly according to the following illustration.
Figure 2. Connector installation - 2x2.5-inch drive model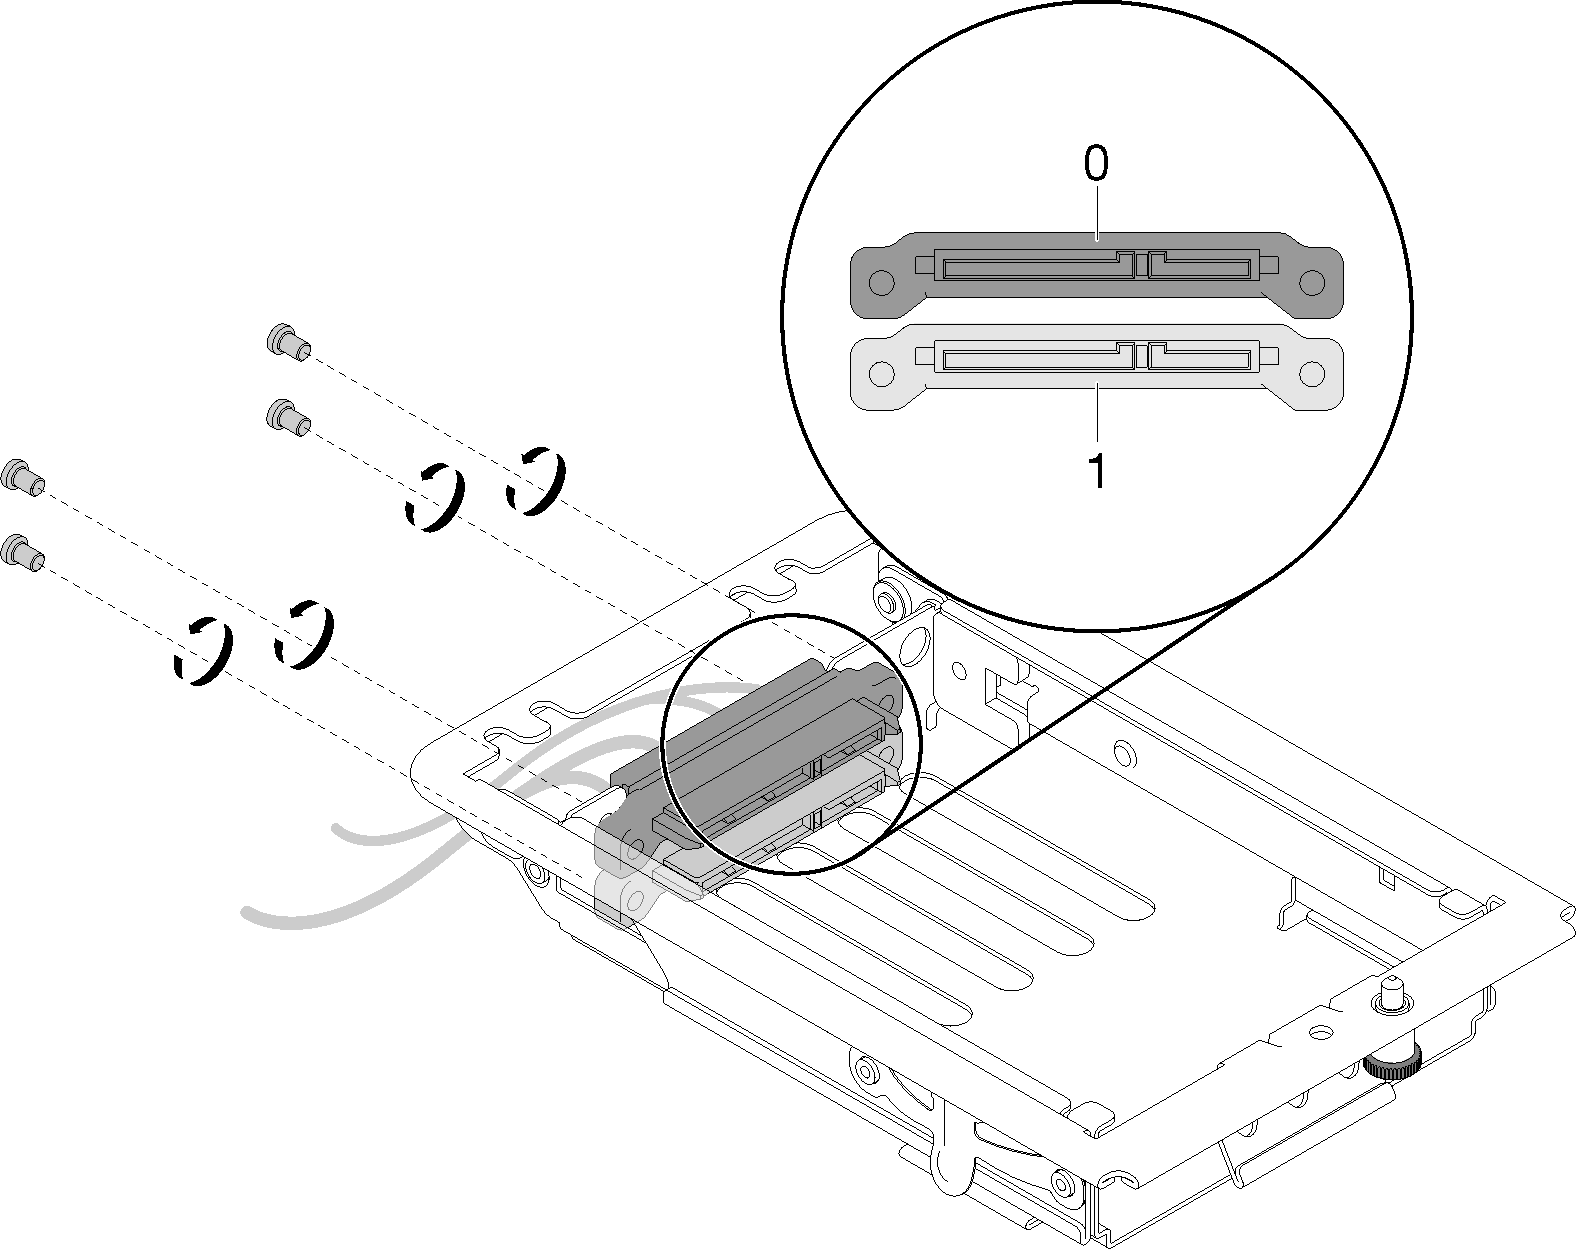
- Insert connectors into the drive cage and tighten screws..
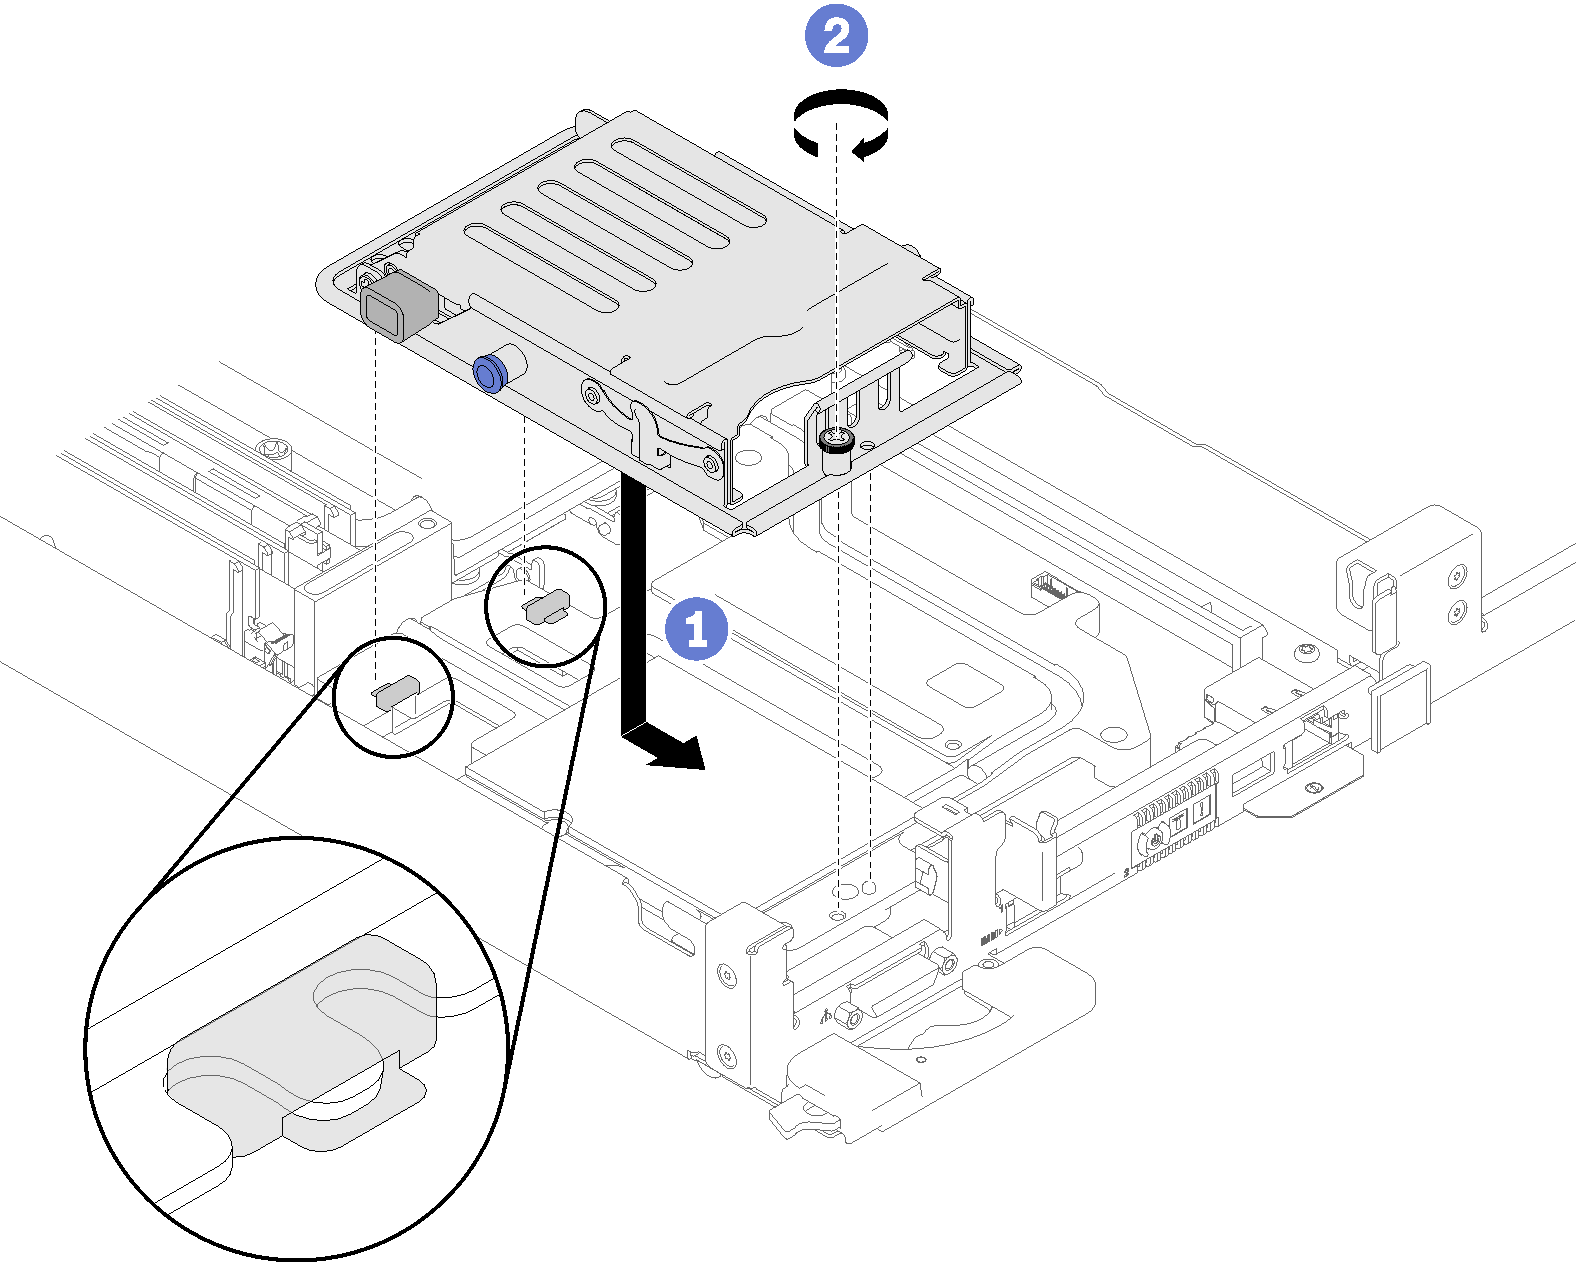
- Tighten the captive screw.Figure 3. Drive cage assembly installation
- Route cables as illustrated.
1x2.5-inch drive model
Figure 4. Cable routing - 1x2.5-inch drive model
2x2.5-inch drive model
Figure 5. Cable routing - 2x2.5-inch drive model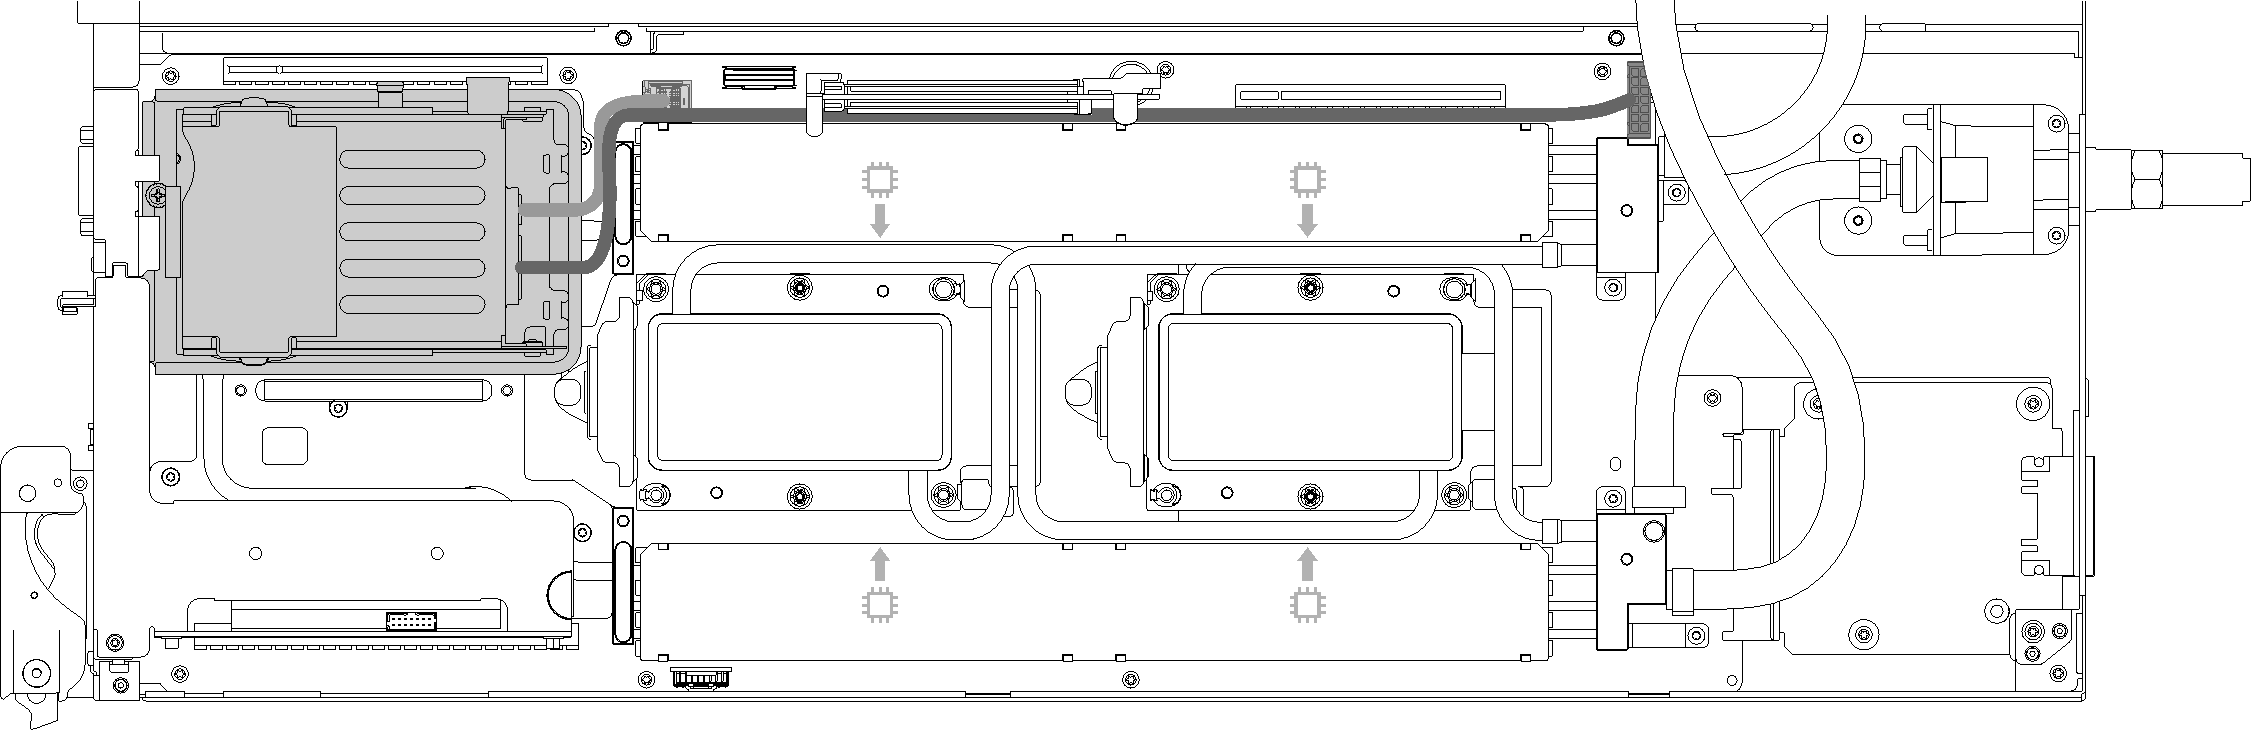
After you install a drive cage assembly, complete the following steps:
Reinstall the blank bezel filler.
Figure 6. Blank bezel filler installation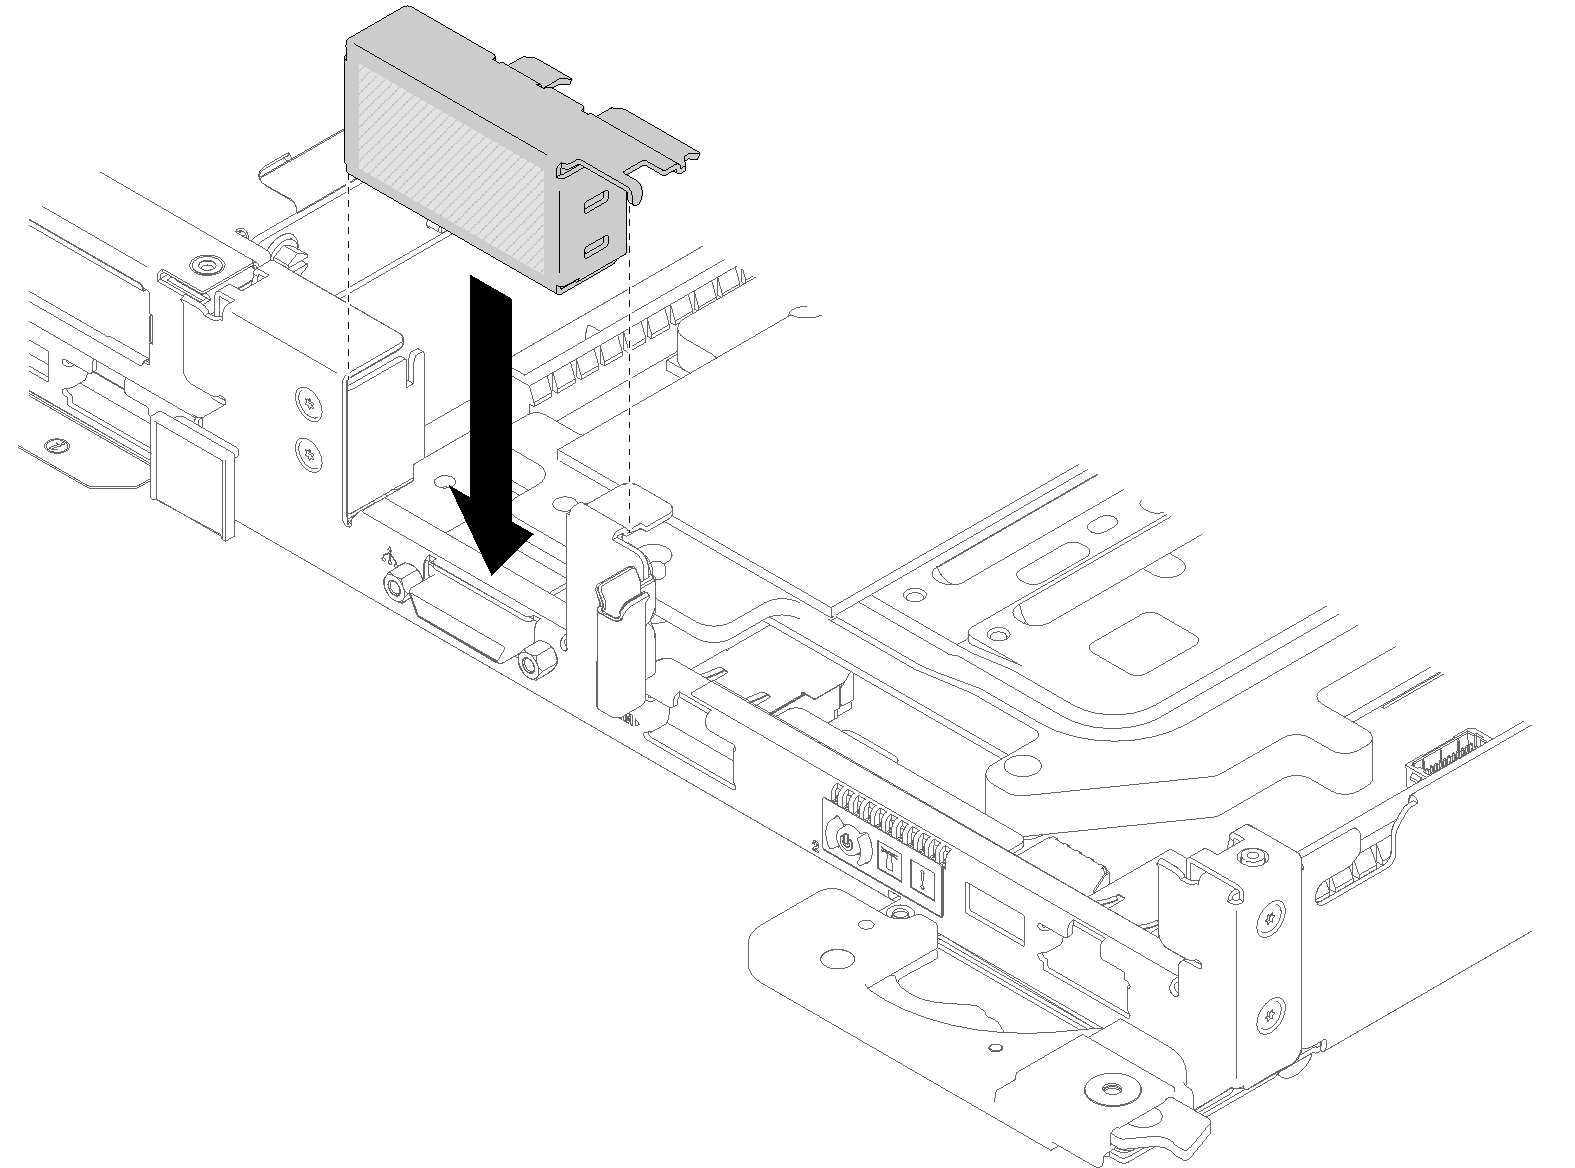
Reinstall the front and the rear cross braces (10x P2 screws).
Figure 7. Cross brace installation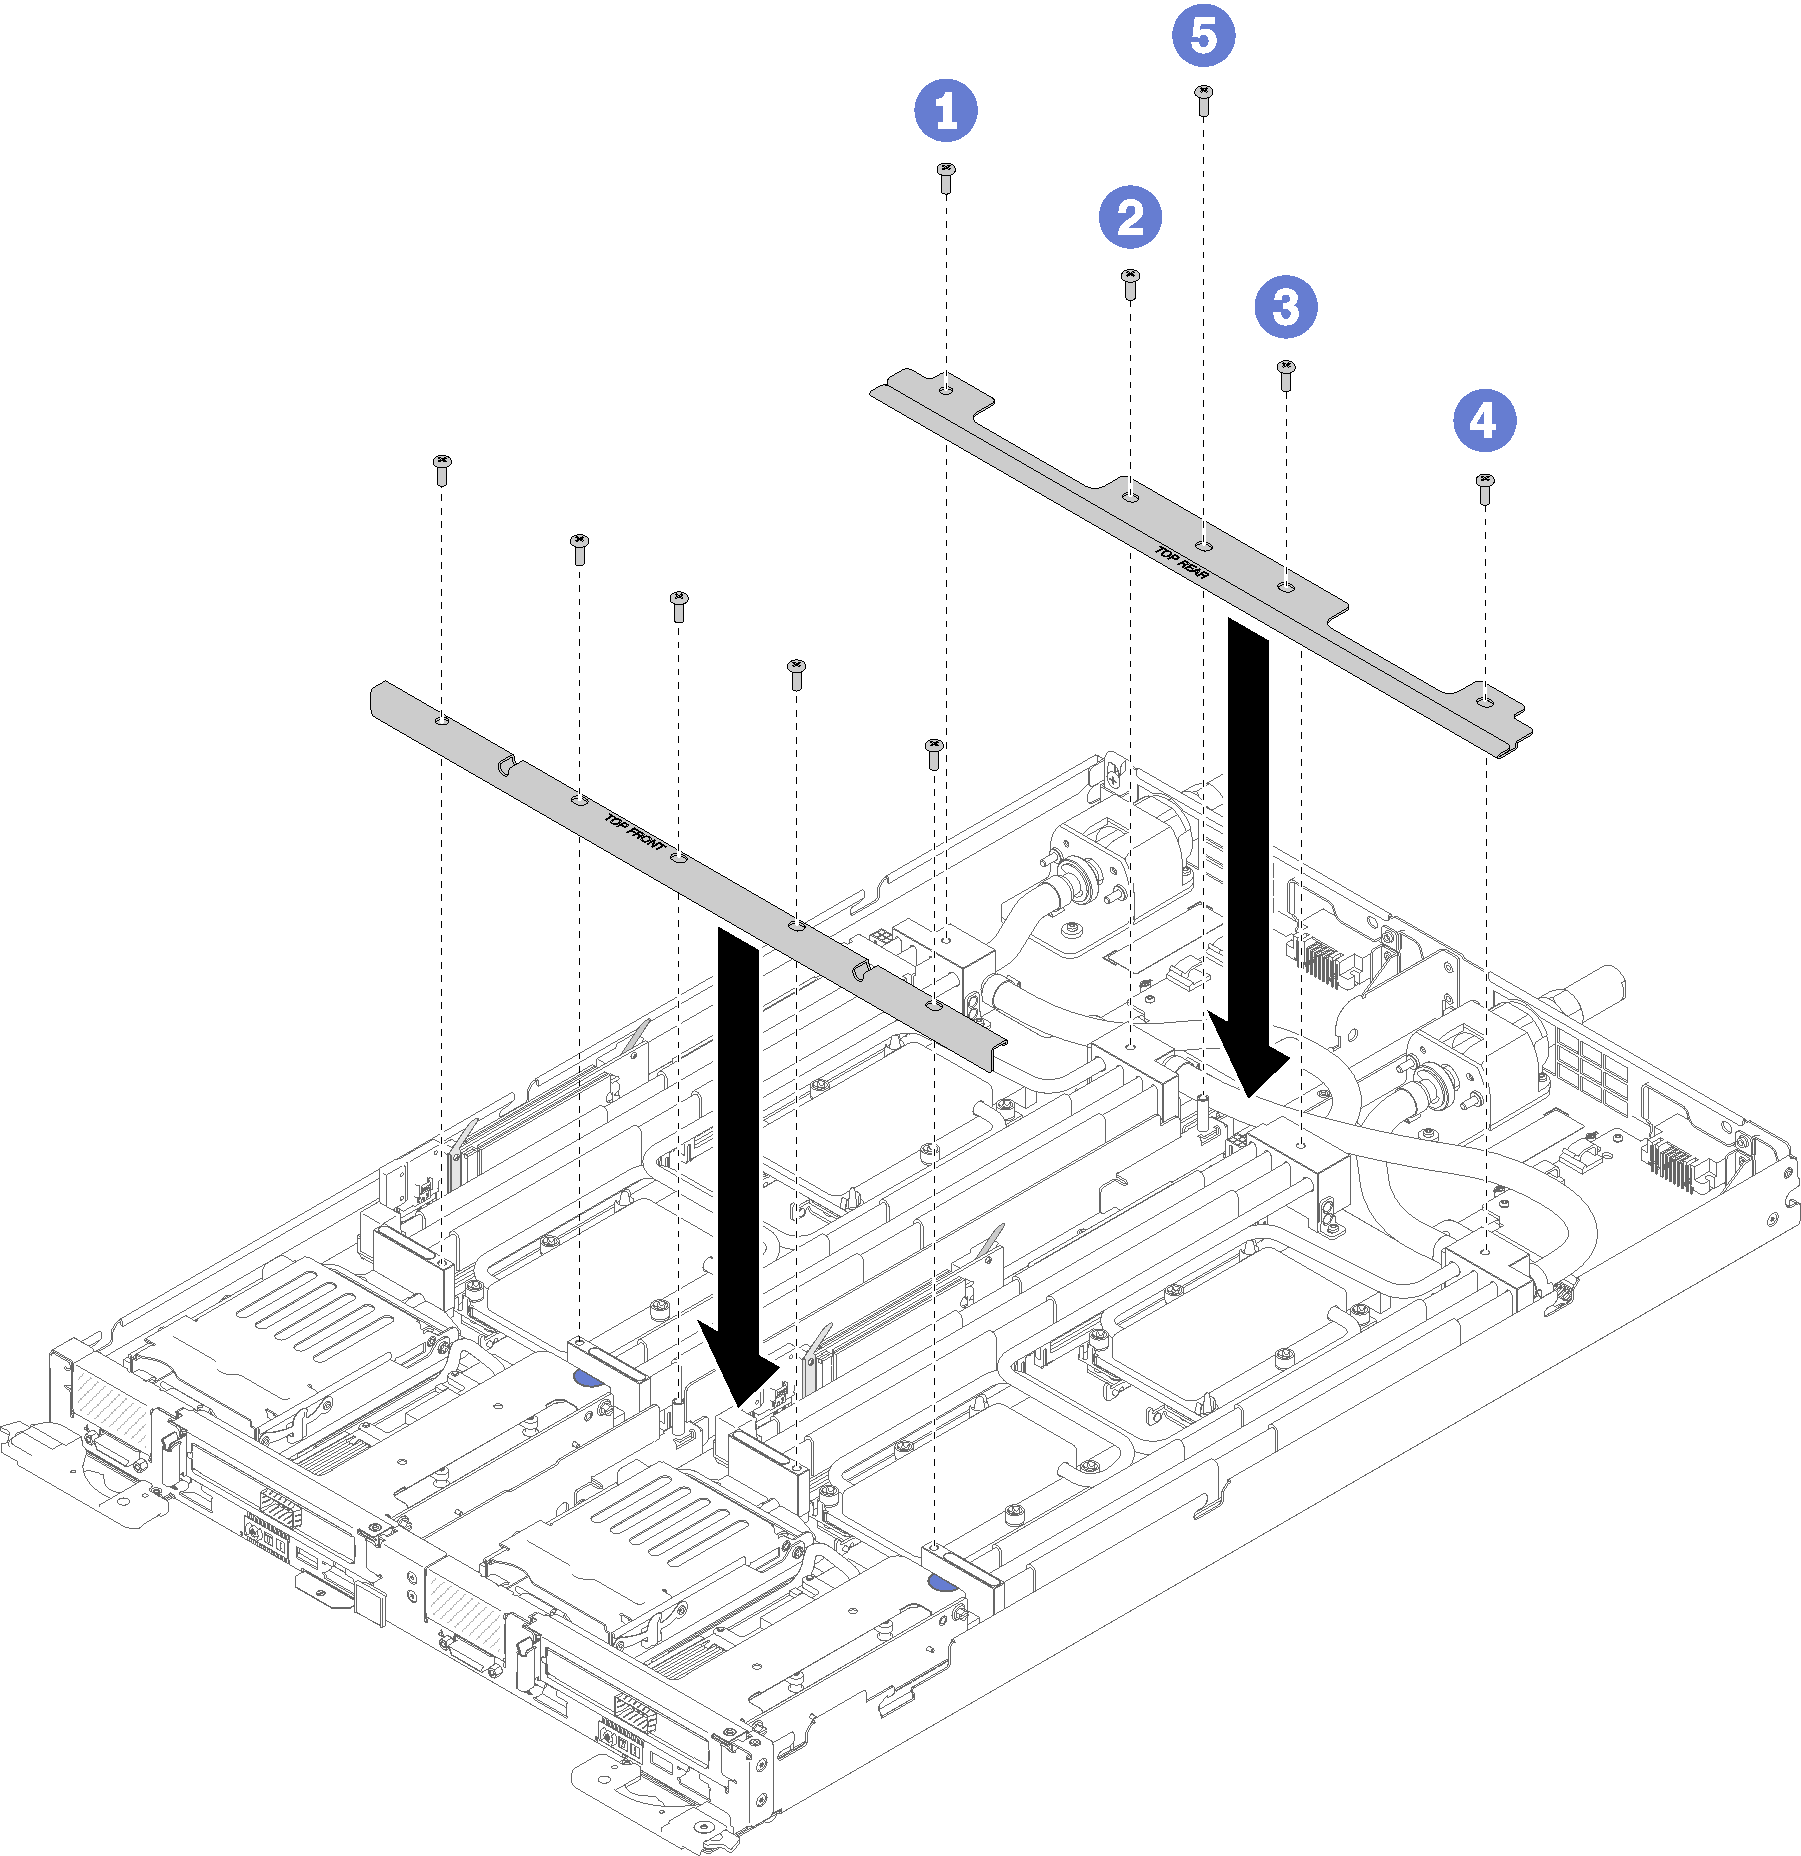
Reinstall the tray cover (see Install the tray cover).
Reinstall the tray (see Install a DWC tray in the enclosure).
Check the power LED on each node to make sure it changes from fast blink to slow blink to indicate both nodes are ready to be powered on.
Demo video