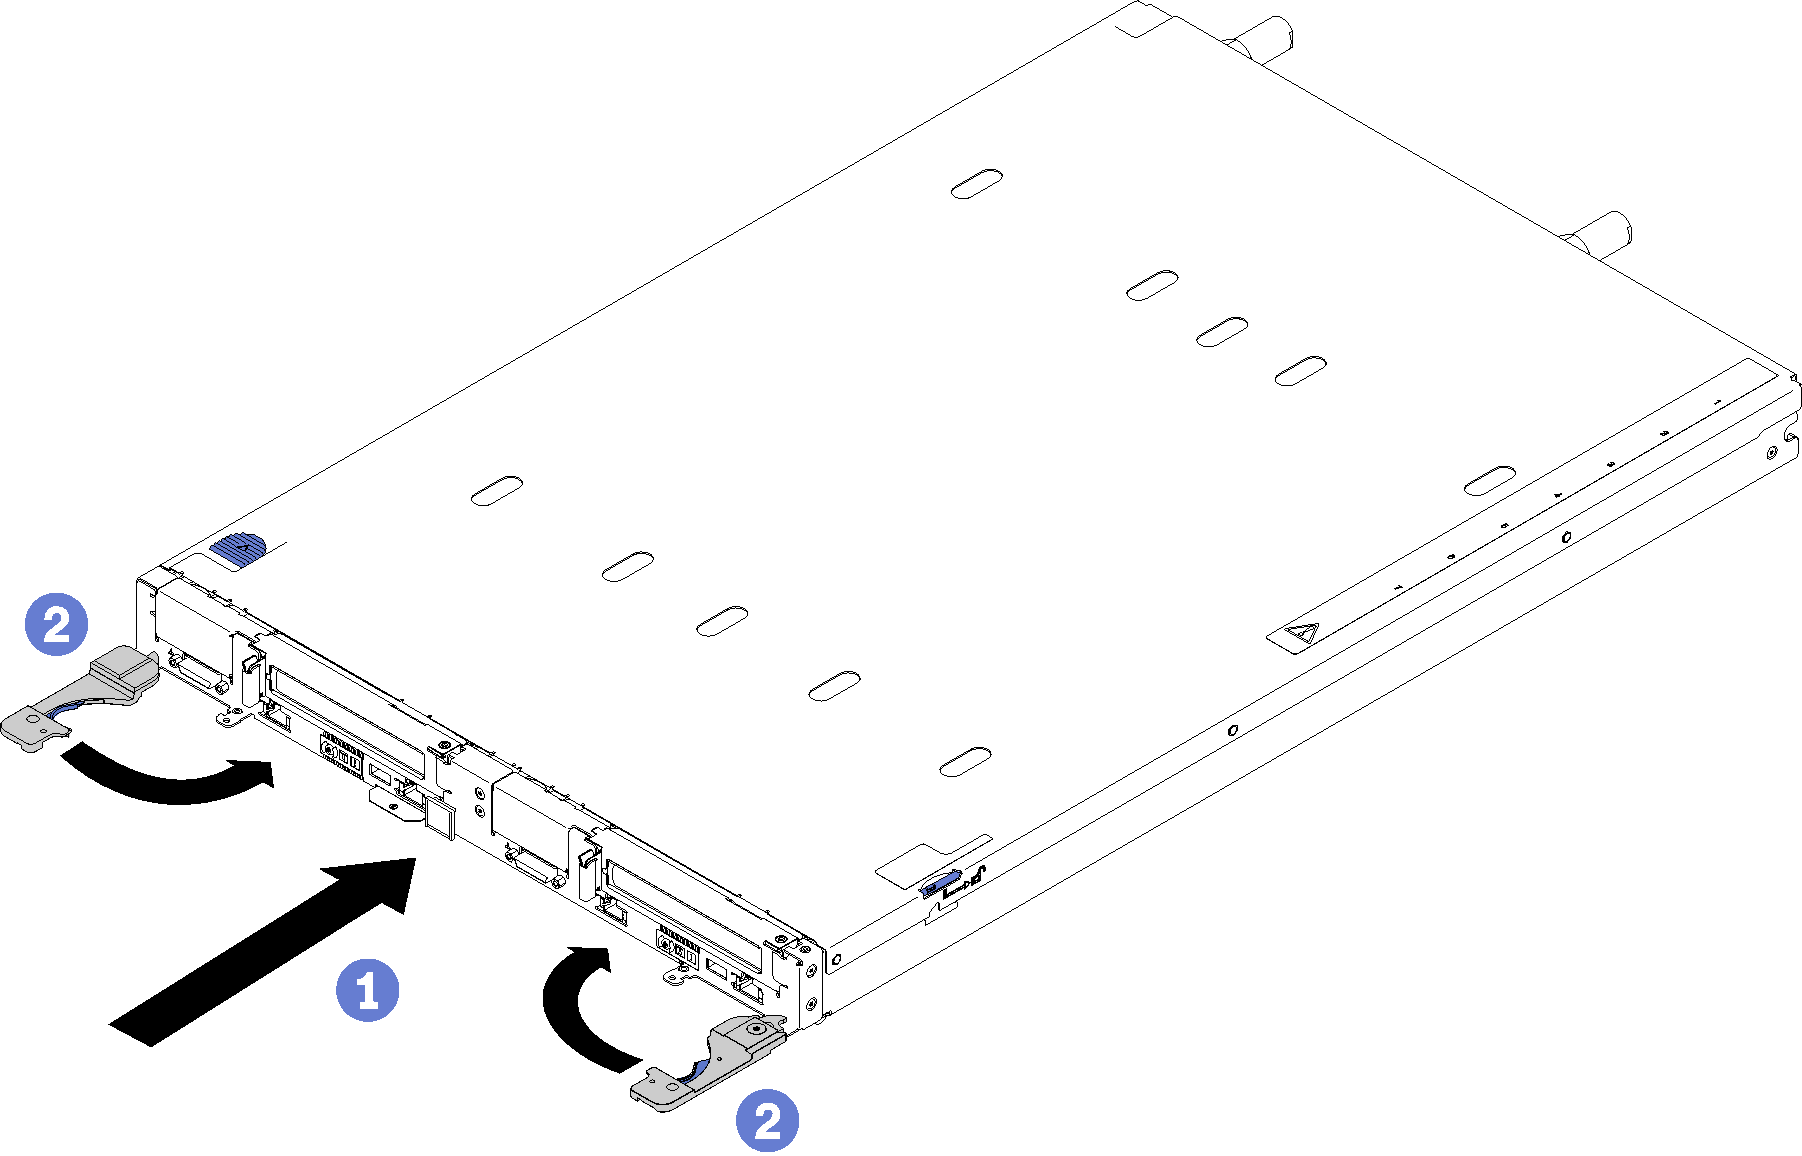
Use this information to install a DWC tray in the enclosure.
S002
The power-control button on the device and the power switch on the power supply do not turn off the electrical current supplied to the device. The device also might have more than one power cord. To remove all electrical current from the device, ensure that all power cords are disconnected from the power source.
Complete the following steps to install a DWC tray in the enclosure.
Figure 1. DWC tray installation
- Select the tray bay.
- Make sure that the front handles on the DWC tray are in the open position.
- Insert the DWC tray into the tray bay until it stops.
- Rotate the front handles on the front of the DWC tray to the closed position to secure the tray in the enclosure.
After the DWC tray is installed, the XCC in the DWC tray initializes. This process takes approximately 110 seconds. The power LED flashes rapidly, and the power button on the DWC tray does not respond until this process is complete.
- Press the power buttons to turn on both nodes in the DWC tray.
- Make sure that the power LED on the node control panel is lit continuously, indicating that the each node is receiving power and is turned on.
- If you have other trays to install, do so now.
If this is the initial installation of the DWC tray in the enclosure, you must configure the DWC tray through the Setup utility and install the DWC tray operating system.
If you have changed the configuration of the DWC tray or if you are installing a different DWC tray from the one that you removed, you must configure the DWC tray through the Setup utility, and you might have to install the DWC tray operating system.


