Install a drive
Use this information to install a drive.
Before you install a drive:
Read the Installation Guidelines to ensure that you work safely.
Complete the following steps to install a drive.
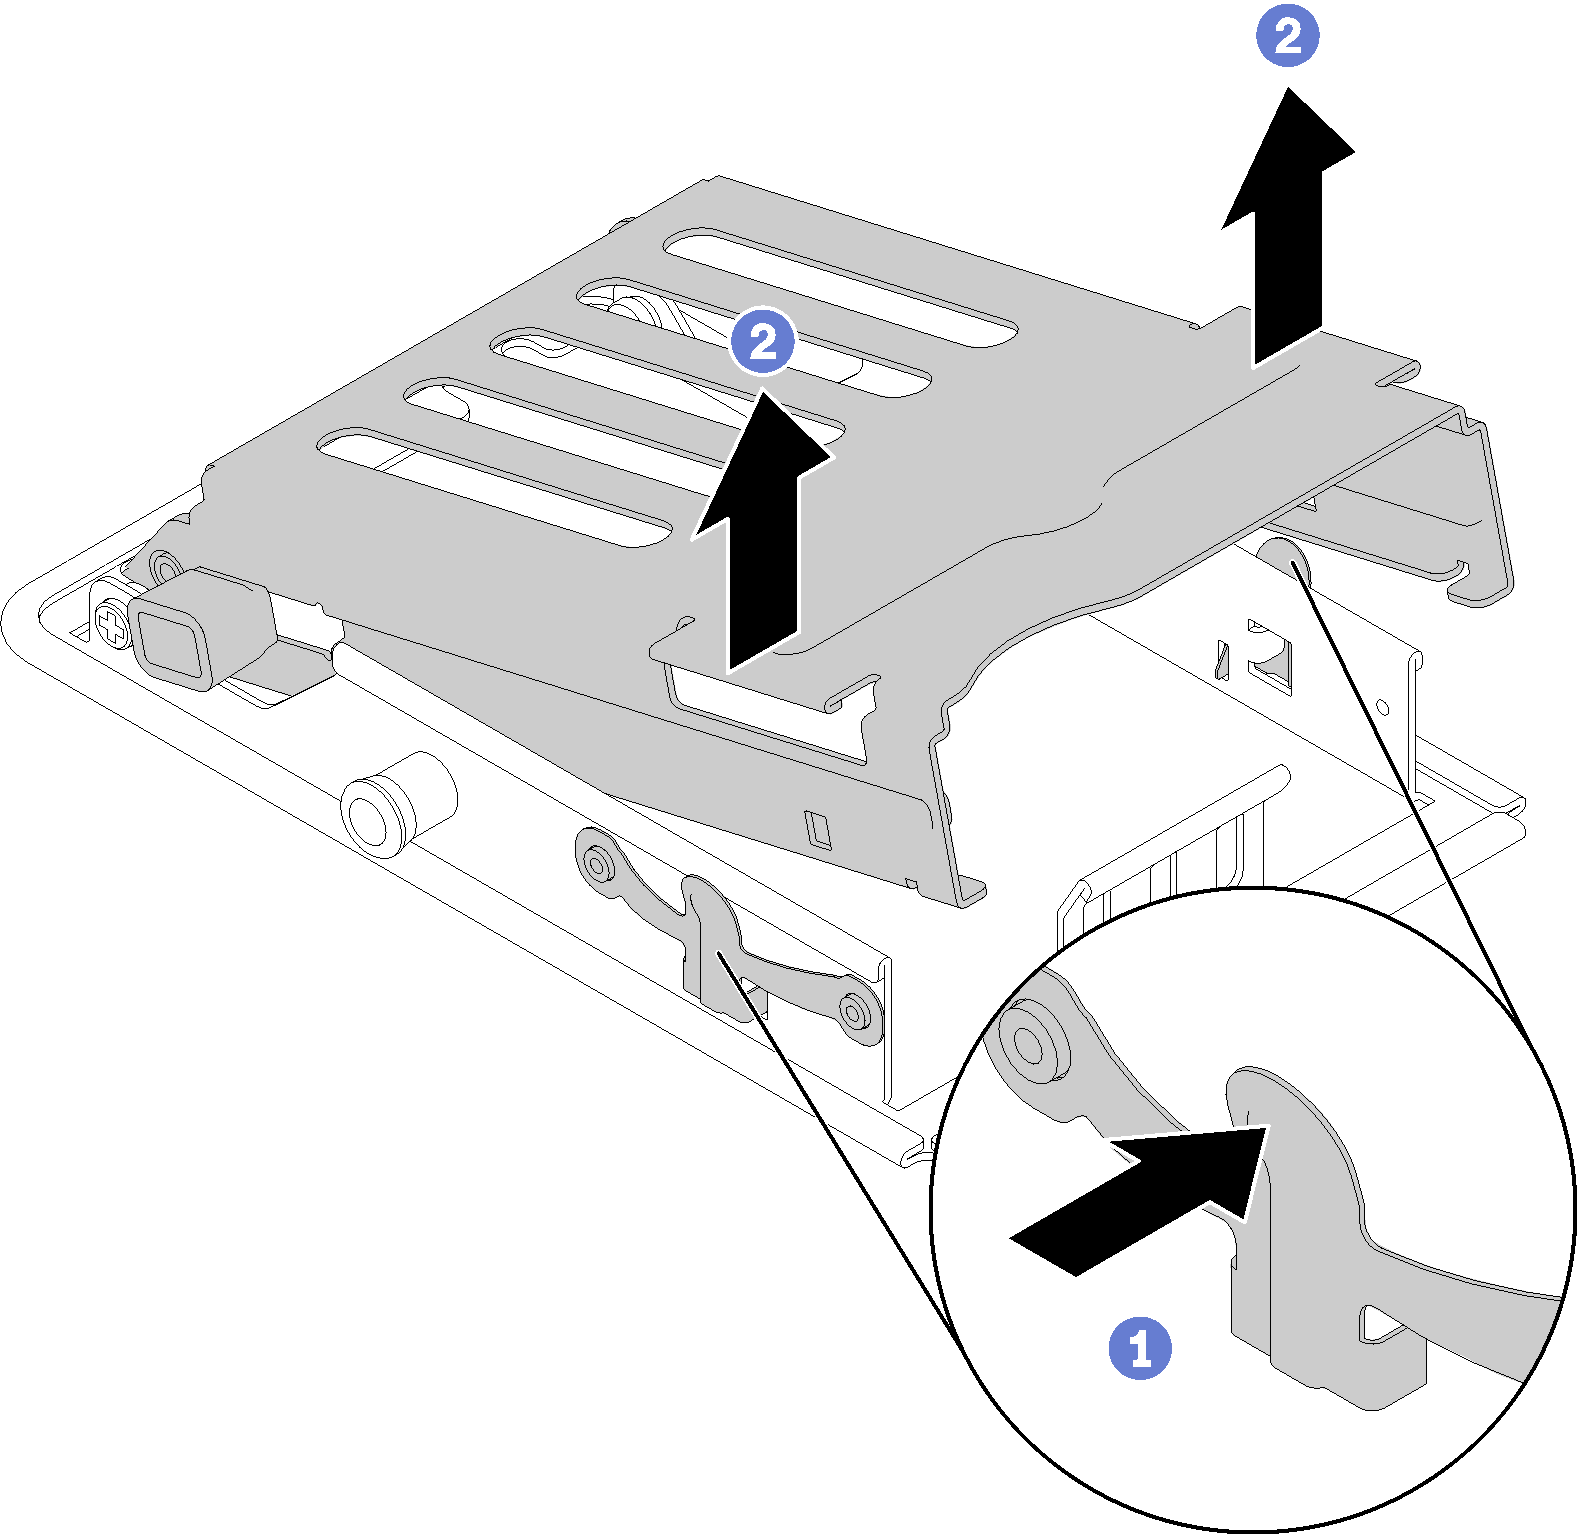
- Squeeze two release latches to release the drive cage.Figure 1. Releasing the drive cage
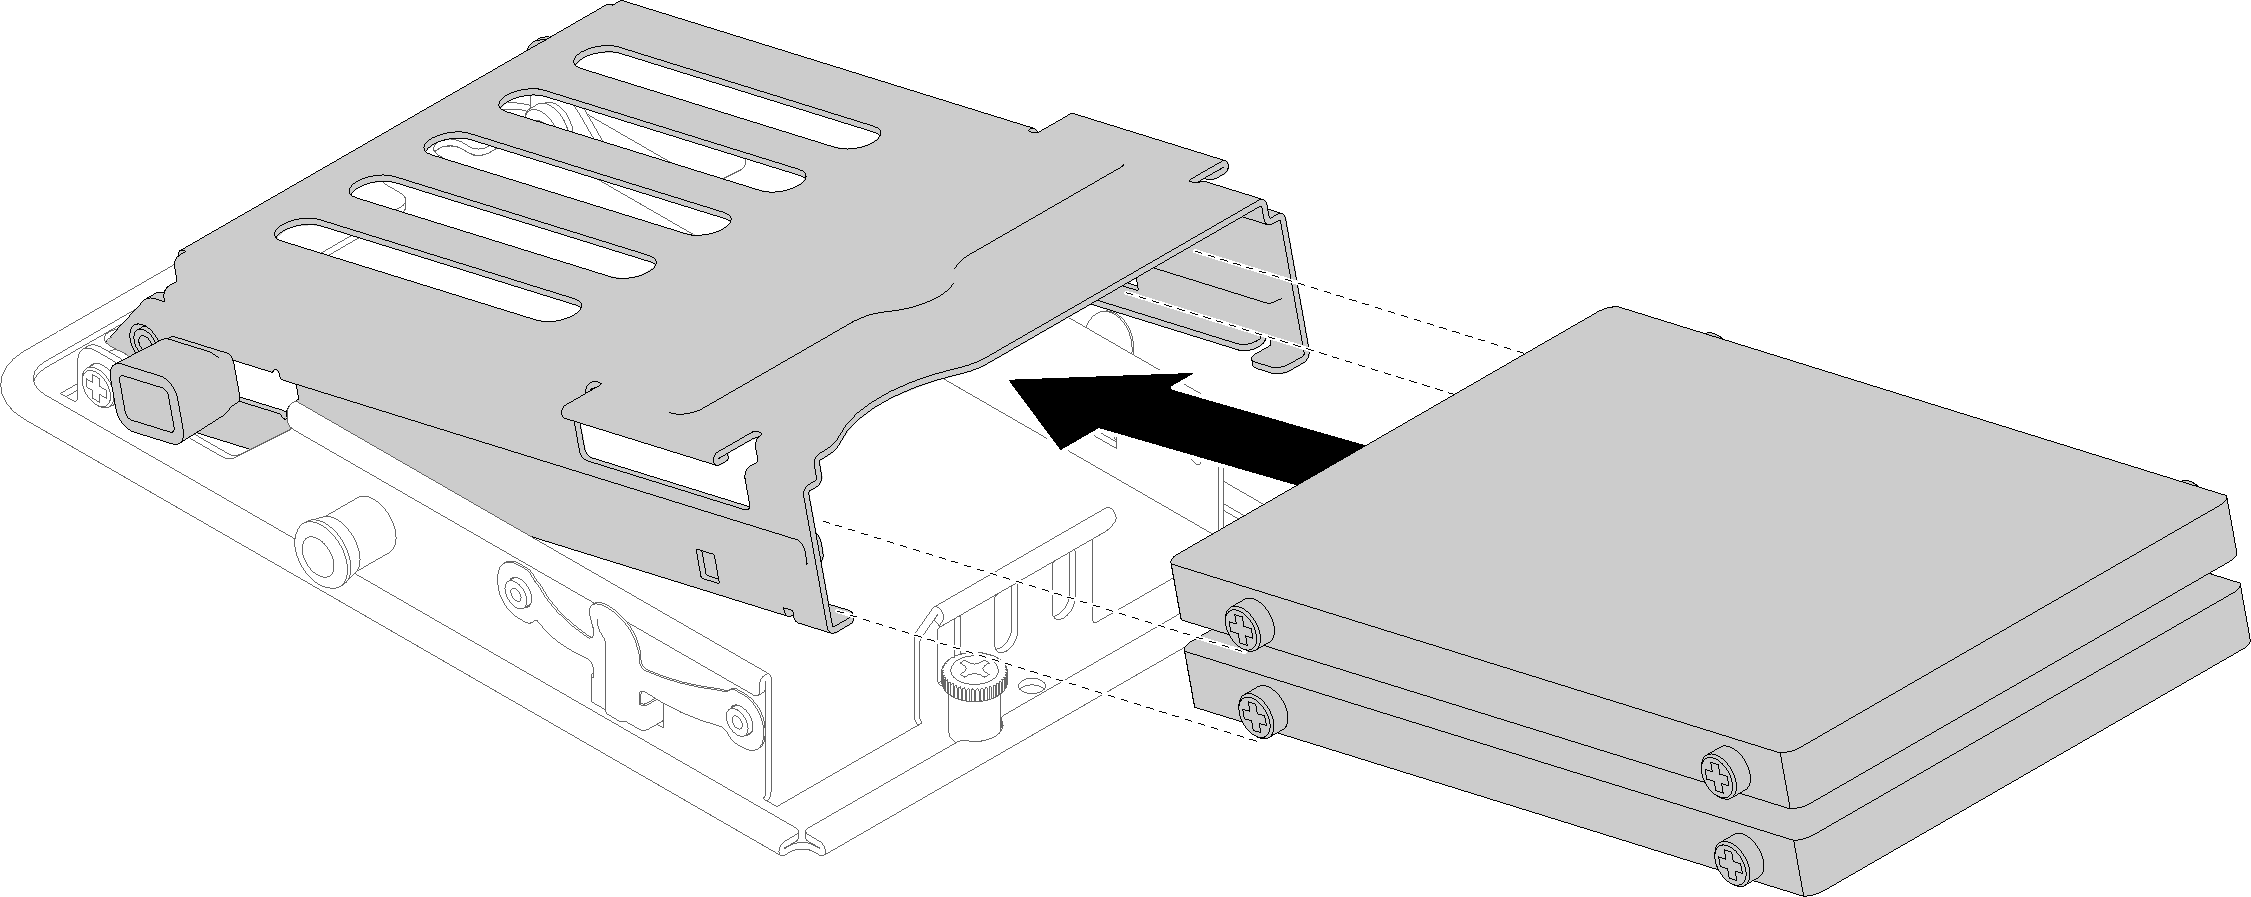
- Align the drive with drive cage and carefully slide the drive into the drive cage.Figure 2. Drive installation
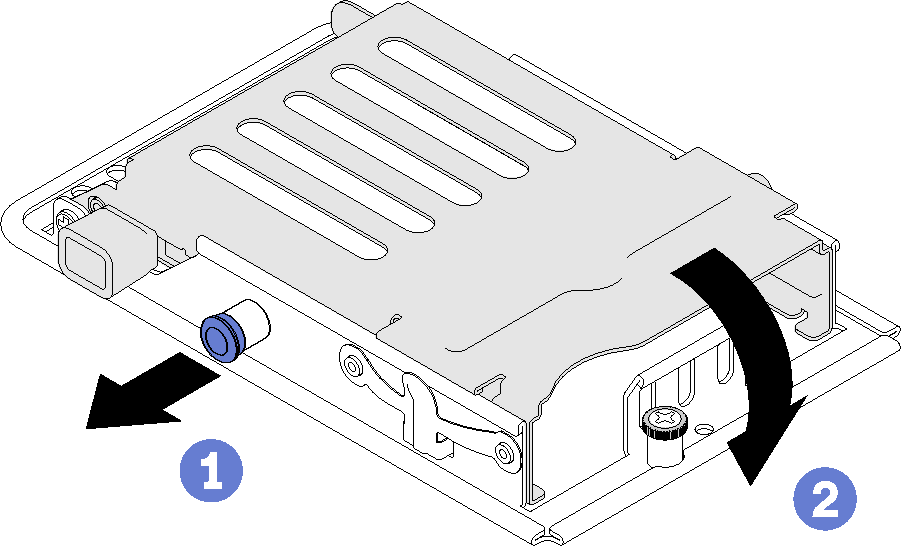
- Pull the blue retention latch and rotate the drive cage down. Carefully push down on the top of drive cage to make sure it is correctly seated.Figure 3. Drive cage installation
After you install a drive, complete the following steps:
Reinstall the tray cover (see Install the tray cover).
Reinstall the tray (see Install a DWC tray in the enclosure).
Check the power LED on each node to make sure it changes from fast blink to slow blink to indicate both nodes are ready to be powered on.
Demo video
Give documentation feedback