Install an M.2 drive into the M.2 backplane
Use this information to install an M.2 drive in the M.2 backplane.
S001

DANGER
danger
Electrical current from power, telephone, and communication cables is hazardous.
To avoid a shock hazard:
- Connect all power cords to a properly wired and grounded electrical outlet/source.
- Connect any equipment that will be attached to this product to properly wired outlets/sources.
- When possible, use one hand only to connect or disconnect signal cables.
- Never turn on any equipment when there is evidence of fire, water, or structural damage.
- The device might have more than one power cord, to remove all electrical current from the device, ensure that all power cords are disconnected from the power source.
Before you install an M.2 drive into the M.2 backplane:
Read the Installation Guidelines to ensure that you work safely.
See the following table for supported M.2 drive configurations.
| M.2 drive configuration | Support status |
| Single 32 GB M.2 drive (42 mm long) | Supported |
| Single 128 GB M.2 drive (80 mm long) | Supported |
| Dual 32 GB M.2 drives (42 mm long) with RAID backplane | Supported |
| Dual 128 GB M.2 drives (80mm long) with RAID backplane | Only supported in certain environments. Contact Lenovo Services for additional details. |
Complete the following steps to install an M.2 drive in the M.2 backplane.
- Insert the M.2 drive at an angle (approximately 30 degrees) into the connector and rotate it until the notch catches on the lip of the retainer; then, slide the retainer forward (toward the connector) to secure the M.2 drive in the M.2 backplane.Figure 1. M.2 drive installation
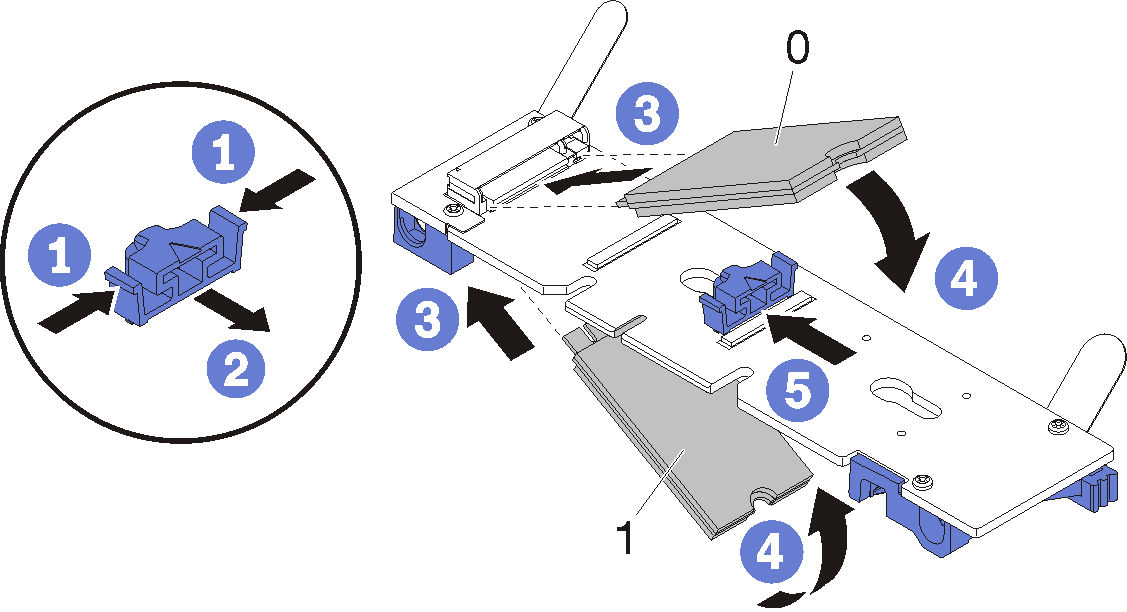 AttentionWhen sliding the retainer forward, make sure the two nubs on the retainer enter the small holes on the M.2 backplane. Once they enter the holes, you will hear a soft “click” sound.Figure 2. M.2 drive installation
After you install an M.2 drive into the M.2 backplane, complete the following steps:
Reinstall the M.2 backplane (see Install the M.2 backplane).
Reinstall the tray cover (see Install the tray cover).
Reinstall the tray (see Install a DWC tray in the enclosure).
Check the power LED on each node to make sure it changes from fast blink to slow blink to indicate both nodes are ready to be powered on.
Demo video
Give documentation feedback