프로세서 공기 조절 장치 및 공기 흐름 센서 보드 제거
이 섹션의 지침에 따라 프로세서 공기 조절 장치 및 공기 흐름 센서 보드를 제거하십시오.
이 작업 정보
S002
경고
장치의 전원 제어 버튼과 전원 공급 장치의 전원 스위치는 장치에 공급되는 전류를 차단하지 않습니다. 또한 장치에는 둘 이상의 전원 코드가 있을 수 있습니다. 장치로 공급되는 전류를 제거하려면 모든 전원 코드가 전원에서 분리되어 있는지 확인하십시오.
S012
경고
뜨거운 표면 부근입니다.
절차
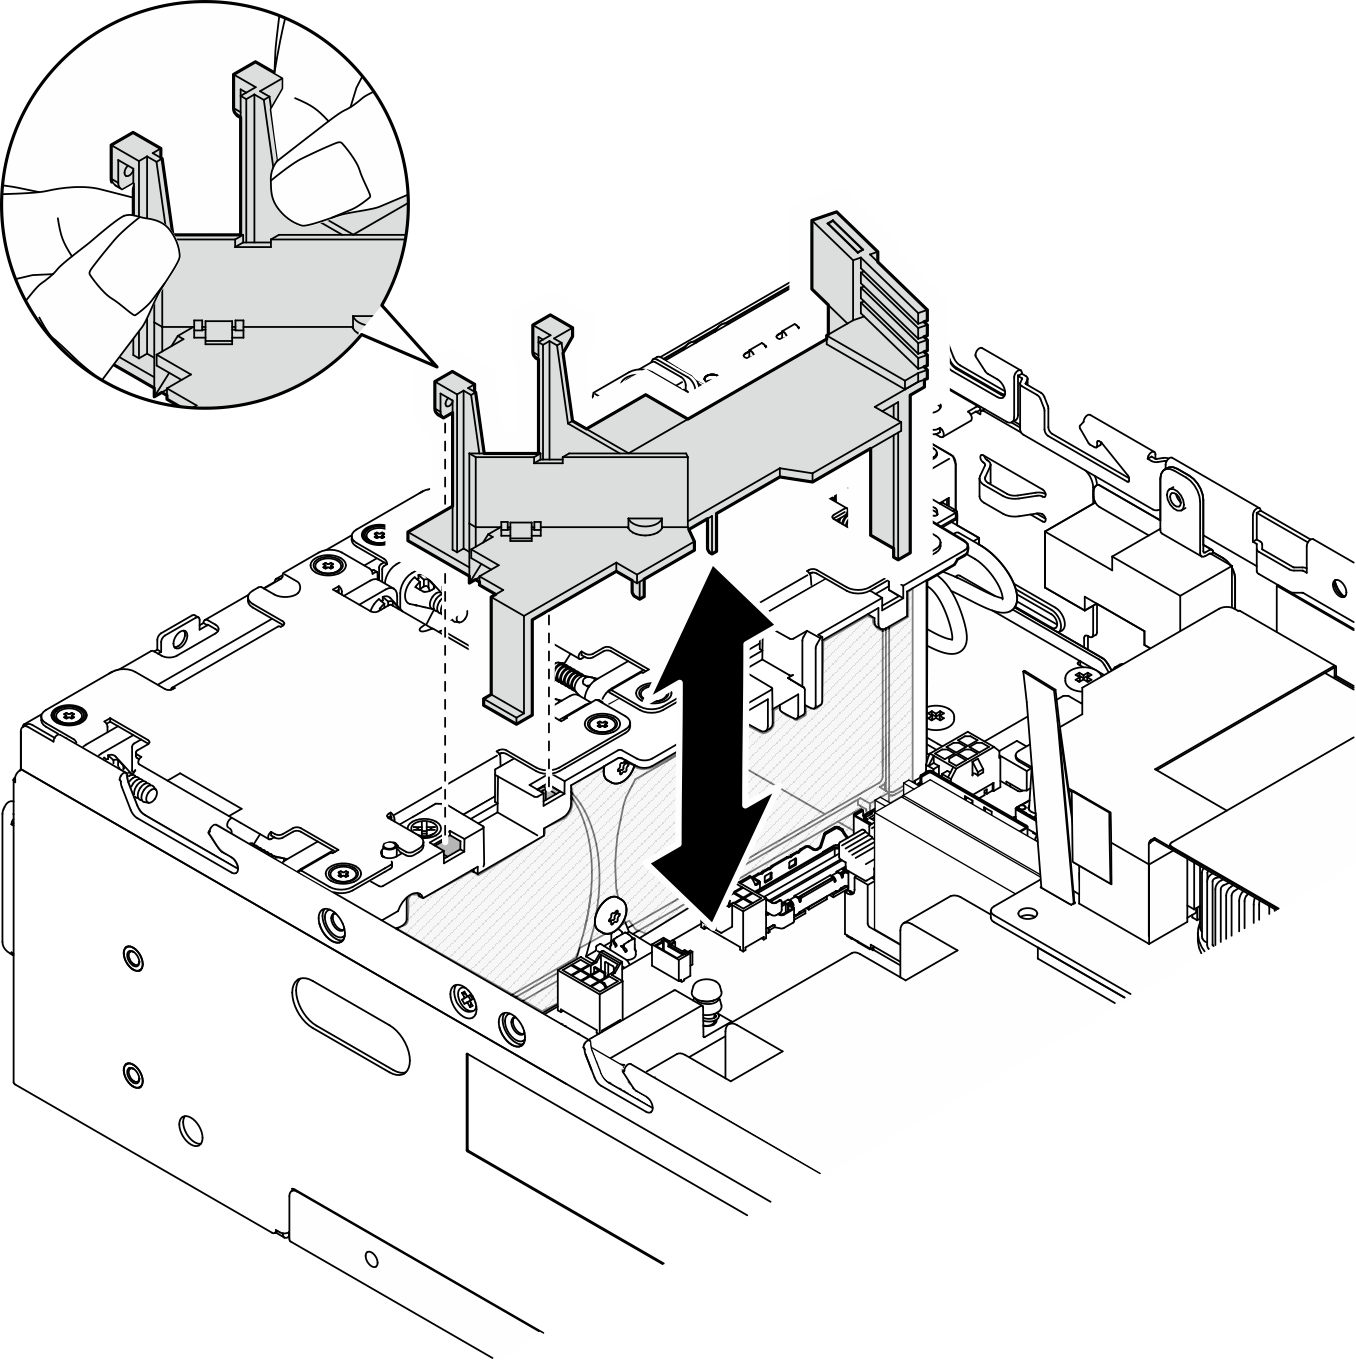
프로세서 공기 조절 장치 제거
그림과 같이 공기 조절 장치를 부드럽게 잡은 다음 공기 조절 장치를 들어 올려 제거하십시오.
주의
적절한 냉각 및 공기 흐름을 위해 서버 전원을 켜기 전에 공기 조절 장치를 다시 설치하십시오. 공기 조절 장치가 제거된 상태에서 서버를 작동하면 서버 구성 요소가 손상될 수 있습니다.
그림 1. 공기 조절 장치 제거
프로세서 공기 조절 장치 및 공기 흐름 센서 보드 제거
- 프로세서 공기 조절 장치를 공기 흐름 센서 보드와 함께 제거합니다.
 그림과 같이 공기 조절 장치를 부드럽게 잡은 다음 공기 조절 장치를 들어 올리십시오.
 시스템 보드에서 공기 흐름 센서 보드의 케이블을 분리합니다.
 공기 조절 장치를 섀시에서 들어 올립니다.
주의적절한 냉각 및 공기 흐름을 위해 서버 전원을 켜기 전에 공기 조절 장치를 다시 설치하십시오. 공기 조절 장치가 제거된 상태에서 서버를 작동하면 서버 구성 요소가 손상될 수 있습니다.
그림 2. 공기 조절 장치 제거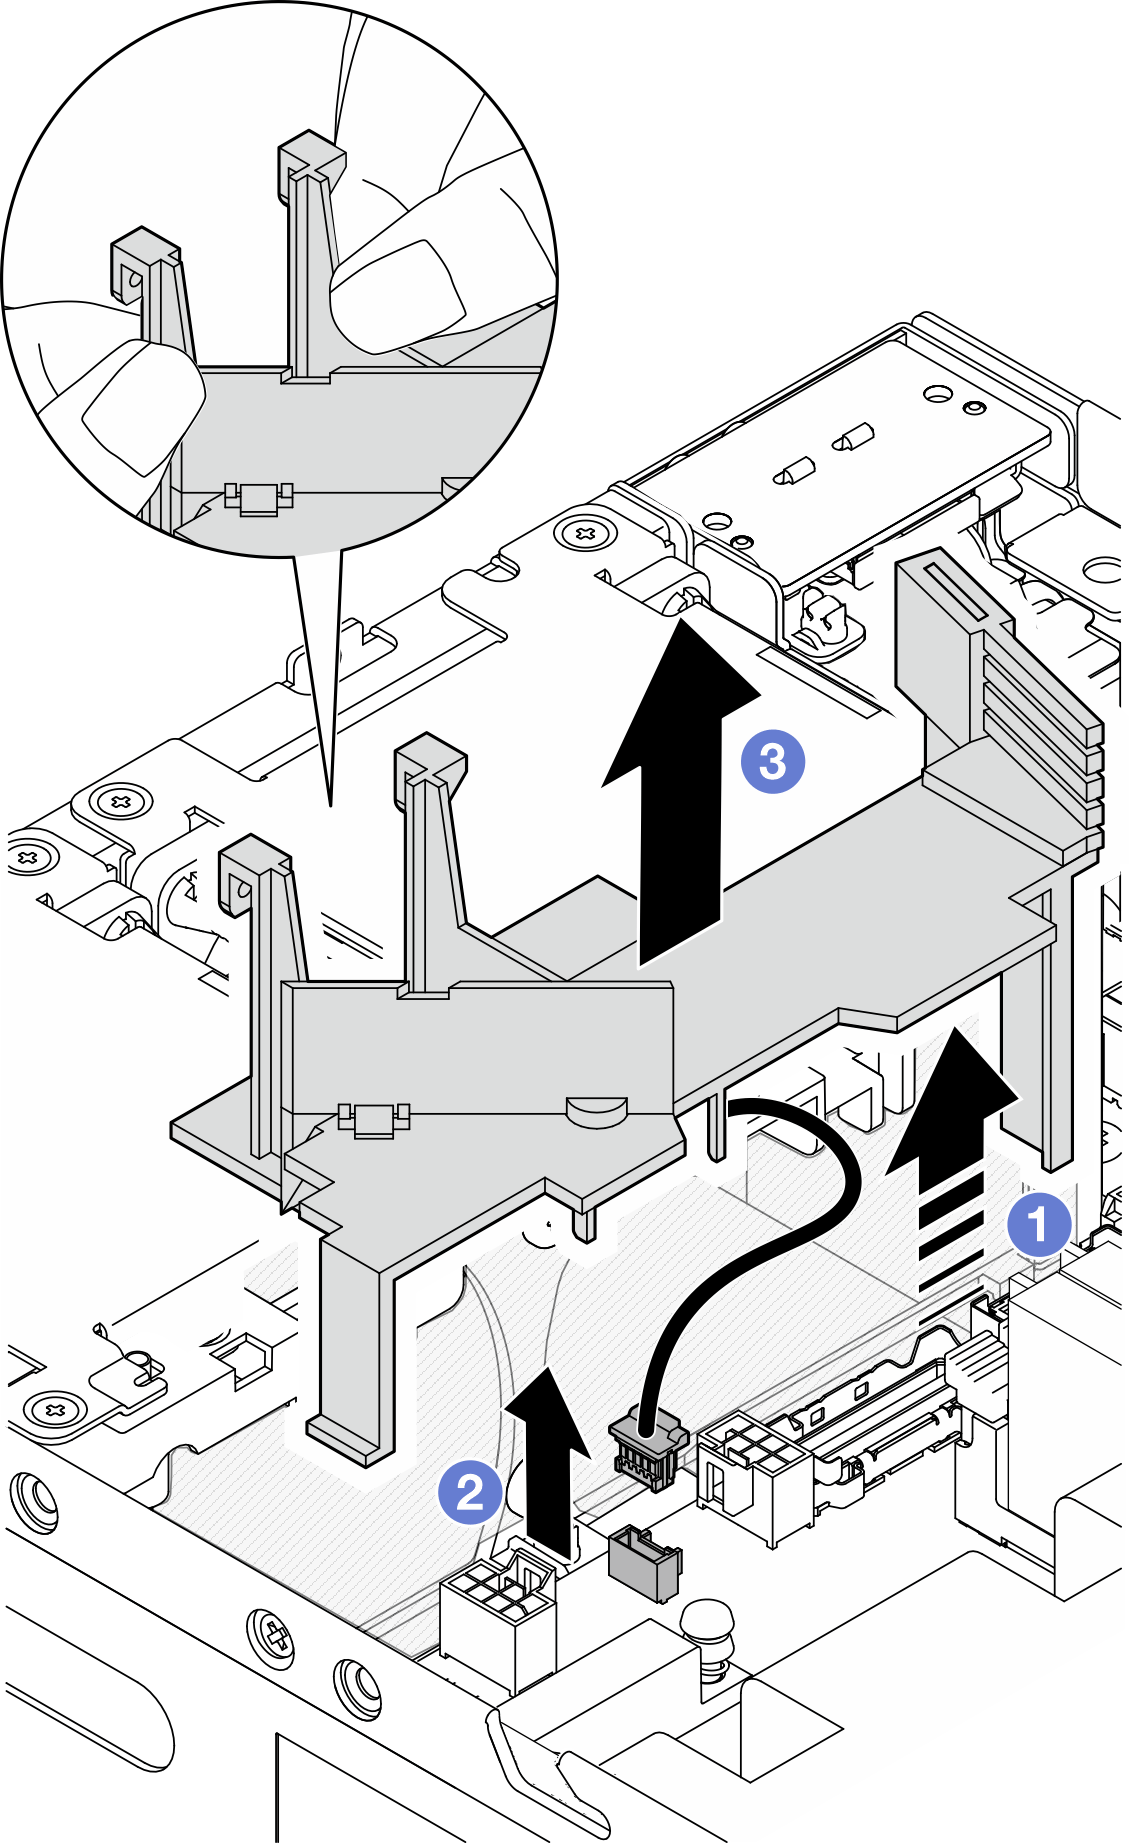
- 프로세서 공기 조절 장치에서 공기 흐름 센서 보드를 제거합니다.
- 공기 흐름 센서 보드를 고정하는 나사 2개를 푸십시오.
- 마일라 필름을 위로 당깁니다.
- 공기 흐름 센서 보드를 들어 올려 공기 조절 장치에서 제거합니다.
그림 3. 공기 흐름 센서 보드 제거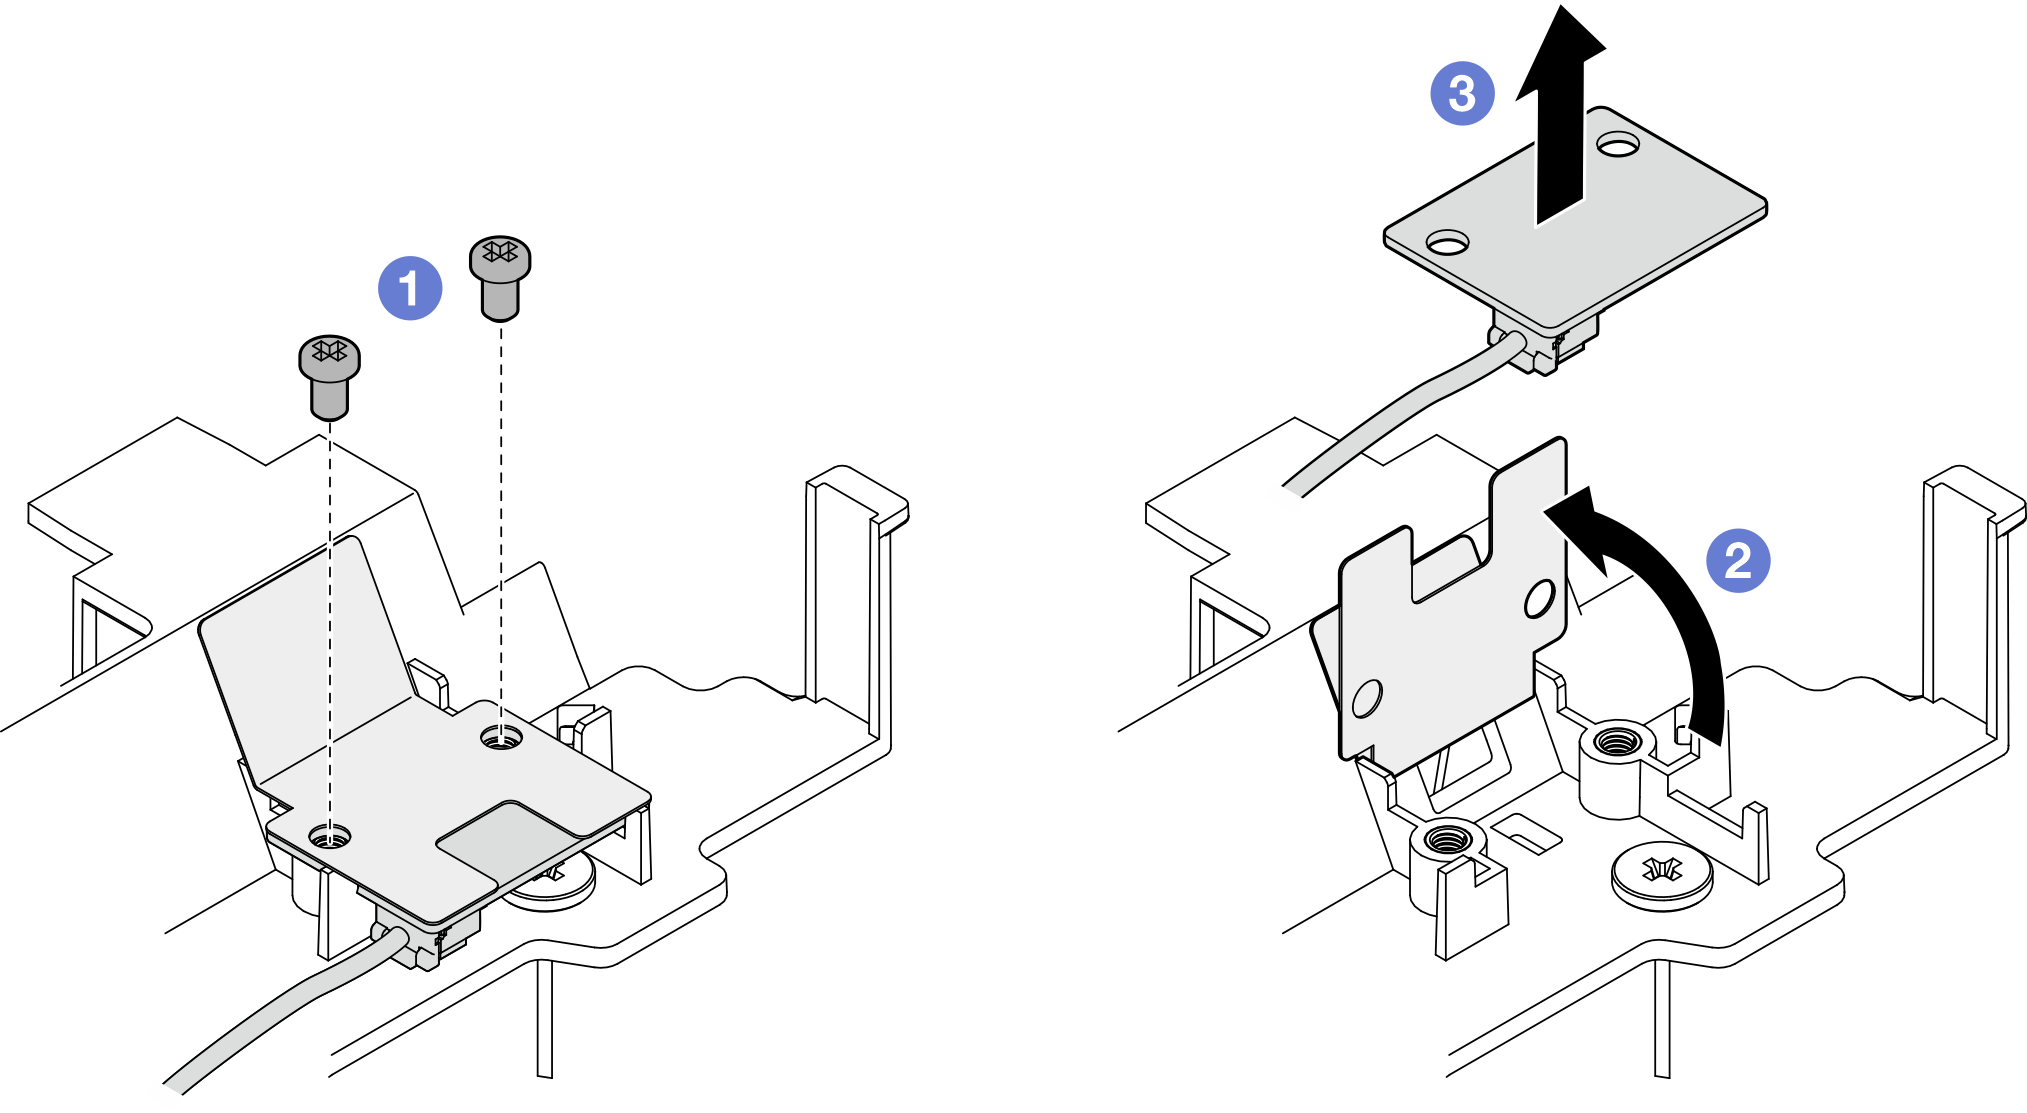
피드백 보내기