Install the Embedded Network Module and WLAN module
See this topic to learn how to install the Embedded Network Module.
About this task
Procedure
- If necessary, install the WLAN module and WLAN antenna cables. If not, go to step 3.
- Place a washer between the hex nut and the antenna cable. Then, tighten the hex nut with the wrench that comes in the air baffle as shown to secure the antenna cable. Repeat the same procedure on the other antenna cable.Figure 1. Installing a WLAN antenna cable
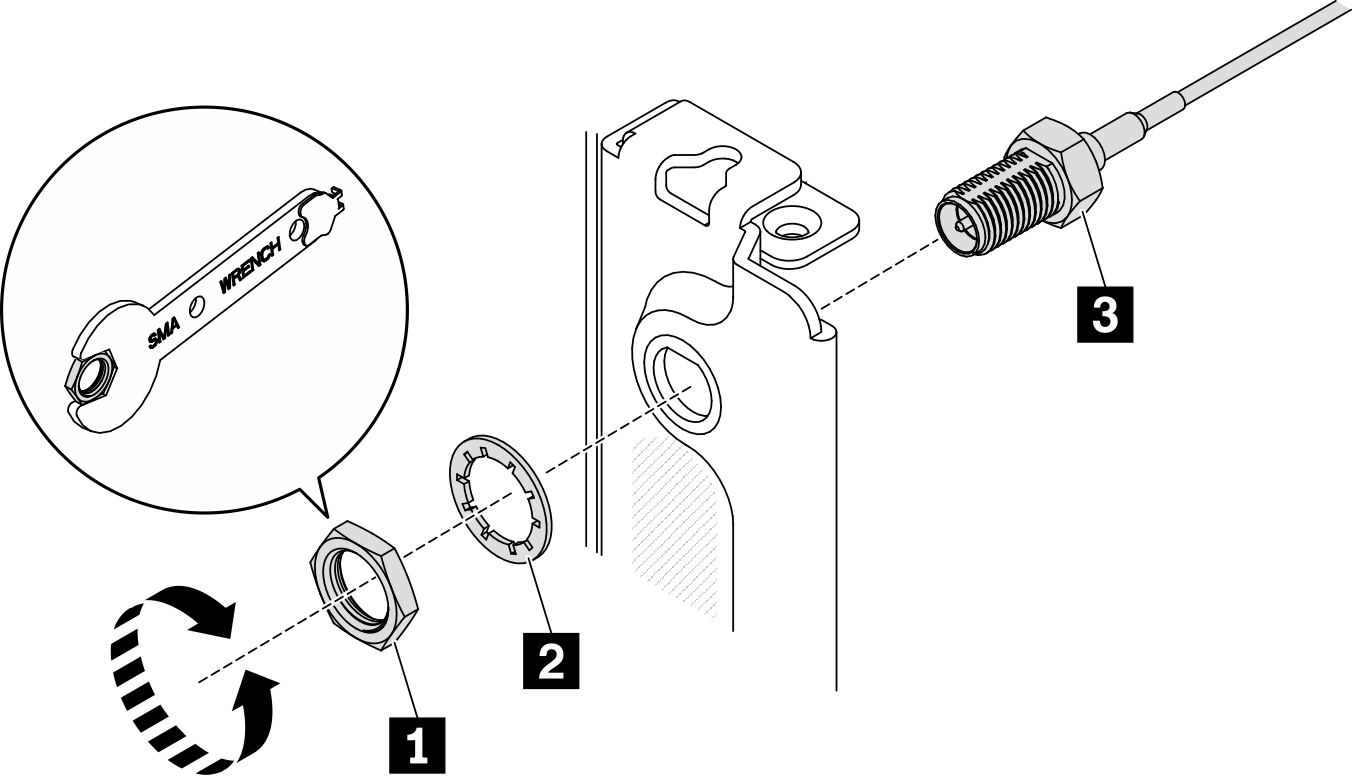
1 Hex nut 2 Washer 3 Antenna cable Figure 2. Antenna locations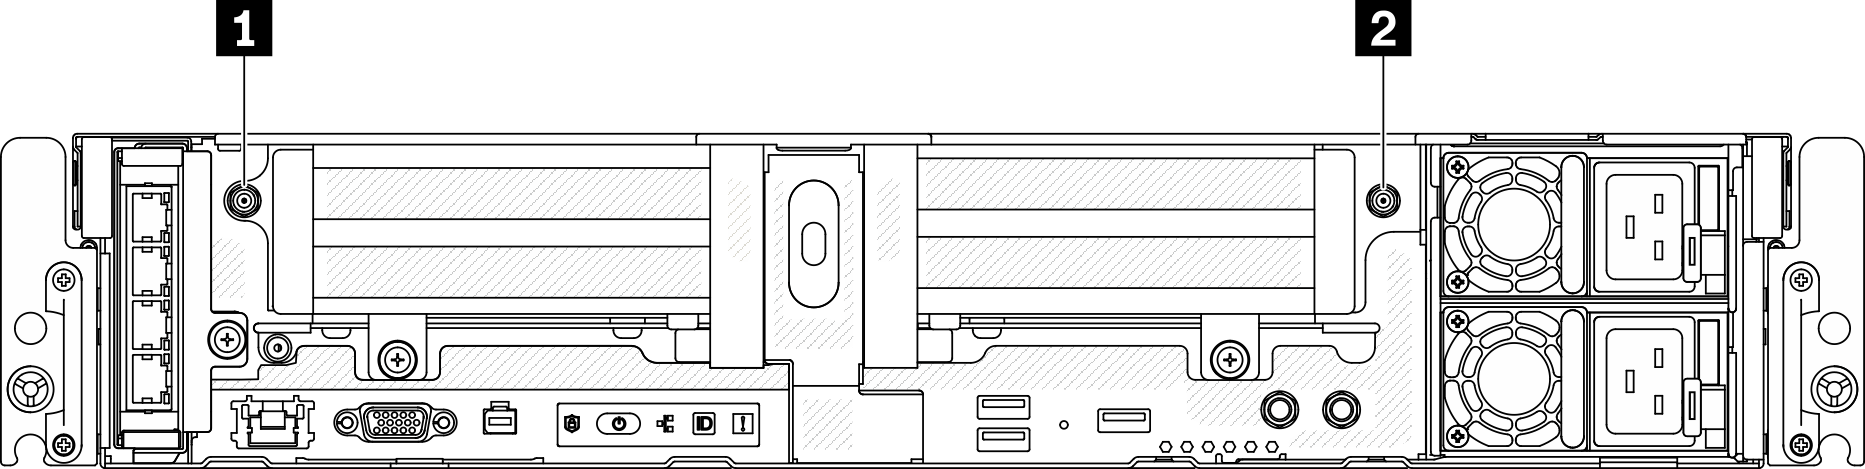
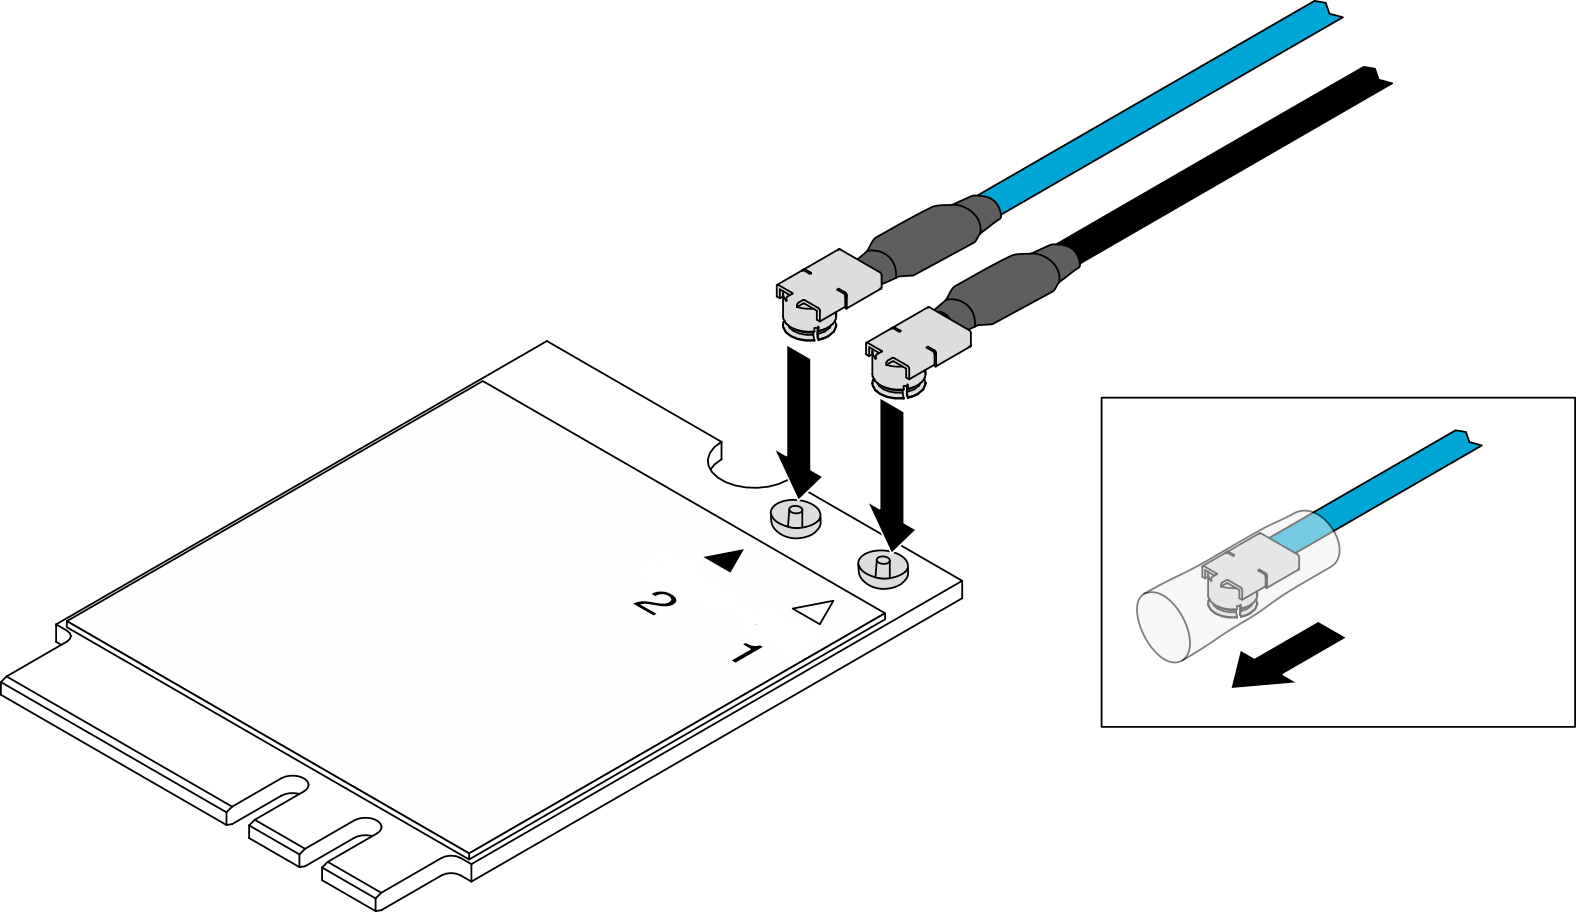
1 Antenna 1 2 Antenna 2 - Remove the protection cover of the blue cable, and gently press the cable connector down until it clicks in connector 2 on the WLAN module. Then, repeat the same procedure to the black cable on connector 1.Figure 3. Installing the antenna cable to the WLAN module
 Note
Note- Make sure to slide the rubber sleeves to next to the connector.
- Make sure the cables are connected to the right connector.
- The blue cable should be connected to connector 2.
- The black cable should be connected to connector 1.
- To make sure the cables are connected properly, try rotating the cables slightly horizontally. They should stay attached to the WLAN module.
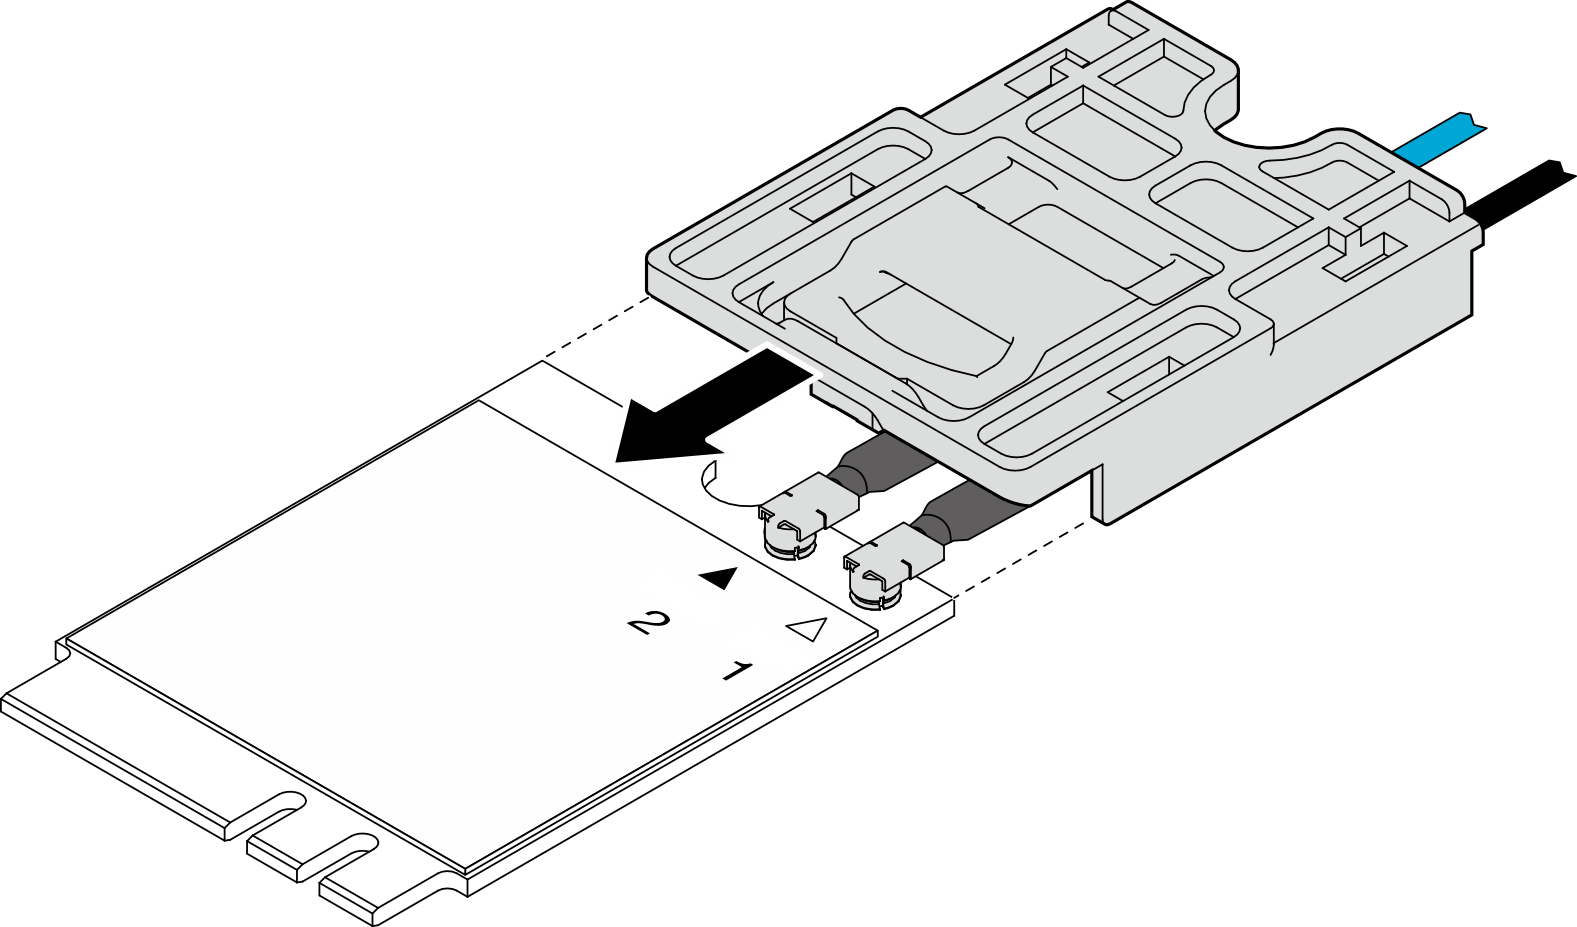
- Align the cable holder with the WLAN module, and slide the holder over the module until it clicks in place.Figure 4. Installing the cable holder
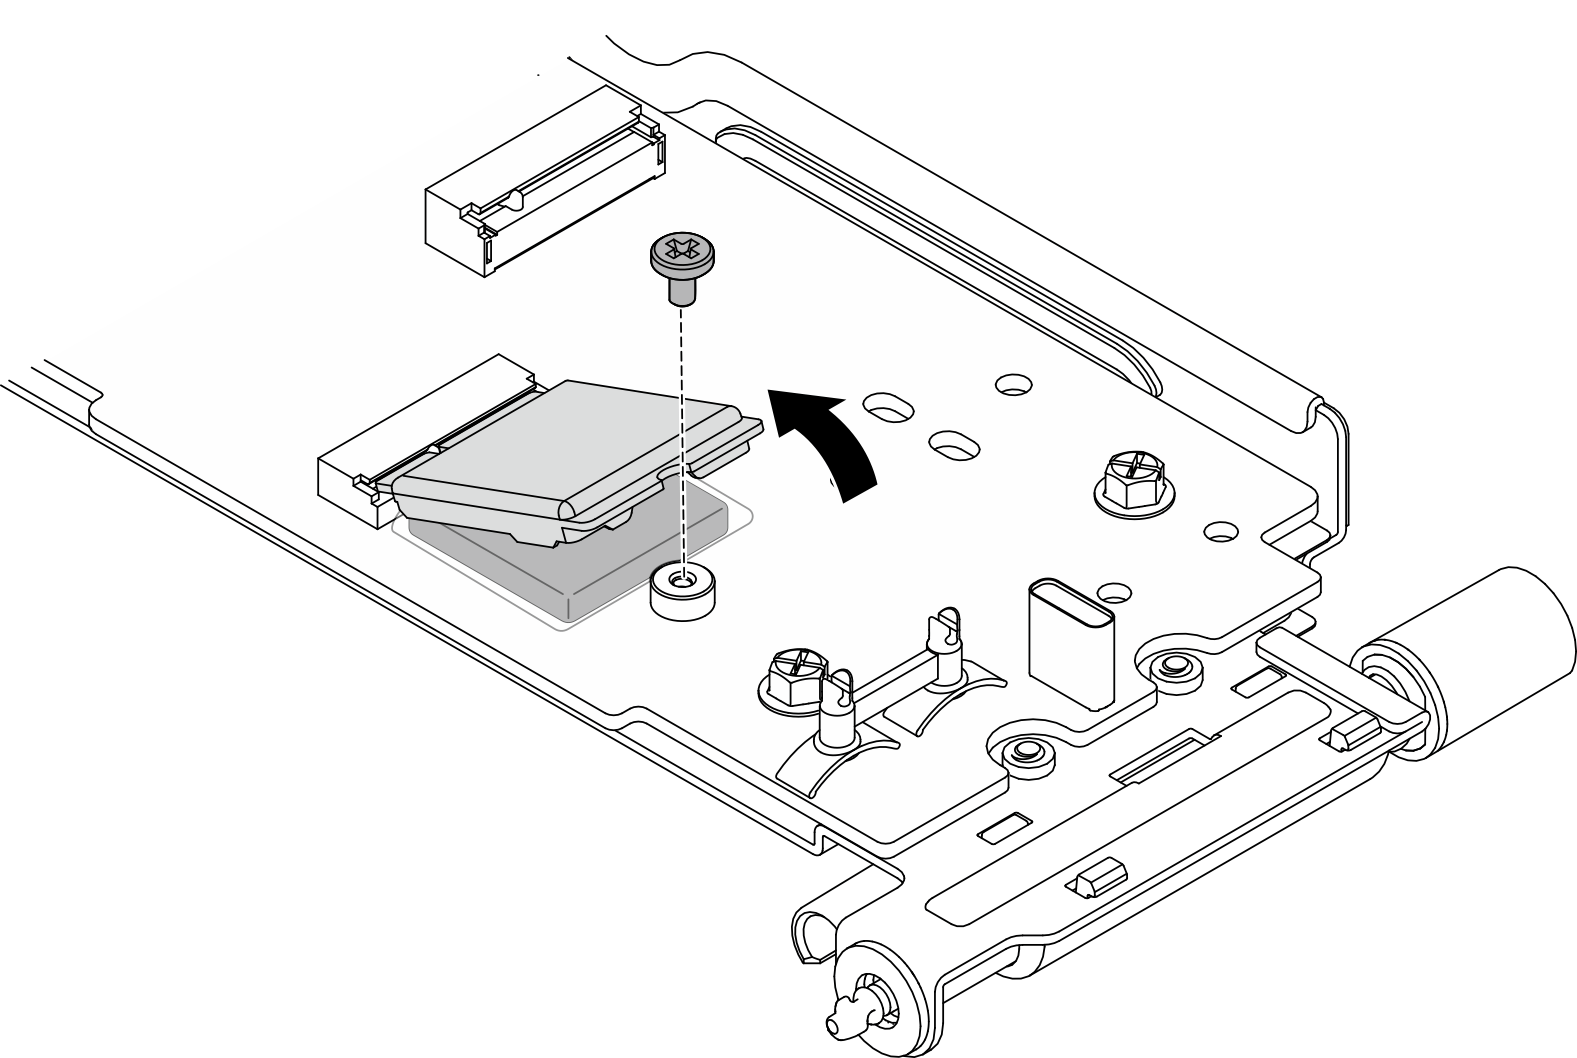
- Remove the screw that secures the WLAN module dummy cover, and remove the cover.Figure 5. Removing the WLAN module dummy cover
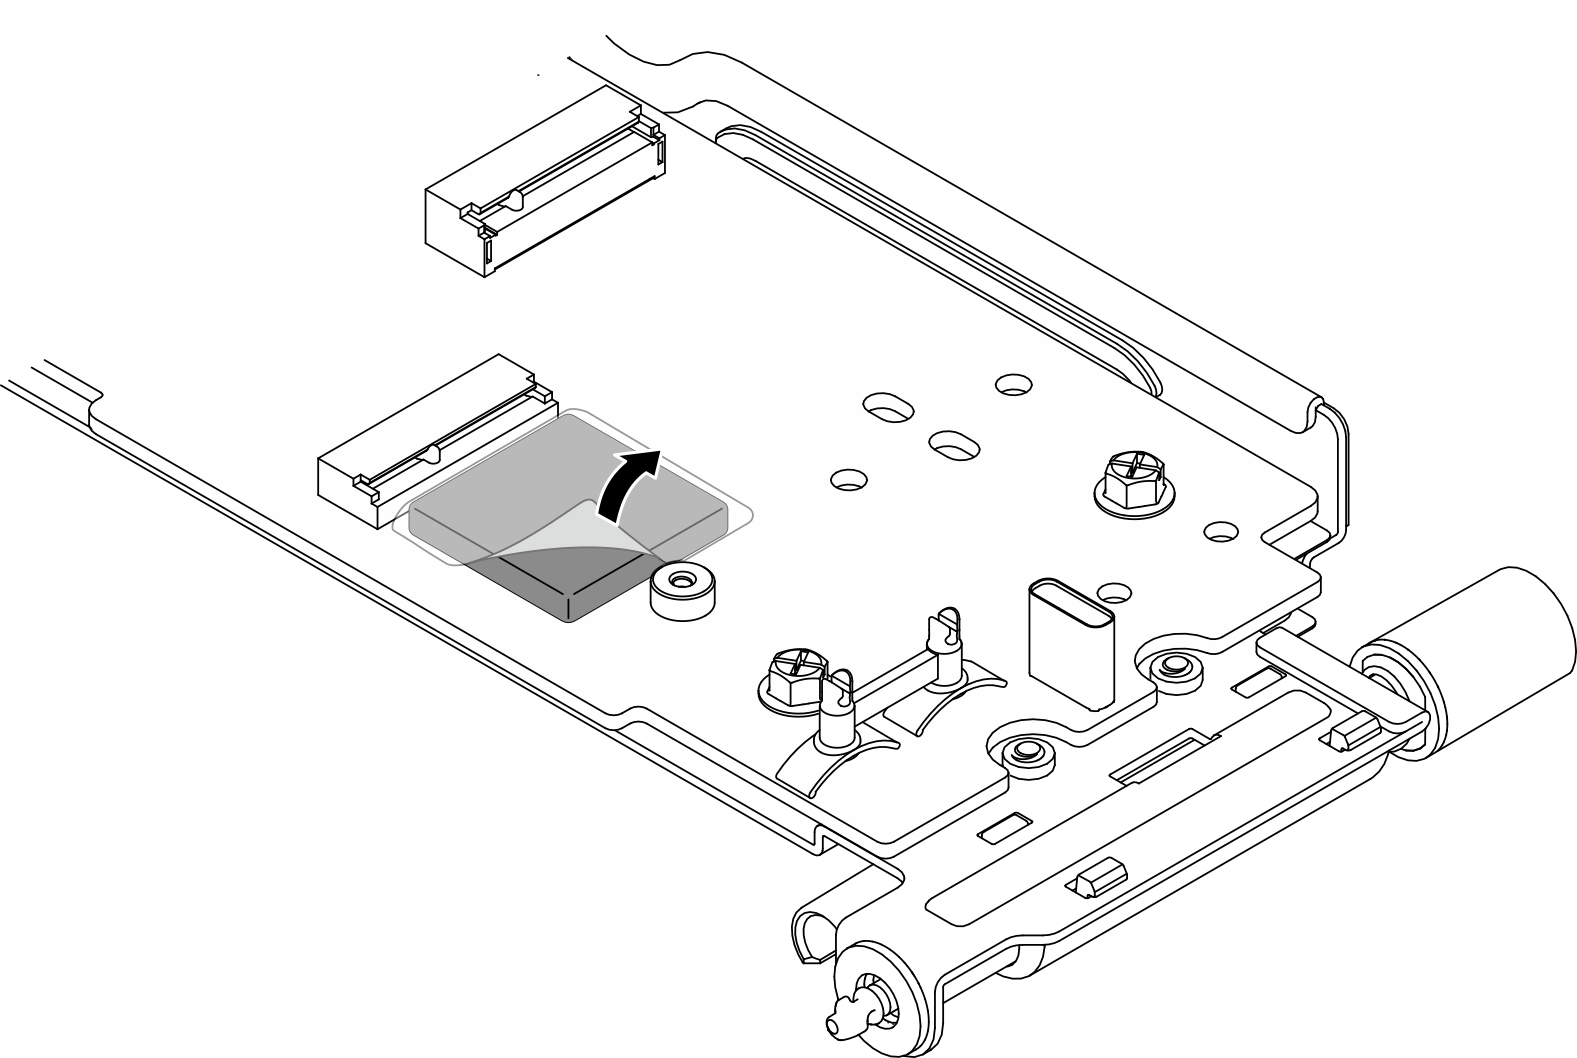
- Remove the film on the heat sink pad.Figure 6. Removing the film on the heat sink pad
- Align the WLAN module with the connector on the Embedded Network Module. Then, rotate the module down, and secure the WLAN module to the Embedded Network Module with a screw.AttentionMake sure to secure the cables in the cable clips, and route the
blue cable over the black cable. Figure 7. Installing the WLAN module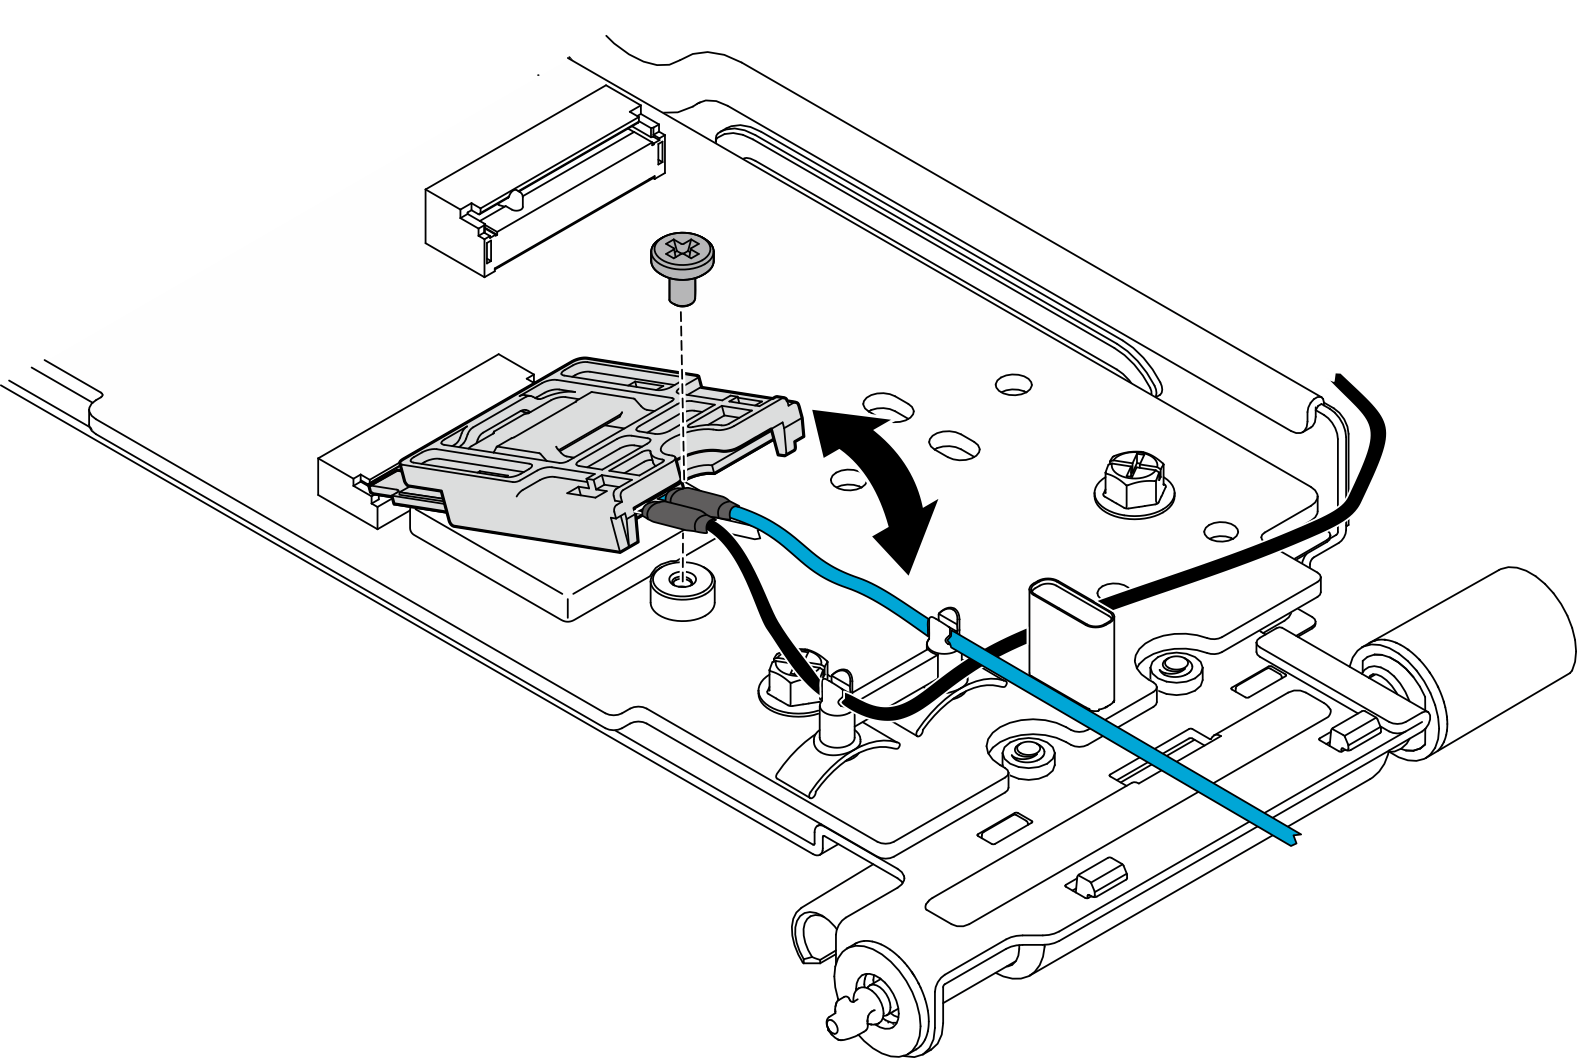
- Route the two antenna cables as illustrated.Figure 8. Cable routing for the WLAN antenna cables
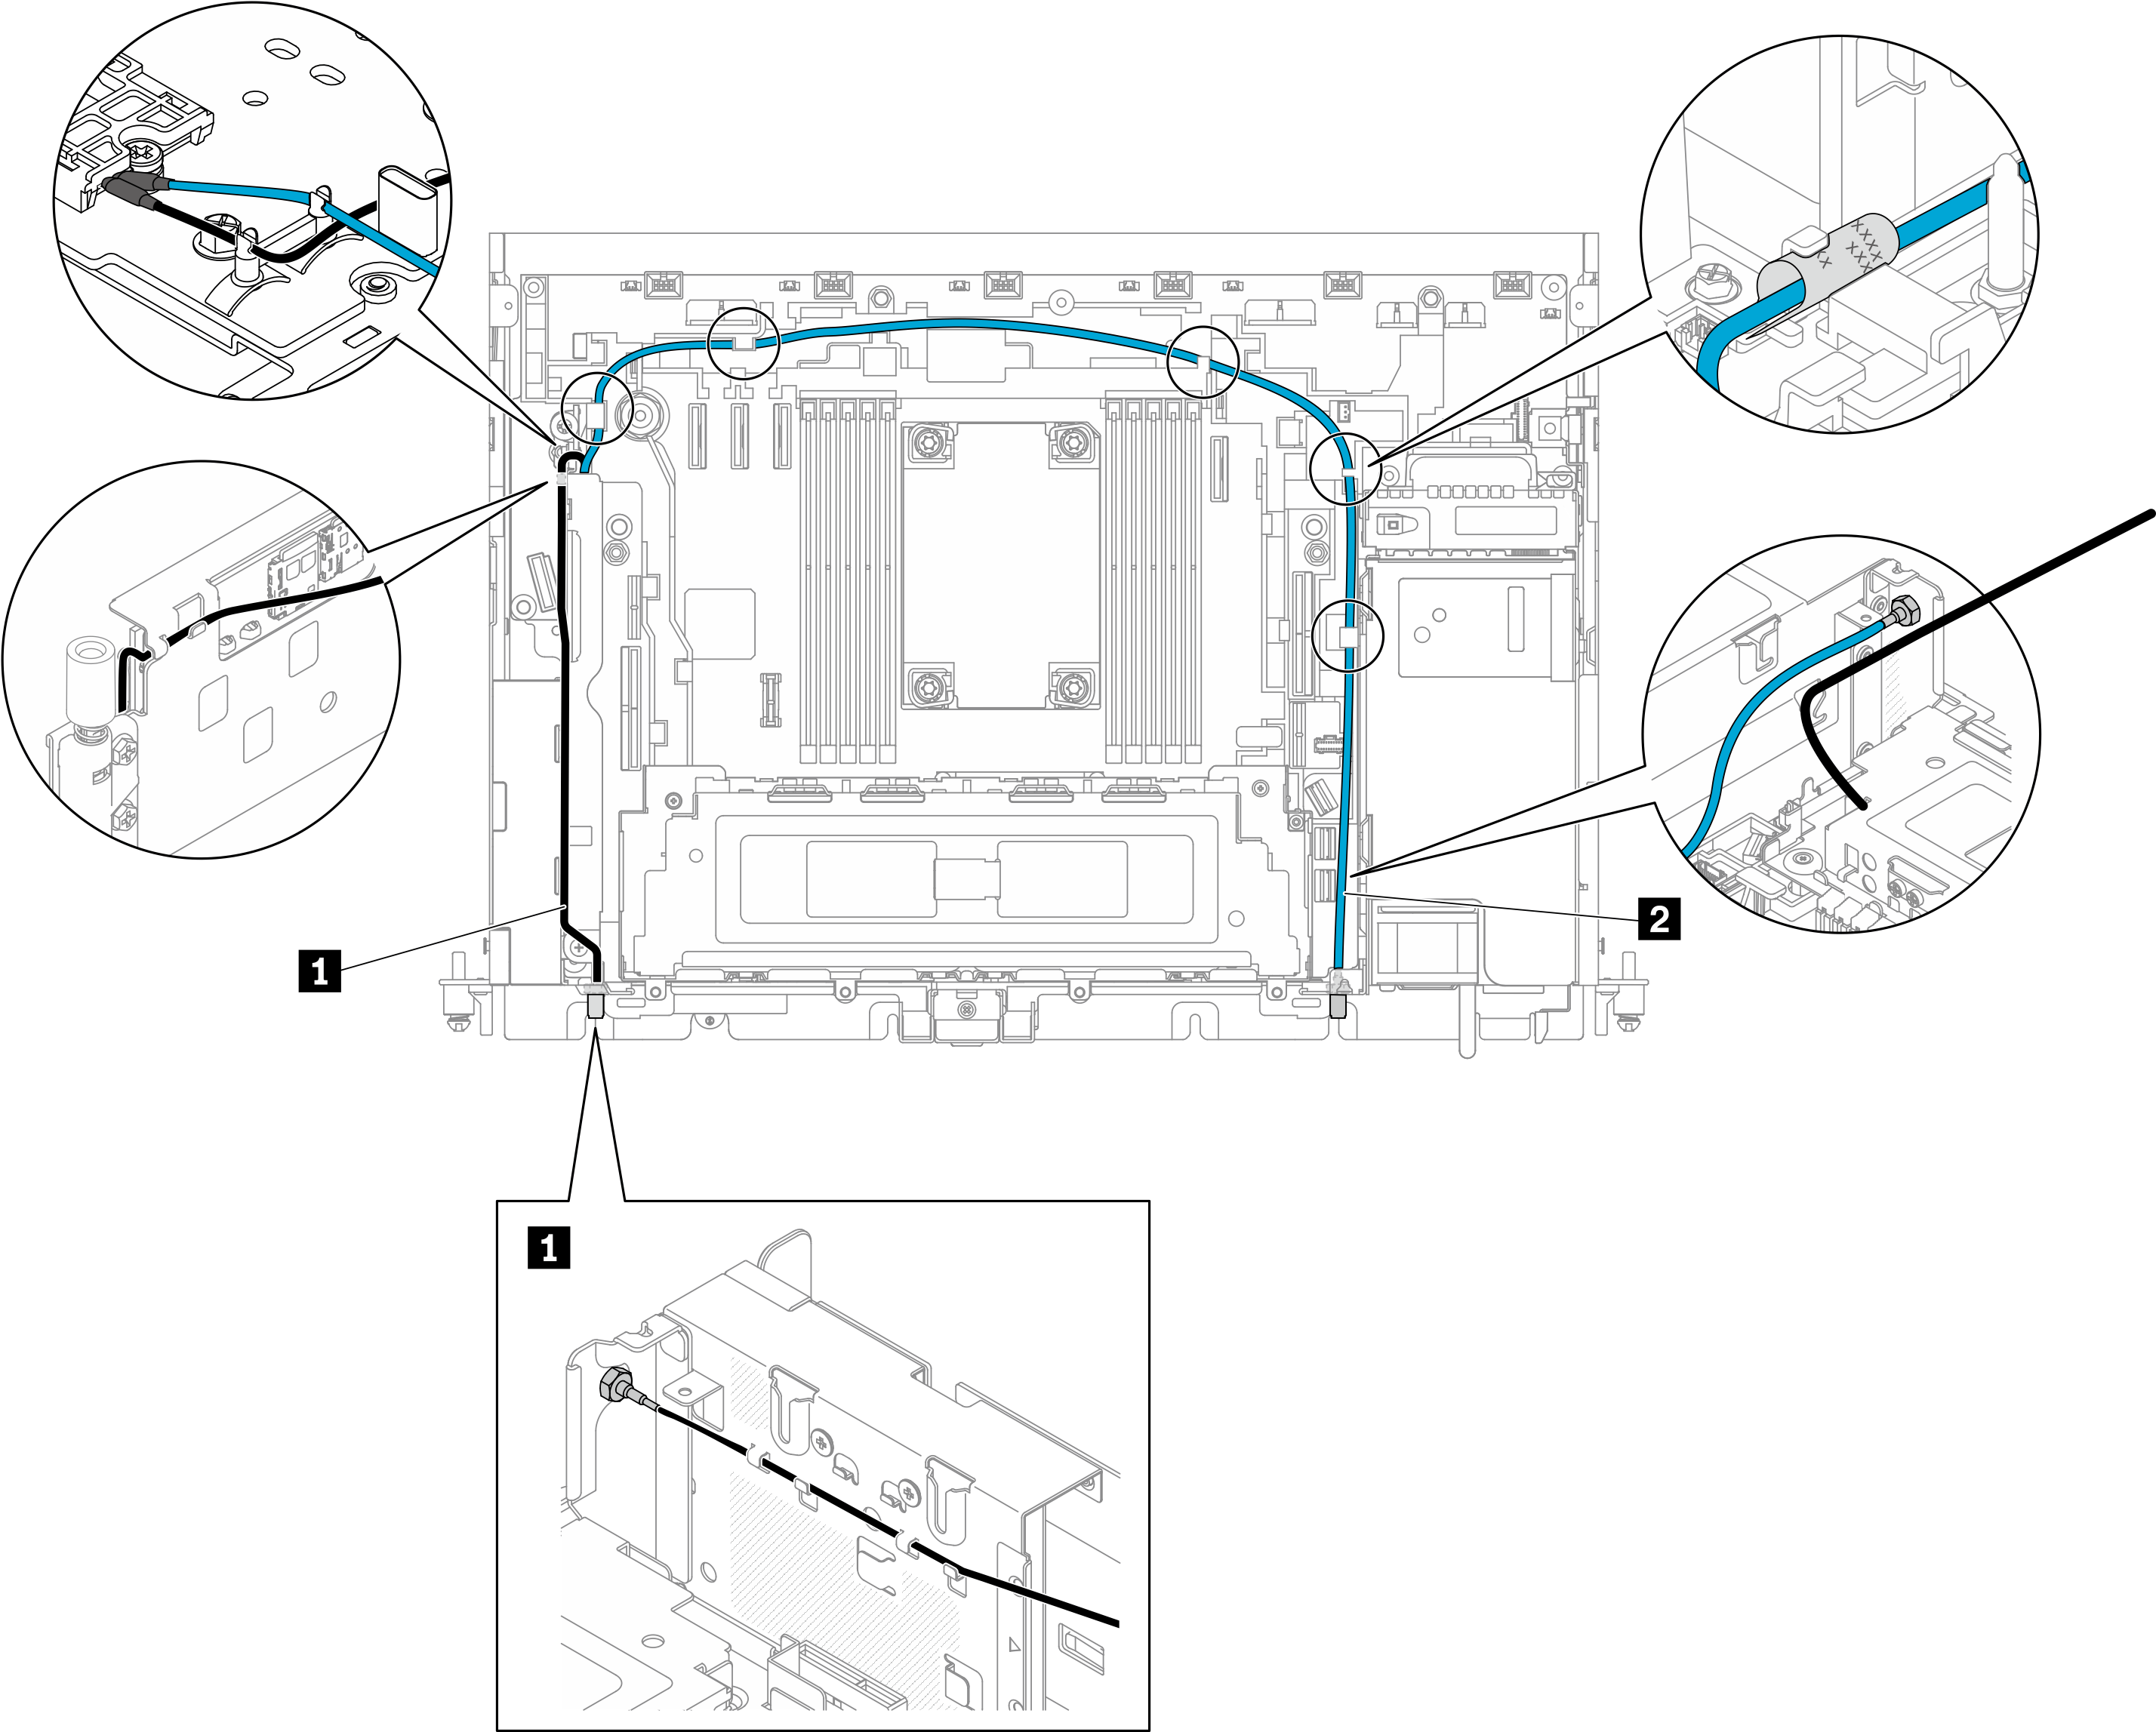
Table 1. Cable routing for the WLAN antenna cables From (WLAN Module) Cable color To 1 Connector 1 Black Antenna 1 2 Connector 2 Blue Antenna 2
- Place a washer between the hex nut and the antenna cable. Then, tighten the hex nut with the wrench that comes in the air baffle as shown to secure the antenna cable. Repeat the same procedure on the other antenna cable.
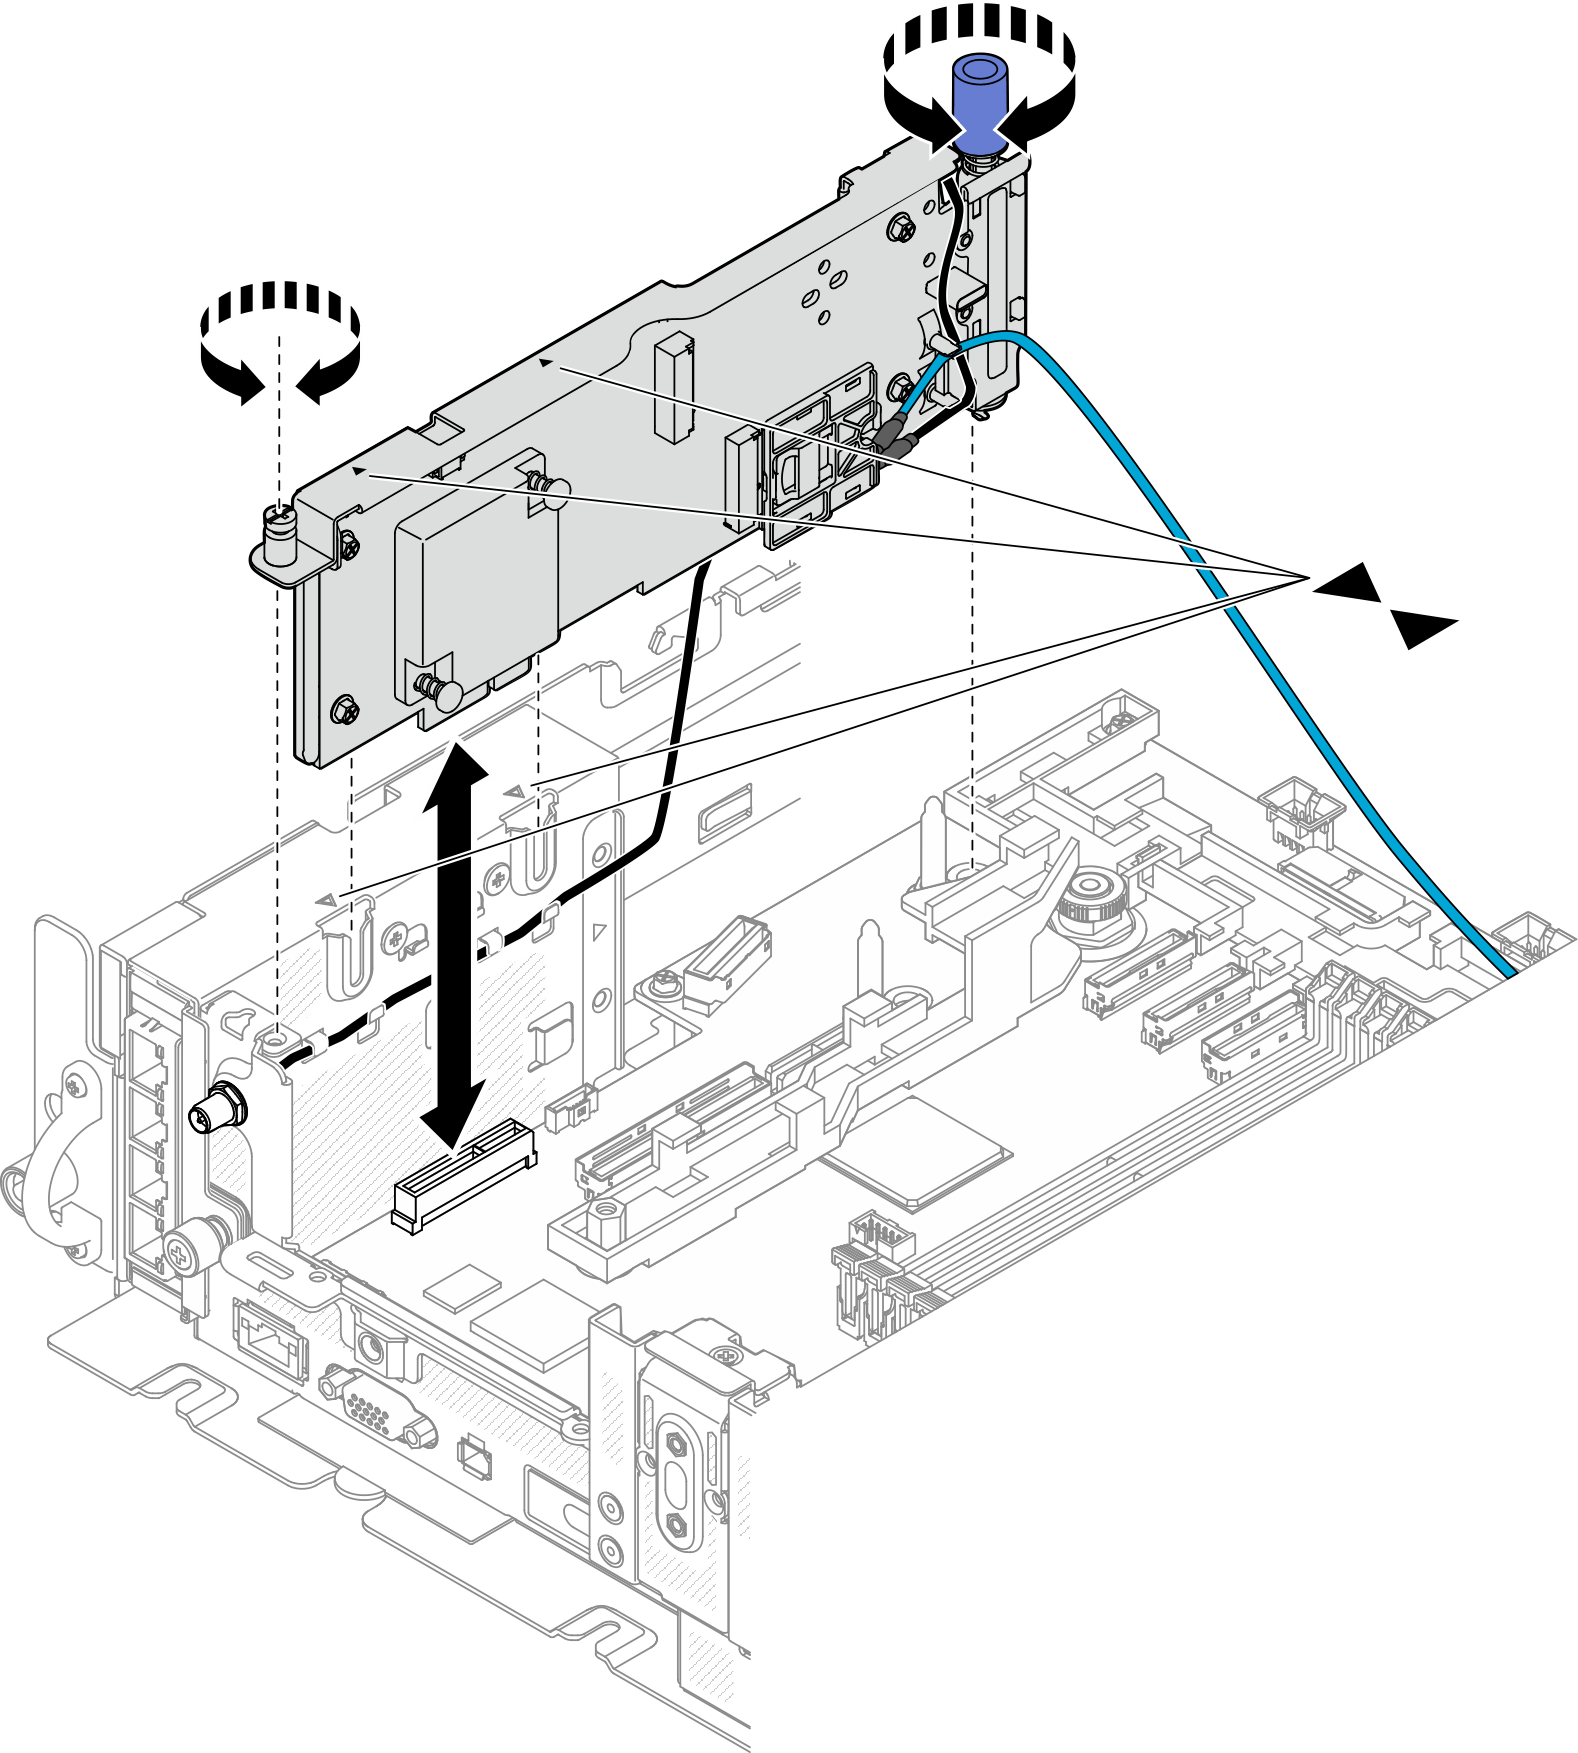
- Align the pointed ends of the triangles on the Embedded Network Module and the chassis, and lower the module until it is firmly seated. Then, tighten the two thumbscrews to secure the Embedded Network Module.Figure 9. Installing the Embedded Network Module
After this task is completed
Proceed to complete the parts replacement (see Complete the parts replacement).
Give documentation feedback