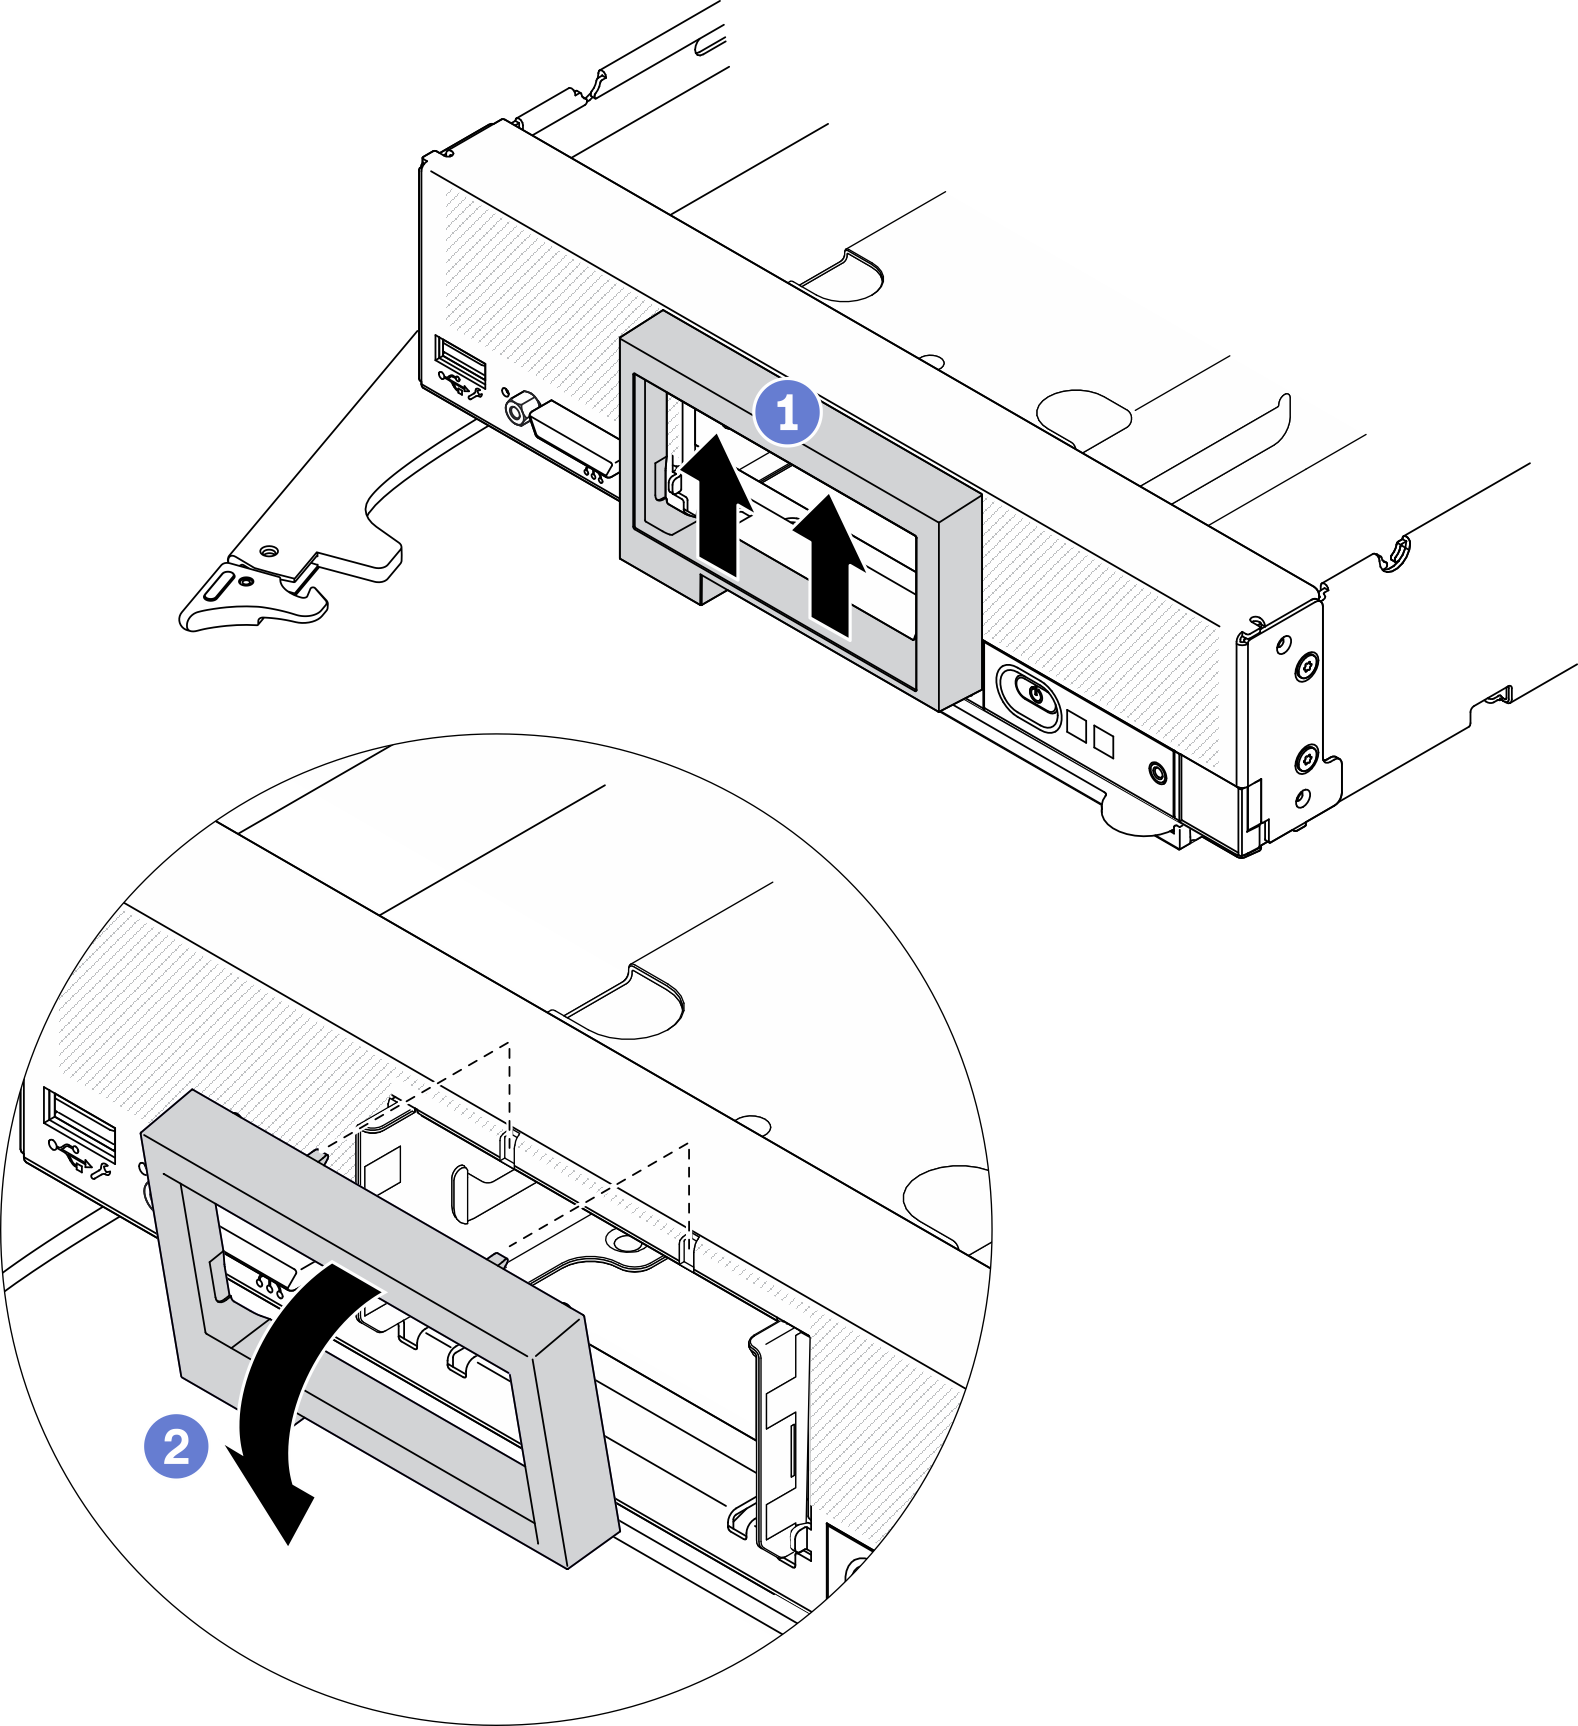
Remove the front bezel
Use this information to remove the front bezel.
About this task
Attention
Read Safety inspection checklist and Installation Guidelines to ensure that you work safely.
Power off the corresponding compute node that you are going to perform the task on.
Remove the compute node from the chassis. See Remove the compute node from chassis.
Note
Several different types of front bezel can be installed in the compute node: all are removed and installed in a similar manner. The front bezel shown in the illustrations might differ slightly from the bezel installed in your compute node.
Procedure
After you finish
If you are instructed to return the component or optional device, follow all packaging instructions, and use any packaging materials for shipping that are supplied to you.
Demo video
Give documentation feedback


