Remove the EDSFF hot-swap drive backplane
Use this information to remove the EDSFF hot-swap drive backplane.
About this task
Read Safety inspection checklist and Installation Guidelines to ensure that you work safely.
Before you make changes to the drives, drive controllers, drive backplanes, or drive cables, make sure to back up all important data stored in drives.
Before you remove any component of a RAID array (drive, RAID card, etc.), back up all RAID configuration information.
Procedure
- Remove the backplane assembly.
 Press the latch on cable and disconnect the cable from system board.
 Lift up the backplane from the connector on system board and remove the backplane away from the compute node.
Figure 1. EDSFF drive backplane assembly removal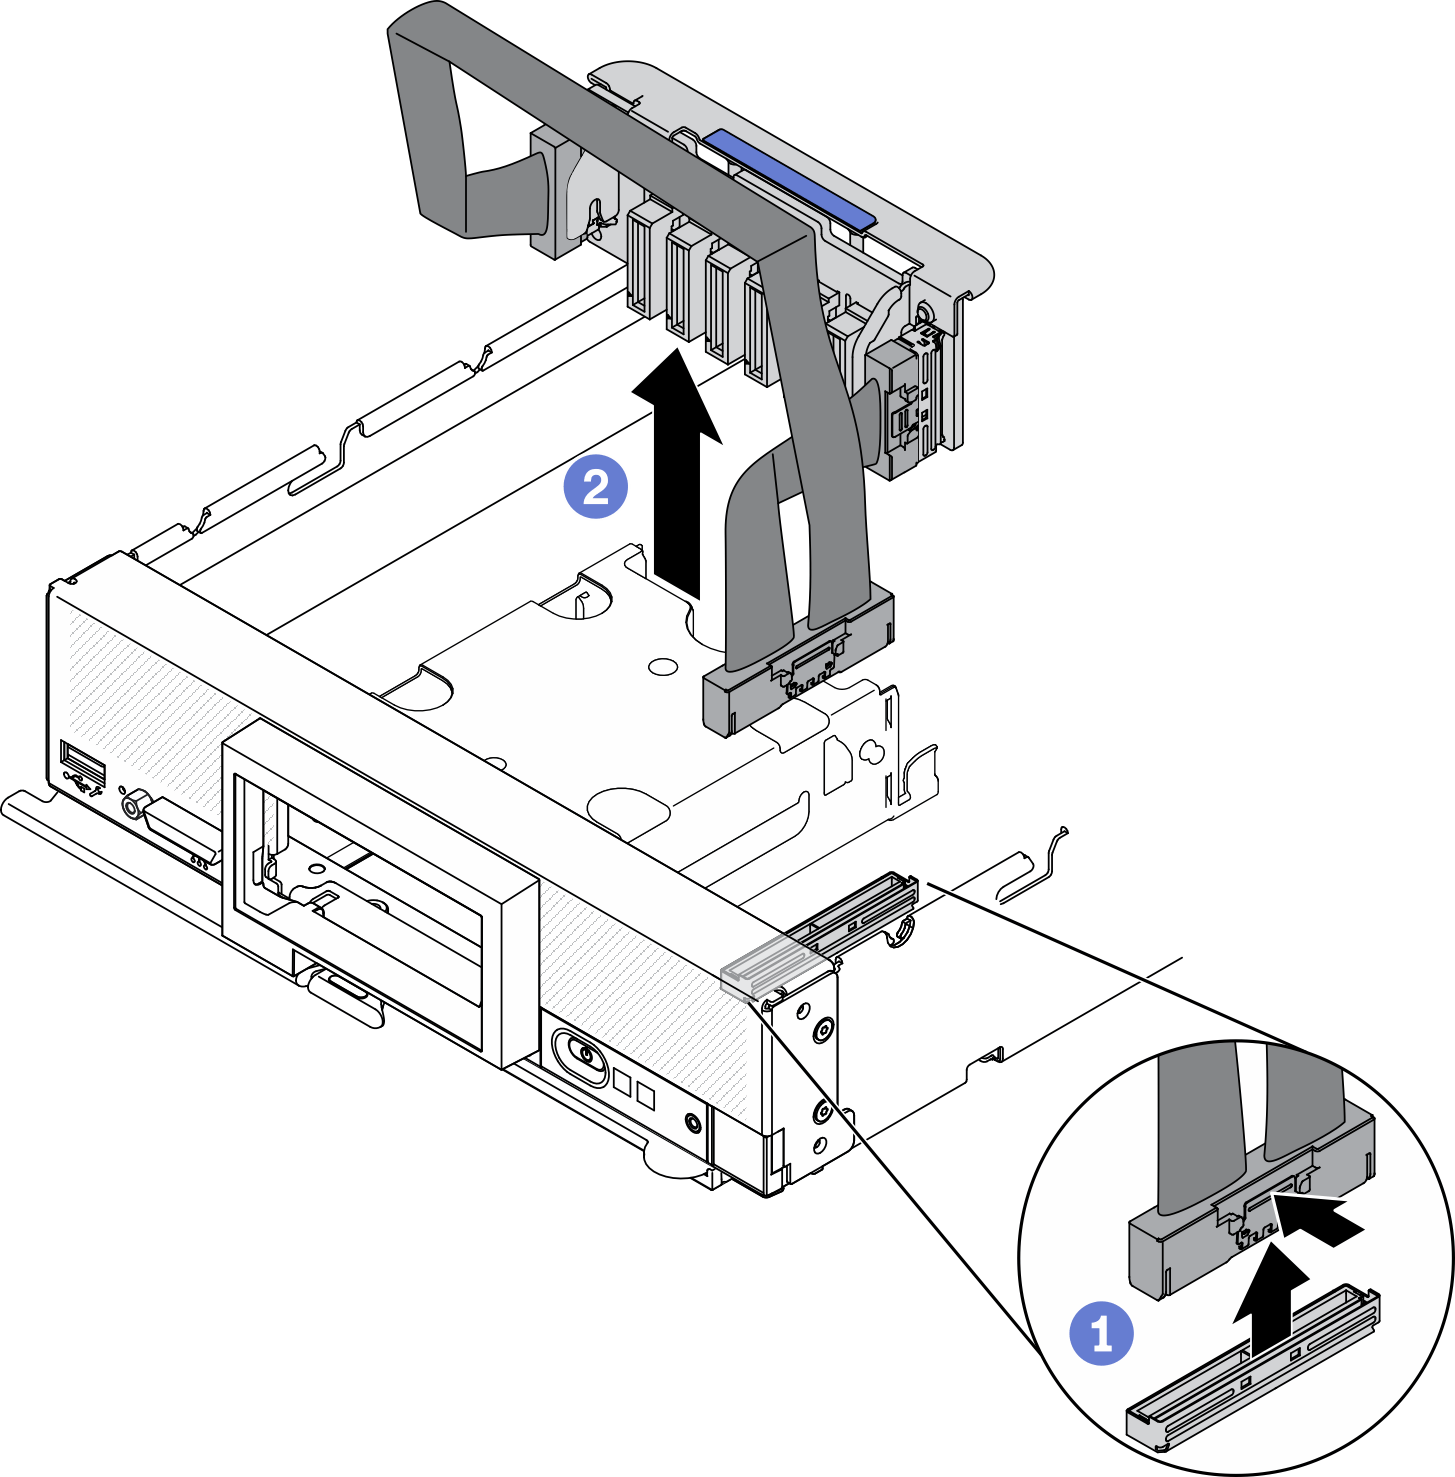 AttentionStrictly observe the following instructions to avoid damaging cable sockets on the system board. Any damage to the cable sockets might require replacing the system board.
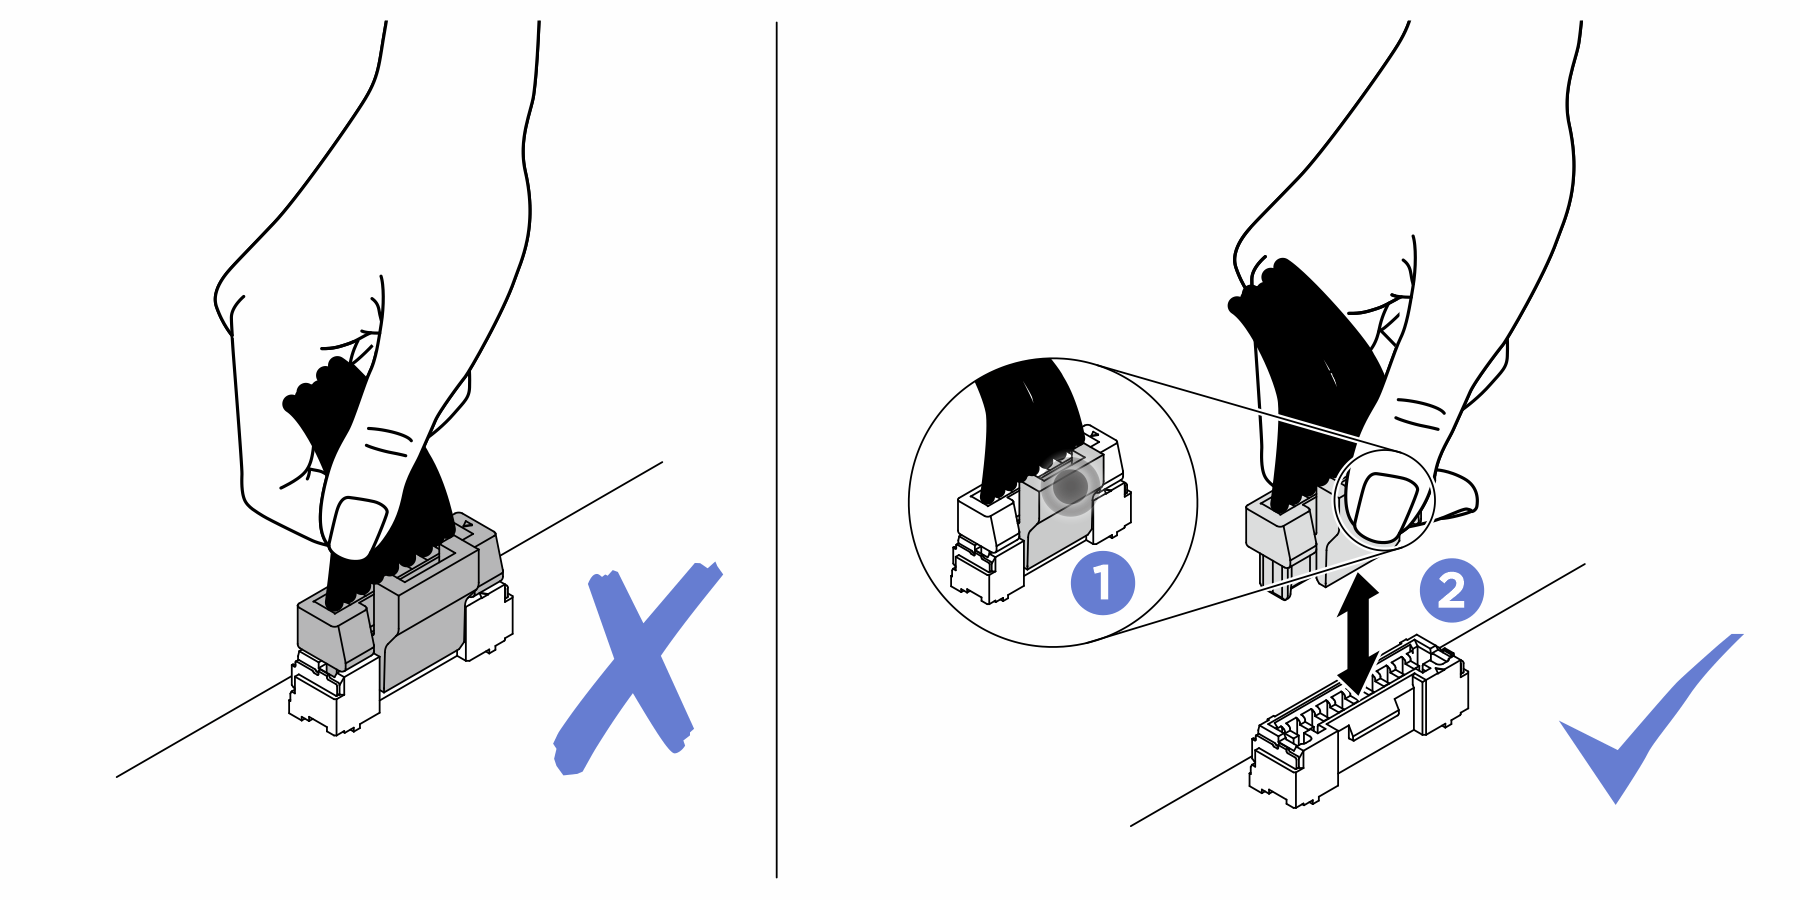
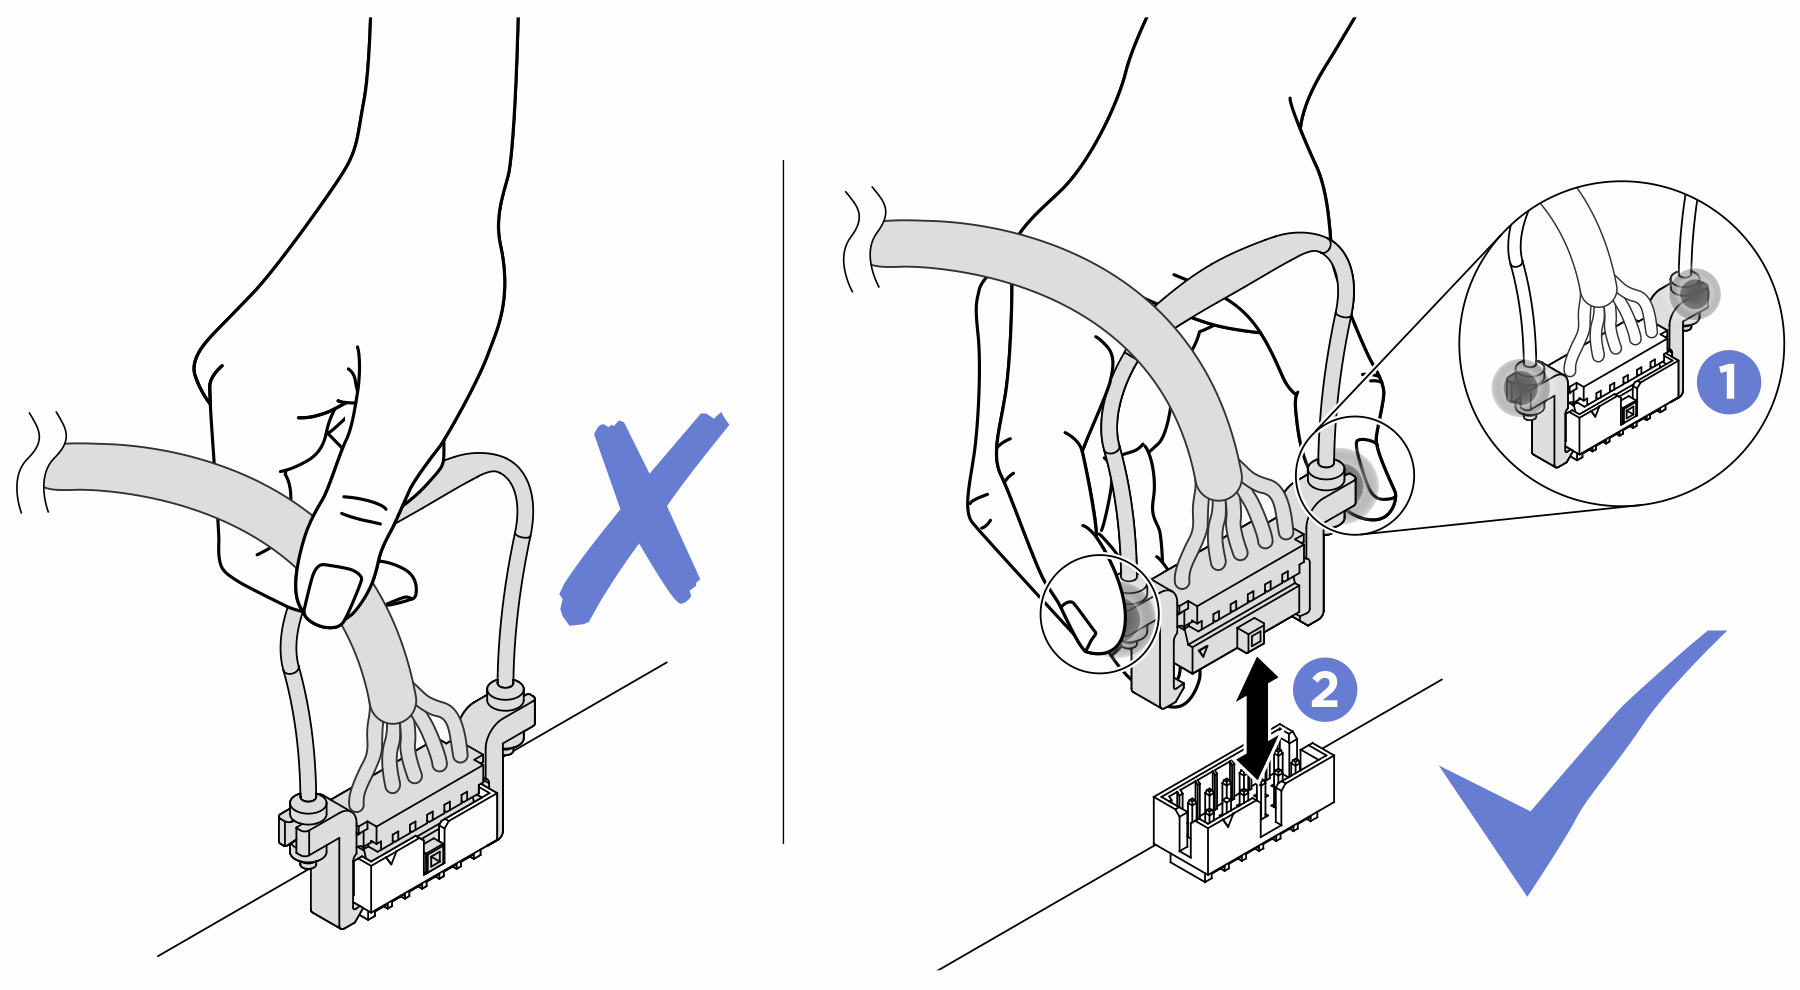
Connect cable connectors vertically or horizontally in alignment with the orientations of the corresponding cable sockets, avoiding any tilt.
- To disconnect cables from the system board, do as follows:
Press and hold all latches, release tabs, or locks on cable connectors to release the cable connectors.
- Remove the cable connectors vertically or horizontally in alignment with the orientations of the corresponding cable sockets, avoiding any tilt.NoteThe cable connectors might look different from those in the illustration, but the removal procedure is the same.
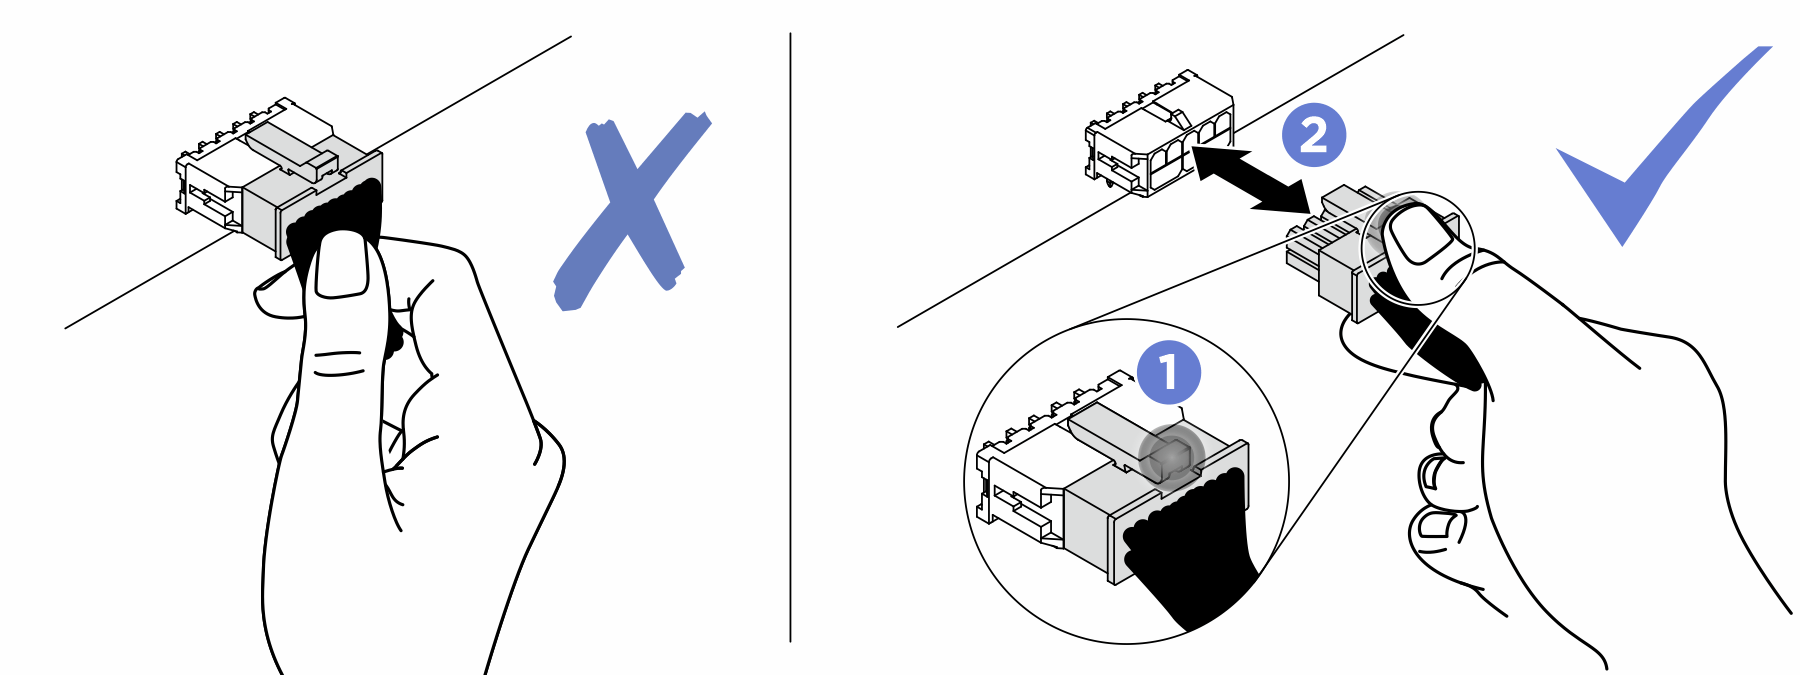
- Disconnect the cable from the backplane.
- Press the latches on both ends of the cable.
- Pull the connector away from the backplane.
Figure 2. Disconnecting cable from EDSFF backplane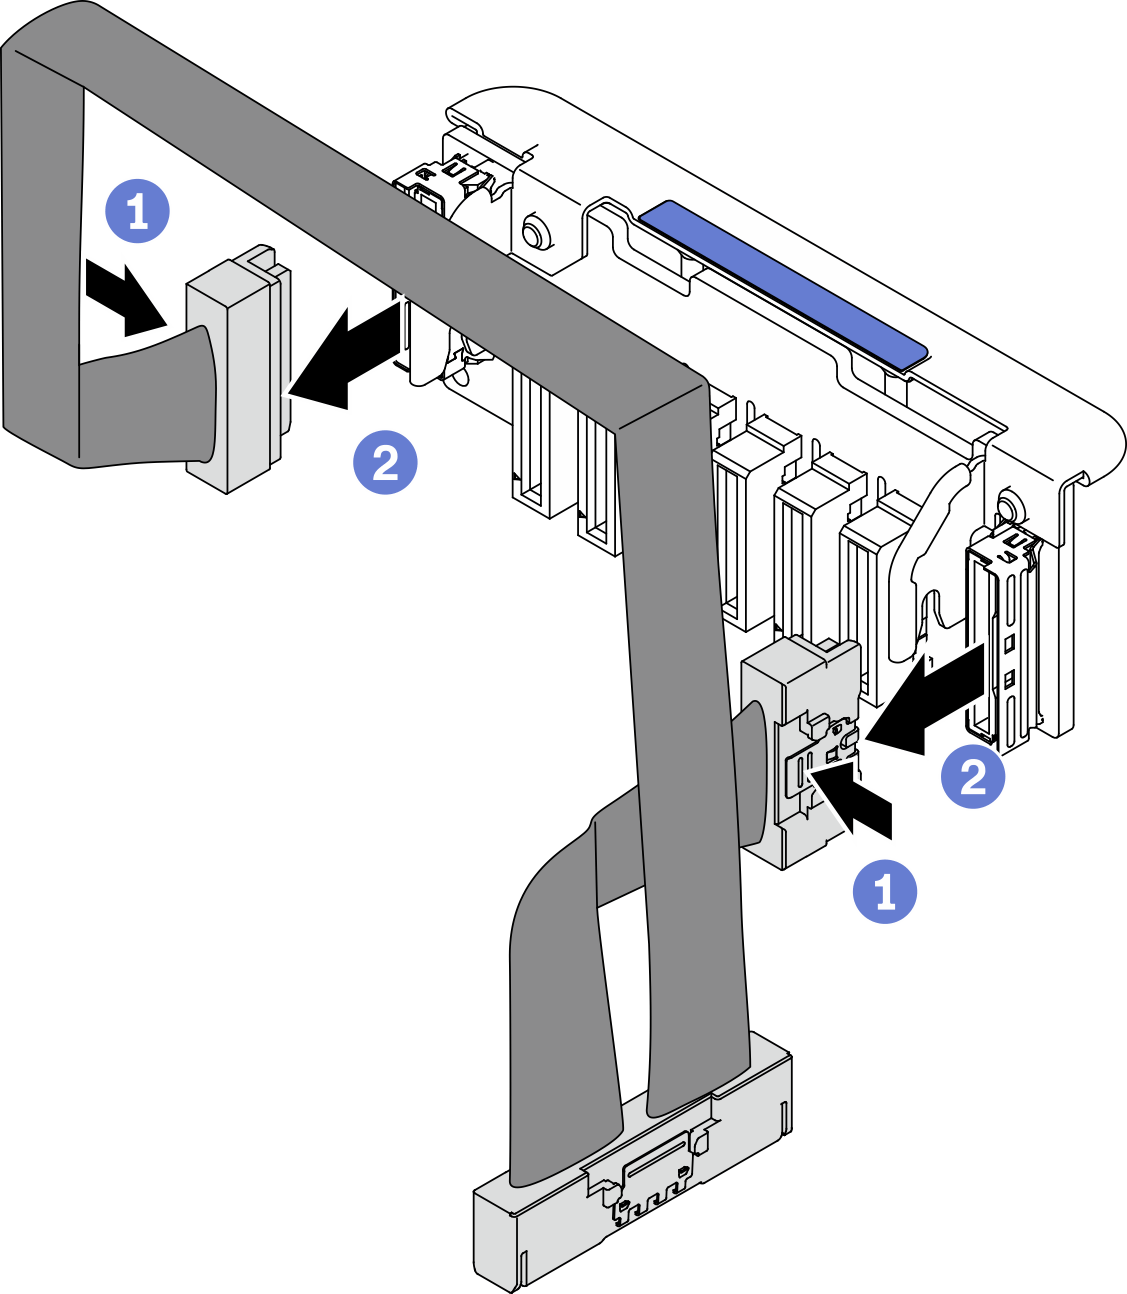
If you are instructed to return the component or optional device, follow all packaging instructions, and use any packaging materials for shipping that are supplied to you.
Demo video