Use this information to install the compute node in the Lenovo Flex System Enterprise Chassis chassis.
About this task
Read Safety inspection checklist and Installation Guidelines to ensure that you work safely.
Power off the corresponding compute node that you are going to perform the task on.
Carefully lay the compute node on a flat, static-protective surface, orienting the compute node with the bezel pointing toward you.
Make note of the number of the node bay from which you are removing the compute node.
Make sure you have a node bay filler available if a compute node will not be immediately reinstalled to the node bay.
Procedure
Figure 1. Compute node removal from chassis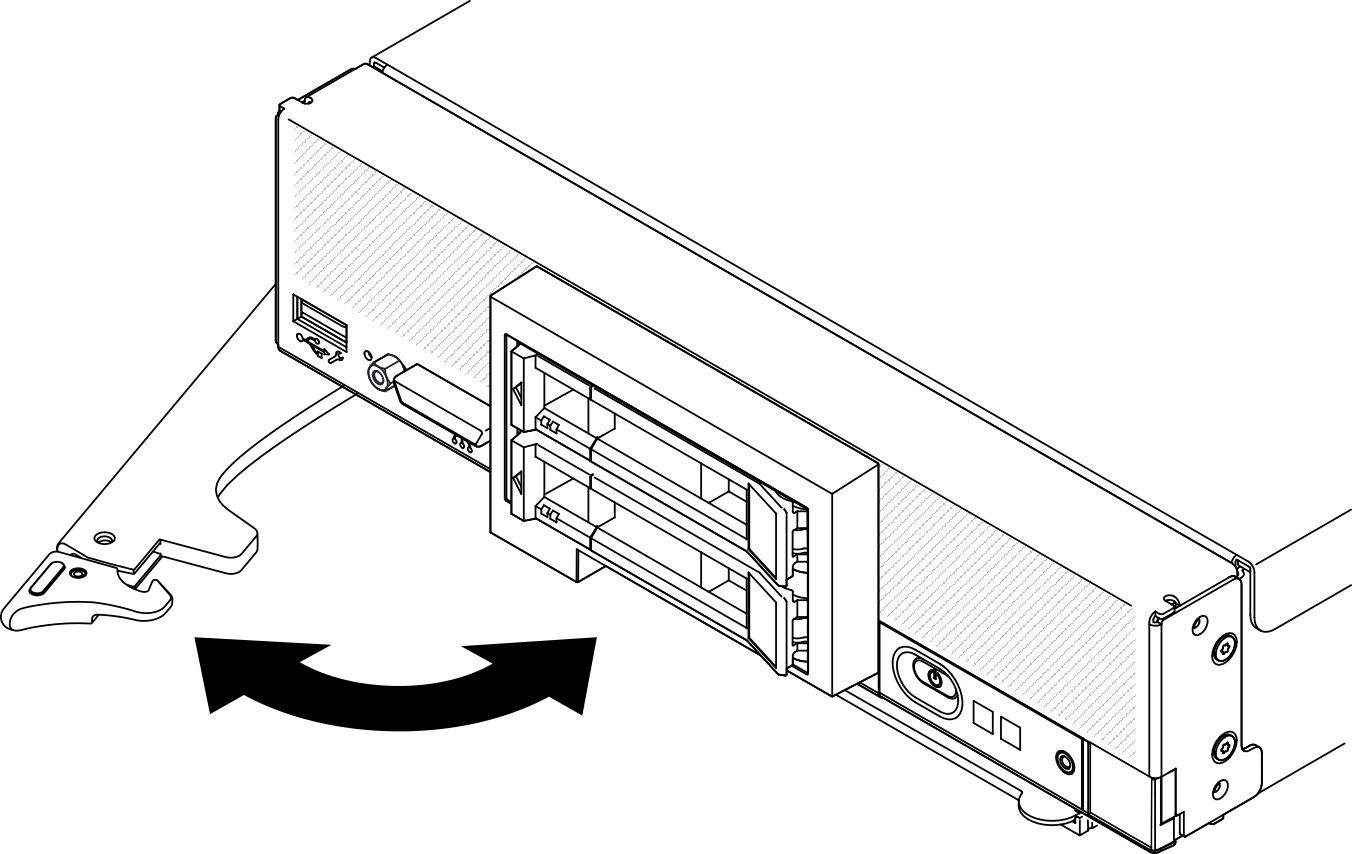
- Release and rotate the front handle as shown in the illustration. The compute node moves out of the node bay approximately 0.6 cm (0.25 inch).
- To maintain proper system cooling, do not operate the Lenovo Flex System Enterprise Chassis without a compute node or node bay filler installed in each node bay.
- When you remove the compute node, note the node bay number. Reinstalling a compute node into a different node bay from the one it was removed from can have unintended consequences. Some configuration information and update options are established according to the node bay number. If you reinstall the compute node into a different node bay, you might have to reconfigure the compute node.
- Remove the compute node.
- Pull the compute node out about half way out of the node bay.
- Hold the compute node on both sides.
- Pull the compute node entirely out of the node bay.
- Carefully lay the compute node on a flat, static-protective surface, orienting its bezel pointing toward you.
- Install either a node bay filler or another compute node in the node bay within 1 minute.