Install a fabric connector
Use this information to install a fabric connector.
Before you install a fabric connector, complete the following steps:
Read Installation Guidelines to ensure that you work safely.
- Obtain a long shank #1 Phillips screwdriver.
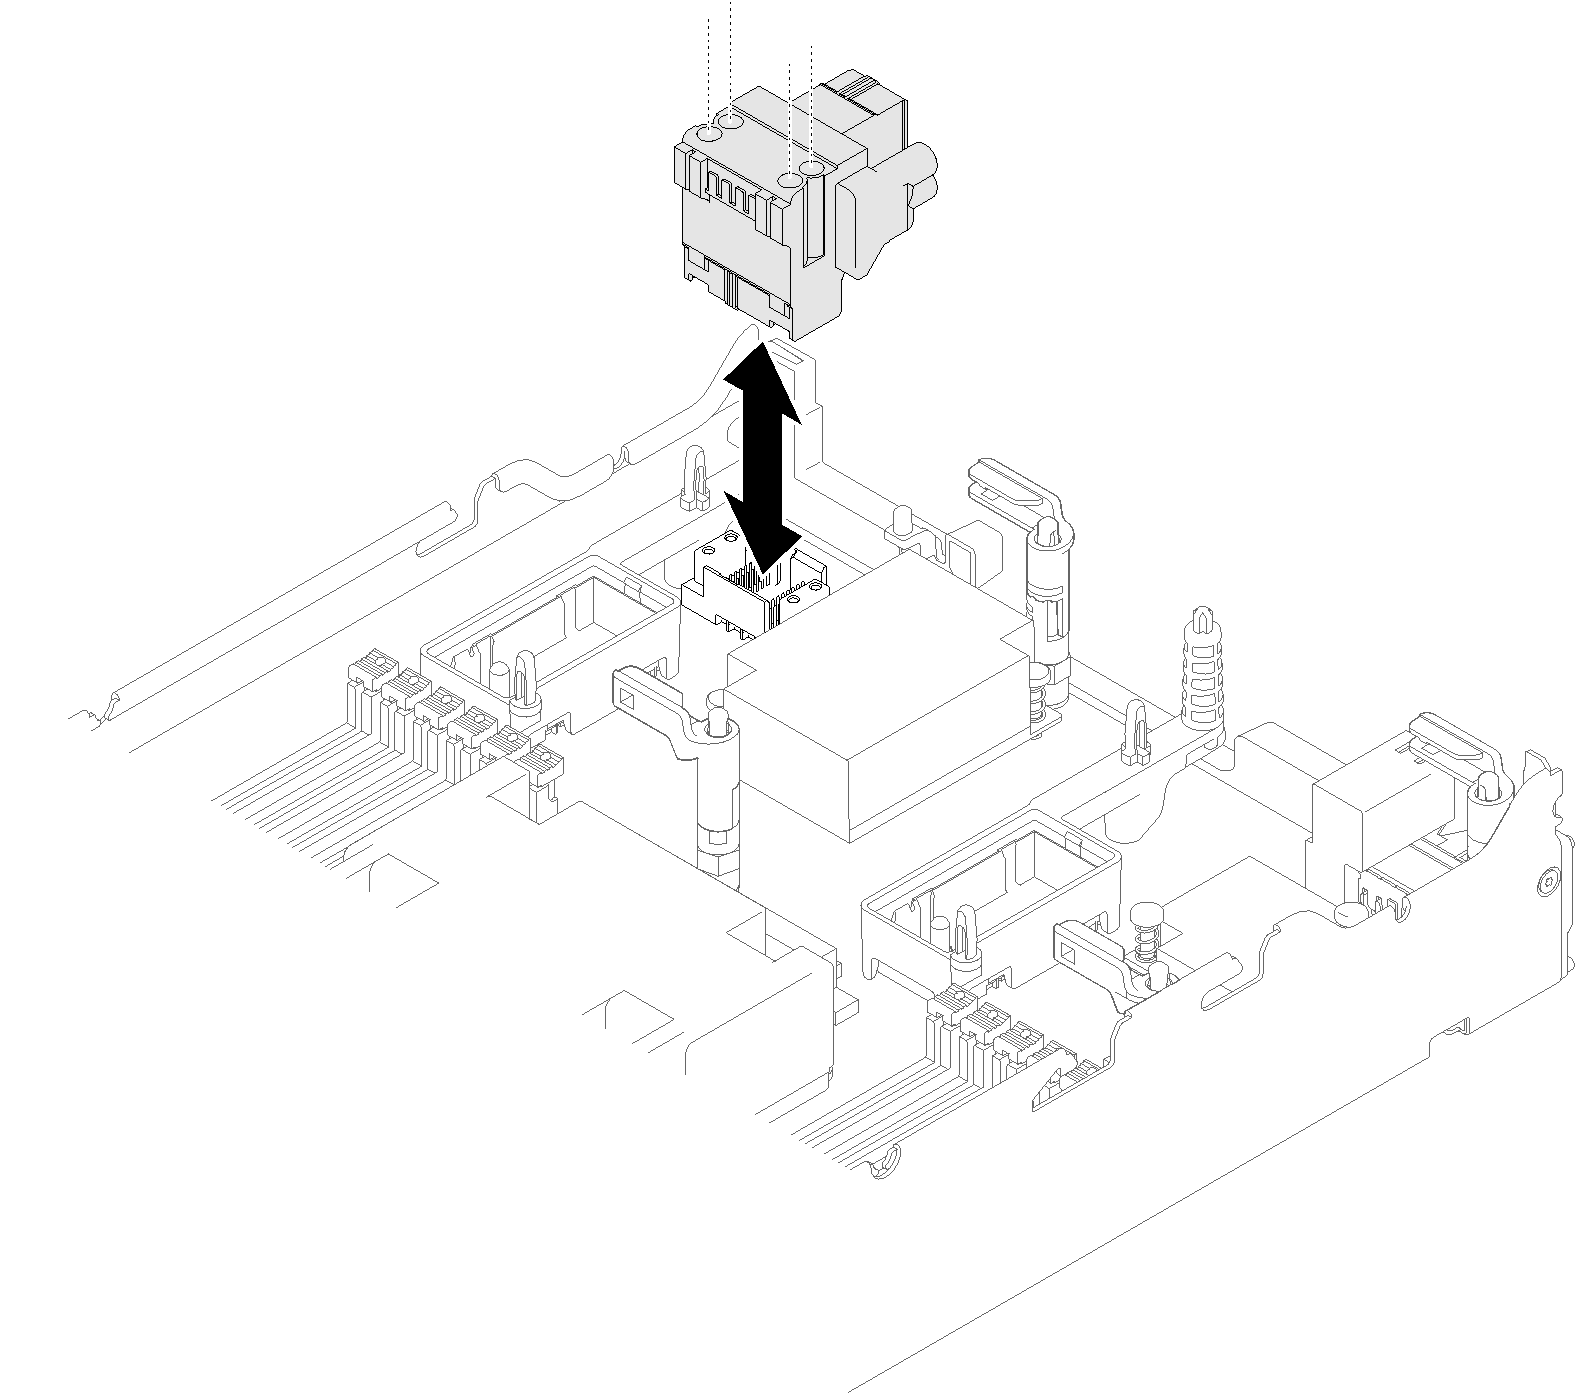
To install a fabric connector, complete the following steps:
Figure 1. Fabric connector installation
After you install the fabric connector, complete the following steps:
Install the compute node cover (see Install the compute node cover ).
Install the compute node into the chassis (see Install the compute node in the chassis ).
Power on the compute node.
Demo video
Give documentation feedback