Install the power interface board
Use this information to install the power interface board.
Before you install the power interface board, complete the following steps:
- Read the following section(s) to ensure that you work safely.
To install the power interface board, complete the following steps:
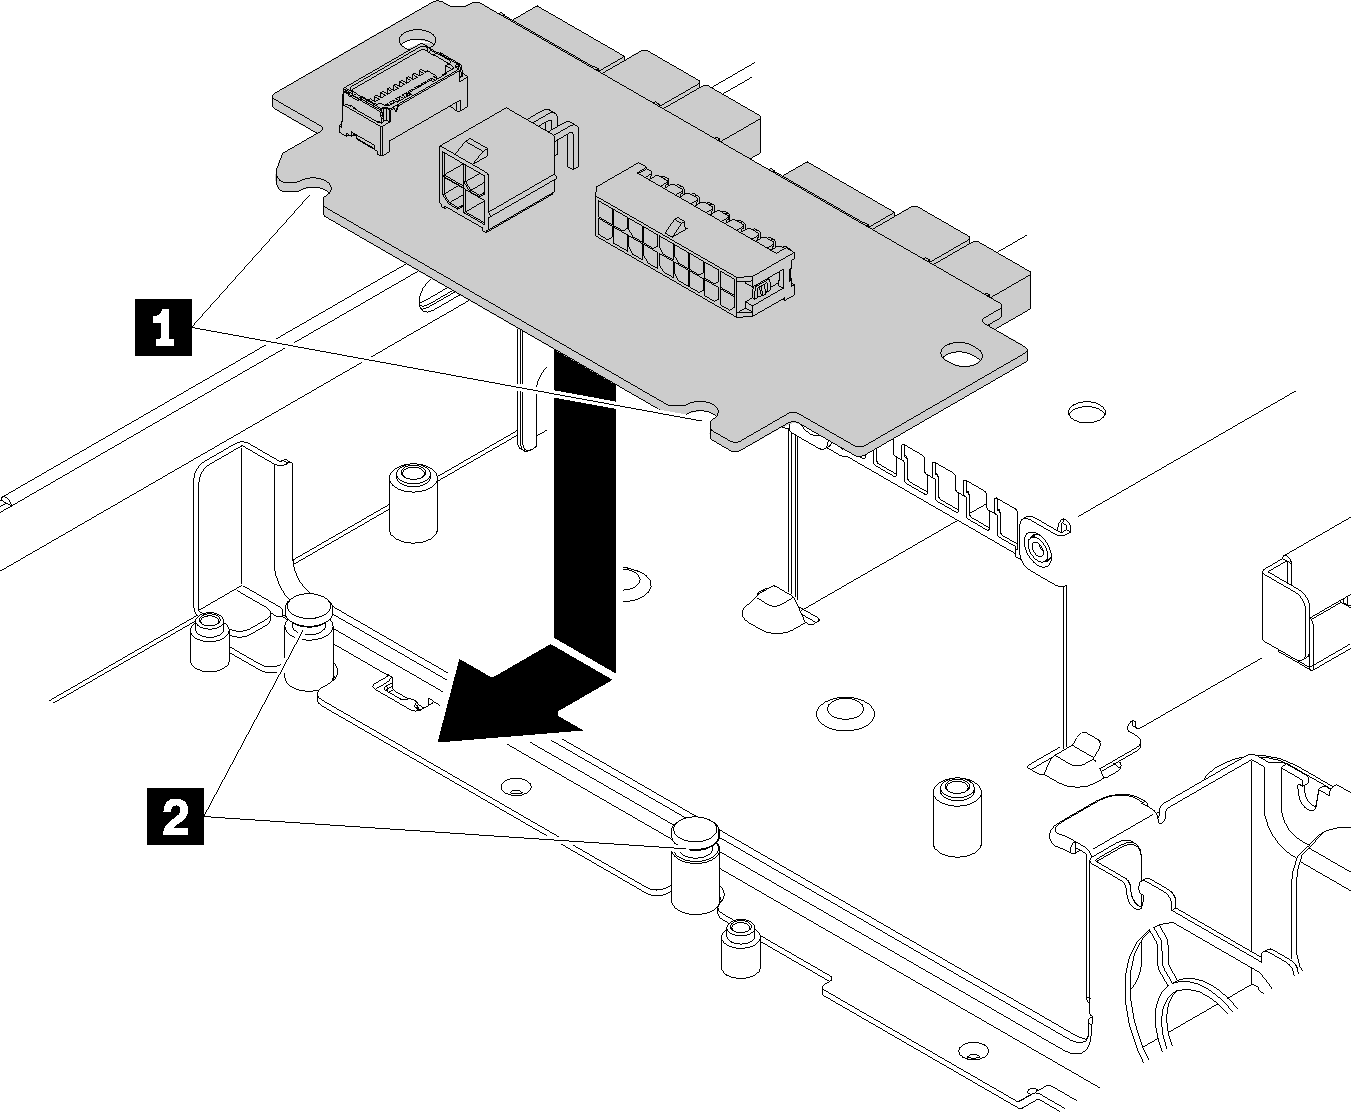
- Align the power interface board slots 1 with alignment pins 2 and lower it into the server; then, slightly pull the power interface board forwards to insert it.Figure 1. Power interface board installation
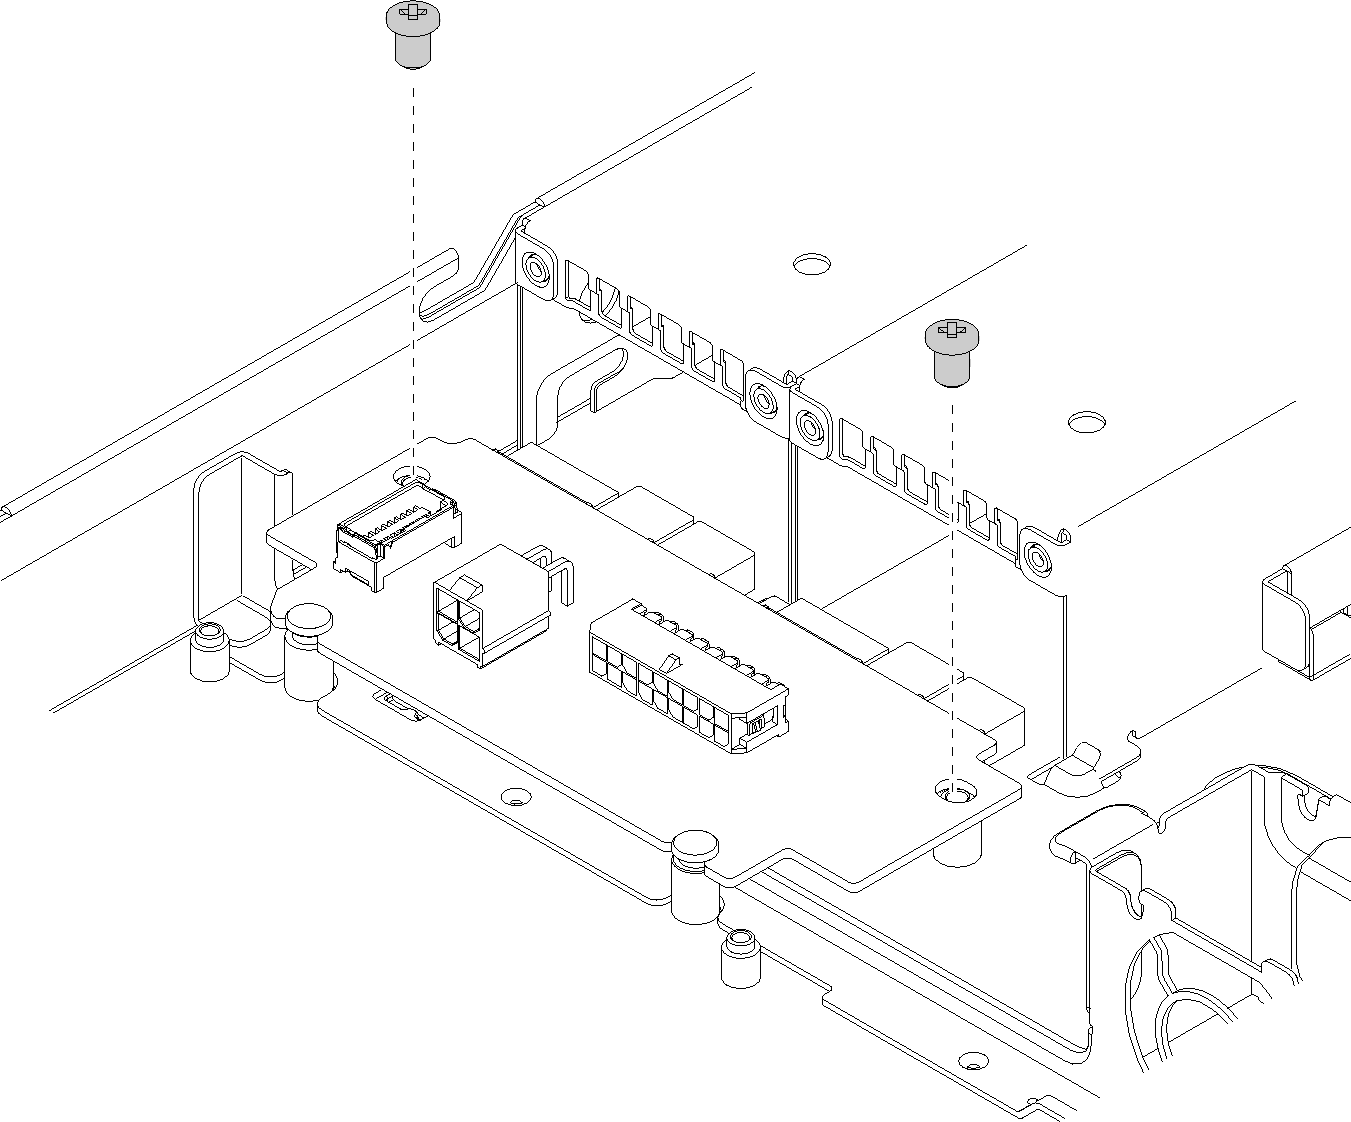
- Fasten the two screws to secure the power interface board.Figure 2. Screw installation
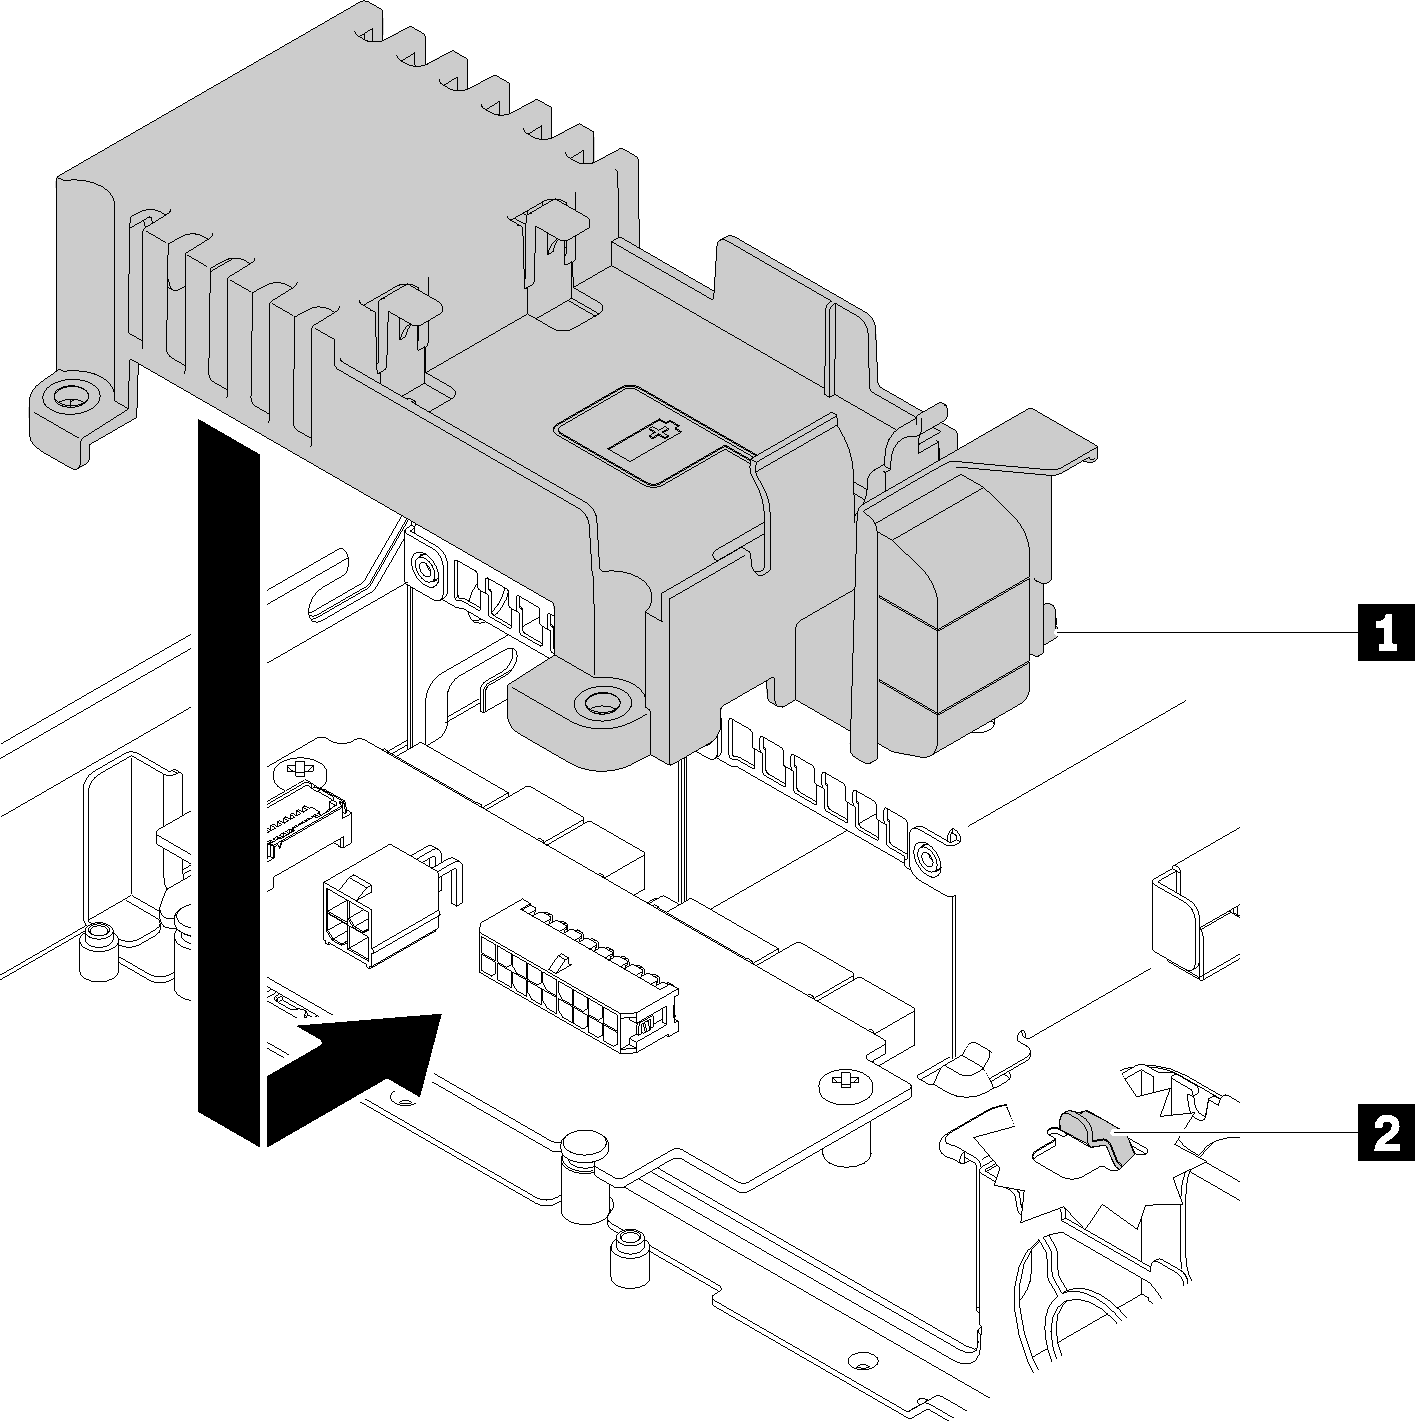
- Align the power interface board cover pin 1 with the hook 2 and lower it into the server; then, slightly push the power interface board cover backwards to insert it.Figure 3. Power interface board cover installation
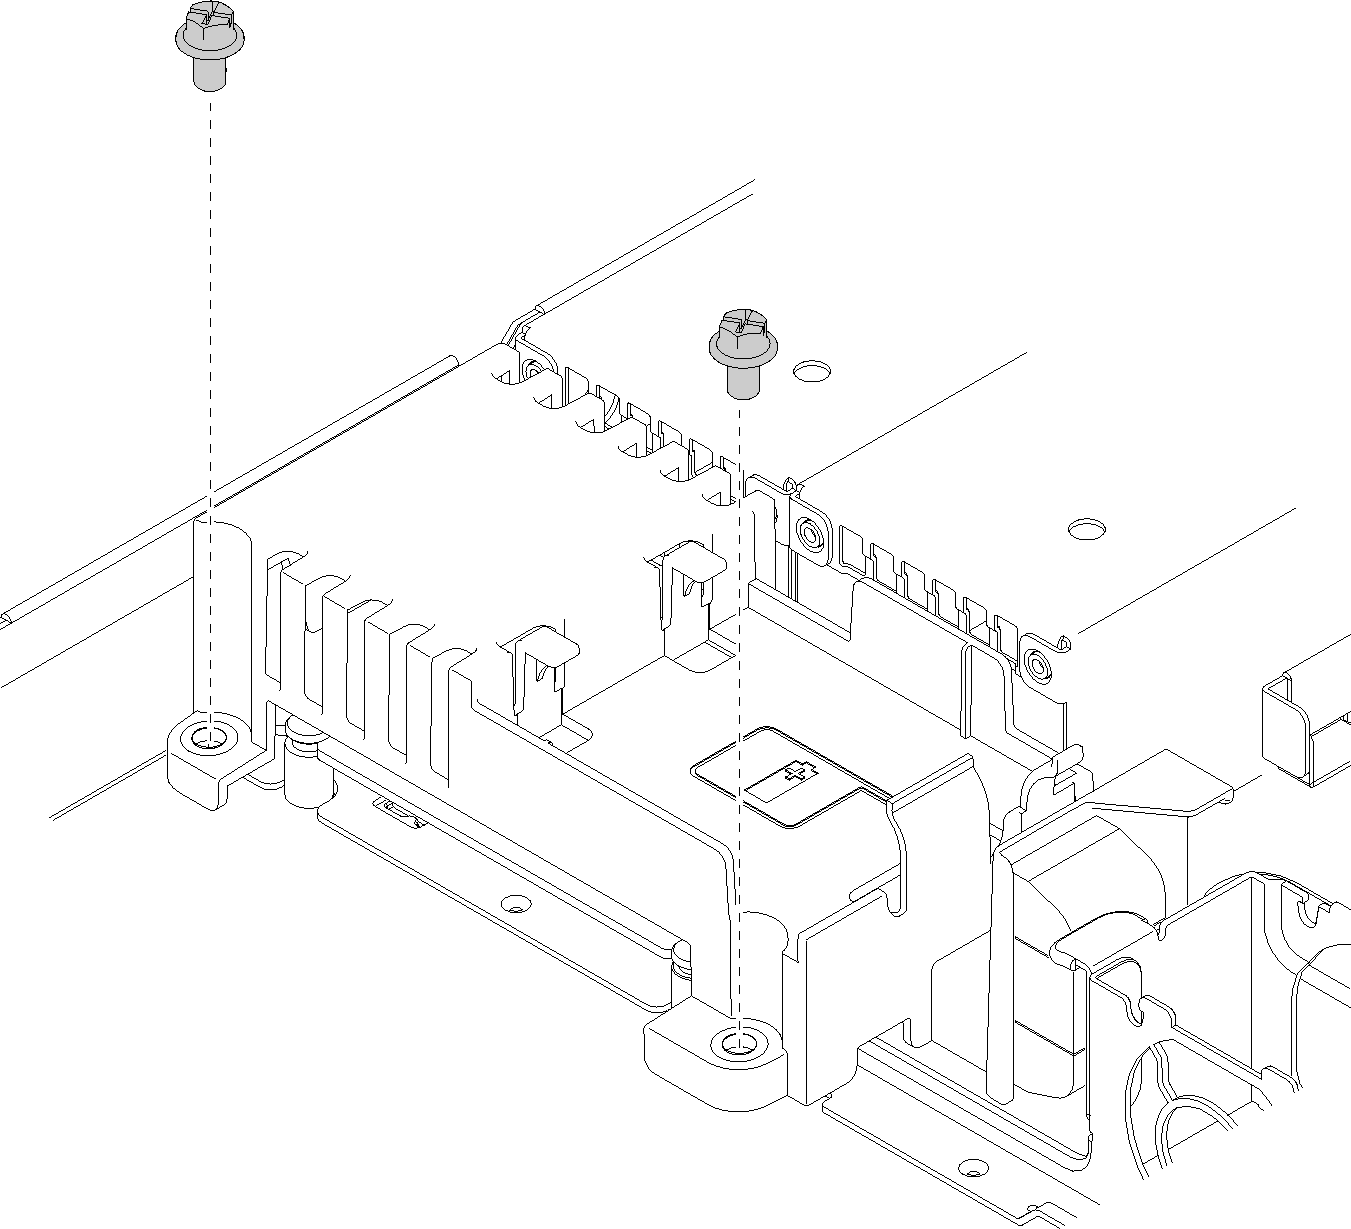
- Fasten the two screws to secure the power interface board cover.Figure 4. Cover screw installation
After you install the power interface board, complete the following steps:
Connect the cables to the power interface board. See Internal cable routing for more information.
Install the top cover onto the server (see Install the top cover).
Install the power supply unit (see Install a hot-swap power supply unit).
Install the server into the rack if necessary.
Reconnect power cords and all external cables.
- If necessary, configure the RAID array using the Setup utility configuration.
Demo video
Give documentation feedback