Install a riser card
Use this information to install a riser card.


To install a riser card, complete the following steps:
Watch the procedure
A video of this procedure is available at YouTube.
Note
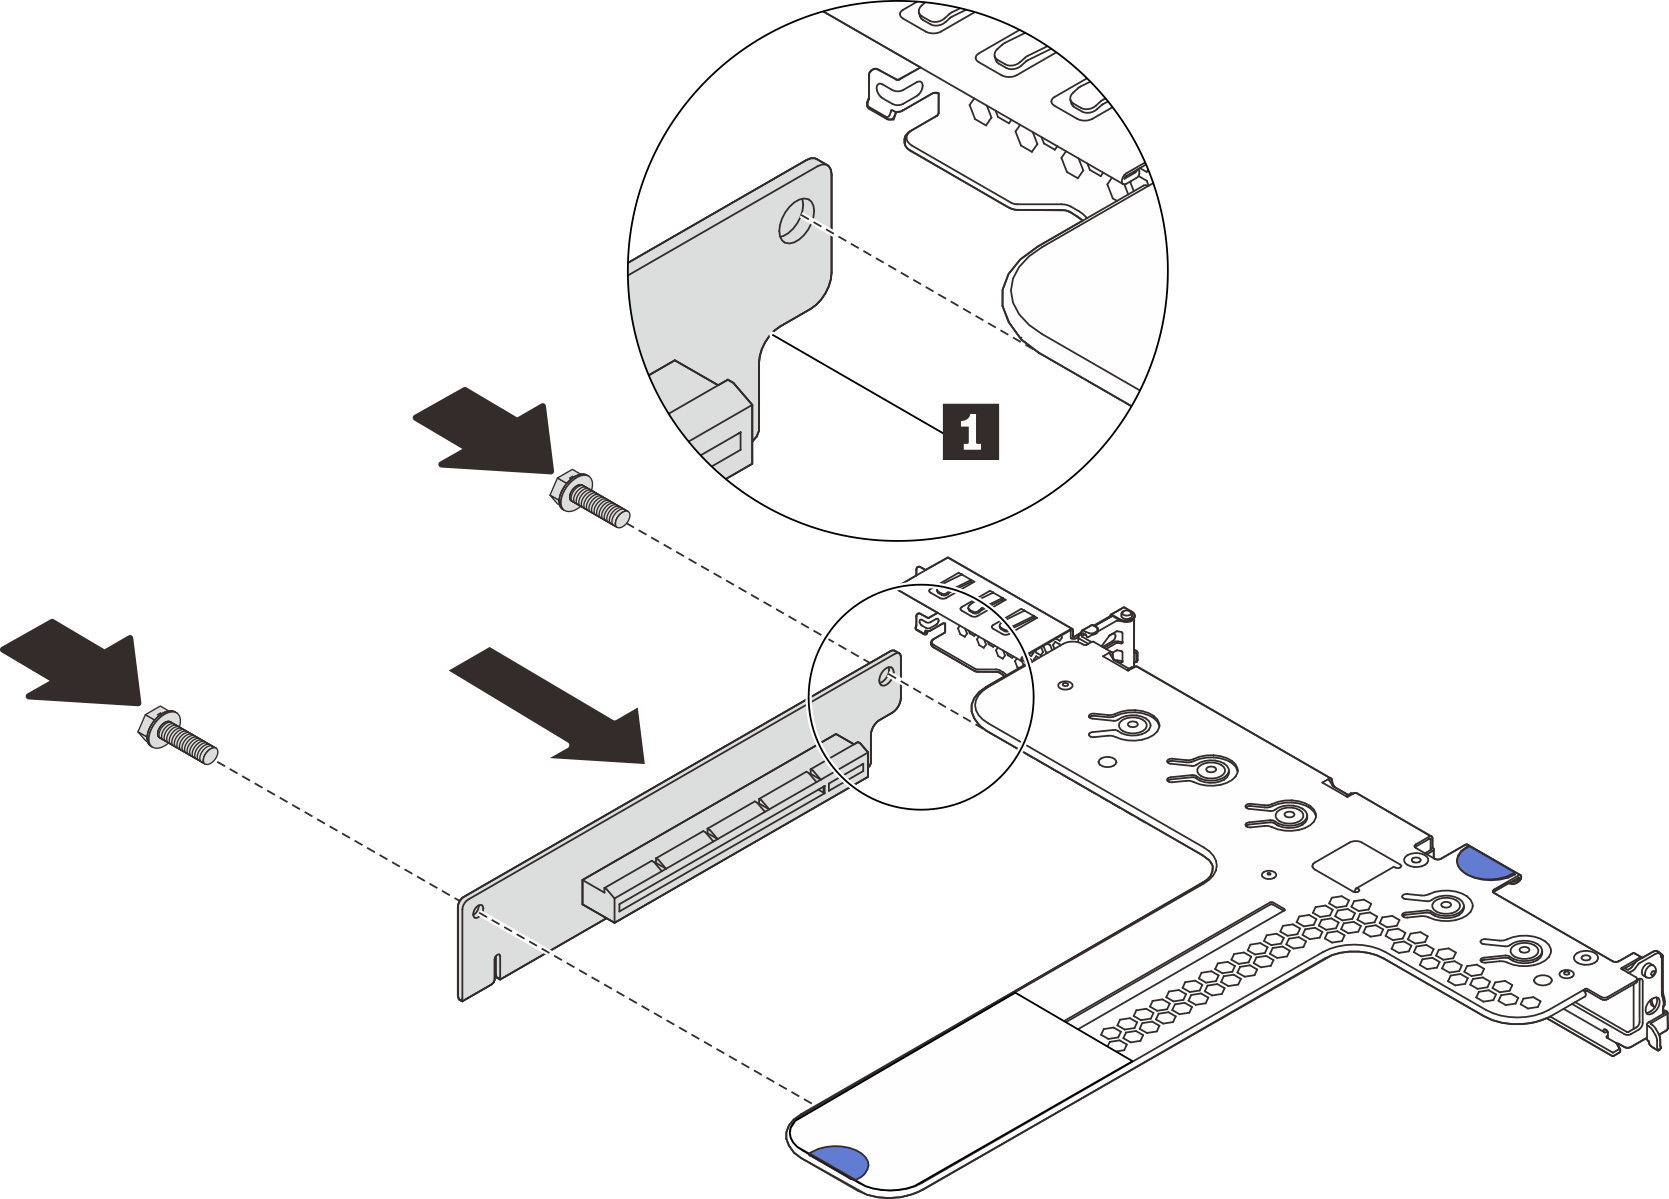
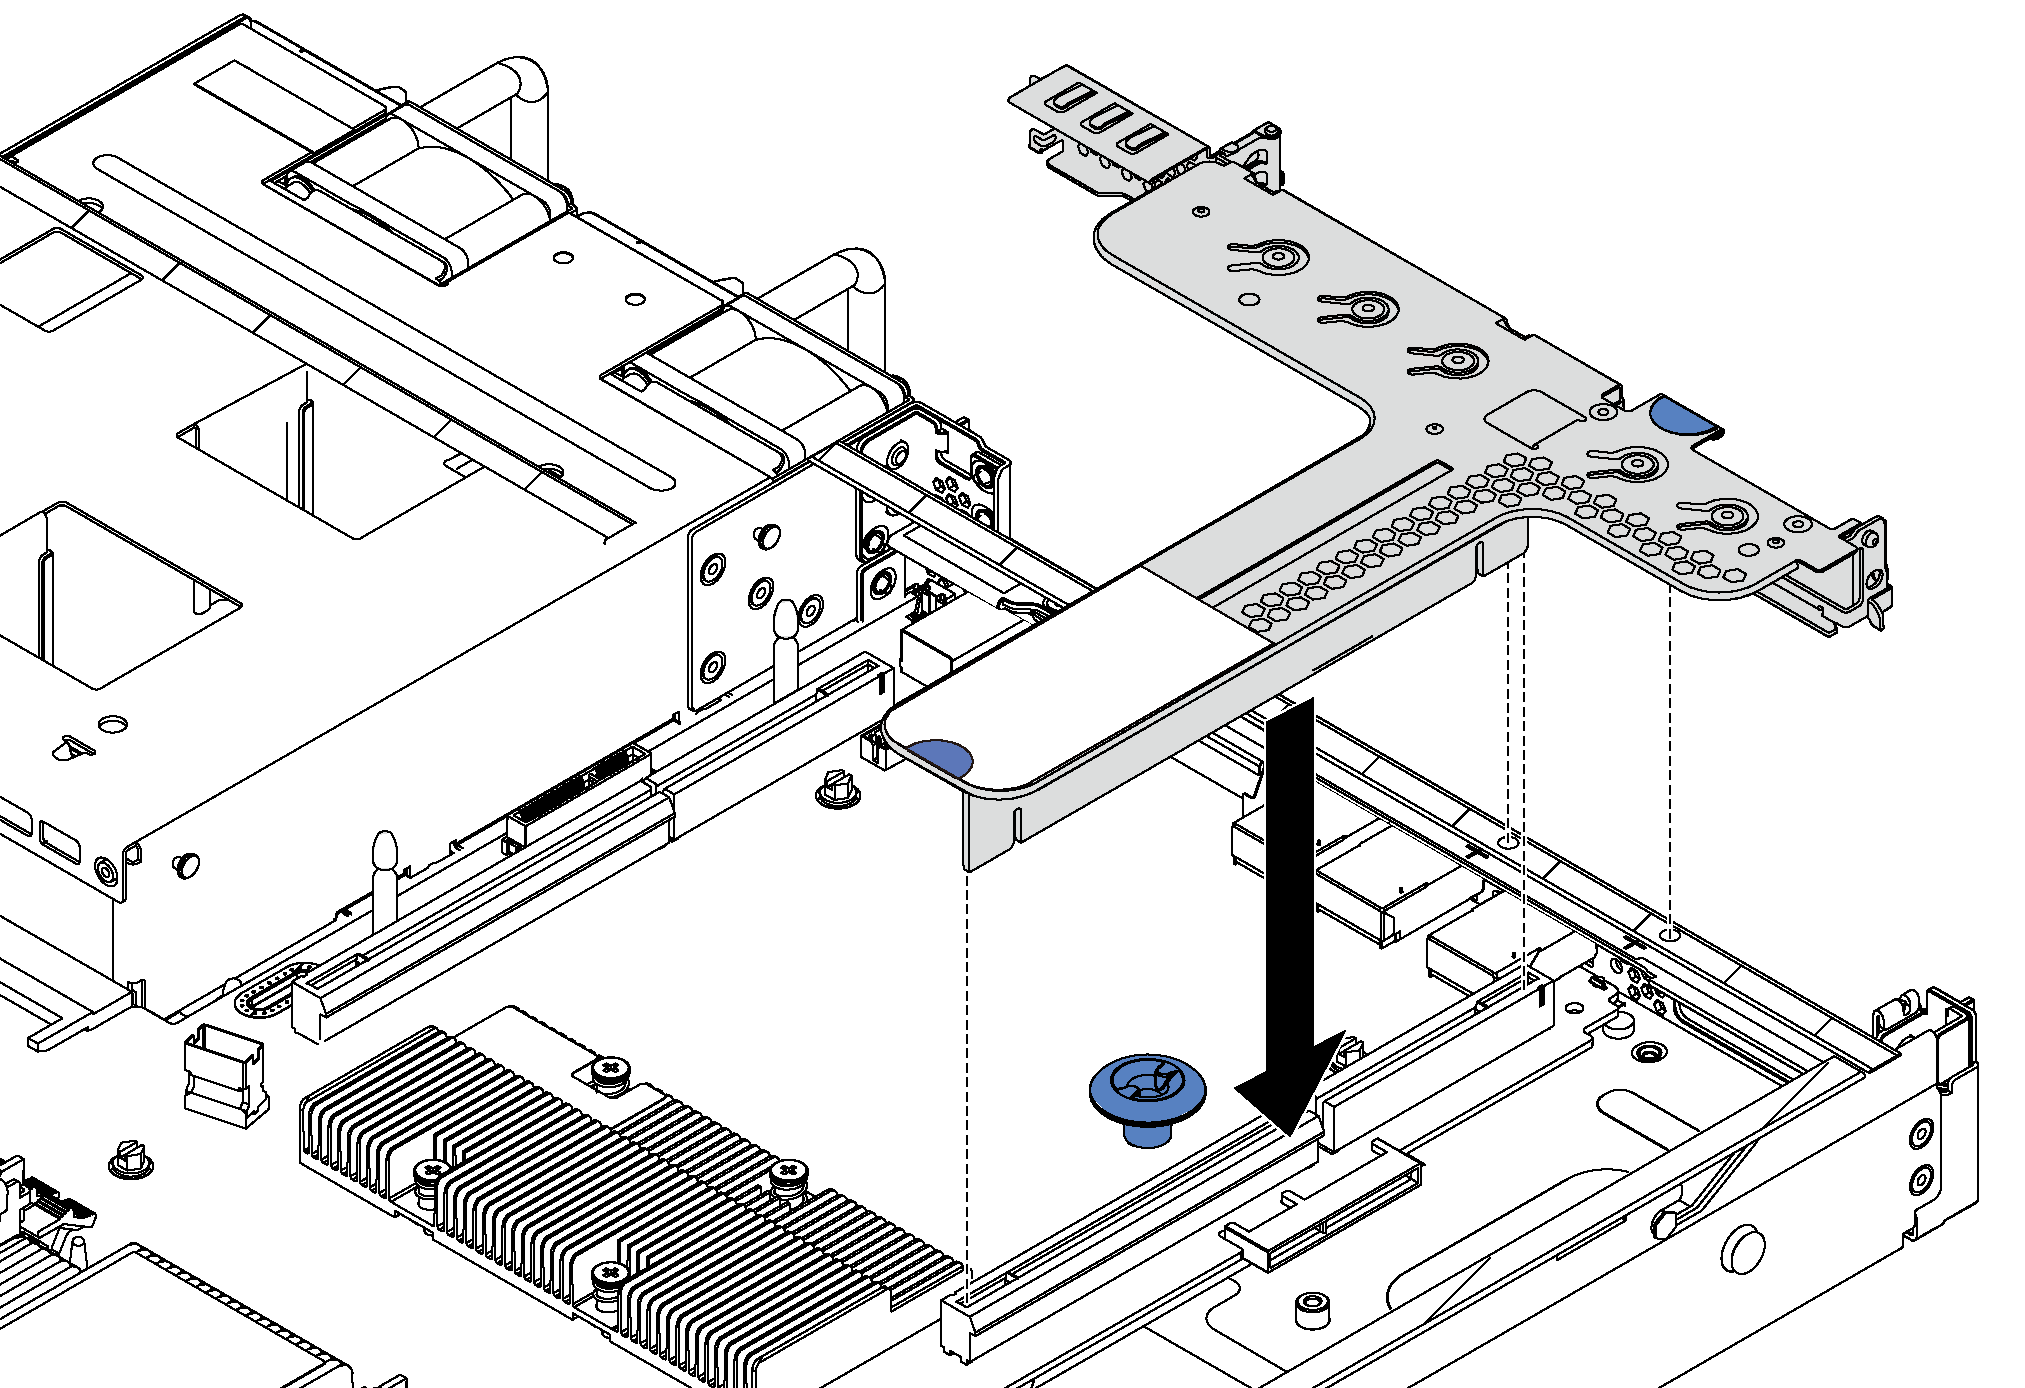
The riser assembly you want to install might be different from the illustrations below, but the installation method is the same.
- Note the notch 1 on the riser card and ensure that the orientation of the riser card is correct as shown. Then, align the screw holes in the new riser card with the corresponding ones in the bracket and install the two screws to secure the riser card to the bracket.Figure 1. Riser card installation
- Position the riser assembly on the chassis. Align the two pins on the bracket with the two holes in the chassis and align the riser card with the riser slot on the system board. Then, carefully press the riser assembly straight down into the slot until it is fully seated.Figure 2. Riser assembly installation
After installing the riser card, complete the parts replacement. See Complete the parts replacement.
Give documentation feedback