背面 M.2 ライザー・ケージおよびドライブ・バックプレーンの取り外し
背面 M.2 ライザー・ケージおよびドライブ・バックプレーンを取り外すには、このセクションの説明に従ってください。
このタスクについて
重要
安全に作業を行うために、取り付けのガイドラインおよび 安全検査のチェックリストをお読みください。
サーバーと周辺機器の電源をオフにし、電源コードとすべての外部ケーブルを取り外します。サーバーの電源をオフにするを参照してください。
静電気の影響を受けやすいコンポーネントは取り付け時まで帯電防止パッケージに収め、システム停止やデータの消失を招く恐れのある静電気にさらされないようにしてください。また、このようなデバイスを取り扱う際は静電気放電用リスト・ストラップや接地システムなどを使用してください。
手順
- 背面 M.2 バックプレーンを取り外します。注図に示されている M.2 バックプレーンは参照用であり、実際のハードウェアとは異なる場合があります。図 1. M.2 バックプレーンの取り外し
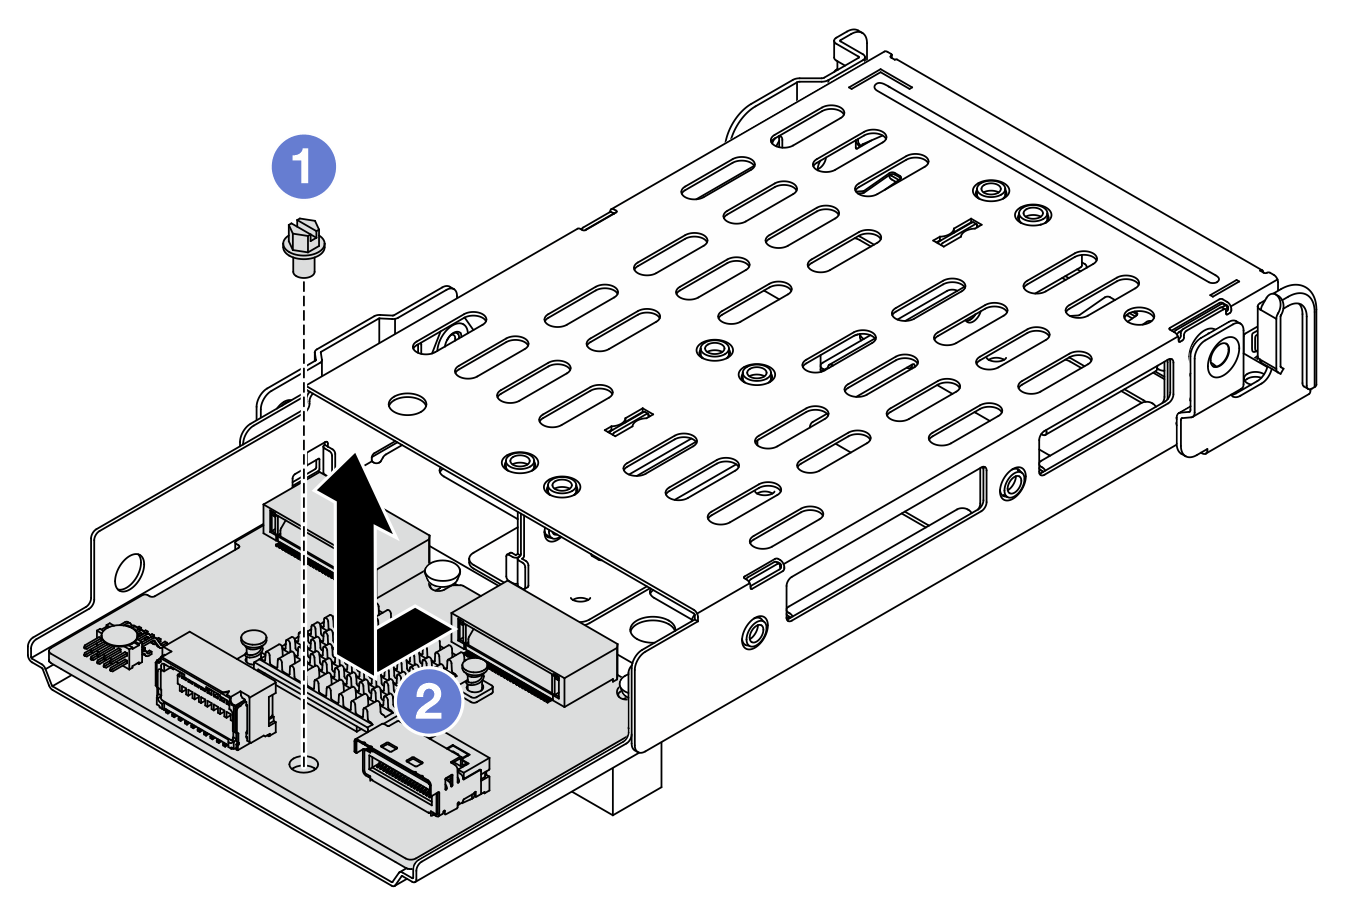
 バックプレーンをケージに固定している 1 本のねじを緩めます。
 上の図のようにバックプレーンをスライドさせ、持ち上げてケージから取り外します。
完了したら
コンポーネントまたはオプション装置を返却するよう指示された場合は、すべての梱包上の指示に従い、提供された配送用の梱包材がある場合はそれを使用してください。
デモ・ビデオ
フィードバックを送る