E3.S CMM 케이지 및 백플레인 설치
이 섹션의 지침에 따라 E3.S CMM 케이지 및 백플레인을 설치하십시오.
이 작업 정보
절차
- E3.S 2T 케이지에 백플레인을 설치하십시오.그림 1. 백플레인 설치
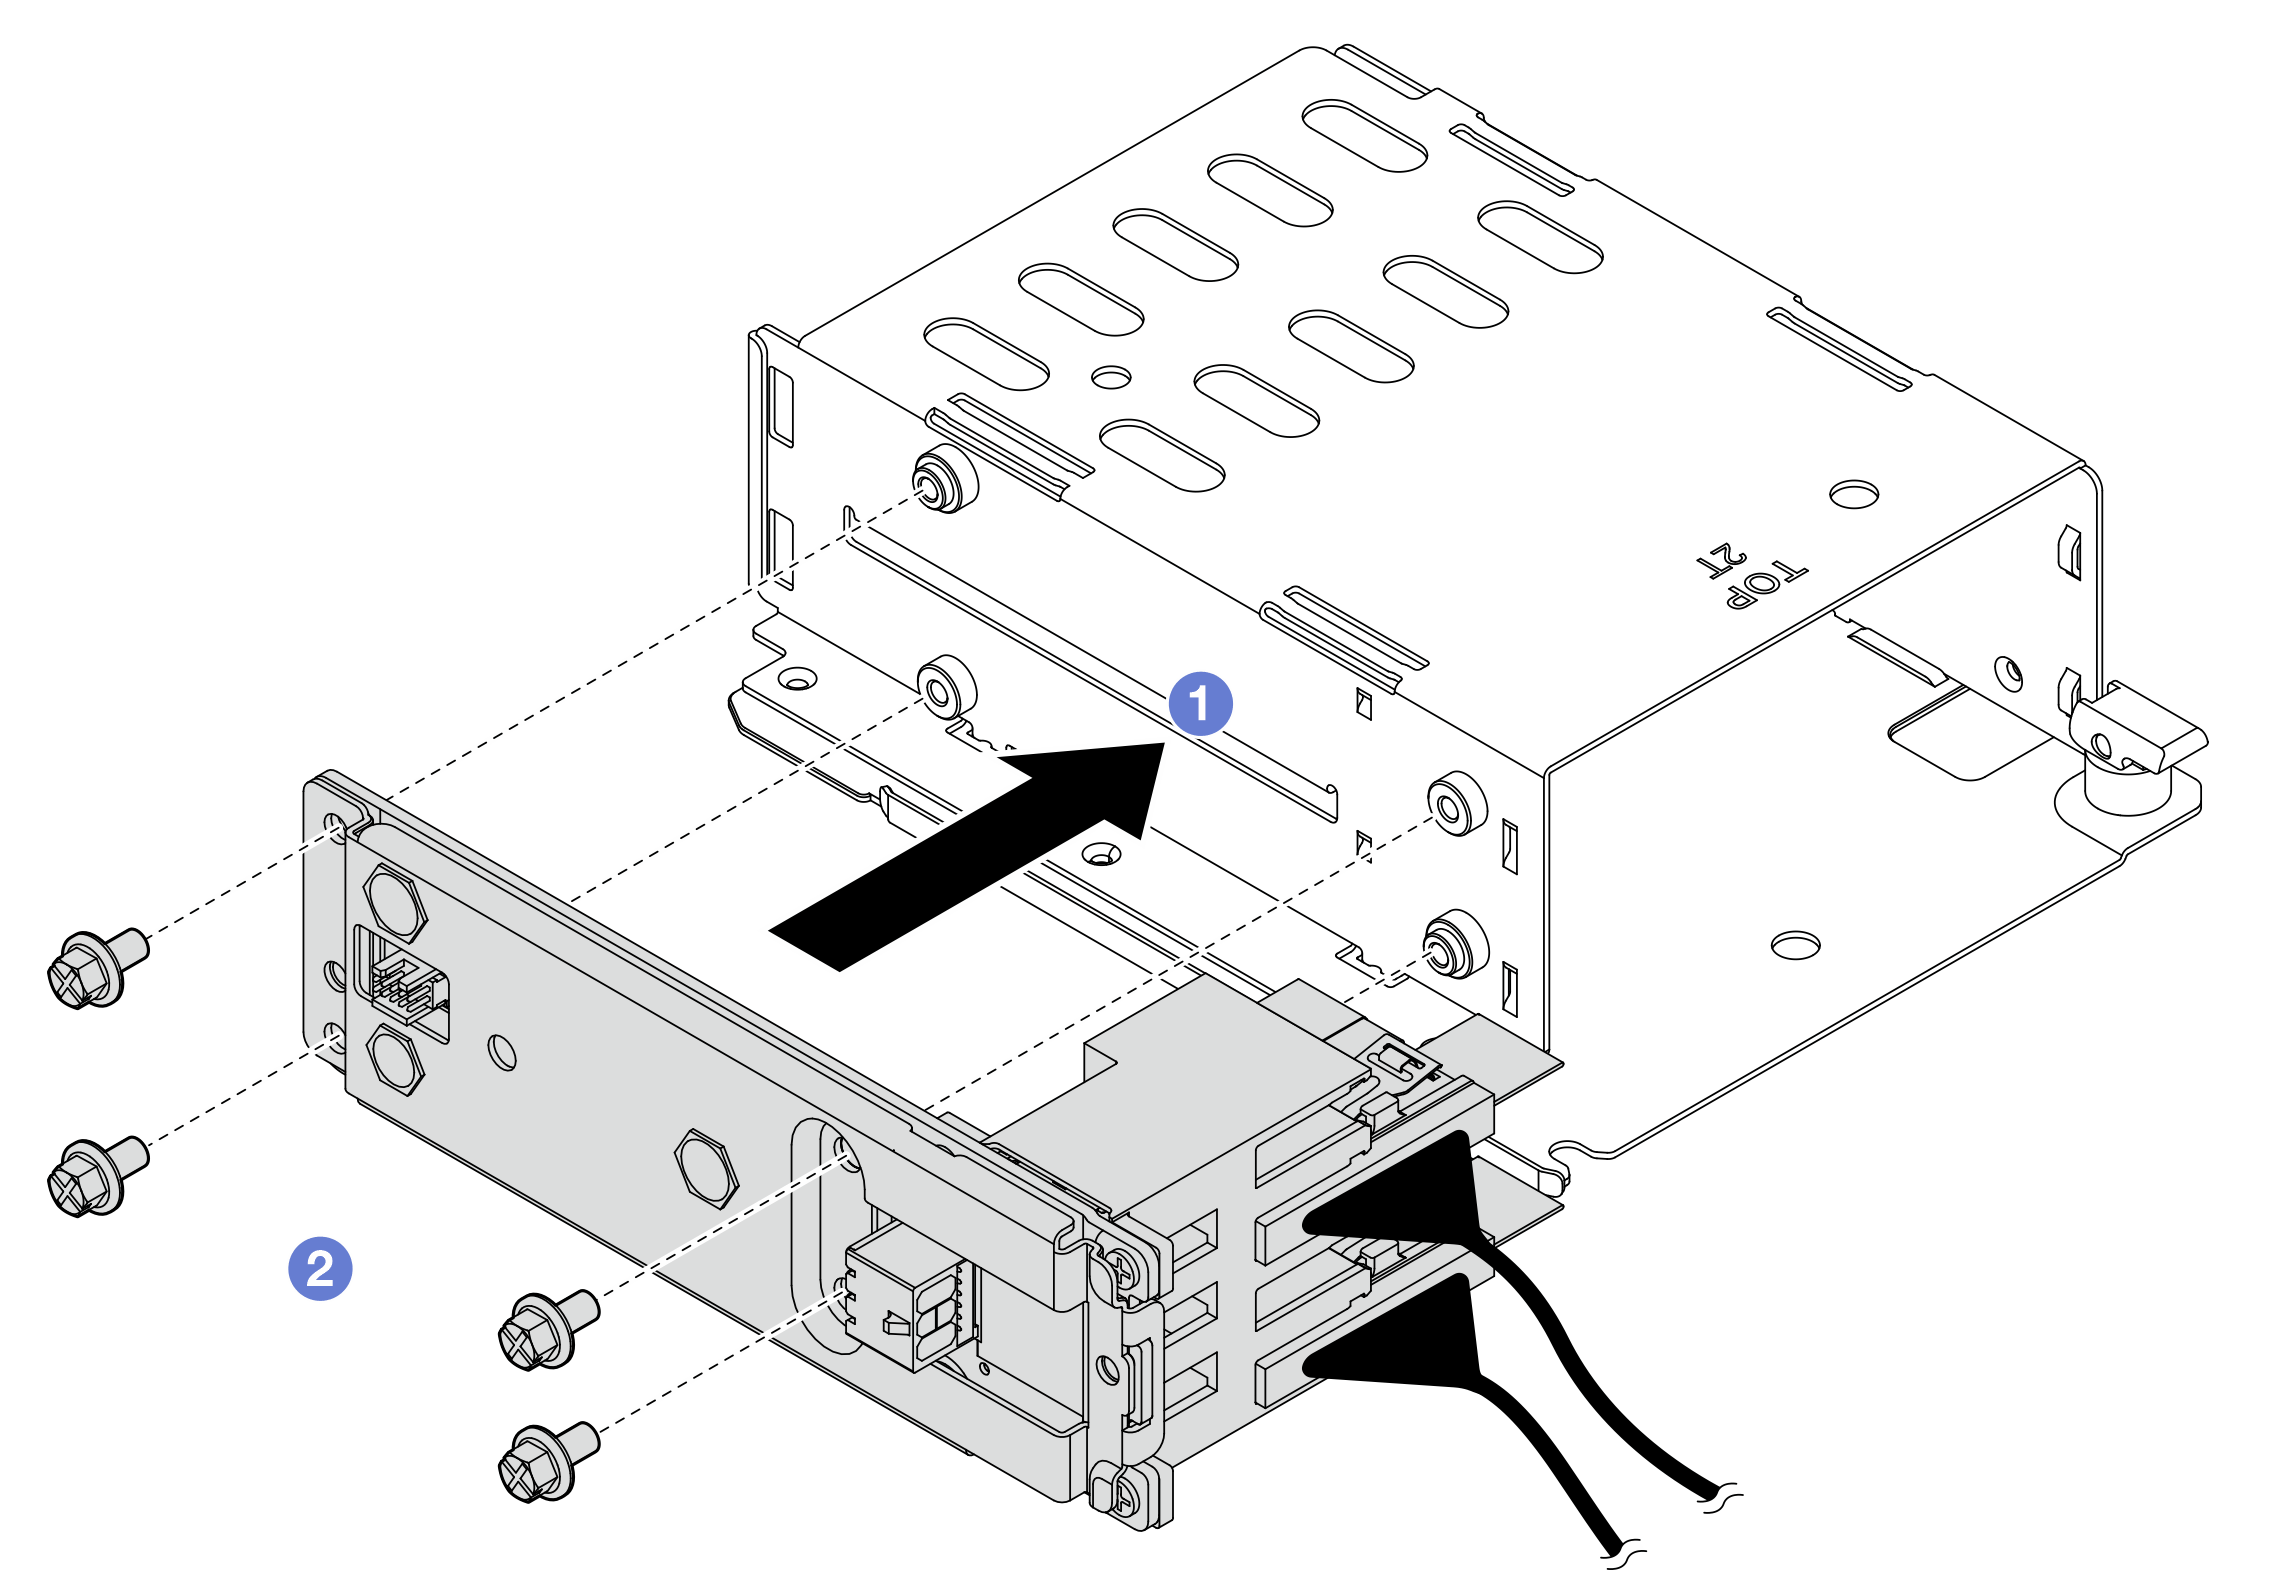
 백플레인을 케이지에 설치하십시오.
 나사 4개를 조여 백플레인을 고정합니다.
- E3.S 2T 케이지를 설치합니다.그림 2. E3.S 2T 케이지 설치
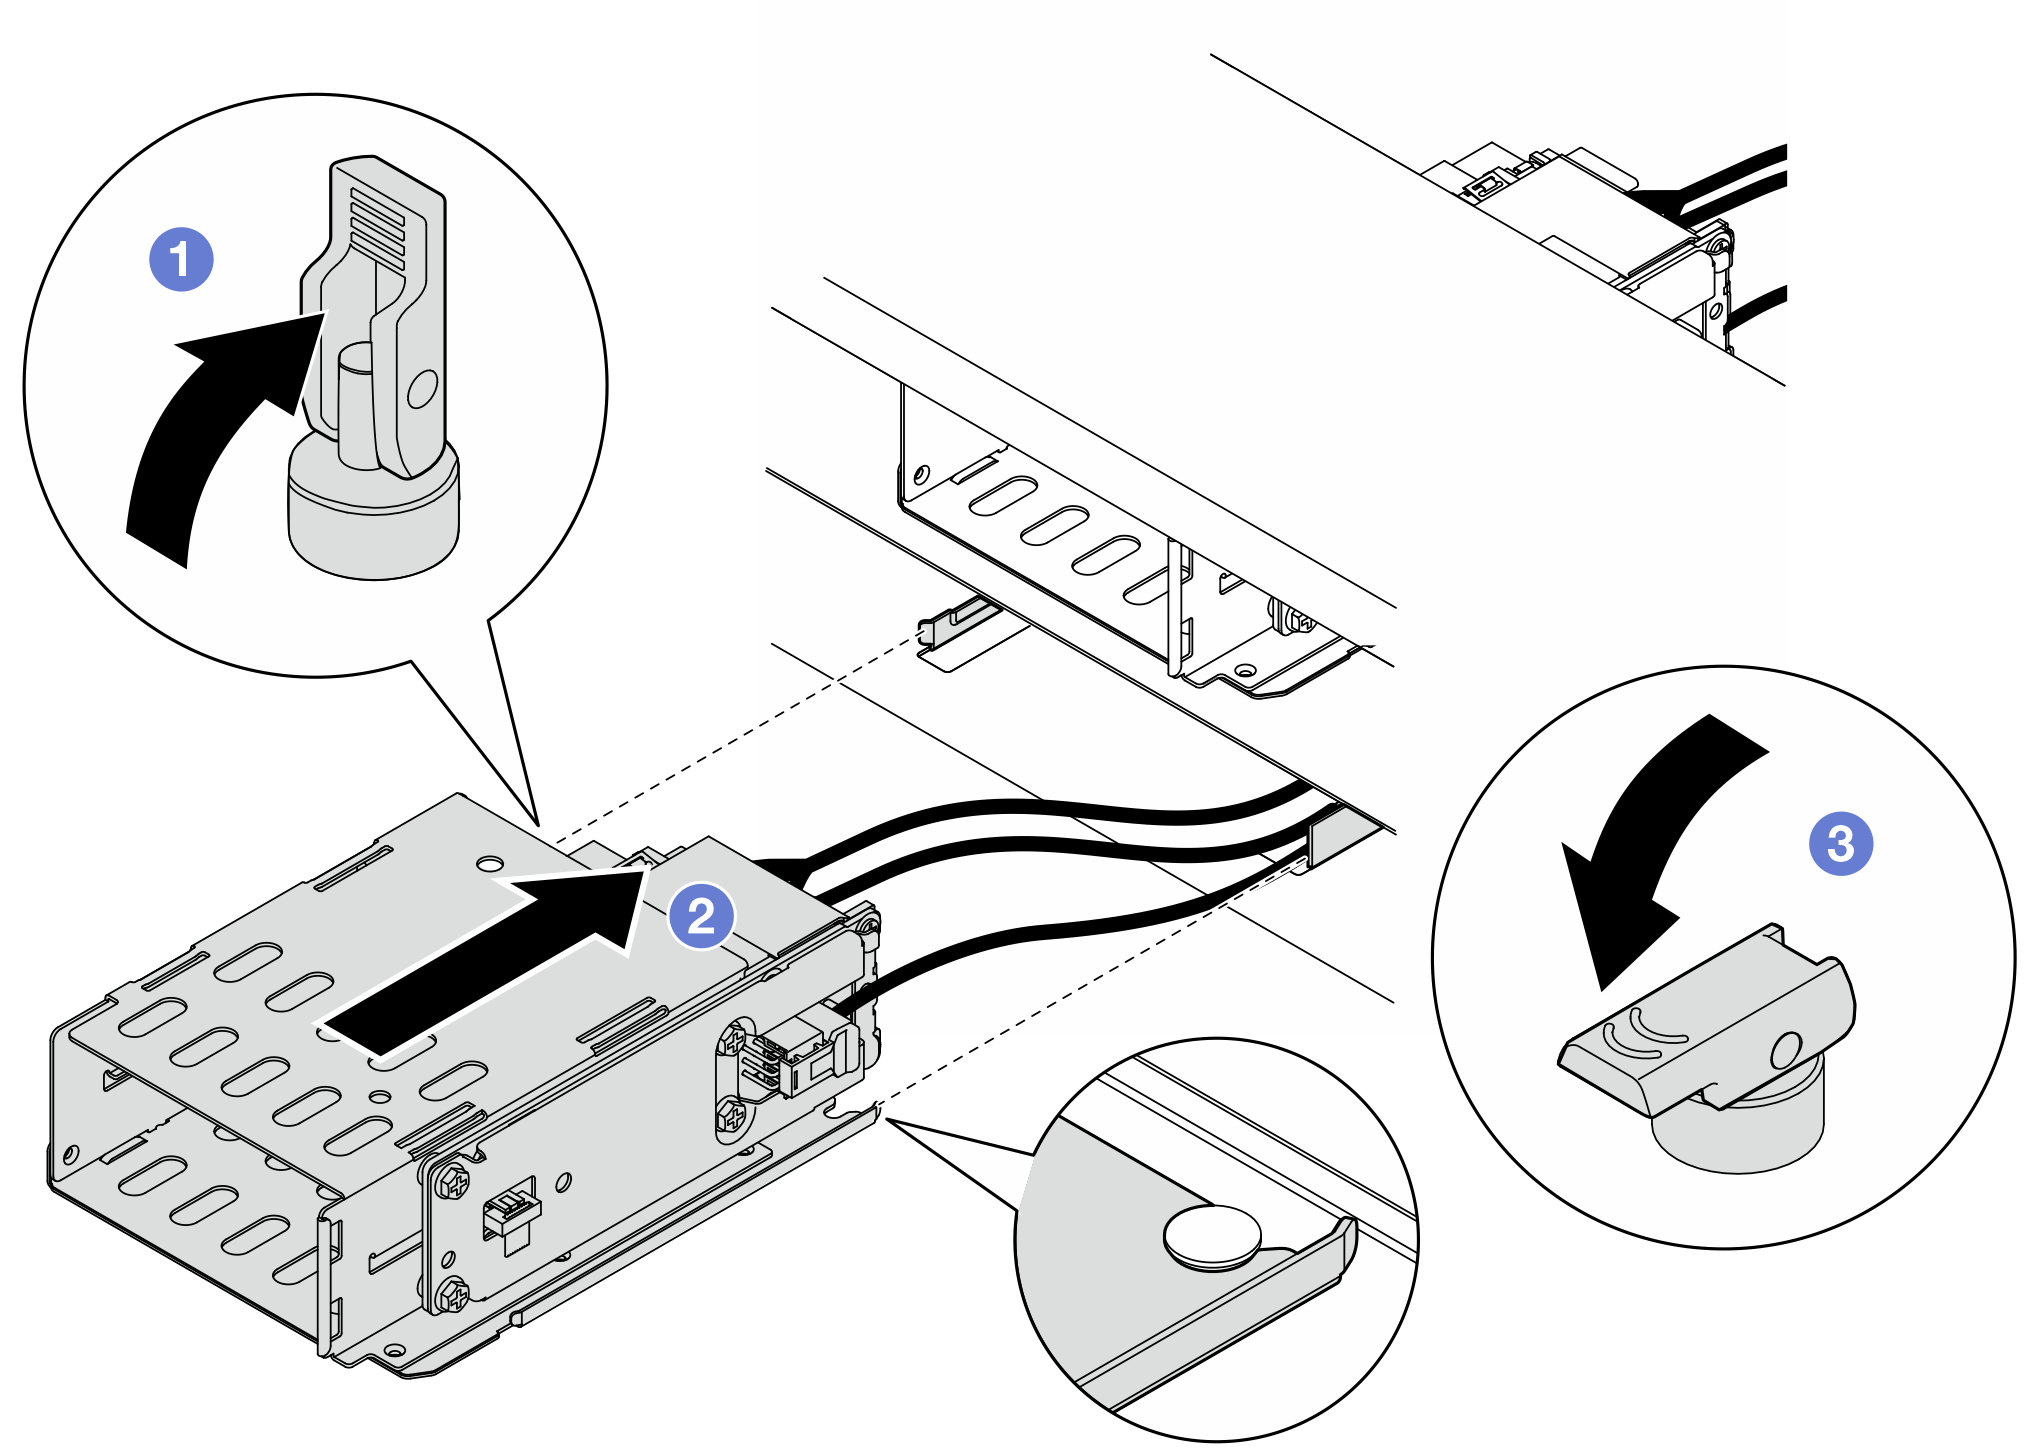
- 래치가 열림 위치에 있는지 확인하십시오.
- 케이지를 섀시에 밀어 넣으십시오. 이때 섀시의 가이드 핀이 제자리에 들어갈 때까지 밀어 넣습니다.
 래치를 아래로 눌러 케이지를 고정합니다.
완료한 후
공기 조절 장치를 다시 설치하십시오. 공기 조절 장치 설치의 내용을 참조하십시오.
윗면 덮개를 다시 설치하십시오. 윗면 덮개 설치의 내용을 참조하십시오.
CMM 또는 CMM 필러와 E3.S 베젤을 다시 설치하십시오. E3.S 비 핫 스왑 CMM 설치의 내용을 참조하십시오.
부품 교체를 완료하십시오. 부품 교체 완료의 내용을 참조하십시오.
데모 비디오
피드백 보내기