將 RAID 超級電容器模組安裝在空氣擋板的底端
使用此資訊將 RAID 超級電容器模組安裝在空氣擋板的底端。


註
您的伺服器最多支援兩個 RAID 超級電容器模組。
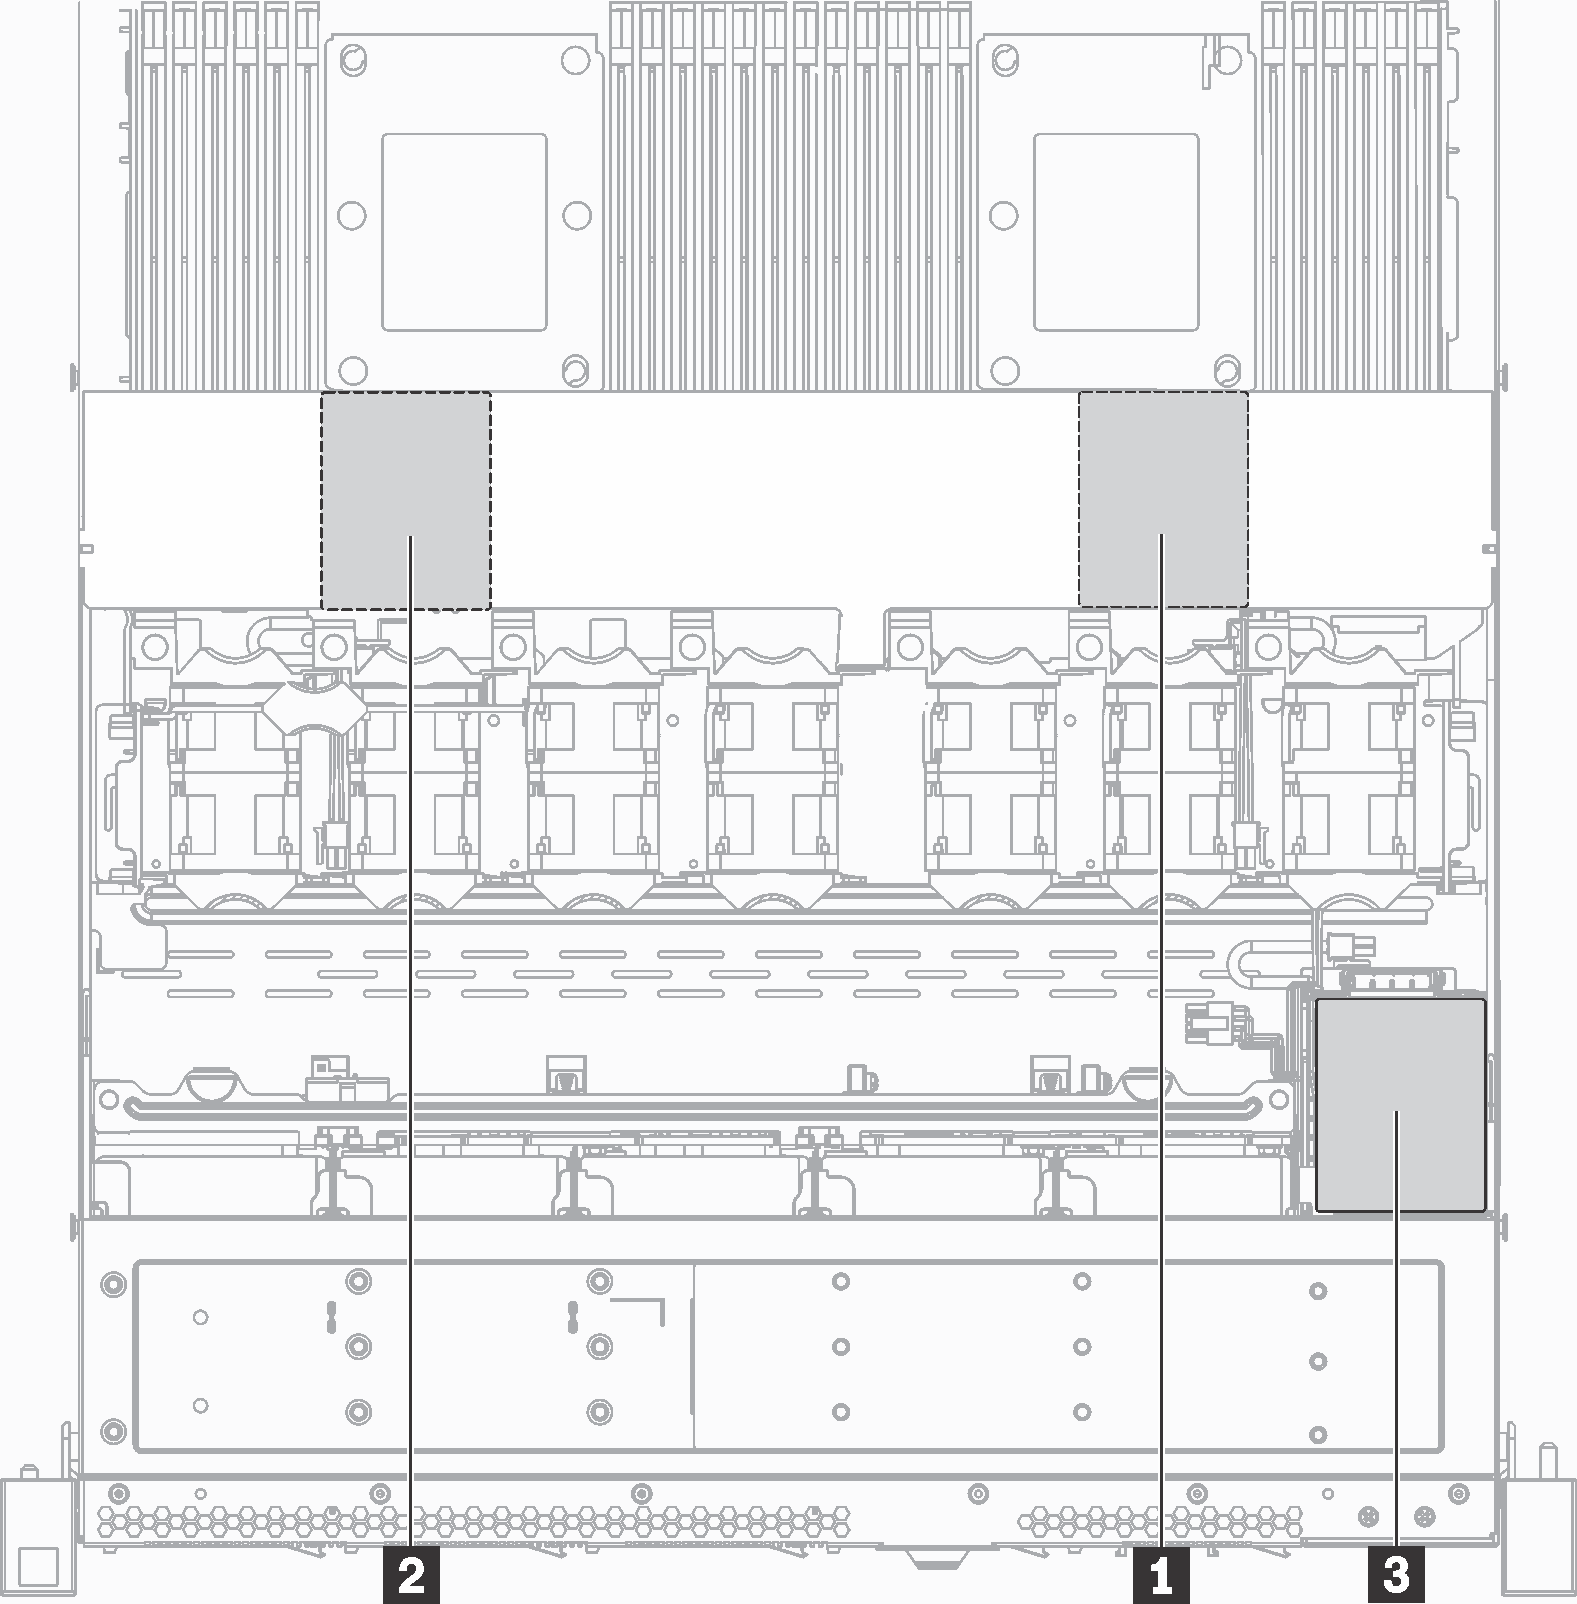
如果是配備 3.5 吋機槽的伺服器型號,請將第一個 RAID 超級電容器模組安裝在位置 1,然後將第二個 RAID 超級電容器模組安裝在位置 2。
- 至於配備 2.5 吋機槽的伺服器型號:
如果位置 3 有 RAID 超級電容器模組匣,請將第一個 RAID 超級電容器模組安裝在位置 3,然後將第二個 RAID 超級電容器模組安裝在位置 1。
如果位置 3 沒有 RAID 超級電容器模組匣,您可以將第一個 RAID 超級電容器模組安裝在位置 1,然後將第二個 RAID 超級電容器模組安裝在位置 2。
圖 1. RAID 超級電容器模組位置
將 RAID 超級電容器模組安裝在空氣擋板的底端之前,請將裝有新 RAID 超級電容器模組的防靜電保護袋觸碰伺服器外部任何未上漆的表面。然後從保護袋中取出新的 RAID 超級電容器模組,並將其放置在防靜電表面上。
若要將 RAID 超級電容器模組安裝在空氣擋板的底端,請完成下列步驟:
觀看此程序
如需此程序的影片,請造訪 YouTube。
圖 2. 將 RAID 超級電容器模組安裝在空氣擋板的底端
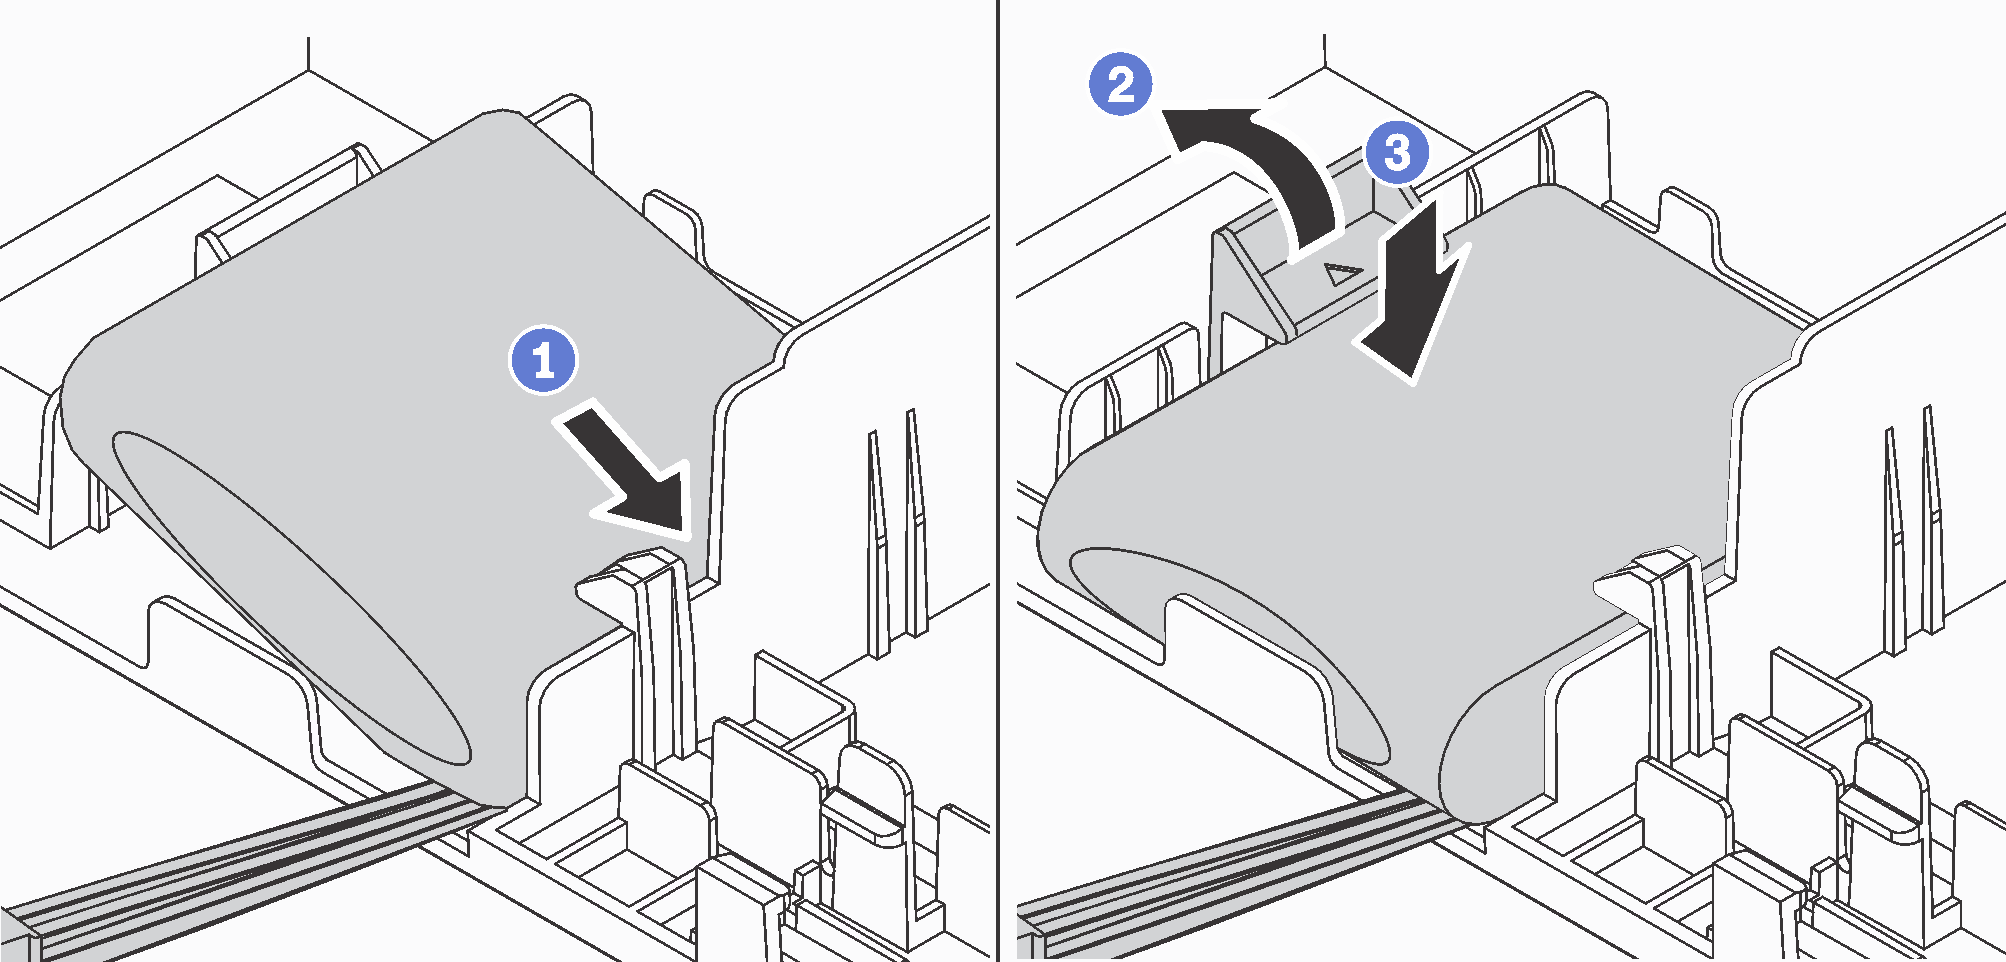
- 依照所示將 RAID 超級電容器模組插入空氣擋板底端的插槽。
- 依照所示輕輕按壓空氣擋板上的卡榫。
- 向下按壓 RAID 超級電容器模組,將其安裝在插槽中。
安裝 RAID 超級電容器模組之後:
使用 RAID 超級電容器模組隨附的延長線,將 RAID 超級電容器模組連接至 RAID 配接卡。
完成零件更換。請參閱完成零件更換。
提供意見回饋