Install a RAID super capacitor module on the bottom of the air baffle
Use this information to install a RAID super capacitor module on the bottom of the air baffle.
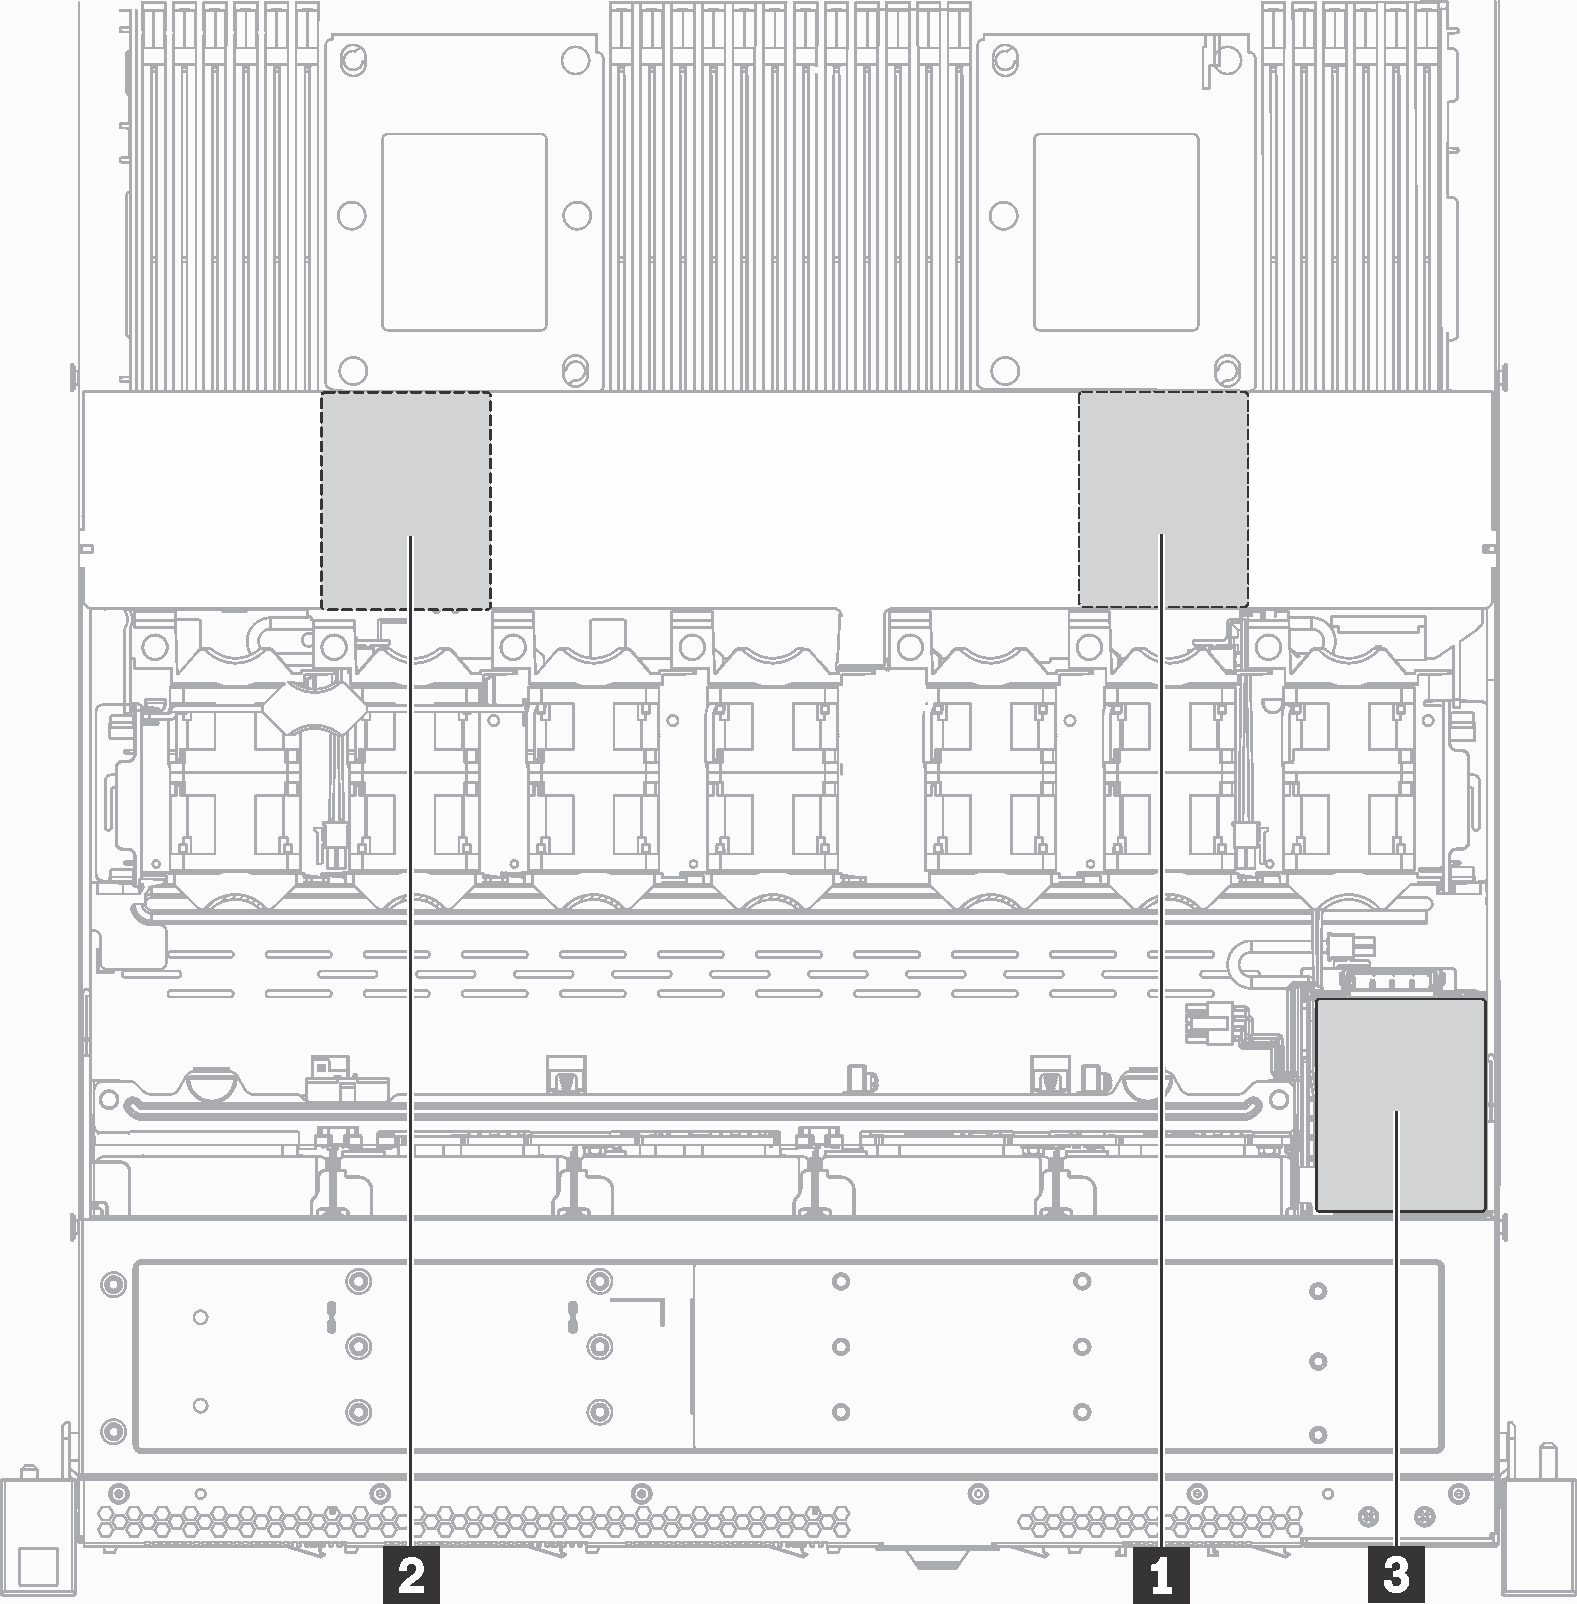
For server models with 3.5-inch drive bays, install the first RAID super capacitor module in location 1 and install the second RAID super capacitor module in location 2.
- For server models with 2.5-inch drive bays:
If you have a RAID super capacitor module holder in location 3, install the first RAID super capacitor module in location 3 and install the second RAID super capacitor module in location 1.
If you do not have a RAID super capacitor module holder in location 3, you can install the first RAID super capacitor module in location 1 and install the second RAID super capacitor module in location 2.

Before installing a RAID super capacitor module on the bottom of the air baffle, touch the static-protective package that contains the new RAID super capacitor module to any unpainted surface on the outside of the server. Then, take the new RAID super capacitor module out of the package and place it on a static-protective surface.
To install a RAID super capacitor module on the bottom of the air baffle, complete the following steps:
Watch the procedure
A video of this procedure is available at YouTube.

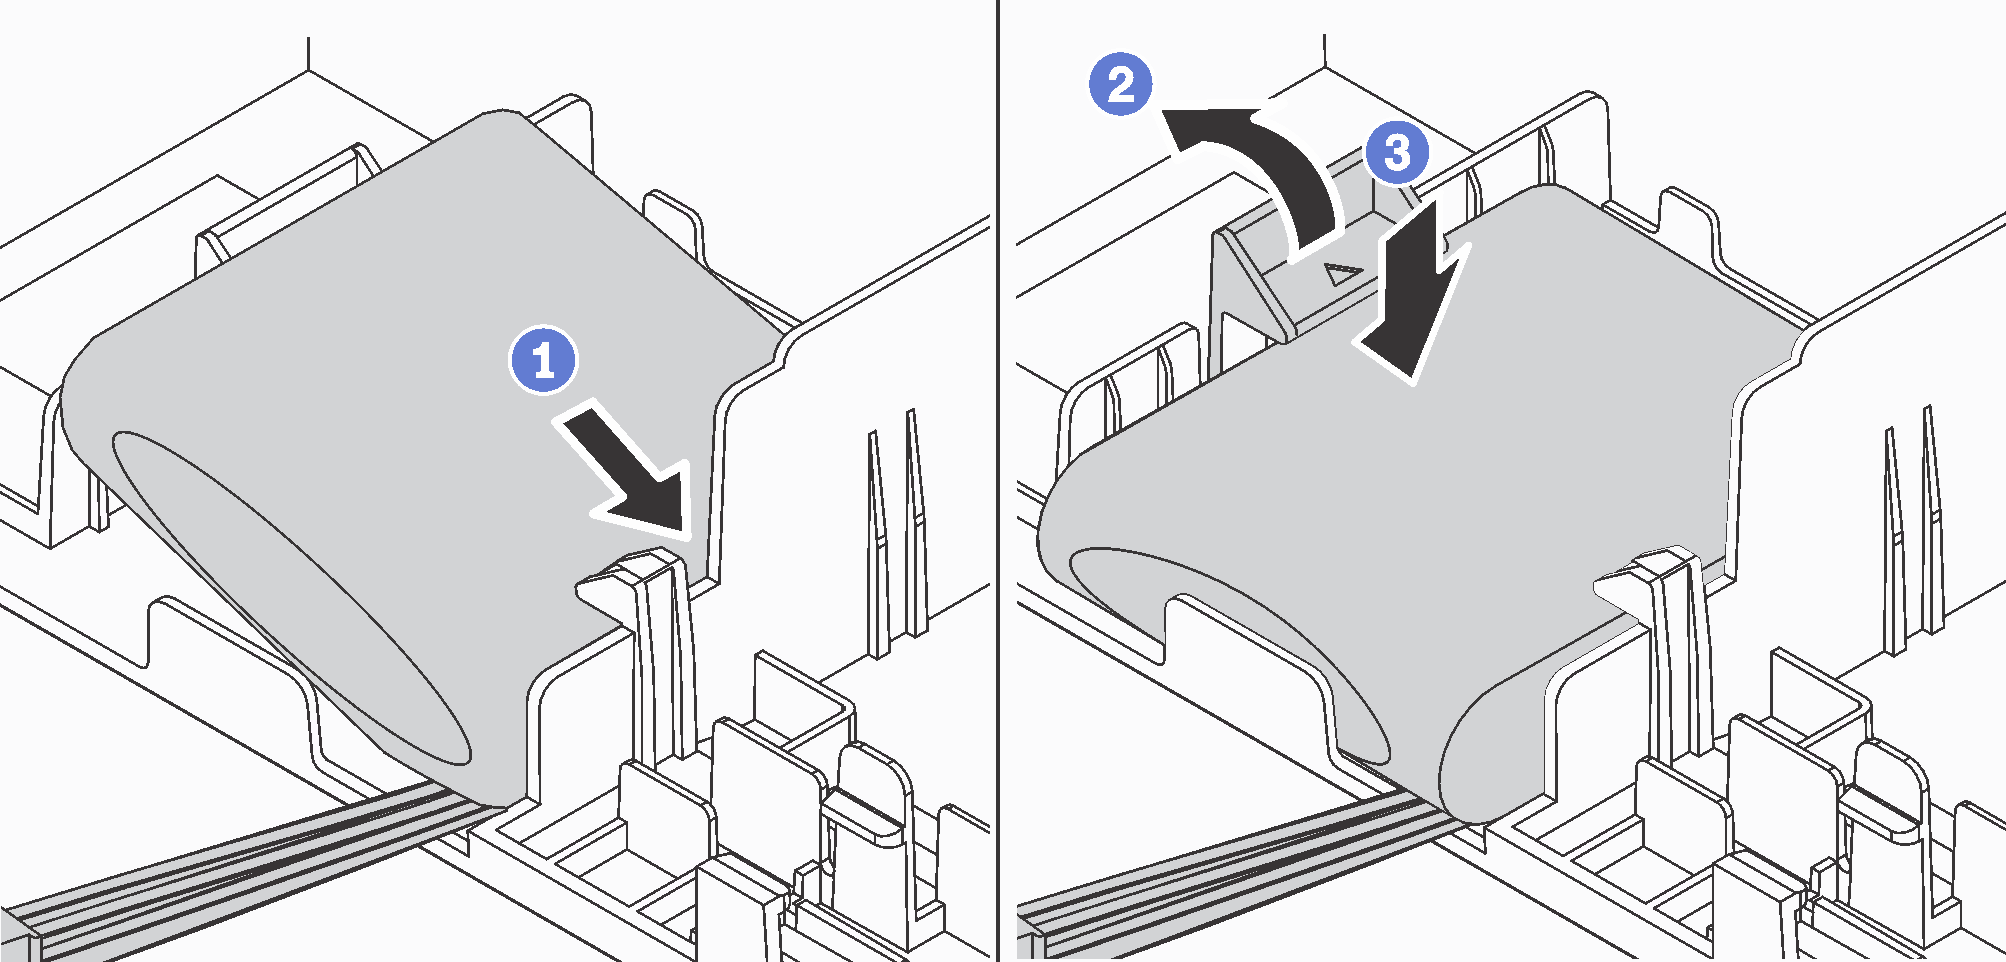
- Insert the RAID super capacitor module into the slot at the bottom of the air baffle as shown.
- Gently press the tab on the air baffle as shown.
- Press down the RAID super capacitor module to install it into the slot.
Connect the RAID super capacitor module to a RAID adapter with the extension cable that comes with the RAID super capacitor module.
Complete the parts replacement. See Complete the parts replacement.


