Install the RAID super capacitor module on the riser
Use this information to install the RAID super capacitor module on the riser.
About this task
Read Installation guidelines to ensure that you work safely.
Power off the server and disconnect all power cords for this task.
Prevent exposure to static electricity, which might lead to system halt and loss of data, by keeping static-sensitive components in their static-protective packages until installation, and handling these devices with an electrostatic-discharge wrist strap or other grounding system.
Procedure
- Install the RAID super capacitor module on the riser.Figure 1. Installation of the RAID super capacitor module on the riser
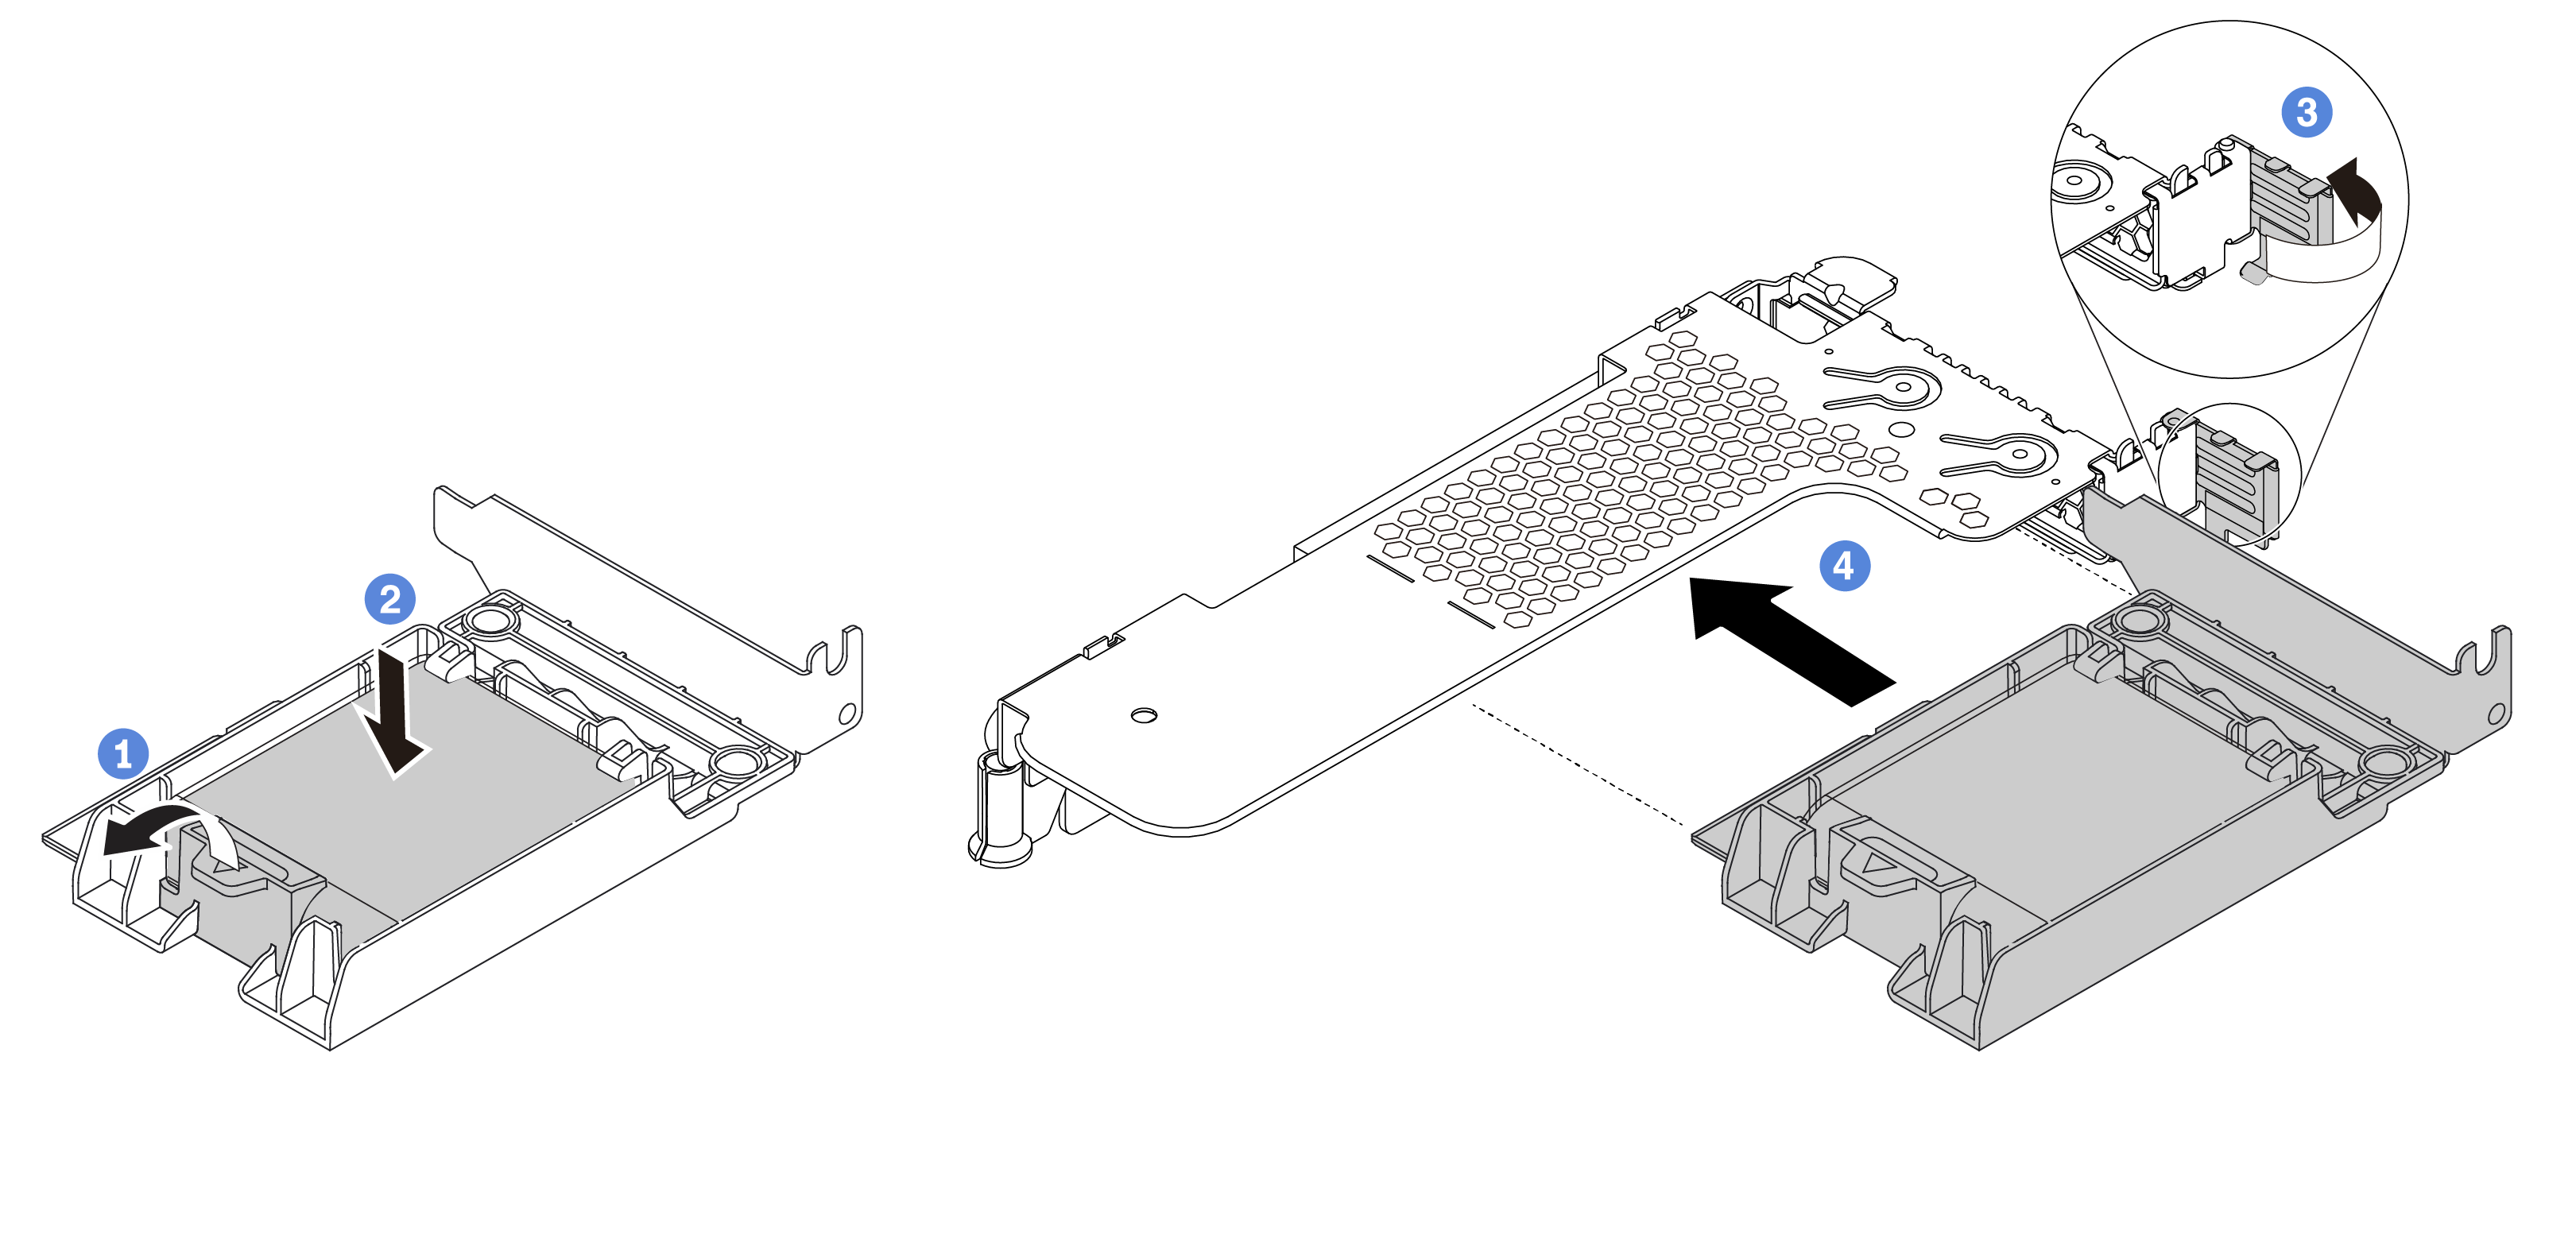
- Open the retention clip on the holder.
- Put the RAID super capacitor module into the holder and press it down to secure it into the holder.
- Rotate the latch on the riser bracket to the open position.
- Align the RAID super capacitor assembly with the slot on the riser card. Then, carefully press the RAID super capacitor assembly straight into the slot until it is securely seated and its bracket also is secured.
After you finish
Install the riser assembly on the chassis. See Install a riser assembly.
Connect the super capacitor module to an adapter with the extension cable that comes with the super capacitor module. For detailed cable routing information, see Internal cable routing.
Complete the parts replacement. See Complete the parts replacement.