Install the 3.5-inch-drive backplane
Use this information to install the 3.5-inch-drive backplane.


The procedure is based on the scenario that you want to install the backplane for up to twelve 3.5-inch drives. The procedure is similar for the backplane for up to eight 3.5-inch drives.
If you are installing the 3.5-inch-drive backplane with expander and the 8i HBA/RAID adapter for the server models with twelve 3.5-inch-drive bays, GPU is not supported, the maximum supported processor TDP is 165 watts, and you need to create the RAID volume to avoid the disorder of the HDD sequence. Besides, if the rear hot-swap drive is installed, the server performance might be degraded.
Before installing the 3.5-inch-drive backplane, touch the static-protective package that contains the new backplane to any unpainted surface on the outside of the server. Then, take the new backplane out of the package and place it on a static-protective surface.
To install the 3.5-inch-drive backplane, complete the following steps:
Watch the procedure
A video of this procedure is available at YouTube.
- Connect the cables to the backplane.
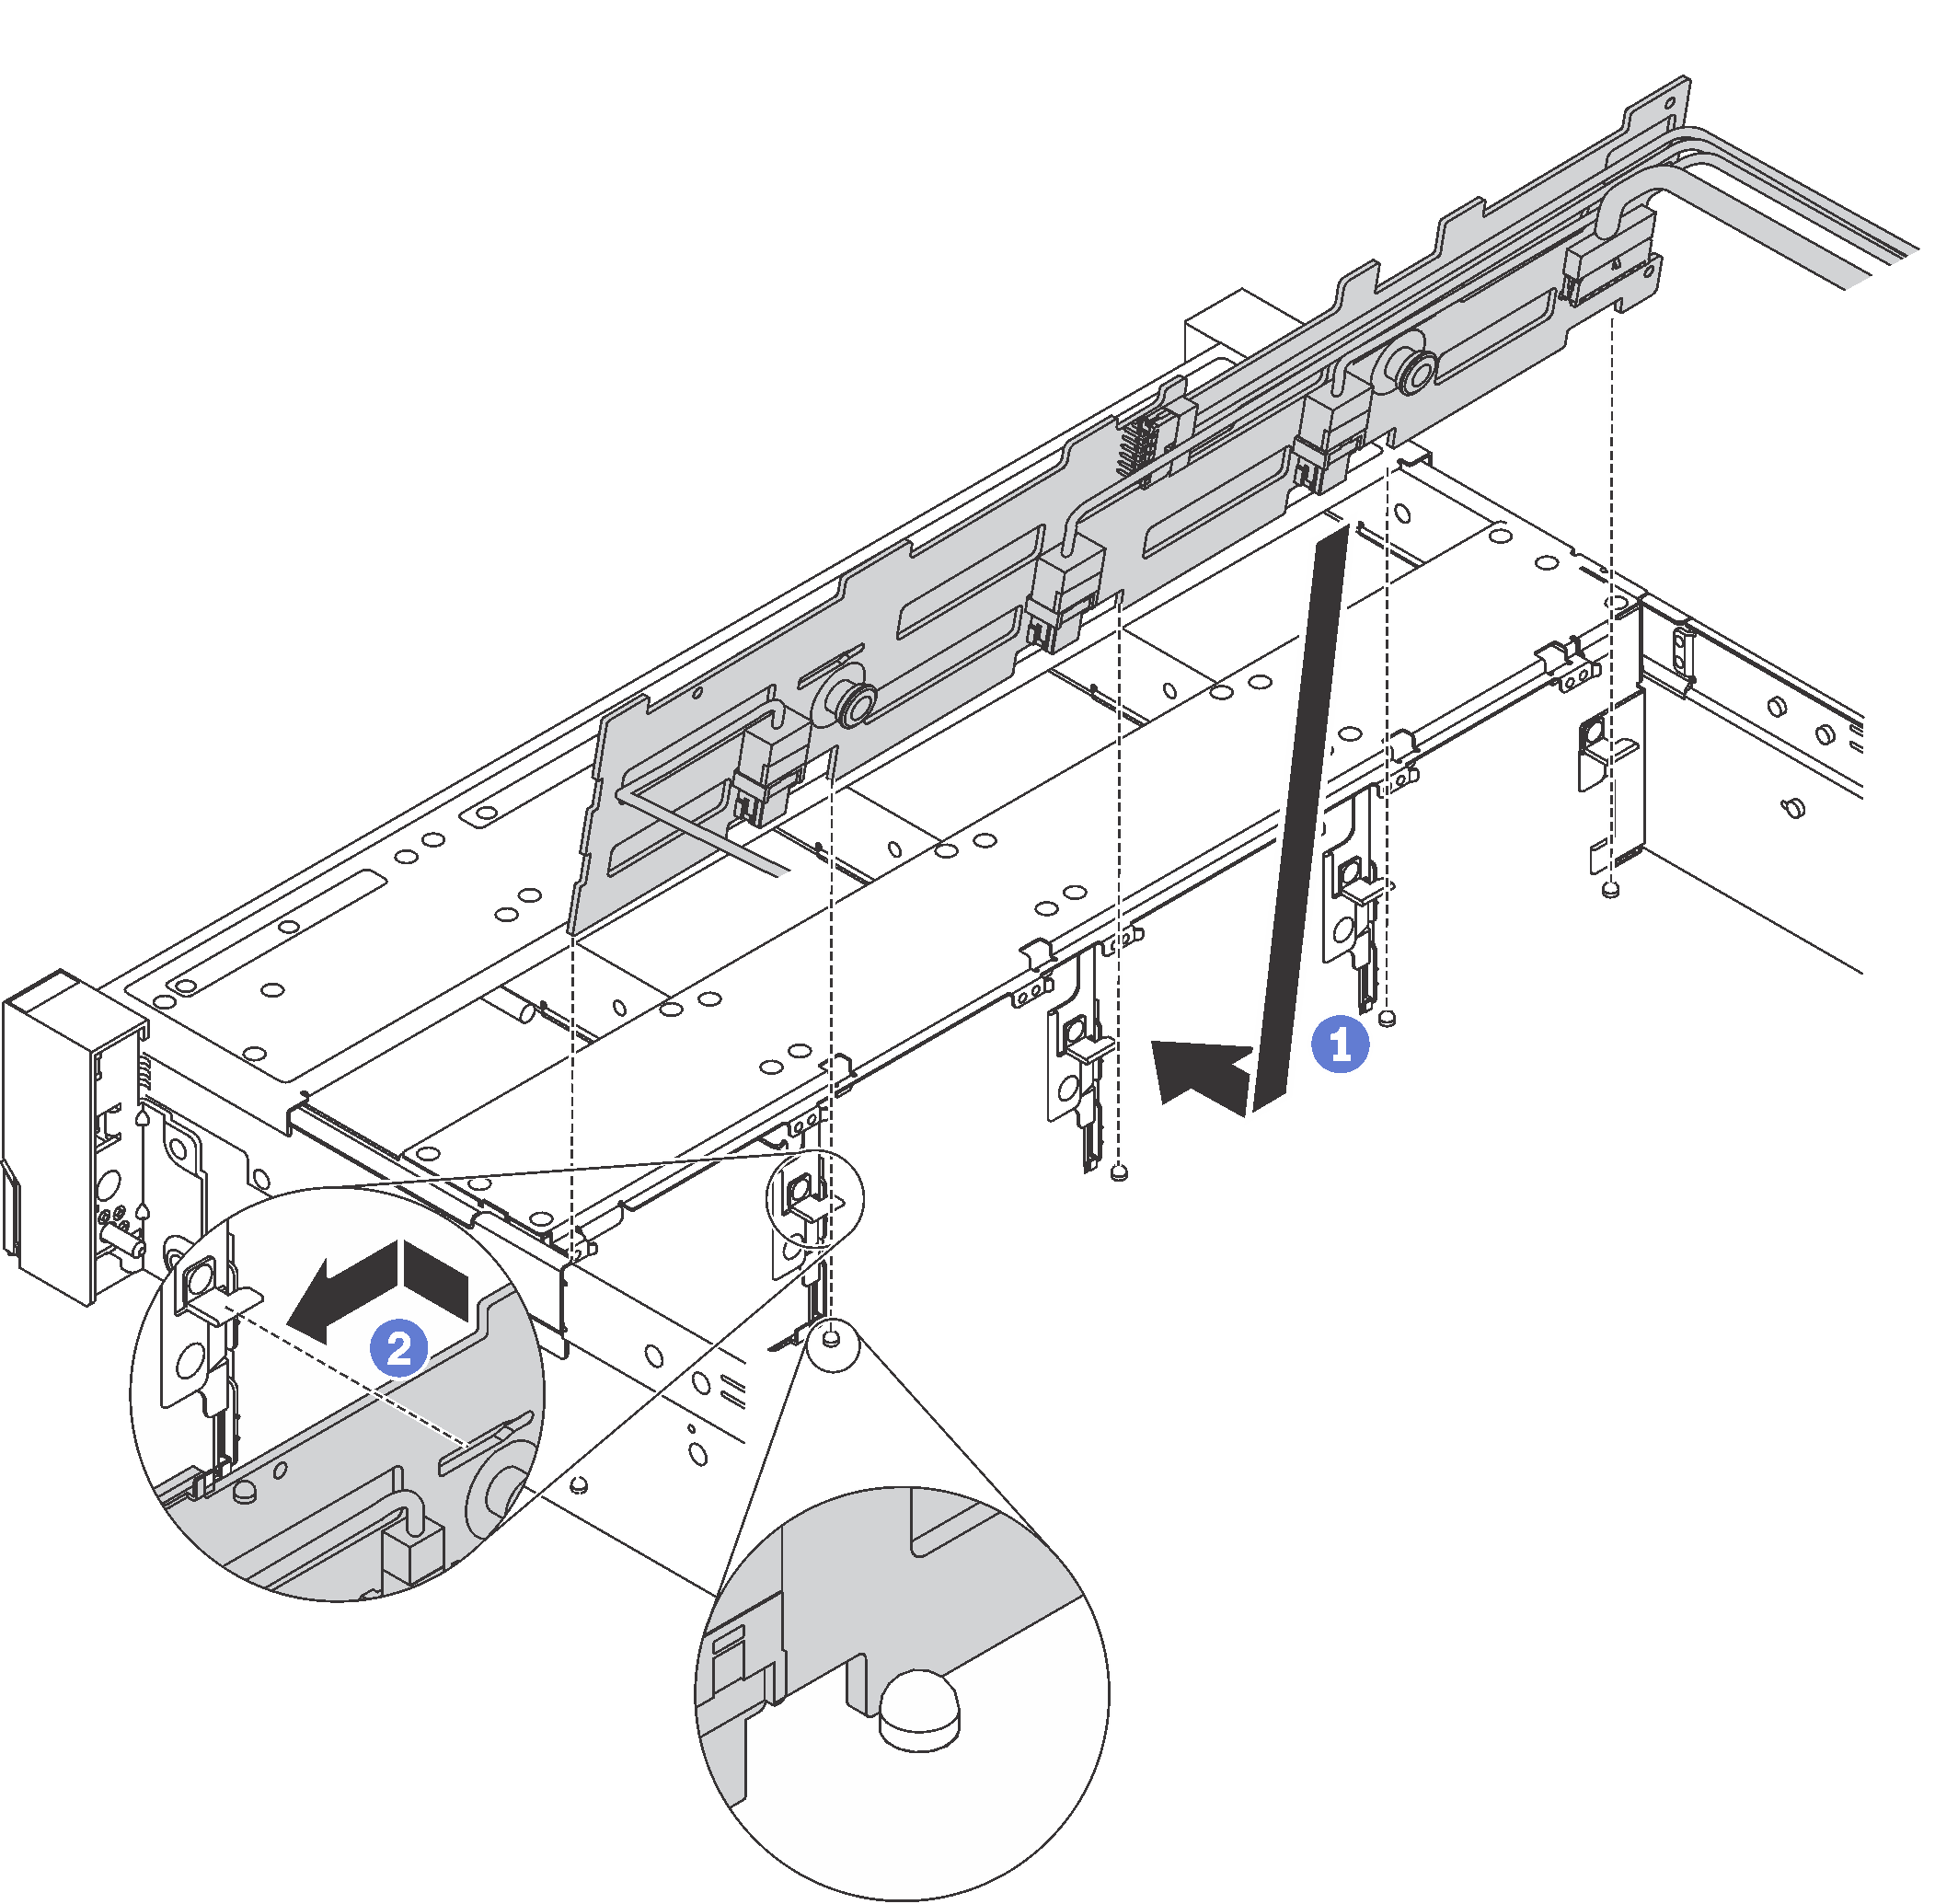
- Align the backplane with the chassis and lower it into the chassis. Then, put the backplane into place with it leaning backward slightly.
- Rotate the backplane to vertical position to ensure that the four hooks on the chassis pass through the corresponding holes in the backplane. Then, slide the new backplane as shown until it is secured into place.
Reinstall all the drives and fillers (if any) into the drive bays. See Install a hot-swap drive.
Complete the parts replacement. See Complete the parts replacement.