Remove a serial port module

Use this information to remove a serial port module.

About this task

Attention
  • Read Installation Guidelines to ensure that you work safely.

  • Power off the server and disconnect all power cords for this task.

  • Prevent exposure to static electricity, which might lead to system halt and loss of data, by keeping static-sensitive components in their static-protective packages until installation, and handling these devices with an electrostatic-discharge wrist strap or other grounding system.

Procedure

  1. Remove the top cover. See Remove the top cover.
  2. Disconnect the cable of the serial port module from the system board.
    1. Press the release tab to release the connector.
    2. Disengage the connector from the cable socket.
    Note
    Failing to release the tab before removing the cables will damage the cable sockets on the system board. Any damage to the cable sockets might require replacing the system board.
    Figure 1. Disconnecting the serial port cable
    Squeeze the release tabs at both sides and disengage the connector from the cable socket. Do not pull the cable straight up using force. Do not pull the connector straight up using force.

  3. Remove the riser assembly from the system. See PCIe adapter and riser assembly replacement.
  4. Open the retention latch and remove the serial port module from the riser bracket.
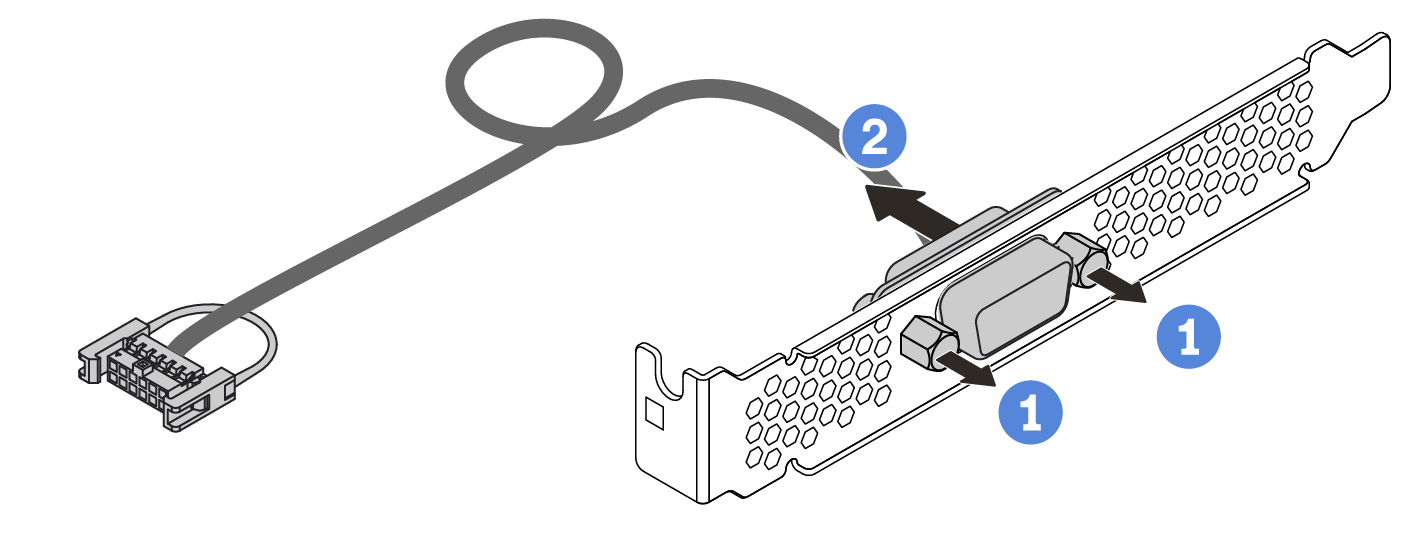
  5. (Optional) If you need to replace the serial port bracket, use a 5 mm wrench to disassemble the serial port cable from the bracket.
    Figure 2. Serial port module disassembling
    Serial port module disassembling

After you finish

  1. Install a new serial port module, a PCIe adapter, or a PCIe slot bracket to cover the place. See Install a serial port module and Install a PCIe adapter and riser assembly.

  2. If you are instructed to return the defective component, follow all packaging instructions and use any packaging materials that are provided.